
Invite a teammate to your game server
Applies to: CloudExa game panel desktop interface on 9 November 2026; labels, permissions and available options may change.
Documentation checked .
Use Users to let a teammate manage an existing game server. Use Splitter, where your plan includes it, to divide the plan's resources between separate game servers. Each action changes a different part of your setup; inviting someone does not create another server or transfer your billing account.
Invite a teammate
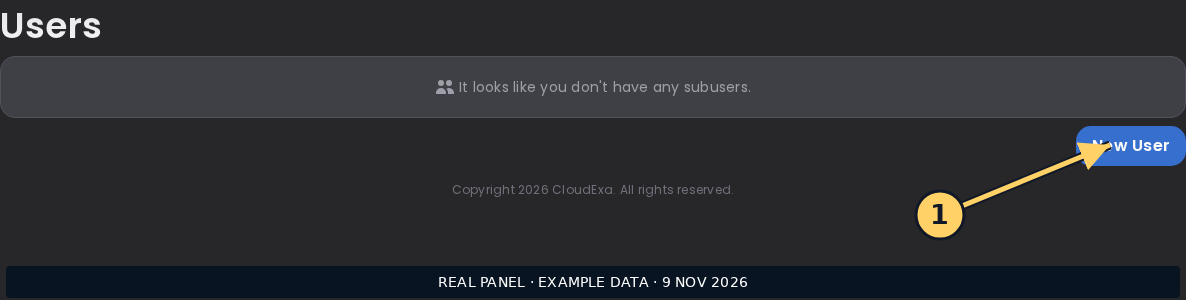
- Open the correct server at game.cloudexa-hosting.com. Check its name and address before changing access.
- Open Users and choose New User. Enter your teammate's own address in User Email.
- Choose a Role Preset as a starting point, then review the selected permission rows. Grant the actions they need for their role.
- Choose Invite User and confirm that their entry appears in Users.
- Ask the teammate to sign in using their own account and check that they can open the assigned server. A new panel user should check their inbox and spam folder for account-access instructions.
Review the permissions
Console commands can grant in-game privileges, file access can expose configuration secrets, and backup downloads can contain your server files. Full Access (Select All) and Power User (Control + Files + Backups) include actions that can change or delete data. The Moderator preset includes user management. Review those rows before granting access.
Review the Viewer preset too. In the current panel, its Console selection can include sending commands. Remove that permission if the person should only watch output. Test the intended access with the teammate rather than granting everything to solve a missing button.
To change access, edit their entry in Users and choose Save. To revoke it, use the delete control and confirm Yes, remove subuser. Removing a subuser revokes that person's access to this server; it does not remove the game files. Review access when a teammate leaves or changes role.
Understand server splits
A split creates a separate server using resources from its parent plan. It does not duplicate your full RAM, CPU and storage allowance. Resource allocations reserve capacity even while a child server is stopped. For example, a child allocated 4 GB from a 12 GB RAM entitlement leaves 8 GB for the parent and other children combined.
Leave enough RAM and disk for the parent to run. Check actual disk usage before reducing an allocation: setting a smaller limit does not remove files or make them fit. A split also needs an available split slot and a usable network allocation. CPU allocations and usage are different measures; the panel's current usage graph alone does not show the resources left to allocate.
Find Splitter in the left-hand server menu, as shown in the Users screenshot above.
Plan a split or resource change
- Check your plan's split allowance and the resources already assigned to children.
- Record the parent and child server IDs and the RAM, CPU and storage you intend each to use.
- Open Splitter on the parent and review the controls available to your plan. Ask support if the page or a needed allocation is unavailable.
- Review the proposed allocation before confirming a change. Check the resulting limits on both parent and child.
- Check each child's Users and Backups sections. Do not assume that a parent's teammate access or backup slots grant the same access or allowance on every child.
Before moving existing worlds or configuration between servers, take a backup and preserve both copies until you have checked the result. Do not remove a parent or child server to clear a resource error: server removal can delete files, and removing a parent can also remove its children.
If access or allocation fails
For invitations, check the address and existing user list before retrying. For a remaining-resource error, compare allocated limits across the parent and children, not just live usage. Send support the IDs, intended change, time and full error through a private ticket. Keep passwords and API keys out of screenshots.
No comments to display
No comments to display