
Move an existing Minecraft server to CloudExa
Applies to: CloudExa game panel desktop interface on 9 November 2026; labels, permissions and available options may change.
Documentation checked .
Use this guide when you want to move a complete Java Minecraft server from another host. Keep your old service and an independent backup until you have checked the new server in game. A file transfer does not move a plugin's remote MySQL database.
Before you transfer
- Record the old server software, exact Minecraft version, Java runtime and startup filename. Start with matching versions; upgrade after the move works.
- Check that your new plan has room for the extracted files and any upload archive. You may need space for both copies during extraction.
- Choose a maintenance window. Tell players to leave, then stop the old server so worlds and plugin data stop changing.
- Download a complete backup to your own computer or another safe location. Include hidden files if your transfer client offers that option.
Create and check a backup before replacing files. Stop the destination server too. Do not use Reinstall to move your files.
Copy the server files
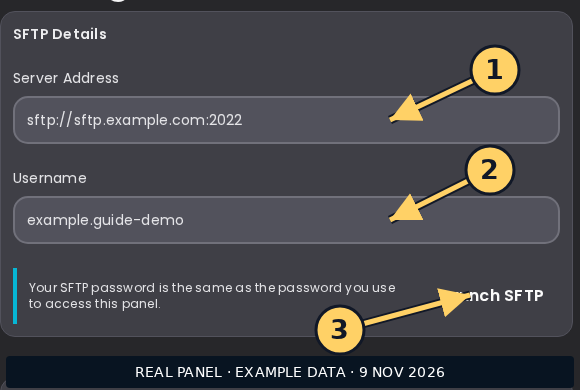
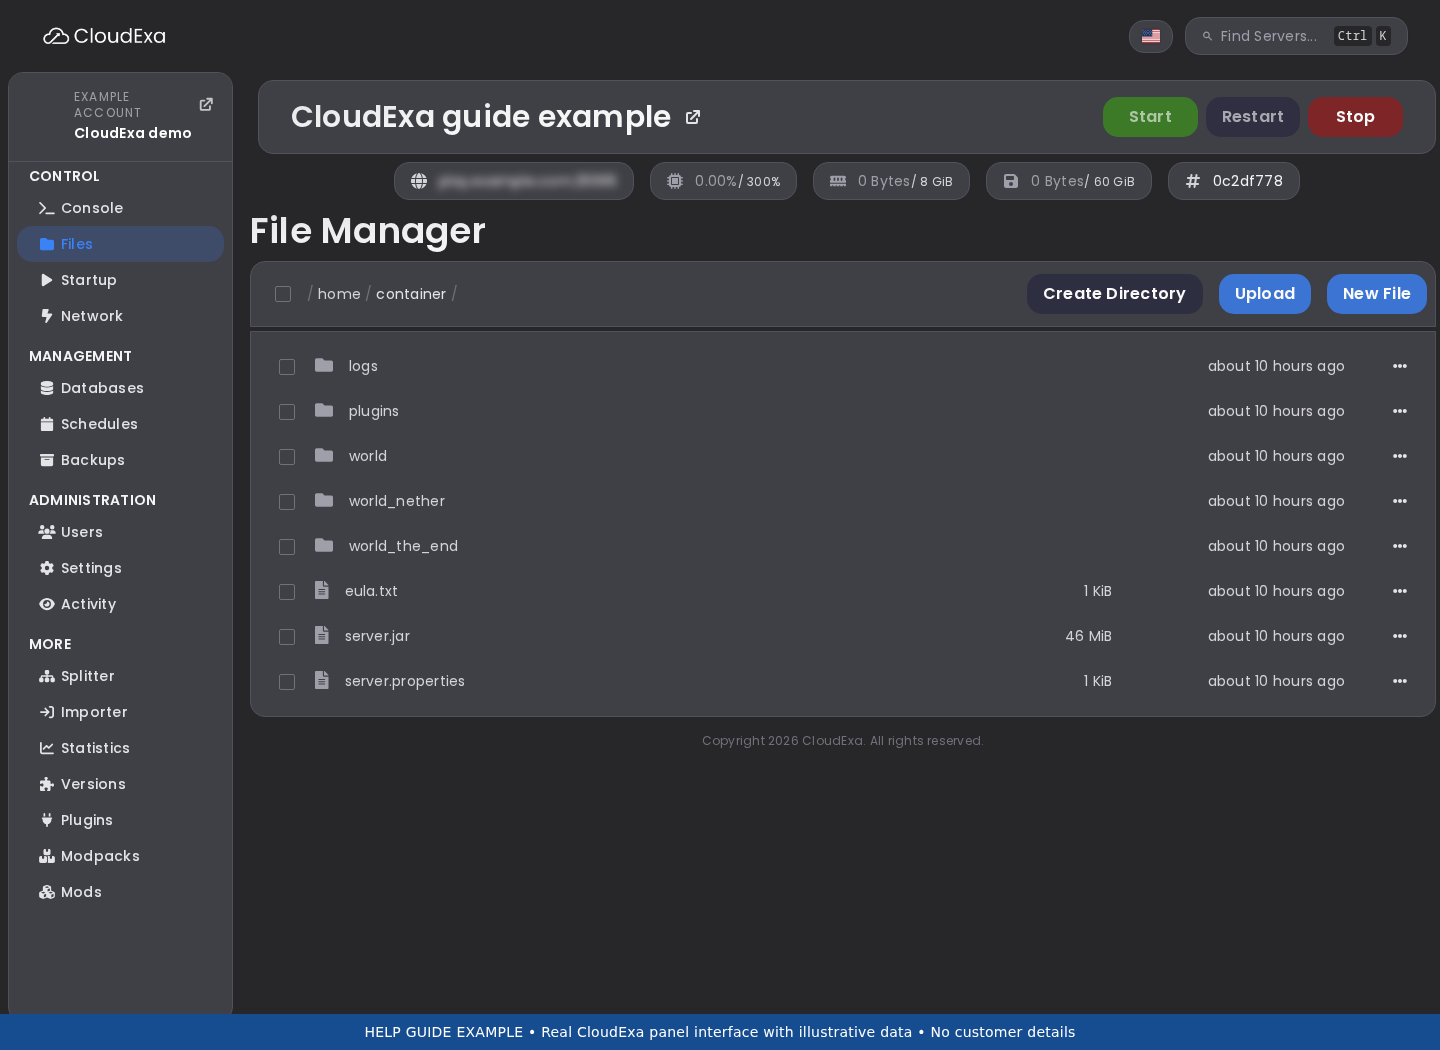
- Open your CloudExa server in the game panel. Use Files for uploads, or open Settings to copy your server's SFTP address and username. Use the values shown for this server, including its SFTP port.
- Transfer the contents of the old server's root folder into the new server's root folder. Avoid an extra folder level such as
old-server/world. Keep the original world folder names and structure, including dimension folders. - Include
pluginsand their configuration/data folders,server.properties, whitelist, operators and ban lists. Include any extra worlds and datapacks your server uses. Treat configuration files as private because they may contain credentials. - If your destination already has a generated world, retain a separate copy before replacing it. Ask support for help if you cannot distinguish the new files from your imported world.
- Open Startup and check that the selected runtime and server JAR filename match the files you intend to run. See choosing a Java runtime.
Move databases and adjust addresses
Export plugin databases from the old host and import them into the destination database before starting plugins that use them. Update each plugin's host, port, database name, username and password. Copy the destination connection details from Databases; do not assume the old credentials will work.
Keep CloudExa's assigned listening port in server.properties. Leave server-ip blank unless support has instructed otherwise. Check separate ports for Geyser, voice chat and web maps against your assigned allocations under Network.
Check before sending players over
- Start the CloudExa server and read Console. Wait for startup to finish, then connect using the new IP and port.
- Visit the main world and other dimensions. Check player inventories, permissions, plugin data and a sample of existing builds.
- Stop and start once during your maintenance window, then confirm that changes persist.
- Update your domain only after these checks. Keep the old server stopped to avoid two communities writing different copies of the same world.
If startup fails, stop and collect the error using the log guide. Changing server software or downgrading an upgraded world can damage data. Paper documents version-specific world layouts in its migration guide.