Minecraft Plugins
Plugin setup and troubleshooting guides for Minecraft servers: maps, claims, shops, quests, voice chat, moderation and more.
- Find a Minecraft plugin setup or troubleshooting guide
- Add and import Minecraft worlds with Multiverse-Core
- Add and test WorldGuard ExtraFlags in one region
- Add mcMMO skills and preserve existing player levels
- Build a safe starter menu with DeluxeMenus
- Build and diagnose a small BetonQuest conversation
- Configure an AdvancedEnchantments trial without risking player gear
- Configure an ExcellentCrates test crate and verify rewards
- Configure and test an EconomyShopGUI server shop
- Configure AuraSkills progression and test player rewards
- Configure bounded random teleports with BetterRTP
- Configure DriveBackupV2 and verify an off-server recovery copy
- Configure first-join spawn and respawn rules with EssentialsXSpawn
- Configure GriefDefender claims and LuckPerms safely
- Configure LiteBans moderation and preserve punishment history
- Configure NuVotifier and protect vote-receiver credentials
- Configure SkinsRestorer without changing account authentication
- Control a Minecraft maintenance window with Maintenance
- Create a controlled Multiverse-Portal between worlds
- Create a DecentHolograms display and check player visibility
- Create a Lands claim and control member roles
- Create a separate creative plot world with PlotSquared
- Create and manage a Citizens NPC without granting command access
- Create and protect a ChestShop sign shop
- Create and test a beginner quest with PikaMug Quests
- Create and test Minecraft vote rewards with VotingPlugin
- Create player chest shops with QuickShop-Hikari
- Create player-owned public warps with Player Warps
- Create Shopkeepers player shops and test trades safely
- Customise the Minecraft server list with MiniMOTD
- Evaluate legacy Java client support with ViaRewind
- Fix EssentialsXChat prefixes and chat formatting
- Give safe lobby items with ItemJoin
- Install Dynmap and test a bounded world render
- Install Plasmo Voice and diagnose voice connection errors
- Install ProtocolLib and diagnose dependent plugin failures
- Introduce CMI without conflicting with existing server plugins
- Introduce GrimAC alerts before automated punishments
- Let supported older Java clients join with ViaBackwards
- Link Nether and End worlds with Multiverse-NetherPortals
- Load an existing world safely with MyWorlds
- Maintain an existing ServerListPlus configuration safely
- Publish a squaremap world map with a separate web port
- Replace WorldEdit with FastAsyncWorldEdit safely
- Restore a recorded player inventory with InventoryRollbackPlus
- Separate creative and survival inventories with Multiverse-Inventories
- Set up a BlueMap web map and control rendering load
- Set up a CrazyCrates test and troubleshoot crate keys
- Set up a FancyHolograms text display on Paper
- Set up AdvancedBan with controlled moderation tests
- Set up GSit poses and restrict player interactions
- Set up Jobs Reborn and check that job payments work
- Set up PacketEvents for plugins that require it
- Set up personal homes and teleport requests with HuskHomes
- Set up Plan analytics without exposing private player data
- Set up player land claims with GriefPrevention
- Set up Simple Voice Chat with an allocated UDP port
- Set up SuperVanish for a limited staff role
- Set up zAuctionHouse and test item sale recovery
- Test cross-server inventory synchronisation with HuskSync
- Use MiniPlaceholders with a compatible Minecraft text plugin
- Write a permission-limited Skript command and reload one script
- Fix SkBee syntax errors after a Skript or Minecraft update
- Create a Towny starter town and test outsider permissions
- Set Residence visitor flags without locking out the owner
- Fix ItemsAdder resource-pack delivery before changing item files
- Preserve Oraxen item IDs while changing a custom item texture
- Trace a Nexo custom-item display failure from pack to client
- Create a bounded MythicMobs test encounter without natural spawns
- Tune RoseStacker rules without losing named or custom mobs
- Fix an ajLeaderboards board that shows missing or stale values
- Match a ChunkyBorder boundary to a pre-generated Minecraft world
- Diagnose an AdvancedRegionMarket listing without resetting rented land
- Test InteractiveChat item previews without exposing staff inventory
- Create a separate BentoBox BSkyBlock island world safely
- Trace a denied Minecraft command with LuckPerms verbose
- Fix overlapping WorldGuard region flags with a small permission test
- LuckPerms tasks
- Give a LuckPerms permission an expiry without leaving permanent access
- Make a LuckPerms event rank expire while preserving other ranks
- Limit a LuckPerms command permission to one Minecraft world
- Keep a LuckPerms permission local to one network backend
- Move a player along a LuckPerms track without replacing unrelated groups
- Fix a LuckPerms prefix priority without changing chat formatting
- Remove a direct LuckPerms exception without weakening its parent rank
- Apply a small LuckPerms web-editor session to the correct server
- Export LuckPerms data before changing its storage configuration
- Find an inheritance cycle before it complicates a rank change
- Keep default-player permissions separate from staff inheritance
- Diagnose LuckPerms edits that reach one backend but not another
- Check a player UUID before changing LuckPerms account data
- Remove a staff member from one LuckPerms track without clearing their account
- EssentialsX tasks
- Give an EssentialsX rank a fixed home limit
- Restrict one EssentialsX warp to an approved player group
- Test EssentialsX teleport delay and movement cancellation
- Add an EssentialsX cooldown to one utility command
- Resolve an EssentialsX command alias conflict without removing either plugin
- Check EssentialsX AFK kick exemptions for a staff role
- Limit EssentialsX nickname changes without granting formatting control
- Give staff a read-only EssentialsX player-information role
- Recover from an accidental EssentialsX ignore setting
- Restrict EssentialsX repair commands to the intended tool policy
- Review EssentialsX command-disabled entries after a plugin change
- Test an EssentialsX jail location without trapping a real player
- Change the EssentialsX starting balance for new players only
- Set EssentialsX maximum and minimum money limits with a boundary test
- Change the EssentialsX currency symbol without changing stored money
- Test an EssentialsX pay dispute using two controlled accounts
- Review EssentialsX worth prices before enabling item selling
- Explain an EssentialsX balance leaderboard that looks out of date
- Trace an unexpected EssentialsX command charge
- Back up EssentialsX money before a player-data migration
- LiteBans tasks
- Verify a LiteBans temporary ban expires at the intended time
- Test whether a LiteBans mute covers a private-message command
- Build a LiteBans appeal-review role without punishment access
- Check a LiteBans moderator’s maximum punishment duration
- Find which plugin handled a ban command on a mixed-plugin server
- Verify the server scope of a LiteBans network punishment
- Investigate a LiteBans database connection failure without losing history
- Reverse one appealed LiteBans punishment while preserving the audit trail
- AdvancedBan tasks
- Test an AdvancedBan time layout before staff use it
- Check AdvancedBan warnings without accidentally escalating a real player
- Give an AdvancedBan helper access to history without ban powers
- Check AdvancedBan storage before changing from local files to MySQL
- Lift one AdvancedBan restriction after an approved appeal
- Locate AdvancedBan correctly on a proxy network
- SuperVanish tasks
- Test SuperVanish visibility with separate staff and player accounts
- Check whether a vanished SuperVanish moderator can pick up items
- Verify flight is safe when a SuperVanish moderator reappears
- Check silent chest inspection without changing container contents
- Find a SuperVanish join or player-list information leak
- Remove vanish access from a staff role without leaving a hidden account
- PremiumVanish tasks
- Check PremiumVanish layered visibility after changing staff ranks
- Verify PremiumVanish network vanish across Velocity backends
- Check vanished staff interactions before a live investigation
- Recognize the PremiumVanish API jar before installing an integration
- GrimAC tasks
- Give GrimAC alerts to one observer without granting exemptions
- Remove a GrimAC exemption and verify when checks resume
- Collect a GrimAC prediction log for a false-positive report
- Review a GrimAC punishment interval before enabling enforcement
- Check a GrimAC issue against the actual client and protocol path
- Preserve GrimAC incident evidence before reloading configuration
- CoreProtect tasks
- Investigate one chest withdrawal with a bounded CoreProtect lookup
- Exclude routine block types from a CoreProtect investigation
- Limit a CoreProtect lookup to a WorldEdit selection
- Review an inventory rollback before restoring missing player items
- Reverse an accidental CoreProtect rollback with the matching scope
- Turn off CoreProtect inspection without granting rollback access
- Plan CoreProtect retention without losing evidence needed for recovery
- Investigate a growing CoreProtect consumer queue without discarding it
- Explain why CoreProtect has no record of an older action
- Rehearse a supported CoreProtect database-backend migration
- WorldGuard tasks
- Give a WorldGuard plot member access without making them its owner
- Extend a WorldGuard region vertically without replacing its members
- Remove a WorldGuard greeting without confusing blank and inherited values
- Restrict entry to a WorldGuard region’s approved members
- Test WorldGuard chest access separately from block building
- Verify a WorldGuard no-PvP area at its actual boundary
- Find the correct WorldGuard region when names repeat across worlds
- Change a WorldGuard parent without losing track of inherited membership
- Limit a WorldGuard mob-spawn restriction to one region
- Review a WorldGuard blocked-command rule without relying on it for permissions
- WorldGuard ExtraFlags tasks
- Test regional flight with WorldGuard ExtraFlags before opening an area
- Check regional keep-inventory without changing the whole world rule
- Change regional walking speed without leaving players with a stale speed
- Fix an unknown ExtraFlags flag after a plugin or server update
- LoginSecurity tasks
- Change a LoginSecurity password without exposing it to staff
- Check remembered LoginSecurity sessions after a password change
- Investigate an inventory hidden by LoginSecurity before declaring item loss
- Resolve a LoginSecurity username-case refusal without resetting the account
- WorldEdit tasks
- Fix a WorldEdit schematic that pastes at the wrong offset
- Paste a WorldEdit structure without erasing surrounding blocks with air
- Rotate a WorldEdit clipboard without changing the source build
- Use a WorldEdit mask to replace one block type without touching its neighbours
- Unbind a WorldEdit brush from a tool before normal building
- Change a bounded WorldEdit biome area and verify the client view
- Remove a small patch of snow with WorldEdit without flattening terrain
- Check WorldEdit chunk selections before editing a region boundary
- Diagnose a schematic that WorldEdit cannot load without replacing the original file
- Choose whether a WorldEdit clipboard should include entities
- FastAsyncWorldEdit tasks
- Assign a finite FAWE edit limit to one builder group
- Test FAWE region restrictions with a claim owner and a visitor
- Investigate a FAWE edit that appears queued or unfinished
- Check FAWE disk history before relying on a later undo
- Limit FAWE schematic access for a shared building team
- Bound FAWE brush radius without removing a builder’s other tools
- Verify FAWE disallowed blocks with a non-admin account
- Inspect lighting and side effects after a FAWE terrain edit
- Multiverse-Core tasks
- Set a Multiverse world spawn without changing the main server world
- Find why a player can teleport to one Multiverse world but not another
- Choose a Multiverse respawn world and test bed behaviour separately
- Stop weather changes in one Multiverse event world
- Diagnose Multiverse animal and monster spawn rules in one world
- Apply a world-specific PvP rule without bypassing region protection
- Change difficulty for one Multiverse world and confirm it persists
- Use a Multiverse world alias without renaming the world folder
- Prevent an unused Multiverse event world from loading automatically
- Investigate a Multiverse world player limit that staff can bypass
- Multiverse-Portals tasks
- Allow one player role through a Multiverse portal without opening every portal
- Set a Multiverse portal landing position and facing without moving its frame
- Stop an arrival loop between two Multiverse portals
- Find an invisible or overlapping Multiverse portal trigger
- Test a Multiverse portal fee without charging live players
- Repair a Multiverse portal destination after a target world is renamed
- Multiverse-Inventories tasks
- Find conflicting Multiverse-Inventories groups before changing player profiles
- Share bed spawns between selected worlds without sharing every player statistic
- Isolate experience between world groups while preserving their inventories
- Check why a staff account bypasses Multiverse inventory separation
- Add an existing world to an inventory group with a profile checkpoint
- Diagnose an optional last-location share that overrides a portal destination
- Multiverse-NetherPortals tasks
- Correct a Nether portal pair that only works in one direction
- Check Nether coordinate scaling before moving a portal network
- Diagnose a Nether portal with no destination world
- Disable Nether travel for one event world while keeping its saved dimension
- MyWorlds tasks
- Keep an unused MyWorlds map unloaded without deleting its data
- Set a MyWorlds spawn facing away from a dangerous landing edge
- Check MyWorlds world entry permissions without granting teleport administration
- Measure the effect of keeping a MyWorlds spawn area loaded
- Lock time in one MyWorlds lobby and verify other maps keep their cycle
- Set a MyWorlds admission limit for a small event map
- PlotSquared tasks
- Allow visitors to use plot doors without granting building access
- Test a PlotSquared PvP arena without enabling combat on every plot
- Restrict a PlotSquared flag to the values a building role actually needs
- Distinguish a PlotSquared weather display from actual weather mechanics
- Give a PlotSquared build a fixed-looking time without stopping the world clock
- Limit plot entity counts without changing every world’s mob settings
- Disable redstone on one PlotSquared test plot and check its boundaries
- Check PlotSquared claim allowances against the permission-search range
- Verify WorldEdit cannot cross a PlotSquared owner boundary
- Add plot entry and exit messages without changing the world’s chat format
- Chunky tasks
- Pause a Chunky task without discarding its saved progress
- Catch an off-centre Chunky selection before generating terrain
- Compare circular and square Chunky selections for the same playable area
- Check a Chunky ETA that stops changing before assuming the task has crashed
- Verify Chunky can continue its task after a planned server restart
- Measure a Chunky pilot area before estimating full-world disk needs
- Schedule two Chunky world tasks without doubling peak generation load
- Rerun Chunky over existing terrain without treating it as world regeneration
- ChunkyBorder tasks
- Enable a visible ChunkyBorder edge for unmodified clients
- Test a temporary border bypass without leaving a player exempt
- Check how a wrapping border returns players across a world edge
- Load an existing border into Chunky without replacing the border itself
- BlueMap tasks
- Find why a BlueMap build still shows old blocks
- Hide live player locations on BlueMap without removing the terrain map
- Exclude a private area from a BlueMap render and verify existing tiles
- Check a BlueMap resource pack when custom blocks render incorrectly
- Diagnose BlueMap mixed-content errors behind an HTTPS map address
- Add a second BlueMap view without accidentally pointing it at the wrong world
- Dynmap tasks
- Find a Dynmap marker hidden by its layer or zoom settings
- Hide a consenting player’s Dynmap location and verify the public view
- Separate a stale Dynmap tile from a stale browser response
- Pause Dynmap rendering during a busy event and resume deliberately
- Compare a lower-detail Dynmap view before changing production map quality
- Diagnose a Dynmap view using the wrong world template
- Vault tasks
- Find the economy provider that Vault actually selected
- Check a plugin that says no economy provider is available
- Investigate different balances in a shop and a balance command
- Plan a Vault economy-provider change without losing balances
- Distinguish Vault economy failures from permissions failures
- Prepare a useful report for a Vault integration error
- ChestShop tasks
- Diagnose a ChestShop sign that does not become a shop
- Separate ChestShop buy and sell directions before opening a market
- Check ChestShop quantity and item matching with renamed stock
- Investigate a ChestShop out-of-stock message when the chest is full
- Audit ChestShop taxes with one low-value transaction
- Test ChestShop inside a claim without granting build access to customers
- Preserve ChestShop ownership when a shopkeeper changes name
- Collect a ChestShop transaction failure without exposing player data
- QuickShop-Hikari tasks
- Change one QuickShop-Hikari price and verify the bundle cost
- Switch a QuickShop-Hikari stall between buying and selling
- Freeze QuickShop-Hikari trading during a market investigation
- Give a QuickShop-Hikari assistant access to one shop
- Trace a QuickShop-Hikari custom item that will not trade
- Check QuickShop-Hikari trade history before refunding a complaint
- Move a QuickShop-Hikari checkpoint to an isolated test server
- Reduce QuickShop-Hikari display clutter without removing shops
- EconomyShopGUI tasks
- Find why one EconomyShopGUI item is missing for a player
- Check EconomyShopGUI item currency against its section currency
- Audit EconomyShopGUI buy and sell prices for an accidental profit loop
- Diagnose an EconomyShopGUI sell command that skips an item
- Check an EconomyShopGUI section edit before reloading it
- Compare EconomyShopGUI stack prices with a single-item purchase
- Separate EconomyShopGUI menu access from bulk-selling permission
- Preserve EconomyShopGUI custom prices through a plugin update
- Shopkeepers tasks
- Fix a Shopkeepers trade blocked by a full payment chest
- Test Shopkeepers buying trades with enchanted and damaged items
- Change one Shopkeepers price without altering the item being sold
- Explain why a Shopkeepers trade ignores a Vault money balance
- Avoid title collisions in a Shopkeepers book shop
- Investigate a Shopkeepers container link that an owner cannot use
- Back up Shopkeepers records together with shop containers
- Separate Shopkeepers owner editing from customer trading
- Jobs Reborn tasks
- Separate Jobs Reborn money, experience and points rewards
- Test Jobs Reborn break-and-place rewards for a money loop
- Investigate a Jobs Reborn income limit that stops payments
- Audit Jobs Reborn bonuses before a double-pay event
- Check Jobs Reborn leave-and-rejoin level loss before changing jobs
- Back up Jobs Reborn membership and economy state consistently
- Trace a Jobs Reborn custom-mob action that pays nothing
- Review Jobs Reborn level-up commands before awarding a rank
- Towny tasks
- Check Towny plot permissions that override the town policy
- Calculate Towny town-bank runway before the next upkeep collection
- Check Towny percentage taxes against a flat resident tax
- Test a Towny embassy plot before selling it to an outsider
- Check Towny outpost costs before claiming a distant base
- Separate Towny town-spawn access from building permissions
- Review a Towny assistant rank before promoting a resident
- Check what happens to Towny plots when a resident leaves
- Test Towny shop plots without exposing neighboring storage
- Investigate Towny protection at a town and wilderness boundary
- Lands tasks
- Create a Lands subarea with a deliberate height boundary
- Allow Lands bank deposits while restricting withdrawals
- Check Lands taxes before changing the economy provider
- Preview Lands inactive-owner expiration without removing claims
- Test a Lands rental extension and maximum rental time
- Check a Lands claim refusal without raising every player limit
- Prevent duplicate Lands economy collection on a Redis network
- Verify a Lands database backup on an isolated server
- GriefPrevention tasks
- Choose GriefPrevention access trust without exposing containers
- Restrict a GriefPrevention subdivision without changing the parent claim
- Resize a GriefPrevention claim while preserving its protected build
- Explain GriefPrevention accrued and bonus claim-block totals
- Check GriefPrevention siege and PvP behavior on a test claim
- Keep GriefPrevention administrative claims separate from player claims
- GriefDefender tasks
- Identify a GriefDefender flag denial in the correct claim context
- Give a GriefDefender helper container access without full ownership
- Review GriefDefender expiration settings before enabling cleanup
- Verify GriefDefender storage before a database migration
- Test GriefDefender claim menus with a Bedrock player
- Trial GriefDefender economy-mode claim costs before switching modes
- MythicMobs tasks
- Fix a MythicMobs skill that never fires on attack
- Choose the right MythicMobs target for a healing skill
- Stop a MythicMobs timer skill from overwhelming an arena
- Separate MythicMobs custom drops from vanilla loot
- Diagnose a MythicMobs boss bar that disappears during combat
- Keep a MythicMobs spawn skill from duplicating its passengers
- Check MythicMobs conditions before a reward skill runs
- Trace a MythicMobs skill reference across several files
- Test MythicMobs equipment without changing live boss loot
- Keep MythicMobs test summons inside an arena boundary
- ItemsAdder tasks
- Organise ItemsAdder content without changing existing namespaces
- Find an ItemsAdder item that loads under the wrong namespace
- Check ItemsAdder texture path case after a Linux move
- Add a test recipe without replacing a live ItemsAdder recipe
- Test an ItemsAdder furniture hitbox before placing it at spawn
- Check a custom ItemsAdder sound before adding it to rewards
- Limit an ItemsAdder custom block to the intended test world
- Validate an ItemsAdder font image in chat and a menu title
- Check an ItemsAdder consumable before distributing it to players
- Prepare an ItemsAdder content update with a stable ID inventory
- Oraxen tasks
- Build an Oraxen recipe without replacing another recipe
- Diagnose an Oraxen cooking recipe with the wrong timing
- Keep Oraxen recipe-book groups understandable for players
- Fix an Oraxen glyph that is clipped above a menu title
- Separate an Oraxen missing glyph from a missing permission
- Check an Oraxen item component against the Minecraft version
- Find duplicate Oraxen item IDs before merging a pack
- Test an Oraxen pack update with a clean client download
- Nexo tasks
- Check a Nexo item stack-size change before updating inventories
- Test Nexo durability and repair materials on expendable tools
- Make a Nexo consumable return the intended container
- Preserve selected item components in a Nexo upgrade recipe
- Restrict a Nexo recipe to the intended crafting station
- Check a Nexo furniture hitbox independently of its model
- Check a Nexo tooltip change without hiding important item state
- Audit Nexo references before retiring a custom item
- AdvancedEnchantments tasks
- Fix an AdvancedEnchantments book assigned to a missing group
- Separate enchantment application failure from activation failure
- Test custom enchantment equipment restrictions with ordinary players
- Check a custom enchantment level limit before selling higher books
- Audit who can issue AdvancedEnchantments books and gear
- Compare a fresh enchantment book with an older stored copy
- Check enchantment group selection in a random-book reward
- Keep an enchantment configuration edit from breaking YAML loading
- mcMMO tasks
- Find which mcMMO XP multiplier changes a player reward
- Test mcMMO party XP sharing at the edge of its range
- Check an mcMMO ability permission without granting every skill command
- Explain why a player-placed block gives no mcMMO XP
- Compare mcMMO diminished returns with a genuine XP failure
- Reduce mcMMO notification noise without changing skill progress
- Tune one mcMMO activity reward without resetting existing levels
- Test mcMMO party invitations before changing membership limits
- AuraSkills tasks
- Separate an AuraSkills source reward from its XP multipliers
- Check AuraSkills player-placed block protection before allowing XP
- Find an AuraSkills source with the wrong material or source ID
- Check an AuraSkills menu that shows an outdated reward
- Test an AuraSkills money reward when Vault is unavailable
- Check recurring AuraSkills level rewards for off-by-one mistakes
- Distinguish an AuraSkills mana shortage from an ability cooldown
- Keep AuraSkills reward commands from targeting the wrong player
- RoseStacker tasks
- Measure RoseStacker changes with stack statistics instead of labels
- Check whether custom dropped items should merge into one stack
- Verify spawner-stack quantity before changing farm output
- Test stacked-block removal before allowing it in a public build
- Give staff RoseStacker inspection access without cleanup powers
- Explain a RoseStacker placeholder count that differs from nearby mobs
- Quests tasks
- Test whether a Quests item requirement consumes the offered item
- Require a completed Quests prerequisite without blocking new players
- Choose when a Quests stage action should run
- Check a daily Quests schedule against cooldown and timezone
- Find which requirement prevents an NPC from offering a quest
- Test quest rewards with a nearly full player inventory
- Distinguish a Quests command permission from quest eligibility
- Plan a Quests storage change without starting with empty progress
- BetonQuest tasks
- Find a BetonQuest objective that was defined but never started
- Test an inverted BetonQuest condition with both player states
- Guard a BetonQuest reward against repeat conversation clicks
- Keep a BetonQuest journal entry separate from objective progress
- Repair a cross-package BetonQuest reference after organising files
- Check a delayed BetonQuest objective across logout and restart
- Match a BetonQuest quest item without accepting lookalikes
- Hide a completed quest option without hiding unrelated NPC dialogue
- Edit BetonQuest dialogue text without renaming conversation options
- Compare BetonQuest configuration errors with player-state errors
- PlaceholderAPI tasks
- Compare a PlaceholderAPI result for two different players
- Test which PlaceholderAPI expressions need a player context
- Identify a built-in PlaceholderAPI expansion before downloading another
- Pin one PlaceholderAPI expansion update for a staging test
- Check a relational PlaceholderAPI value in both directions
- Remove an unused PlaceholderAPI expansion without breaking displays
- Reduce repeated PlaceholderAPI work in a busy scoreboard
- Share a useful PlaceholderAPI support report without player data
- MiniPlaceholders tasks
- Compare MiniPlaceholders output with and without an audience
- Find a missing MiniPlaceholders expansion on the correct server
- Check a MiniPlaceholders relational tag from two viewpoints
- Choose MiniPlaceholders or percent-style placeholders for one field
- Verify a MiniPlaceholders tag after a server transfer
- Diagnose a MiniPlaceholders tag that breaks only for one rank
- DeluxeMenus tasks
- Restrict one DeluxeMenus button without hiding the entire menu
- Choose player or console execution for a DeluxeMenus action
- Fix a DeluxeMenus item missing from a specific slot
- Prevent a DeluxeMenus open command from conflicting with another plugin
- Trace a DeluxeMenus placeholder before changing a purchase requirement
- Check left and right click actions separately in DeluxeMenus
- Tune a DeluxeMenus refresh interval for changing display values
- Repair one DeluxeMenus YAML edit while preserving the working menu
- DecentHolograms tasks
- Move a DecentHolograms display without losing its text
- Fix one stale PlaceholderAPI value in a DecentHolograms line
- Limit a DecentHolograms display range for a crowded spawn
- Reorder DecentHolograms lines without changing their contents
- Restrict a DecentHolograms information line to the intended viewers
- Check DecentHolograms persistence before a planned restart
- FancyHolograms tasks
- Change FancyHolograms visibility without granting editing access
- Tune a FancyHolograms viewing distance on one display
- Rotate a FancyHolograms text display for its viewing area
- Resize a FancyHolograms display without blocking nearby signs
- Copy a FancyHolograms display before editing its public version
- Collect a FancyHolograms display report after a Minecraft update
- TAB tasks
- Find which TAB instance controls a player’s visible list
- Correct a TAB player group without changing all rank permissions
- Fix TAB sorting without changing player name prefixes
- Diagnose TAB nametag flicker from competing team plugins
- Check a TAB scoreboard placeholder before changing its refresh rate
- Limit a TAB display to the intended backend server
- Test a TAB header with an empty and a long player value
- Collect a focused TAB diagnostic report for one affected player
- DiscordSRV tasks
- Choose the authority direction for one DiscordSRV rank mapping
- Fix DiscordSRV role hierarchy without granting Administrator
- Move one DiscordSRV chat route to a replacement channel
- Keep a DiscordSRV console channel read-only for observers
- Rotate a DiscordSRV bot token after an accidental disclosure
- Correct a DiscordSRV link made to the wrong Discord account
- Diagnose DiscordSRV chat that works in only one direction
- Stop duplicate DiscordSRV bridge posts without losing chat history
- Prepare a redacted DiscordSRV debug report for a bridge fault
- Test DiscordSRV link-to-join before enforcing it for players
- Simple Voice Chat tasks
- Separate Simple Voice Chat listening and speaking permissions
- Disable Simple Voice Chat groups while keeping proximity audio
- Tune Simple Voice Chat normal and whisper distances separately
- Choose a Simple Voice Chat spectator speaking policy
- Set a Simple Voice Chat recording policy without promising privacy guarantees
- Stage a Simple Voice Chat client-required admission rule
- Keep a Simple Voice Chat configuration edit from being overwritten
- Distinguish a Simple Voice Chat UDP port conflict from a game connection fault
- Plasmo Voice tasks
- Investigate a Plasmo Voice not-installed message before changing ports
- Apply and reverse a targeted Plasmo Voice moderation mute
- Check Plasmo Voice proximity activation permissions for one rank
- Trace Plasmo Voice audio after moving between proxy backends
- Compare a Plasmo Voice bind error with an unreachable advertised endpoint
- Capture a short Plasmo Voice client-and-server debug session
- InteractiveChat tasks
- Limit repeated InteractiveChat placeholders with a measured cooldown
- Restrict one InteractiveChat custom placeholder to an intended group
- Keep InteractiveChat command links as suggestions rather than execution
- Diagnose an InteractiveChat formatter conflict one event at a time
- Reduce InteractiveChat mention noise without disabling normal chat
- Explain an expired InteractiveChat inventory link without resetting inventories
- MiniMOTD tasks
- Verify every entry in a MiniMOTD rotation
- Pair a MiniMOTD message with the intended icon
- Hide MiniMOTD player-name hover details while keeping honest counts
- Trace a MiniMOTD virtual-host message to the address players use
- ServerListPlus tasks
- Repair ServerListPlus YAML without removing its typed sections
- Preserve two-line ServerListPlus text and UTF-8 characters
- Check which ServerListPlus virtual host owns a displayed message
- Review ServerListPlus hover text for unintended player information
- GSit tasks
- Let players opt out of GSit click interactions
- Separate GSit command sitting from right-click seat permissions
- Diagnose a GSit region denial without opening claim protection
- Check GSit pose compatibility after a Minecraft update
- Geyser tasks
- Separate a Geyser signalling failure from a gameplay timeout
- Resolve a Geyser port collision with Query or a web map
- Check the public address Geyser advertises behind container networking
- Investigate the first-connection trust prompt in Geyser NetherNet
- Check a Bedrock resource pack without replacing the Java pack
- Compare static and passthrough server descriptions in Geyser
- Build a Geyser compatibility check before a Bedrock client update
- Test Bedrock forms and inventory menus with a non-staff account
- Floodgate tasks
- Plan a Floodgate username-prefix change without splitting player identity
- Check player progress before enabling Floodgate global account linking
- Allowlist a Floodgate player using the identity the server actually sees
- Give a Bedrock player a rank without relying on a display name
- Replace a leaked Floodgate key across the trusted proxy path
- Diagnose missing Bedrock skins on one backend server
- ViaVersion tasks
- Set a deliberate Java client policy with ViaVersion version blocks
- Locate the translation layer in a Velocity network
- Test translated items before publishing a Java resource pack
- Update the Via plugin family as a tested release set
- Investigate packet-rate kicks without disabling every guard
- Prepare a useful ViaVersion support report without leaking configuration
- ViaBackwards tasks
- Check old-client access near modern world-height limits
- Test smithing and crafting menus with older Java clients
- Contain a translated-client inventory desynchronisation report
- Separate a missing ViaBackwards dependency from an unsupported client
- ViaRewind tasks
- Check the complete dependency chain for a legacy Java client
- Explain legacy-client block and item fallback displays
- Run a legacy-client combat and anti-cheat acceptance test
- Retire a legacy Java connection route without touching the world
- ProtocolLib tasks
- Identify the dependent plugin behind a ProtocolLib listener error
- Choose the correct ProtocolLib artifact for Paper or Spigot
- Investigate a missing ProtocolLib API method after an update
- Validate dependent features after a ProtocolLib maintenance restart
- PacketEvents tasks
- Check whether a plugin bundles PacketEvents or needs it installed
- Trace a PacketEvents API mismatch to the owning plugin
- Reproduce an action-specific PacketEvents disconnect safely
- Coordinate a PacketEvents update across several dependent plugins
- spark tasks
- Capture only slow ticks with a bounded spark profile
- Choose a main-thread or all-thread spark recording
- Separate allocation pressure from a Minecraft memory leak
- Save a spark profile locally before sharing it
- Compare two spark profiles under the same Minecraft workload
- Check and stop an unwanted spark profiler session
- Plan tasks
- Give a staff member a limited Plan web group
- Resolve a Plan web-port conflict without moving gameplay
- Investigate missing recent sessions in a Plan dashboard
- Prepare a recoverable Plan database migration
- Compare Plan statistics using consistent dates and timezones
- Review privacy before publishing a static Plan export
- DriveBackupV2 tasks
- Prevent old archives from being included in a new DriveBackupV2 backup
- Separate local and remote DriveBackupV2 retention counts
- Reconnect a revoked cloud account used by DriveBackupV2
- Investigate overlapping backup jobs and temporary disk pressure
- Plan a consistent external SQL backup with DriveBackupV2
- Verify a remote DriveBackupV2 archive without restoring over production
- InventoryRollbackPlus tasks
- Plan per-event inventory history before raising record limits
- Separate inventory inspection from staff restore permissions
- Investigate a missing InventoryRollbackPlus event record
- Create a deliberate inventory checkpoint before a player event
- HuskSync tasks
- Diagnose a player held in HuskSync synchronisation lock
- Choose which player features should synchronise between backends
- Coordinate a HuskSync database recovery across all writers
- Separate Redis failures from database failures in HuskSync
- Test keepInventory death handling before allowing server transfers
- Isolate a staging server from the production HuskSync group
- HuskHomes tasks
- Resolve conflicting HuskHomes home limits across ranks
- Explain why a HuskHomes teleport has no warmup
- Disable a conflicting HuskHomes command without removing homes
- Limit a HuskHomes warp to the intended player group
- Control public HuskHomes listings without deleting private homes
- Check a HuskHomes home-slot charge before changing balances
- NuVotifier tasks
- Stop duplicate vote rewards caused by two forwarding paths
- Find an offline vote waiting in NuVotifier forwarding cache
- Correct a vote listing that uses the wrong token or RSA key
- Separate an accepted vote from a failed reward listener
- VotingPlugin tasks
- Match a VotingPlugin site to the service name actually received
- Investigate an offline VotingPlugin reward before granting it again
- Review the command privileges in a VotingPlugin reward
- Distinguish a VotingPlugin vote party from a personal milestone
- Reduce repeated vote reminders without disabling voting
- Preserve monthly voting history before changing leaderboard tracking
Find a Minecraft plugin setup or troubleshooting guide
Find setup and troubleshooting instructions for Minecraft server plugins, grouped by what you want to do. These guides cover individual projects and their integrations; they are not a recommendation to install every plugin together. Start with the smallest set of features your community needs.
Before choosing a plugin
Check the plugin author's supported Minecraft release and server platform before downloading. Paper, a proxy such as Velocity, and a Fabric server require different builds. A guide does not guarantee compatibility with every future release. Some projects require a paid licence; obtain those files from the author through a legitimate account.
Read how to install plugins, keep a completed backup, and test substantial changes away from the only copy of your world. Plugins may keep player data in an external database, which needs its own matching backup. Use the commands and configuration for the exact installed release.
Maps, worlds and land protection
- Set up a BlueMap web map and control rendering load
- Install Dynmap and test a bounded world render
- Publish a squaremap world map with a separate web port
- Add and import Minecraft worlds with Multiverse-Core
- Create a controlled Multiverse-Portal between worlds
- Separate creative and survival inventories with Multiverse-Inventories
- Link Nether and End worlds with Multiverse-NetherPortals
- Load an existing world safely with MyWorlds
- Create a separate creative plot world with PlotSquared
- Set up player land claims with GriefPrevention
- Configure GriefDefender claims and LuckPerms safely
- Create a Lands claim and control member roles
NPCs, menus, quests and progression
- Create and manage a Citizens NPC without granting command access
- Create Shopkeepers player shops and test trades safely
- Build a safe starter menu with DeluxeMenus
- Create a DecentHolograms display and check player visibility
- Set up a FancyHolograms text display on Paper
- Configure an ExcellentCrates test crate and verify rewards
- Set up a CrazyCrates test and troubleshoot crate keys
- Create and test a beginner quest with PikaMug Quests
- Build and diagnose a small BetonQuest conversation
- Set up Jobs Reborn and check that job payments work
- Add mcMMO skills and preserve existing player levels
- Configure AuraSkills progression and test player rewards
Voice chat, voting and community tools
- Set up Simple Voice Chat with an allocated UDP port
- Install Plasmo Voice and diagnose voice connection errors
- Set up Plan analytics without exposing private player data
- Configure NuVotifier and protect vote-receiver credentials
- Create and test Minecraft vote rewards with VotingPlugin
- Customise the Minecraft server list with MiniMOTD
- Maintain an existing ServerListPlus configuration safely
- Control a Minecraft maintenance window with Maintenance
- Set up GSit poses and restrict player interactions
- Configure SkinsRestorer without changing account authentication
- Restore a recorded player inventory with InventoryRollbackPlus
- Use MiniPlaceholders with a compatible Minecraft text plugin
Administration, compatibility and moderation
- Install ProtocolLib and diagnose dependent plugin failures
- Set up PacketEvents for plugins that require it
- Let supported older Java clients join with ViaBackwards
- Evaluate legacy Java client support with ViaRewind
- Set up SuperVanish for a limited staff role
- Configure LiteBans moderation and preserve punishment history
- Set up AdvancedBan with controlled moderation tests
- Introduce GrimAC alerts before automated punishments
- Add and test WorldGuard ExtraFlags in one region
- Replace WorldEdit with FastAsyncWorldEdit safely
- Configure DriveBackupV2 and verify an off-server recovery copy
- Give safe lobby items with ItemJoin
Shops, travel, economy and shared player data
- Create player chest shops with QuickShop-Hikari
- Configure and test an EconomyShopGUI server shop
- Create and protect a ChestShop sign shop
- Set up zAuctionHouse and test item sale recovery
- Create player-owned public warps with Player Warps
- Configure bounded random teleports with BetterRTP
- Set up personal homes and teleport requests with HuskHomes
- Test cross-server inventory synchronisation with HuskSync
- Introduce CMI without conflicting with existing server plugins
- Configure an AdvancedEnchantments trial without risking player gear
- Fix EssentialsXChat prefixes and chat formatting
- Configure first-join spawn and respawn rules with EssentialsXSpawn
Permissions, protection and performance essentials
Already have the basics installed? These existing guides explain common dependencies and the controls used by several plugins above. Check permissions with an ordinary player account as well as an administrator; operator access can conceal a missing permission or bypass a protection rule.
- Create Minecraft ranks and inheritance with LuckPerms
- Connect Vault to an EssentialsX economy
- Install PlaceholderAPI expansions and fix raw placeholders
- Configure a Minecraft TAB list and scoreboard
- Allow compatible Minecraft Java clients with ViaVersion
- Inspect block changes and preview a CoreProtect rollback
- Set up EssentialsX commands and player permissions
- Use WorldEdit selections, limits and undo safely
- Protect a Minecraft spawn with WorldGuard regions
- Connect Minecraft chat to Discord with DiscordSRV
- Pre-generate Minecraft terrain with Chunky and monitor disk space
When a plugin does not work
Save the first useful startup error and record the server, Java and plugin versions. Check dependencies before changing permissions or replacing data. Restart normally after a supported file change; do not repeatedly reload the entire server to bypass a failed plugin. A missing command, an inactive dependency and a blocked network connection need different investigations.
If you need help, open a private support ticket with the relevant server ID, timestamp and redacted logs. Do not post database passwords, voting tokens, bot credentials or remote-storage keys. Keep the original files and last working backup while investigating.
Focused tasks by plugin
Choose a plugin below for individual configuration tasks, checks and recovery steps. These guides complement the setup articles above. Match the instructions to your installed release and keep a recovery copy before changing player data.
Permissions and moderation
- AdvancedBan tasks and troubleshooting
- CoreProtect tasks and troubleshooting
- EssentialsX tasks and troubleshooting
- GrimAC tasks and troubleshooting
- LiteBans tasks and troubleshooting
- LoginSecurity tasks and troubleshooting
- LuckPerms tasks and troubleshooting
- PremiumVanish tasks and troubleshooting
- SuperVanish tasks and troubleshooting
- WorldGuard tasks and troubleshooting
- WorldGuard ExtraFlags tasks and troubleshooting
Worlds, building and maps
- BlueMap tasks and troubleshooting
- Chunky tasks and troubleshooting
- ChunkyBorder tasks and troubleshooting
- Dynmap tasks and troubleshooting
- FastAsyncWorldEdit tasks and troubleshooting
- Multiverse-Core tasks and troubleshooting
- Multiverse-Inventories tasks and troubleshooting
- Multiverse-NetherPortals tasks and troubleshooting
- Multiverse-Portals tasks and troubleshooting
- MyWorlds tasks and troubleshooting
- PlotSquared tasks and troubleshooting
- WorldEdit tasks and troubleshooting
Economies, shops and claims
- ChestShop tasks and troubleshooting
- EconomyShopGUI tasks and troubleshooting
- GriefDefender tasks and troubleshooting
- GriefPrevention tasks and troubleshooting
- Jobs Reborn tasks and troubleshooting
- Lands tasks and troubleshooting
- QuickShop-Hikari tasks and troubleshooting
- Shopkeepers tasks and troubleshooting
- Towny tasks and troubleshooting
- Vault tasks and troubleshooting
Progression, items and quests
- AdvancedEnchantments tasks and troubleshooting
- AuraSkills tasks and troubleshooting
- BetonQuest tasks and troubleshooting
- ItemsAdder tasks and troubleshooting
- mcMMO tasks and troubleshooting
- MythicMobs tasks and troubleshooting
- Nexo tasks and troubleshooting
- Oraxen tasks and troubleshooting
- Quests tasks and troubleshooting
- RoseStacker tasks and troubleshooting
Menus, chat and voice
- DecentHolograms tasks and troubleshooting
- DeluxeMenus tasks and troubleshooting
- DiscordSRV tasks and troubleshooting
- FancyHolograms tasks and troubleshooting
- GSit tasks and troubleshooting
- InteractiveChat tasks and troubleshooting
- MiniMOTD tasks and troubleshooting
- MiniPlaceholders tasks and troubleshooting
- PlaceholderAPI tasks and troubleshooting
- Plasmo Voice tasks and troubleshooting
- ServerListPlus tasks and troubleshooting
- Simple Voice Chat tasks and troubleshooting
- TAB tasks and troubleshooting
Connections, analytics and backups
- DriveBackupV2 tasks and troubleshooting
- Floodgate tasks and troubleshooting
- Geyser tasks and troubleshooting
- HuskHomes tasks and troubleshooting
- HuskSync tasks and troubleshooting
- InventoryRollbackPlus tasks and troubleshooting
- NuVotifier tasks and troubleshooting
- PacketEvents tasks and troubleshooting
- Plan tasks and troubleshooting
- ProtocolLib tasks and troubleshooting
- spark tasks and troubleshooting
- ViaBackwards tasks and troubleshooting
- ViaRewind tasks and troubleshooting
- ViaVersion tasks and troubleshooting
- VotingPlugin tasks and troubleshooting
Add and import Minecraft worlds with Multiverse-Core
Multiverse-Core manages additional worlds inside one Minecraft server. It does not allocate another game server or isolate that world's CPU and memory. Adding a world increases the data and workload handled by the same service.
Plan names and take a recovery copy
Record the server version, current world identifiers and any terrain-generator plugins. Choose a new, unused identifier for a new world. For an imported world, record its source Minecraft version and required generator. Loading it with a different generator can create mismatched terrain as players explore beyond existing chunks.
Stop the service and take a completed backup containing all worlds, player data and existing Multiverse configuration. Keep an off-server copy. Test an imported copy before opening it to players; do not overwrite the live world or rename its folders as a shortcut. See backups and world upload.
Install and identify the expected world format
Install a supported Multiverse-Core release using the plugin guide. Check the documented migration notes when updating an older major version. Addon modules must be compatible with the Core release; their minor version numbers do not necessarily match.
Current Multiverse documentation distinguishes older Spigot/Paper folder-based world names from Paper 26.1+ namespaced dimension identifiers. Follow the layout and identifier syntax for your actual server. Do not move a newer dimension into an old-style folder structure simply to make an old video tutorial fit.
Create a separate world or import a copy
- Check the current world list using the installed
/mvhelp. Confirm that the intended destination name is unused. - For a new ordinary overworld, current Core documentation uses
/mv create creative normal. Replacecreativewith your planned unused world identifier and check the release's syntax before executing. - For an existing world, upload its copy into the correct version-specific location while stopped. Use
/mv importwith the matching environment and actual identifier. Do not use create against data you intend to import. - Read Console for the completion or first meaningful error before repeating any operation.
- Visit the destination as an administrator. Inspect terrain and choose a safe arrival point;
/mv setspawnuses the player's current position.
Commands shown with a slash are in-game commands. Remove the slash when using Console, and remember that location-dependent operations require a player position.
Test access and boundaries
Use an ordinary non-operator player to test entry, return travel, spawn and game mode. Where world-access enforcement is enabled, grant the specific multiverse.access.WORLD node for the intended world rather than a global wildcard. Record any respawn or teleport plugin that can override these results.
Multiverse-Core alone does not create per-world inventories. Arrange inventory separation before allowing creative items into survival; see the Multiverse-Inventories guide. Do not assume a different game mode automatically separates player possessions.
If an import fails, preserve the uploaded files and send support the world identifier, source version, generator and first error. Further reading: basic world management and access permissions.
Looking for another plugin? Browse the Minecraft plugin guide directory.
Add and test WorldGuard ExtraFlags in one region
WorldGuard ExtraFlags adds flag types to WorldGuard's existing region system. It does not create a separate protection boundary. Region overlap, priorities, membership and bypass permissions still affect the final result, so start with one private test region.
Identify the project and compatible versions
Several similarly named projects and forks exist. This guide concerns the aromaa WorldGuardExtraFlags project. Check the exact release's supported Minecraft, WorldGuard and WorldEdit combination before installing it. Do not treat a different fork's flag list or configuration as interchangeable.
If your newest Minecraft release is not confirmed by the project's documentation, test on a copy and ask the maintainer about support. An extension loading successfully does not prove that every flag works on a changed server event API.
Back up region data before installation
- Stop the server normally and take a completed backup of the worlds and protection-plugin data. Preserve any external storage the protection stack uses.
- Confirm WorldGuard and its supported WorldEdit implementation already enable correctly. Fix their startup errors first.
- Place one supported ExtraFlags JAR in
plugins/, keeping old copies outside the loaded directory. - Start and inspect Console. Check the extension registers its flags rather than assuming the filename proves it loaded.
- Keep the existing region priorities and memberships unchanged while testing the new flag.
Test a bounded rule on the ground
Use a small test region you own, away from active players. Inspect its current flags and write down their previous values. On a compatible release exposing the documented fly flag, an in-game example is /rg flag test-area fly deny. Replace the region name with the one you verified and keep the test player safely on the ground.
Do not test flight restrictions over a drop or above another player's build. Confirm the intended rule using an ordinary account, then compare a staff account whose bypass permissions you know. Region overlap can change the outcome, and an administrator test alone does not represent visitor access.
Avoid privileged command flags as a first feature
Entry and exit command flags can run actions repeatedly as players cross a boundary. Console-command variants can execute with server privileges. Leave them unused until you have reviewed the exact syntax, permissions, repeat behaviour and consequences. Never accept player-controlled text as an unrestricted privileged command.
Keep inventory and experience flags separate from death-management plugins. Test the combined behaviour using disposable items on an isolated copy before changing a public region; overlapping inventory rules can produce loss or duplication.
Undo the rule deliberately
Return the individual flag to its recorded previous value using WorldGuard's documented flag controls. Do not delete the whole region to remove one effect. If a flag is unknown, capture the extension startup error and exact version combination rather than granting broader permissions.
See WorldGuard regions and file backups. Further reading: official extension, registered flags and WorldGuard flag behaviour.
Looking for another plugin? Browse the Minecraft plugin guide directory.
Add mcMMO skills and preserve existing player levels
mcMMO adds skills, progression and abilities to supported Minecraft servers. Plan its effects on survival gameplay before increasing experience rates or rewards. It stores progression separately from the ordinary world, so restoring a world alone does not guarantee that player skills return to the matching point in time.
Choose the correct project and build
Use the official mcMMO website and its linked distribution channels. Several unrelated projects use similar names; a client-side mod or an unofficial repack is not a substitute for the server plugin. Obtain any required licence legitimately and check support for your Minecraft, Java and server build.
Stop normally and keep a completed backup of worlds, the mcMMO data directory and its configured player storage. Export an external database consistently while writes are stopped. If this is an upgrade, retain the old JAR and configuration. Read the changelog before assuming that every configuration option or stored value remains compatible with an older release.
Establish a clean baseline
- Follow plugin installation and keep one mcMMO JAR in the loaded plugins directory.
- Start once and inspect Console for mcMMO and storage errors. Let the compatible release generate its own defaults rather than uploading another server's whole directory.
- Join with a disposable, non-operator test account and use the plugin's installed help to inspect an available skill.
- Perform a small number of ordinary actions for that skill, such as mining naturally generated blocks where the configured skill permits it.
- Record progress, stop and restart normally, then confirm the same account retains its progress.
Keep the test player separate from an established player's account. Do not use a reset or database conversion command to diagnose a display problem. If progress is not retained, preserve the log and investigate storage before opening skills to everyone.
Change progression settings carefully
mcMMO splits configuration across several YAML files. Find the setting in the documentation for the installed release instead of adding an old internet example to whichever file looks similar. Back up that file, change one behaviour and test the same action again under the same conditions.
Consider experience rates, ability effects and interactions with protection or economy plugins together. A skill bonus can change how quickly items enter the economy. Avoid enabling several overlapping reward systems at once unless you have tested the combined outcome. Permission-based bonuses also need a normal-player test; an operator's result can hide the real access rules.
Diagnose an unexpected result
Check the skill and action, relevant world restrictions, player permission context and any plugin cancelling the action. Distinguish missing progression from a missing action-bar message; other plugins can compete for the same display area. Test a simple action without integrations on an isolated copy if the live setup is complex.
For an update, compare the release notes and generated defaults before replacing customised configuration wholesale. A rollback should restore matching plugin files and player data if a migration changed storage. Send support the precise build, skill, action, test result and redacted log. See permission groups. Further reading: installation and updates, configuration overview and main configuration reference.
Looking for another plugin? Browse the Minecraft plugin guide directory.
Build a safe starter menu with DeluxeMenus
Prepare a small test menu
Check the required server version and dependencies for the selected DeluxeMenus release. Its official documentation lists PlaceholderAPI as required. Install compatible releases using the plugin guide, stop normally and keep a backup of existing menus, permissions and any databases involved in purchases.
Start once and read Console. Stop again before manually changing files. Do not import an entire menu pack directly into production: inspect its actions, external links, commands and permissions first. Packs can include console actions that assume different plugins, worlds or rank names.
Register and edit the menu
- Open
plugins/DeluxeMenus/config.yml. Under the existinggui_menussection, register a uniquely named menu and a unique YAML filename using the documented external-menu format. - Use the plugin's supported reload command,
/dm reload, from an administrator account. Check its output; a reload request alone does not prove the menu parsed. - Open the generated file under
plugins/DeluxeMenus/gui_menus/and work from the example for your installed release. - Give the menu a distinct
open_command, a small valid inventory size and one visible information item. - For the first click action, use a harmless message or close action. Do not start with a payment, rank change or console command.
Use spaces consistently in YAML and preserve list indentation. Material names must exist in the Minecraft version you run. Keep the menu ID, filename and opening command distinct in your notes: they identify different parts of the setup.
Test the player route
The administrative /dm open command is not the ordinary player's menu command. Test the configured open_command with a non-operator account. Add narrow view or click requirements where appropriate and check that a denied player cannot trigger the protected action by using a different command.
Check placeholders separately through PlaceholderAPI diagnostics. A raw placeholder may mean a missing expansion or unsupported data source, rather than a broken menu slot. Do not grant broad administrator permissions to make a placeholder appear.
Add transactions only after basic validation
Review who executes each action: a player action, a console action and a cross-server action have different effects. Use only the documented player placeholder in trusted commands, and avoid constructing privileged commands from arbitrary user input. Check affordability, permission and success behaviour before promising a reward.
Test insufficient funds, full inventory, rapid repeated clicks and reconnecting. Record balances and received items so duplicated rewards or unexpected charges are visible. If an update breaks a menu, restore its previous configuration and compatible dependency versions together rather than clearing player data.
Further reading: external menus, commands and action types.
Looking for another plugin? Browse the Minecraft plugin guide directory.
Build and diagnose a small BetonQuest conversation
BetonQuest connects conversations, conditions, events and objectives. Start with a short conversation that displays text and ends, then add gameplay consequences. A missing reply can be a condition or pointer problem rather than an installation failure.
Choose documentation for your installed branch
Record the BetonQuest version, Minecraft release, Java runtime and required integrations. Package layout and syntax can change across major releases. The examples linked here describe the 2.2 documentation branch; use the matching documentation selector if your installed major differs, rather than mixing a development tutorial with an older production package.
Stop normally and take a completed backup of packages, configuration and player progress, including the plugin database. A file-only backup is incomplete if progress is stored externally. Follow plugin installation and keep existing packages intact. Do not rename established objective or event identifiers simply to tidy a live setup without reviewing their saved references.
Trace a minimal conversation
- Create an isolated test package using the sample structure documented for your installed release. Use unique, descriptive identifiers.
- Define a starting NPC option with a short line of text and one player reply. Link the starting option to that reply using the version's pointer format.
- Point the reply to one final NPC response. Initially omit reward commands and restrictive conditions so the conversation path is easy to inspect.
- Load the package with the supported reload workflow. For the documented 2.2 command family,
/q reloadreports configuration loading errors to Console. - Trigger the conversation through the installed version's documented test or NPC integration and confirm each branch appears.
Keep configuration YAML properly indented and quote values containing special syntax where required. Read the first error naming a file or identifier. A later failure to start the conversation may only be the consequence of a package that never loaded.
Add one condition or event at a time
A condition controls whether a branch is available. An event performs an action, and an objective tracks ongoing progress. Give each identifier a clear purpose and test the condition's true and false cases with disposable progress. If no player option remains available, the conversation can end; that is not automatically a server crash.
Do not test by purging the whole player database. Progress belongs to players, and command events may change ranks, items or money outside BetonQuest. Use a test account, low-value rewards and an isolated database on a staging copy when investigating a complex existing questline.
Preserve progress while troubleshooting
Compare the exact identifier referenced by the pointer with the identifier defined in the package. Check which event should start an objective and whether a tag or requirement has already changed for the test player. Repeatedly firing completion events can award duplicate rewards, so record each test.
Read Console after reload and keep the configuration error before editing again. A reload is not a database reconnection or a replacement for a full restart when storage settings change. For support, include the minimal redacted package, version, player-state description and trigger steps. See NPC identity and setup for linked characters. Further reading: conversation structure, commands and configuration troubleshooting.
Looking for another plugin? Browse the Minecraft plugin guide directory.
Configure an AdvancedEnchantments trial without risking player gear
AdvancedEnchantments adds custom enchantment effects and ways to obtain enchanted items. An effect working once is only part of the setup: prices, application chances, equipment compatibility and permissions also determine whether the system is safe to open to players.
Install a legitimate compatible build
Make a completed backup of worlds, player data, plugin files and any external storage before introducing custom items. Keep the original jars and configuration separately. Existing enchanted items can retain plugin-specific data, so removing the plugin later is not automatically a complete rollback.
Start once to generate files, read Console for loading errors and stop before editing. Use /ae about to identify the installed release when reporting problems. Configuration paths and menu structures can change; use files generated by your release instead of an old complete configuration from a video.
Start with a disposable equipment test
Create a private test area and use ordinary disposable equipment, not a player's valuable armour. Select one documented enchantment that applies to that item type. Check its allowed levels, targets and effect conditions before testing combinations.
The documented administrative form /ae enchant (enchantment) (level) changes the held item. Replace the parenthesised arguments with a valid enchantment identifier and supported level from your installed release. Keep this command with trusted administrators; it is not a normal player entitlement.
Record the item's starting state and test the effect under its actual trigger conditions. Check Console for errors and compare with an unenchanted control item. An enchantment intended for a particular tool or event may do nothing in an unrelated test.
Configure the enchanter deliberately
The official current menu documentation describes plugins/AdvancedPlugins/menus/Enchanter.yml. Confirm that path against your generated files before editing. Copy the existing menu file and change one option at a time, preserving YAML indentation and quoting.
Choose the intended payment type and price for the trial. The documentation supports several currencies, including money, experience and items; these are different resources with different integration requirements. A money price needs a working supported economy. See economy integration checks before opening paid purchases.
Run /enchanter as an ordinary test player with the documented ae.enchanter permission. Compare the exact resource balance before and after one purchase. Test insufficient funds and a full inventory, then restart normally and check that the resulting item still behaves correctly.
Review failure chances and access
Read success, failure and destruction settings before allowing application to real gear. Test each enabled outcome with disposable items; do not advertise guaranteed preservation unless the tested configuration provides it. Avoid adding unknown console commands to menu actions, which can run with much greater authority than a player.
Do not grant an administrative wildcard to make a menu appear. Grant only intended player permissions and test denials with a non-operator account. Report issues with versions, the enchantment identifier, item type and redacted relevant configuration. Further reading: commands and enchanter configuration.
Looking for another plugin? Browse the Minecraft plugin guide directory.
Configure an ExcellentCrates test crate and verify rewards
ExcellentCrates manages crates, keys and rewards. Build a private test crate before distributing keys or announcing prizes. A successful animation is not proof that the correct item, balance or permission was awarded, and a mistaken reward command can affect more than the person opening the crate.
Use documentation for the installed major version
Check the release's supported Minecraft, Java and server platforms and install its required NightCore framework. Optional integrations should be added only for features you use. ExcellentCrates has changed its crate, key and block workflows across major versions; do not paste an older tutorial's commands into a newer installation without checking the command help.
Follow plugin installation, stop normally and keep a backup of configuration, crate definitions, player/key data and any external database. Preserve the previous JAR and matching framework version. A database format conversion may make downgrading unsafe even when the old JAR is still available.
Create an isolated reward test
- Start and inspect Console for required-plugin or loading errors.
- On the documented v7 command family, use
/ecrates helpand/ecrates statusto inspect commands and active modules. - Open the documented crates editor using
/crates editor. Create a distinctly named test crate rather than modifying a crate already in public use. - Add one small, unmistakable item reward through the editor. Read its quantity, chance or weight, eligibility and execution settings before saving.
- Use the matching key editor and current key command help to create and issue a limited test key to your own test account.
Aliases can be changed in configuration. If the installed command differs, inspect its help rather than repeatedly trying commands from another release. Keep the test inaccessible to ordinary players until the whole transaction has been checked.
Verify keys, opening and delivery
Test a valid key and an invalid or missing key. Count keys before and after one opening, then inspect the actual reward received. Try a full inventory to understand the plugin's configured delivery behaviour. Verify that quitting or reconnecting does not grant a second reward from the same completed opening.
For physical crate blocks, follow the workflow for your exact release. Older block-linking instructions do not necessarily apply to newer modular crate-block systems. Check that placement occurs in the intended world and that region protection allows the interaction without allowing visitors to edit the crate.
Review commands before adding valuable prizes
A console reward executes with server authority. Use the documented recipient placeholder, restrict editors to trusted staff, and avoid operator grants or commands built from arbitrary player input. Test money rewards against the economy provider and check balances independently. See economy integration.
Back up before deleting a crate or changing its reward structure. Some releases remove linked rewards when a crate is deleted. For failures, preserve key counts and transaction logs, then report the crate ID, test player, timestamp, versions and redacted error rather than clearing player data.
Further reading: requirements, commands and workflow changes.
Looking for another plugin? Browse the Minecraft plugin guide directory.
Configure and test an EconomyShopGUI server shop
EconomyShopGUI provides a menu for trading items with the server. Unlike player chest shops, a server shop can introduce new items and currency into your economy. Start with one inexpensive test product and decide your pricing rules before exposing a large catalogue.
Install the matching edition
Check the project's supported Minecraft releases and dependencies, then download the correct free or Premium edition from its official distribution links. Premium-only features and configuration examples may not work in the free edition. Keep one edition active rather than loading both JAR files.
Set up a supported economy provider first. For a Vault-based configuration, verify Vault and the actual balance provider both enable successfully. Use the economy connection guide to establish a working balance test before diagnosing menu prices.
Back up the current shop configuration, player/economy data and any external databases before replacing an existing shop. Stop the server while taking a consistent recovery point. Keep your old plugin build with those files so a rollback does not pair an old JAR with a newer database schema.
Understand the generated files
Start once to generate the plugin's files, inspect Console, then stop before editing them. The configuration controls general behaviour and the economy choice; section definitions describe the menu categories, while shop definitions describe their products. Modern releases use separate section and shop files rather than every example's older single-file arrangement.
- Copy one generated example section rather than starting from a configuration for a different edition.
- Keep its internal name consistent with the corresponding shop file. A friendly display title is not necessarily that internal identifier.
- Add one normal material and explicitly choose both purchase and resale prices. Use the installed edition's format and preserve YAML indentation.
- Check whether the product can be bought, sold, both or neither. A missing value must not be assumed to mean the same thing in every release.
- Save and start normally. Use
/shopin game and confirm your section appears.
Check the full transaction
Use an ordinary player with a small known balance and an inventory containing no valuable items. Buy one product, compare the balance and item quantity, then sell that product back if selling is enabled. Include any rank discounts, sell multipliers, taxes or stock limits in your expected result.
A resale price above the effective purchase price can create repeatable profit, especially when group discounts and bonuses combine. Also compare products made from each other through crafting or smelting. Keep the trial shop restricted until you have checked those conversions.
Avoid /sellall as your first test: it can sell every eligible item in the inventory. Test with a deliberately disposable inventory and a specific product instead. The documented reload command is /sreload, but some general settings still require a full server restart.
Investigate an absent item or rejected sale
Check the internal section name, item material, edition-specific support and permissions before changing prices at random. Record whether the failure occurs when opening, purchasing or selling. Send support redacted startup errors and the affected section definition; do not share database passwords or blindly install another server's entire shop layout.
See backup and restore precautions. Further reading: file layout and dependencies, commands and shop configuration.
Looking for another plugin? Browse the Minecraft plugin guide directory.
Configure AuraSkills progression and test player rewards
AuraSkills adds skills, stats and abilities. It was previously named Aurelium Skills, so older tutorials can refer to different names and configuration formats. Start with default progression on a small test account, then change rewards and world policies one at a time.
Prepare compatible files and storage
Check the current AuraSkills release against your Minecraft and server platform. Read migration notes if replacing an older Aurelium Skills or AuraSkills installation. Do not assume that renaming a directory converts its data. Use official download links and follow plugin installation.
Stop normally and keep a completed backup containing configuration, player progression, worlds and any external database. If another plugin awards money or items when a skill level changes, preserve that integration's data too. Keep the old JAR and matching configuration until the new build has passed a clean save and restart test.
Check experience and persistence
- Start and read Console for loading or storage errors.
- Join with an ordinary test account and run
/skillsto inspect the skills overview. - Use
/sk sources miningto inspect the documented sources menu for that skill. Check the installed help if your language or release changes the presentation. - Perform a small, permitted activity in an enabled survival world. Record the skill's progress and compare it with the intended source.
- Reconnect, then complete a normal stop/start cycle and confirm progress persists.
Do not use an administrator set-level or reset command as a first test of natural experience gain. Those commands intentionally alter progress and may trigger separate reward behaviour. Work with a disposable account so a test does not change an established player's progression.
Set world and experience policies
Review disabled_worlds in the generated main configuration and use the exact world names. The documentation notes that menus and commands can remain available even where gameplay progression is disabled, so seeing a menu does not prove a world should award experience.
Inspect block-replacement checking before changing mining behaviour. Allowing placed blocks to repeatedly grant experience can create a progression loop. Check spawner and other source multipliers deliberately, and compare permission-based bonuses with group membership. Keep player access narrow; administrator skill manipulation is not needed for normal progression.
Add one reward and test its boundaries
Use the version's reward format to configure a small reward at a known level. Check the recipient, amount, required integration and whether the action executes as console. If a reward has a reversal command, test both gaining and losing the level on an isolated copy before relying on it.
Run a full-inventory test for item rewards and inspect the documented claim-items route rather than assuming missing items were deleted. Do not repeatedly grant levels to investigate a reward without tracking whether it has already been delivered.
If a skill stops progressing, record the skill, world, source, permission context and log time. A display conflict can hide progress without changing storage. See group permissions. Further reading: commands, main configuration and rewards.
Looking for another plugin? Browse the Minecraft plugin guide directory.
Configure bounded random teleports with BetterRTP
BetterRTP finds a random teleport destination within configured limits. The search may load or generate terrain, so a large travel area can create both lag and disk growth. Begin with a small area and one intended world instead of opening every dimension immediately.
Define the travel area first
Decide the exact world name, centre, minimum distance and maximum distance. Keep destinations inside the world border and away from a protected spawn where necessary. A radius is measured from a centre; it is not the full width of the destination area.
Review the installed release's support for your Minecraft build, world environment and protection plugins. Obtain the plugin from the author's official links. Before adding it, take a completed backup of world and plugin configuration using the backup guide. Terrain generated during tests will remain part of the world unless separately trimmed or rolled back.
Edit the correct world configuration
Start once to generate files, inspect Console, then stop before making changes. BetterRTP distinguishes defaults, custom world settings and other override arrangements. Read its World Setup Types documentation rather than copying one block into several unrelated configuration sections.
- Record the target world name exactly as the server loads it. A display alias in another plugin may differ.
- Configure that world's allowed range and centre using your generated file's field names.
- Review safe-surface checks, disallowed blocks and the intended Nether or End behaviour where supported.
- Set a modest cooldown and search effort appropriate to your server. Keep economy charges explicit if enabling them.
- Save, start and check that the configuration loads without an error. Inspect any protection-hook startup messages.
Do not remove dangerous-block checks or increase search attempts drastically just because the first trial cannot find a destination. A tiny valid area, water-heavy map or conflicting border can explain the failure.
Run an ordinary-player trial
Use a non-operator test player with the documented use permission for your release. Try /rtp from the intended source world. Record the destination world and coordinates, then confirm there is solid footing and enough space. Repeat a few times with the normal cooldown rather than issuing a burst of requests.
Check that the cooldown and any charge occur only as intended, including when a search fails. Test movement during a teleport delay if you have enabled cancellation. If players should not random-teleport from a hub or a particular dimension, test that refusal separately.
Control generation load
Watch Console, tick performance and free storage during the trial. Random travel outside generated terrain can be much more expensive than revisiting existing chunks. If you choose pre-generation, follow the bounded Chunky guide and keep its selected area consistent with BetterRTP's destination area.
Claim and region integrations must be tested with an ordinary account. Do not assume every protection plugin is supported or that an administrator's successful teleport proves a visitor cannot enter a claim.
Report a failed search clearly
Provide the exact message, plugin/server versions, world name, configured bounds and a redacted relevant configuration section. Preserve existing worlds and restore only your copied configuration if a test change fails. Further reading: configuration, world overrides and permissions.
Looking for another plugin? Browse the Minecraft plugin guide directory.
Configure DriveBackupV2 and verify an off-server recovery copy
DriveBackupV2 can send server file archives to supported storage services. It is a separate backup system from the CloudExa panel's Backups section: its schedules, retention, credentials and failures need their own checks. A remote account being linked is not proof that a usable archive exists.
Choose the recovery scope first
List the worlds, plugin data and configuration needed to recover the server. External MySQL databases require a separate consistent export; including a plugin's configuration file does not include its remote database. Plan a quiet window when a consistent recovery point matters. DriveBackupV2 runs inside the Minecraft process: its commands need that process running. For a fully offline backup, stop Minecraft and use the CloudExa panel backup system or another offline tool instead; do not try to run a plugin command after stopping the process.
Check the plugin's supported server release and obtain the official build. Back up the current installation before adding it. Start once to generate configuration, inspect Console, then stop before editing settings.
Prevent archives from including themselves
Review the generated backup-list, local-save-directory, remote destination and retention settings. Choose explicit inputs rather than blindly archiving the whole server root. Keep local output and old archives outside every included input tree. If you include the plugins directory, check that no plugin stores its backup output underneath that same directory.
A backup that contains earlier backups grows rapidly and can fill the game server before the upload finishes. Leave storage room for temporary archives as well as normal world saves. Multiple backup plugins or panel schedules can compete for that space, so avoid overlapping jobs until you have measured them.
Link one storage destination securely
- Choose a supported provider and follow the plugin's current setup guide for that provider. Use an account or bucket dedicated to server recovery where practical.
- Keep authorisation codes, tokens, access keys and configuration files private. Use the provider's supported encrypted connection method.
- Enable only the intended destination. Set bounded remote retention and review local retention independently.
- Start the server and run the installed version's documented provider test. Read the response and the provider's own storage view.
- Run
drivebackup backupin Console for a supervised first job. Checkdrivebackup statusand wait for successful completion.
Prove that the remote copy can be recovered
Find the completed archive at the destination, download it to a separate location and inspect its contents. Confirm the expected world and plugin data are present and old archives are absent. Keep the backup private: it may contain passwords or service tokens. Provider storage encryption does not make a publicly shared download safe.
Restore a sample onto an isolated test server, including matching database exports when needed. Confirm the world opens and representative player data works. Do not extract over the active production world merely to check whether an archive is readable.
Schedule only after the first test passes
Check the next backup time, timezone and any requirement for players to be online. Review failure messages and remaining storage regularly. A scheduled request can fail after starting, and fixed delays do not establish consistency.
See panel backup and restore checks and full game-server storage. Further reading: provider setup guides, commands and configuration reference.
Looking for another plugin? Browse the Minecraft plugin guide directory.
Configure first-join spawn and respawn rules with EssentialsXSpawn
EssentialsXSpawn controls arrival and respawn locations. First-time joins, repeat joins, the spawn command and returning after death are separate events. Decide the intended destination for each before changing settings, especially on servers with multiple worlds or an existing lobby plugin.
Prepare a safe spawn area
Install compatible EssentialsX core and EssentialsXSpawn builds from the official project. The core plugin is required for its modules. Check that both load successfully in Console, and record any other plugin that handles joins or respawns.
Choose a solid, accessible destination with headroom, safe surroundings and a clear route out. Check the destination world and facing direction. A region-protection plugin may be appropriate for a public lobby; setting spawn does not itself protect blocks or prevent combat.
Stop the server and copy its Essentials configuration, spawn data and affected worlds before editing. Follow the backup guide. Keep existing player records: deleting them to simulate a new account can also reset other player-specific data.
Set and test the general location
Stand at the chosen location as a trusted administrator and use /setspawn. Keep the essentials.setspawn permission with staff. Let an ordinary test player use /spawn with the intended essentials.spawn permission, and confirm the destination without operator bypasses.
Check any configured teleport delay, movement cancellation and cooldown. Repeat after a normal restart to confirm persistence. If another plugin owns the same command, resolve command ownership rather than assuming the visible result came from EssentialsXSpawn.
Choose first-time arrival behaviour
The generated Essentials configuration has a newbies section with a named spawnpoint. To use a separate arrival point, stand there and set the matching name with /setspawn newbies. Ensure the configured name actually matches the spawn you created.
Use a genuine fresh test account that has not joined this server. Check its destination and any welcome message or first-join kit. A returning player logging in again is not a first-join test. Review the kit setting separately so testing spawn does not unexpectedly grant items.
Keep spawn-on-join disabled unless returning players should also be moved on login. If you enable it for selected groups, check the generated configuration's supported syntax and verify an included group and an excluded group. Do not confuse this with first-join behaviour.
Test death and existing respawn choices
Use an empty disposable test inventory in a controlled area. Compare death recovery with no personal respawn point and with a valid bed. Check the generated respawn-at-home, respawn-at-home-bed and respawn-at-anchor descriptions before deciding how homes, beds and anchors should interact.
Respawn listener priority determines how EssentialsXSpawn competes with other handlers, and priority changes require a restart. Do not keep increasing priority until a symptom disappears: identify the intended owner, apply one change and repeat the same test matrix.
Keep useful evidence
Record the event tested, account group, starting world, expected destination and actual coordinates. Report versions and a redacted relevant configuration excerpt if behaviour differs. Personal home management is a separate feature. Further reading: official modules, annotated configuration and spawn permissions.
Looking for another plugin? Browse the Minecraft plugin guide directory.
Configure GriefDefender claims and LuckPerms safely
GriefDefender stores claim rules through a close integration with LuckPerms. A claim can exist while its effective permissions are wrong, so verify both the protection data and the permission inheritance before allowing players to rely on it.
Check dependencies and preserve both data sets
Choose the GriefDefender build for the server platform and Minecraft version. Obtain it through authorised maintainer links, including any required access entitlement. Use the documented compatible LuckPerms major version. A build intended for a mod loader is not interchangeable with a Paper plugin.
Before an upgrade or new protection rollout, stop and back up worlds, GriefDefender configuration and data, plus LuckPerms data. Export external databases while writes are stopped. Keep these as a matched set outside the game server: restoring only claim records can leave their permission state inconsistent. See backups and LuckPerms inheritance.
Preserve the required permission structure
Install using the plugin guide, start once and inspect startup output. GriefDefender generates supporting LuckPerms groups and relies on the normal default-group inheritance path. Do not delete generated groups or disable the default group to simplify the permissions list.
Read the project's permission guide before assigning access. Its documented user permission bundle is different from its administrative bundle. Review the user bundle and deny unwanted user operations according to that guide; do not give ordinary players administrative bypasses or a global wildcard. Test the resulting inheritance rather than replacing it with guessed individual nodes.
Review the world and claim settings
- Stop before editing the generated configuration. Use the format actually generated by your release; newer YAML and older HOCON examples are not interchangeable.
- Record any existing spawn protection or other region plugin before changing overlap behaviour.
- If adjusting vanilla spawn protection as required by your design, first ensure the spawn area will have an equivalent tested administrative claim. Do not leave a public spawn unprotected between changes.
- Choose a small permitted test area and leave economy, taxation and automated expiration features unchanged until basic claims work.
- Start and check that the plugin and LuckPerms load cleanly.
Create and test a basic claim
Use a normal player account with the intended claim allowance. The default claiming tool is a golden shovel; current documentation also provides a tool-free claim mode. Select the two corners and inspect the displayed boundary. Check whether you are using an area-based or volume-based mode before claiming around a multilevel build.
Use another ordinary account to test block placement, containers and doors. Test at the boundary as well as the centre. Review the appropriate trust roles rather than granting every possible permission to a collaborator. Keep a record of the expected behaviour for an owner, trusted player and visitor.
If an action is incorrectly allowed or denied, inspect the claim's effective flags and LuckPerms contexts. Do not delete all permission or claim data to clear the error. Send support coordinates, versions, relevant context and redacted output. Further reading: setup, claim management and required permission structure.
Looking for another plugin? Browse the Minecraft plugin guide directory.
Configure LiteBans moderation and preserve punishment history
LiteBans manages moderation records and enforcement. Begin with a clear policy for warnings, mutes and bans, then give staff the commands required for their role. An installation that accepts a ban command still needs testing for scope, expiry and appeals.
Choose the installation and data scope
Obtain a legitimate copy through the developer's official distribution and check its supported platforms. A proxy installation and an individual backend installation have different enforcement reach. Decide which instance should own commands and where the punishment data belongs before adding it across a network.
Stop affected instances and back up existing plugin files. If LiteBans already uses an external database, take a matching database export while writes are paused. Keep connection details private. A file backup alone cannot recover moderation history stored somewhere else.
Configure and verify storage
- Install the compatible JAR in the selected instance and start once to generate configuration. Inspect Console for loading errors.
- Stop before editing the generated configuration. Follow the installed version's comments for its selected storage driver, database and server identity.
- Use a dedicated database account with the permissions the plugin documents. Do not reuse a panel administrator or database root account.
- Start and confirm the plugin connects. Check the configuration points to the intended database rather than an empty test database.
- For shared storage, test the intended local or network scope before enabling moderation for all staff.
Give moderators bounded access
Read the current permission reference rather than granting litebans.*. Separate routine warnings and history inspection from permanent bans, IP restrictions and administrative history changes. Where supported, apply duration limits to the appropriate roles and verify them with a non-operator test moderator.
For a read-only first check, run /history TestPlayer and /checkban TestPlayer in chat, replacing the name with your own test account. Console commands omit the slash. A command-name collision can route a request to another moderation plugin; identify the command owner before assuming the wrong system stored a punishment.
Test reversibility and expiry
During a private test window, use the installed release's documented syntax to apply a short temporary punishment to an account you control. Confirm its reason, duration and server scope, then remove that specific test punishment. Check the account can join or chat again and that the audit history remains understandable.
Do not use bulk history pruning or staff rollback as a routine setup test. IP matches can include shared households or networks; investigate them rather than automatically treating every associated account as the same person. Keep identifying information and appeal details out of public screenshots.
Before migrating storage, test the documented migration process against a copy and retain the original database. See plugin database connections and staff permission groups. Further reading: commands, permissions and official configuration reference.
Looking for another plugin? Browse the Minecraft plugin guide directory.
Configure NuVotifier and protect vote-receiver credentials
NuVotifier receives notifications from server-list voting sites and passes vote events to a reward listener. Receiving a vote and granting a reward are separate jobs. Test delivery first so reward configuration does not conceal a network or credential problem.
Check the installed platform and release
NuVotifier's public setup documentation is older than many current Minecraft releases. Do not interpret that as a guarantee that every old JAR supports the latest Paper or Java build. Check the actual release, platform instructions and startup result on a test copy before introducing it to your live server.
Keep a backup of the existing configuration and vote/reward data. Use the plugin installation guide for a standalone Paper setup. Proxy networks require the forwarding design documented by NuVotifier rather than independent public receivers that might reward the same vote twice.
Create the receiver endpoint
- Confirm an unused TCP allocation assigned to your service. The default Votifier port from an example is not automatically yours.
- Start the installed plugin once to generate configuration and credentials, then stop normally before editing.
- Set the receiver port to that allocation and use the bind arrangement supported by your service. A container may not bind directly to its public address.
- Start and check Console for the listener. If it reports an occupied or invalid address, resolve that exact issue before entering credentials on a voting site.
- Register the public receiver address and port with a trusted server list, using the protocol and credentials it supports.
TCP web or game availability does not prove that the separate vote endpoint is reachable. Keep an endpoint record for each service so future migrations do not leave a listing pointed at an old machine.
Understand keys and tokens
Legacy Votifier-style RSA credentials have a public key and a private key. Share only the public key with a legitimate server list. Never upload the private key into a public ticket, screenshot, paste service or website configuration.
NuVotifier tokens are a different mechanism. They are secrets shared only with the intended list or forwarding component. A token does not replace an RSA public key on a site that expects the older protocol. Preserve matched keys when moving an existing service; regenerating them requires updating the corresponding listings.
Test delivery before real rewards
Use the trusted list's test facility with a controlled player identity. Note the time and check Console for the vote event. A locally simulated listener event tests the reward plugin but does not prove that an external site can reach your receiver.
Once delivery is confirmed, configure one modest reward in the chosen listener and test it separately. Avoid running several reward listeners unless you deliberately want each to respond. Record whether offline-player votes should wait until the player returns.
For failures, send support the server ID, receiving port, list name, timestamp and redacted error. Never include private keys or tokens. See collecting useful logs. Further reading: NuVotifier setup and forwarding and official release links.
Looking for another plugin? Browse the Minecraft plugin guide directory.
Configure SkinsRestorer without changing account authentication
SkinsRestorer lets a supported Minecraft Java server apply player skins and manage saved skin selections. A player's appearance is separate from whether their account is authenticated. Do not turn off online authentication or change a working proxy trust boundary just to repair a cosmetic problem.
Match the platform and network arrangement
Read the installation and compatibility guide for the exact SkinsRestorer release. Choose the artifact for Paper, your proxy or the supported mod platform. Minecraft and Java requirements depend on that choice; a filename that looks recent is not enough to establish compatibility.
The current official installation guidance says a proxy network needs SkinsRestorer on the proxy and every backend. Follow the full network instructions rather than placing an arbitrary combination of plugin files on a few machines. Preserve existing forwarding and backend access protection.
For a standalone Paper service, use plugin installation. Keep the existing configuration, stored skin data and external database export before an update. A database change can affect saved choices even when players' world files are untouched.
Test a simple player-name skin
- Install the supported release, start normally and read Console for successful loading and storage connection.
- Join with a controlled Java test account. Use the documented player skin command, such as
/skin set PlayerName, with a valid target skin name. - Check the result from another player's view as well as your own. Reconnect if the documented client refresh behaviour requires it.
- Test the documented reset/clear option when you want the account skin back; understand whether it removes the saved selection or only refreshes the current view.
- Repeat with an ordinary player account after applying the intended permissions.
Begin with a player-name skin before testing uploaded PNG files or URL skins. This separates a general plugin/storage failure from an image-format, URL-policy or upstream skin-generation problem.
Limit who can change what
Review SkinsRestorer's current command and permission reference. Self-service skin changes, URL uploads, menu access and changing another player's skin are distinct capabilities. Grant only what your community needs rather than the full administrative permission set.
If you offer custom uploads, publish a simple content policy and retain URL restrictions supported by the plugin. Do not paste private authentication or provider tokens into public image URLs, commands or screenshots. A skin command generated by an uploader is not an invitation to execute unrelated console text.
Diagnose the visible result
A cached or temporarily applied skin can differ from the saved selection. Inspect the documented lifecycle and refresh behaviour before deleting data. Check Console for rate limits, upstream service failures or storage errors; repeatedly reapplying the same skin can make a rate-limit problem harder to diagnose.
Bedrock users joining through Geyser have a different appearance path, so do not use their view as the only test of a Java skin change. Compare two Java accounts first. Record the platform, release, command and failed stage in a support request.
See Java and Bedrock crossplay for that separate setup. Further reading: installation, changing and resetting skins and permissions.
Looking for another plugin? Browse the Minecraft plugin guide directory.
Control a Minecraft maintenance window with Maintenance
The Maintenance plugin can restrict joining while you work on a Minecraft server and show an intentional maintenance message. It does not create a backup, stop all writes or replace a proper shutdown when changing world files. Keep a separate recovery route through the CloudExa panel.
Install for the right layer
Check the current release's supported server or proxy platform. Decide whether maintenance should cover one backend or the public network entrance, then follow the project's instructions for that deployment. Do not assume the same command arguments control every proxy backend.
Use plugin installation for a standalone Paper server. Preserve the existing configuration and maintenance whitelist before an update. Announce the window and identify an administrator who can use the game-panel Console if a permission mistake blocks in-game entry.
Prepare access before enabling maintenance
- Start the compatible plugin and confirm Console reports a successful enable.
- Review the generated configuration and messages. Tell users what is happening and how they will know when access returns.
- Use the documented
/maintenance addcommand to add the intended tester. Follow the installed version's accepted name/UUID syntax; older documentation notes limitations when adding offline names. - Review
/maintenance whitelistand verify that only the intended accounts have bypass access. - Test from an ordinary player account as well as an administrator. Broad operator rights can hide an incorrect access rule.
Do not grant a wildcard permission to everyone so that one staff member can enter. The maintenance access list and the game's ordinary whitelist are separate controls. Changing one does not necessarily update the other.
Enable and end a supervised test
On the documented standalone command surface, /maintenance on enables the restriction and /maintenance off removes it. In panel Console omit the leading slash. Check the installed plugin's help first when you use a proxy edition or a different release.
Keep the first test short and supervised. Confirm that an authorised tester can reconnect and that an unapproved player receives the intended message. Inspect what happens to players already online rather than assuming the plugin's policy matches your plan.
The command /maintenance starttimer 5m is documented for starting maintenance after a delay. A timer is not a player-warning or backup-completion guarantee by itself. Announce the interruption, verify any saved task and use the documented abort-timer control if you need to cancel it.
Keep data operations separate
For an offline backup or world edit, stop normally and wait for saving to finish after access is restricted. A maintenance login barrier does not freeze plugins, scheduled jobs or external database writes. Verify the backup independently before changing data.
When finished, start the server if necessary, confirm a clean startup and check the world with the tester before opening access. Remove temporary bypass entries, disable maintenance deliberately and verify an ordinary player can join. See backup and restore checks. Further reading: commands, configuration and supported platform downloads.
Looking for another plugin? Browse the Minecraft plugin guide directory.
Create a controlled Multiverse-Portal between worlds
Multiverse-Portals creates a defined gateway region that teleports players to a destination. It is useful for a hub or event entrance, but a portal does not automatically make the destination world safe or grant players permission to enter it.
Prepare both ends
Install compatible Multiverse-Core and Multiverse-Portals releases on a supported server. Check each release's requirements instead of mixing an old addon with a newer Core major version. Confirm the source and destination worlds are already loaded, and record their actual identifiers.
Back up the worlds and Multiverse configuration before changing established travel routes. Keep a list of existing portal names and destinations. Choose a unique test name so the new gateway cannot accidentally replace a public entrance. See game backups and world management.
Select a small gateway
In-game commands include a leading slash. Selection steps require a player; pasting a position-dependent command into Console cannot reproduce the administrator's location.
Grant only the intended travel access
For a portal named lobby_exit, the documented access node is multiverse.portal.access.lobby_exit. Grant it to the intended group with your permissions plugin. Keep world-access requirements in place where enforced; portal permission and destination-world permission are separate checks.
Do not disable all portal-access enforcement because one test player cannot travel. First check the exact portal name, destination, effective group permissions and any other region restrictions. Test with a non-operator account because administrators may bypass normal checks.
Test return travel and failure cases
Walk through once, inspect arrival position, and verify the player can leave safely. Return travel is a separate design decision: creating a gateway does not necessarily create the reverse route. Check both directions if your announcement promises a two-way connection.
Also test a player who should be denied. Avoid enabling entity or vehicle travel until you have assessed farms, item transport and potential loops. Do not attach console-command portal actions simply to solve a basic destination issue; those actions can have much wider consequences.
If travel loops or arrives incorrectly, temporarily restrict use and inspect the named portal's destination. Keep the world data intact. Send support the two world identifiers, portal name and error time. Further reading: portal selection and destinations and portal permissions.
Looking for another plugin? Browse the Minecraft plugin guide directory.
Create a DecentHolograms display and check player visibility
DecentHolograms displays text and other supported content at a location in your world. Begin with a static welcome sign. Animated text, frequent placeholder updates and very large numbers of displays should be added only after you have checked their effect on players and server performance.
Choose the display type for your release
Read the documentation matching the installed plugin. DecentHolograms supports different display approaches, and commands for traditional holograms are not interchangeable with every display-entity command. Check Minecraft support before selecting a release; an example written for a different display system may use different line behaviour.
Follow plugin installation. Before replacing an existing JAR, stop the server and back up the plugin's saved holograms and configuration as well as the relevant worlds. Record the name and location of any display linked from another plugin. Keep the old files for a matched rollback.
Create one static hologram
- Start the server, read Console and resolve any dependency or version error.
- Join as a trusted administrator and stand in a safe test area.
- For the documented traditional hologram command, run
/dh h create welcome_test Welcome to our serverin chat. - Add a second line with
/dh l add welcome_test 1 Please read the server rules. Here the number identifies the hologram page; check the installed command help if your version differs. - View the result from an ordinary player's account before adding more text.
Chat examples use your position. A Console creation command needs the explicit location argument documented by the plugin, such as the world and coordinates. Do not assume the server console has a player location. Use a unique hologram name to avoid editing a display that already exists.
Edit carefully and keep permissions narrow
A line replacement changes existing text; adding a line appends content. Check the hologram name, page and line numbering before applying a replacement. Do not use a whole-display delete as a shortcut when you only want to correct one line.
Keep create, edit and action permissions with trusted staff. A visitor reading a hologram does not need administrative commands. If you later add clickable actions, inspect whether they run as player or console and test a harmless action first. Avoid granting the broad dh.admin permission to ordinary players to solve a visibility problem.
Investigate missing text
Confirm that you are in the intended world and near the recorded coordinates. Check visibility distance, permissions or conditions used by that specific hologram. Test static text before placeholders: if static text works, inspect the placeholder's provider and context using the PlaceholderAPI guide.
Review plugins that hide entities or modify packets on an isolated test copy. Compare affected and unaffected client versions rather than immediately removing protections from the live server. Stop and restart normally once to confirm the display is saved. Send support its name, world, coordinates, plugin versions and the first relevant log error.
Further reading: first hologram, creation arguments, line additions and permissions.
Looking for another plugin? Browse the Minecraft plugin guide directory.
Create a Lands claim and control member roles
Lands combines claimed areas with membership, roles and optional economy features. A player trusted in one area may not have the same permissions in every subarea. Begin with a small claim and verify the role rules before inviting a large group.
Install the supported release and keep recovery data
Obtain a legitimate Lands release through its maintainer's links and check the exact server-version requirements. Follow its current dependency instructions. Add economy or map integrations only after the basic plugin starts successfully; optional integrations should not be assumed from an old guide or someone else's plugin list.
Stop and back up the worlds plus Lands configuration and data before installation changes or an upgrade. Include an external storage database if configured, and keep the copy outside the server. For an existing economy, preserve its matching balances too. Read game backup guidance and plugin installation.
Review costs before claiming
Inspect the server's configured claim allowance, economy integration and any taxes or upkeep. Do not promise players free permanent land before checking those settings. A successful claim today does not prove that later maintenance charges are disabled.
Keep the first test area small and outside existing protected locations. Record the relevant account's starting balance so you can distinguish a claim charge from an unrelated economy change. Use a test copy if altering established tax or expiration rules.
Create and select the intended land
- Join as a normal player with the intended permissions. Use the installed command help if the syntax differs from the current documentation.
- Current documentation supports
/lands create TestLandto choose a name before claiming. Use a unique name suitable for your community. - Stand in the authorised test location and use
/lands claim. Inspect the boundary and any charge or allowance message. - When trusted in several lands, use
/lands edit TestLandto select the intended edit land before management commands. - Open
/landsor/lands menuto inspect the area's members, roles and settings.
These are in-game examples. Commands can change between major releases, so use the documentation matching the installed build rather than forcing a newer command into an older server.
Invite members with a deliberate role
Current Lands documentation provides /lands member trust PlayerName for the selected land's default area. Review area-specific behaviour before using options that trust someone across every area. Prefer the namespaced Lands command when another claim plugin also registers a short /trust alias.
Test owner, member and visitor behaviour with non-operator accounts, including a subarea if you use one. Verify that a removed member loses the intended access and that ordinary public routes remain usable. Review the result after a normal restart.
If claims or roles behave unexpectedly, preserve the data and send support the land name, area, involved role and exact action. Do not delete a populated land to fix a membership issue. Further reading: getting started, economy and claim tools.
Looking for another plugin? Browse the Minecraft plugin guide directory.
Create a separate creative plot world with PlotSquared
PlotSquared manages designated building plots and their ownership. For an existing survival server, the safest starting point is a separate new plot world. Changing the generator of a world that already contains player builds can create inconsistent terrain.
Check the release and dependencies
Read the installation requirements for the exact PlotSquared release and your Minecraft version. Obtain legitimate releases through the maintainer's links; do not use unofficial repackaged premium downloads. Check the required WorldEdit or supported FastAsyncWorldEdit combination instead of installing both editing implementations without a migration plan.
Record the existing world manager, generator settings and permissions setup. A plot plugin does not give the service extra RAM or disk. Reserve space for new terrain and leave enough capacity for backups before generating a large creative world.
Protect the current worlds and ownership data
Stop normally and take a completed backup of every world plus PlotSquared's data and configuration if already installed. If ownership is stored in an external database, export it while writes are stopped and keep it with the matching world backup. A copied world without its ownership records is not a complete recovery point.
See game backups and safe WorldEdit changes. Never follow an old tutorial's instruction to delete the default worlds when your goal is to add a separate creative area.
Use a new world and the setup wizard
- Install the compatible plugin and required dependencies. Start once, inspect Console and stop before configuration changes.
- Review the generated storage configuration. Keep the current backend for an established installation unless you are following a tested data-migration procedure.
- Join as an authorised administrator and run
/plot setupto begin the release's setup wizard. - Choose a new unused world name and review each generator and plot-size choice. Do not point the wizard at an existing survival world.
- Record the selected road, plot and world settings before confirming generation. Follow the wizard's own command prompts rather than pasting arguments from a different major version.
Retain the original default world. The new plot world's generator must remain available after restarts so newly explored terrain stays consistent with the configured layout.
Test a normal player's plot
Grant the specific player permissions documented for the intended claim and plot limits, using your permissions manager. Keep administrative bypass permissions away from ordinary players. Verify the exact nodes for your installed release instead of assuming an old wildcard or limit node still applies.
Use a non-operator test account to claim a disposable plot. Check that its owner can build, an unrelated player cannot, and any explicitly added collaborator has the intended access. Test roads and neighbouring plots as well as the plot centre. Record an easy return route to survival before opening the world publicly.
After a normal restart, verify that ownership and permissions persist. Avoid clear, regenerate or move commands during a simple access test because those can change blocks. Send support the plot/world identifier, plugin version and failed action. Further reading: installation, commands and world configuration.
Looking for another plugin? Browse the Minecraft plugin guide directory.
Create and manage a Citizens NPC without granting command access
Citizens adds persistent non-player characters to a compatible Minecraft server. Start with one decorative NPC before connecting shops, quests or commands. An NPC's appearance does not determine its permissions, and clicking an NPC should not accidentally give visitors administrative actions.
Match Citizens to the server
Check the Citizens release against your exact Minecraft and server build. NPC plugins use version-sensitive server features, so a JAR working on a different release is not a compatibility test. Use the project's official download links; where your chosen distribution requires a purchase, obtain it legitimately rather than using an altered download.
Stop the server and keep a completed backup including worlds and the existing Citizens directory. Preserve NPC IDs and any linked quest or shop data together. Recreating an NPC with the same name does not guarantee that integrations will recognise it as the same NPC. Follow the plugin installation guide and keep one Citizens JAR.
Create one NPC in a test location
- Start and inspect Console for Citizens startup errors. Resolve a version or missing-dependency error before creating anything.
- Join with your trusted administrator account and stand on safe ground in a test area.
- Run
/npc help createto check the installed command syntax, then/npc create WelcomeGuide. - Record the selected NPC's ID shown by the plugin. Use the documented selection command when returning to an older NPC instead of assuming your last selection is still active.
- Inspect its placement, visibility and interaction with an ordinary player account. Keep initial behaviour decorative.
These examples run in Minecraft chat. Creation uses your location; do not paste the same example into Console and assume a location will be inferred. Consult the location arguments documented for your release when using Console.
Add behaviour deliberately
Review each trait or integration separately. Citizens command traits can run actions with different execution identities; player execution and privileged execution have different risks. Read the installed command help before adding an action, restrict editing to trusted staff, and test a harmless message before configuring rewards or purchases.
Do not attach an operator grant, unrestricted console command or arbitrary player-supplied command to a public NPC. A permission on the command editor is different from a permission checked when a visitor clicks. Test denied access as well as successful access. Quest and shop integrations may store the NPC's numerical ID, so note that reference before moving or replacing it.
Diagnose missing or broken NPCs
Check whether the NPC's world is loaded and whether the problem affects every player or one client. Read the first Citizens error after startup; repeated later messages may be consequences. Check other plugins that hide entities, alter packets or manage worlds on an isolated copy rather than removing them from a live server without a plan.
Stop normally and restart once to confirm the NPC survives a clean save cycle. Keep the original backup until links and permissions are verified. Send support the NPC ID, world, Citizens and Minecraft versions, timestamp and redacted startup error. See rank and permission management. Further reading: Citizens commands, installation and permissions.
Looking for another plugin? Browse the Minecraft plugin guide directory.
Create and protect a ChestShop sign shop
ChestShop links a sign to a physical stock chest. The meaning of buy and sell prices is from the customer's perspective: a visitor buys items from the shop and sells items to it. Decide which direction you want before writing the sign.
Prepare the server economy
Obtain a release from the official ChestShop project that supports your server version. Read its update warnings if an older market already exists. Install its documented economy integration and a compatible economy provider. Vault is an integration layer rather than a balance database; use the Vault guide if players have no working currency.
Before changing an established shop system, stop the server and back up world files, ChestShop data and the economy database together. Signs, containers and account balances all matter. Save configuration separately before changing price limits or protection integrations.
Create a small player shop
Use a test player who owns the stock rather than building the shop as an administrator on someone else's behalf. In a safe market area, place a chest and put a few inexpensive items inside. Place its sign close enough for the plugin to associate it with that chest, following the release's supported placement rules.
For a simple shop selling one stone for two currency units, write these four sign lines:
1
B 2
?
The first line is intentionally blank: ChestShop fills the owner's name when it creates the shop. The second line is the transaction quantity. The third line allows a customer purchase at the displayed price. The final question mark lets the plugin resolve the item from the chest or the documented item-selection interaction.
Check the completed sign and success message rather than assuming every sign is a valid shop. For a two-way shop, the documented price line uses a buy/sell combination such as B 2:1 S. That example makes the customer's resale price lower than their purchase price; review your own currency scale before using it.
Test as a different player
- Record the seller's money and stock, then join with a non-operator customer.
- With default controls, interact/right-click the sign to buy. Compare both balances and the received quantity.
- If selling is enabled, use the default attack/left-click action to sell and check the reverse transfer. Controls may have been customised in configuration.
- Try a purchase with insufficient funds and with no stock. Confirm the transaction refuses cleanly.
- Check that another player cannot open the chest or remove its sign through your actual claims/protection setup.
Do not grant ChestShop.admin to fix ordinary buying. It permits sensitive actions involving shops, and administrator/access permissions can also affect how test interactions behave. Use the plugin's normal shop permissions and test without operator bypasses.
Resolve problems without resetting the market
Use /shopinfo while looking at the shop and /iteminfo for the held item when identification is unclear. Check world protection, configured minimum/maximum prices and the expected click direction. Rapid repeated clicks may behave differently from one deliberate interaction.
Keep copies of signs and exact messages for support. Avoid replacing all shop data just because one sign fails. See permission groups. Further reading: official usage and permissions and release notes.
Looking for another plugin? Browse the Minecraft plugin guide directory.
Create and test a beginner quest with PikaMug Quests
PikaMug's Quests lets you define objectives and rewards for players. It is a specific plugin: other projects also use the name “Quests” and can have different configuration formats. Check the developer and release before downloading or following an example.
Start with a small independent objective
Choose a compatible build through the project's official links and read the requirements for any integration you plan to use. The current documentation targets Quests 5 and newer; legacy instructions should not be assumed to match a newer editor. An NPC integration is optional for a basic command-started test and should not be added merely to make a first quest possible.
Stop the server and keep a completed backup of the Quests configuration, player progress, worlds and any external storage. Use plugin installation, then inspect the startup log before editing. Preserve existing quest identifiers: replacing a quest with a differently identified copy can affect players' recorded completion state.
Create one quest in the editor
- Join with your trusted administrator account. Run
/quests editorand choose the create option offered by the installed editor. - Give the test a distinct name and a description stating exactly what the player must do.
- Set one simple stage with a small, measurable objective in a test area. Avoid combining a long collection chain with several integrations on the first attempt.
- Add one inexpensive reward. Inspect both item rewards and command actions; a command reward can have server-level authority.
- Save through the editor and read Console for validation or loading errors.
Do not use player-progress reset commands as part of routine setup. Keep administrative and editor permissions separate from normal player access. A player who can view or accept a quest does not need permission to change its rewards.
Test from the player's side
Use a non-operator account and run /quests list. Where command acceptance is enabled, use /quests take with the exact quest name using the installed help's syntax. Check current objectives with /quest. Localised command names can differ, so use the help shown by your server if these names are translated.
Complete the objective once and verify the actual reward, completion state and progress after reconnecting. Check that an incomplete objective does not grant the reward. If the quest counts broken blocks, inspect the options controlling replaced blocks and Silk Touch rather than assuming every block action should count identically.
Review repeatability and integration behaviour
Decide whether the quest should be repeatable and inspect the installed version's cooldown and completion requirements. Test a second attempt rather than assuming a description enforces the rule. Add NPC, party or economy integrations one at a time, keeping each dependency compatible.
For a failure, preserve the quest's definition and the test player's progress before changing anything. Report the stage, action that should have advanced it, plugin versions, timestamp and relevant log. See Citizens NPC setup when adding an NPC start. Further reading: commands, configuration and per-quest options.
Looking for another plugin? Browse the Minecraft plugin guide directory.
Create and test Minecraft vote rewards with VotingPlugin
VotingPlugin listens for vote events and applies rewards according to your configured sites and rules. It does not make a voting site reachable on its own. Establish that NuVotifier or your chosen compatible receiver gets the vote before debugging reward amounts.
Prepare one small test
Check VotingPlugin's release requirements, required libraries and supported platform. Read plugin installation and preserve the existing VotingPlugin data, configuration and any external database before updating. A rewards database and an economy balance database may be separate systems.
Choose one voting site, one test player and one harmless reward. Write down the expected outcome, including whether it can be delivered while the player is offline. Disable overlapping test rewards so a successful result has a clear source.
Configure a site and reward
- Install the compatible plugin and its documented dependencies. Start once and confirm they enable without errors.
- Open the current release's setup documentation and generated files. VotingPlugin supports site-specific configuration and reusable reward definitions; use the schema for your installed build.
- Create or review the voting site's identifier and service-site mapping. The incoming name must match the intended site rule rather than merely resemble its display name.
- Use
/av guiwith an authorised administrator account if using the documented administration interface. Do not give ordinary players broad administrative permissions. - Configure a modest test reward and save it. If a reward runs another plugin's command, verify that command separately with the correct target syntax before linking it to voting.
Files under plugins/VotingPlugin/Rewards/ are one supported way to organise reusable rewards. Some releases also allow inline and special rewards. Do not mix fragments from several tutorials unless their structure matches the generated examples and current documentation.
Trace the event from site to player
Send one external test vote and record its time. Check the receiver's event, VotingPlugin's matched site and the final player outcome. These checkpoints distinguish an unreachable receiver, an unmatched service name and a reward command rejected by another plugin.
Test a normal online player account rather than only an operator. Then test the intended offline behaviour with that same controlled account. Confirm whether rewards queue until login or use a documented offline mechanism; an inventory item cannot simply be inserted into a disconnected process by any arbitrary command.
Prevent duplicate or excessive rewards
Look for a second reward listener, repeated site definitions or proxy forwarding that reaches more servers than intended. Network-wide voting requires a deliberate design for where votes are received and where rewards execute. Do not solve duplicates by repeatedly clearing player data.
Keep valuable economy changes small while testing. Back up the affected data before changing thresholds, streaks or cumulative rewards, and verify a returning player's progress afterward. A local reward test does not confirm the real website's protocol or daily voting limit.
Include the server ID, plugin version, site identifier, test time and redacted log in support requests. See database connection checks. Further reading: VotingPlugin setup, reward definitions and official reference.
Looking for another plugin? Browse the Minecraft plugin guide directory.
Create player chest shops with QuickShop-Hikari
QuickShop-Hikari creates physical shops where players trade items held in chests. It needs a working economy behind the shop interface. Plan a small trial market first: a shop that opens successfully has not yet proved that stock, money and ownership update correctly.
Choose the correct build and dependencies
Check the official release notes against your Minecraft version, server software and Java runtime. Use the main QuickShop-Hikari release, not an integration add-on with a similar filename. The project has several optional compatibility modules; they do not replace the shop plugin itself.
Install Vault and a supported economy provider, such as the EssentialsX economy, before testing shops. Vault connects plugins to an economy; it does not create player balances on its own. Check the release's protocol-library requirements for item displays and localisation. See Vault and economy setup if the provider is missing.
Stop the server and take a completed backup of its files, shop database and economy data before changing an existing market. Preserve world files too: the database references real shop locations and owners. A file-only backup cannot restore transactions stored in an external database.
Enable one test seller
- Upload the compatible plugin and required dependencies using the plugin installation guide, then start and read Console from the beginning.
- Run
qsin Console to check that the plugin responds. Do not use a global plugin reload to repair startup errors. - Create a temporary permissions group for a named test player. Review the release's player permission bundle and shop limit settings before granting access.
- The documented
quickshop.playerbundle enables normal player shop features. Give it only to the trial group initially, and keep administration permissions separate. - Follow that build's in-game chest interaction prompts with a cheap item, a small quantity and an explicit price. Confirm whether the shop buys from or sells to visitors before completing creation.
Do not paste an administrator wildcard into your default group because a creation prompt fails. Permission checks, claim protection and economy errors have different causes.
Test money, stock and protection
Record the seller's balance and chest stock. Join with a different, non-operator buyer, record their balance, then make one purchase. Confirm the buyer received the right quantity, the chest lost that quantity and both balances changed by the intended amount, allowing for any configured fees.
Attempt the same purchase with insufficient funds and with the chest empty. It should fail cleanly without creating items or moving money. Check that an unrelated player cannot open or break the seller's chest. Repeat inside your actual claim or region system; an operator account may bypass its rules.
If displays or transactions fail
Separate a missing floating item from a failed trade. Check protocol-library compatibility for display problems, and the selected economy provider for balance errors. Keep transaction logs, exact versions, timestamps and shop coordinates for support. Stop trading while investigating a suspected duplication issue; do not delete the shop database to reset the symptom.
Further reading: official project and documentation links and release notes and assets.
Looking for another plugin? Browse the Minecraft plugin guide directory.
Create player-owned public warps with Player Warps
Olzie's Player Warps lets players publish destinations that other players can visit. Several unrelated plugins use similar names, so check the author before downloading or following commands. This guide refers to the Olzie Development project.
Plan public destinations and preserve existing warps
Check the release's Minecraft compatibility, dependencies and edition before installation. If replacing an existing warp plugin, do not copy its database over this plugin's data. Use a documented importer or plan a migration with support while retaining the original records.
Stop the server and back up the plugin's data, affected worlds and external database if used. Warps depend on world names, server identifiers and locations. Renaming a world after creating warps can make valid records point somewhere unavailable.
Install using the plugin guide. Start once, read Console for dependency errors, then stop before editing configuration. Review creation costs, visitor charges, teleport delay and available categories before players can create public destinations.
Give a test player a small warp allowance
The documented allowance permission is pw.limit.<number>. For example, a temporary group can receive pw.limit.1 for a one-warp trial. Do not give the unlimited wildcard just to solve an ordinary player's missing allowance. Use LuckPerms groups to apply and inspect the intended membership.
- Stand as the test owner in a safe, permitted area with enough standing room and no immediate fall or suffocation hazard.
- Use
/pw helpto confirm the active command belongs to this plugin. - Create a clearly named trial destination with
/pw set MarketTest, using the installed build's accepted naming rules. - Read any cost confirmation and inspect the published destination in the menu.
- Join as a second non-operator account and use
/pw MarketTestto test access and arrival.
Keep operator status out of the access test. It can mask permission, claim or protection restrictions that ordinary visitors experience.
Check categories and charges
Category visibility and permission to assign a category are different controls. The official FAQ identifies pw.category plus the particular category permission for assignment. Review any category-specific viewing permission before assuming a missing menu item is a corrupted warp.
Record both players' money before and after a charged visit. Check whether the owner receives that charge and whether creation costs are separate. Publish clear prices to players; a free warp name does not mean every teleport is free under your configuration.
Fix command and destination problems
If a subcommand such as lock is interpreted as a destination name, the command may be disabled in configuration. Check that before renaming warps or replacing the JAR. A missing category may instead be a menu configuration or permission issue.
For failed teleports, verify the destination world exists, its chunk can load and your claims plugin permits the intended visit. Do not disable protections globally to make one market accessible. Test at the destination with an ordinary account, and move a dangerous trial warp using the documented edit tools.
Keep the original data and send support the warp name, owner, version and exact message. Further reading: commands and permissions and common configuration problems.
Looking for another plugin? Browse the Minecraft plugin guide directory.
Create Shopkeepers player shops and test trades safely
Shopkeepers creates villager-style trading shops. A player shop uses chest stock, while an admin shop can have unlimited supplies. Decide which model you want before creating the shop: an unlimited shop with an accidental price can affect an entire server economy.
Prepare the market area
Use the official Shopkeepers download matching your Minecraft release and read its requirements. Stop the server, take a completed backup of worlds and plugin data, then follow plugin installation. If a previous Shopkeepers installation exists, preserve its saved shops rather than replacing its data directory with a downloaded example.
Choose a protected test area and a chest containing a small amount of ordinary test stock. Check that the owner can access the chest while visitors cannot take its contents directly. Shop trading permissions and region or chest protection are separate checks; test both before opening a public market.
Create a player shop
- Start the server and resolve any startup error before proceeding.
- Obtain the configured shop-creation item through the documented administrator method. Its identity is configurable; a normal villager spawn egg is not automatically the right item.
- Follow the installed version's creation prompts to select the player shop type, its stock chest and its placement. Select a selling shop for a first stock-for-payment test.
- Use the shop's edit interaction to set one simple trade. Choose ordinary items with clear quantities before using custom items.
- Put a small amount of the offered item into the backing chest, then test buying as an ordinary second player.
Check that stock decreases by the promised amount and payment appears in the expected place. Shopkeepers' item-trade model is not the same as automatically charging a Vault currency balance. If you want money-based trading, verify the relevant supported integration rather than assuming every economy plugin works with every shop type.
Separate administrative shops
For a deliberately unlimited admin shop, the documented /shopkeeper command creates an admin shop while you look at a suitable block. Keep that creation ability restricted to trusted staff. Never grant shopkeeper.* merely because a player cannot create a chest-backed shop.
Review the specific shop-type permission, creation-item availability and configured limits instead. A player who can trade does not need permission to edit another player's shop. When testing custom item trades, compare the actual item metadata, not just its display name; two similarly named items may not be equivalent.
Check failure cases before opening
Test with an empty stock chest, a full receiving inventory and insufficient payment. Confirm an unsuccessful trade does not consume payment or produce items. Verify the shop still exists after a normal stop and start, and that it remains associated with its original chest.
If trading fails, record the shop ID, type, owner, coordinates and relevant error. Check whether chest protection, a moved container or mismatched item data explains it. Avoid deleting the shop as a first fix because this can discard its configuration. Keep the test shop closed until balances and stock reconcile. See region protection. Further reading: creating shops, player shop setup and permissions.
Looking for another plugin? Browse the Minecraft plugin guide directory.
Customise the Minecraft server list with MiniMOTD
MiniMOTD changes the description and related presentation shown when a Minecraft client refreshes its multiplayer server list. That status response is different from chat messages, a login announcement or the text returned by an in-game MOTD command.
Install on the endpoint players contact
Check the project's current platform downloads and game-version requirements. Choose the correct plugin or mod artifact, rather than placing a Fabric download in Paper's plugin folder. Follow the plugin installation guide for a Paper server.
On a proxy network, the public proxy normally answers the player's status request. Editing only a backend can therefore appear to do nothing. Review your proxy's ping-passthrough behaviour and decide which component owns the public response before adding another MOTD plugin.
Keep a copy of your current presentation configuration and stop normally before editing generated files. Avoid having MiniMOTD, ServerListPlus and another status plugin all trying to replace the same response; preserve a rollback copy when choosing one.
Edit the generated configuration
- Start once and inspect Console for a successful enable. Stop before making the initial configuration change.
- Open the main configuration generated by that release. MiniMOTD uses HOCON
.conffiles; the official wiki's example calls its main filemain.conf. - Find the
motdslist and change one entry'sline1andline2. Begin with plain text so you can verify the file and endpoint before adding formatting. - Check
motd-enabledand any icon settings relevant to your configuration. Preserve the surrounding braces, brackets and quotes. - Save and restart normally. Refresh the same saved server entry in a Minecraft client and confirm the new text.
A simple formatted first line might be <gold>Our survival server</gold>. MiniMOTD uses MiniMessage formatting; an ampersand-colour example from a different plugin is not automatically valid here. Escape markup correctly when you mean literal angle brackets.
Add an icon and predictable variation
Follow the installed release's icon requirements and put the PNG in its configured icon directory. In the documented format, an icon name refers to the filename without the .png extension, while random chooses among available icons. Test one known icon before adding a collection.
Multiple MOTD entries can be selected on different refreshes. If text seems to revert randomly, inspect every configured entry before blaming cache. Keep player counts accurate; presentation settings should not be mistaken for additional service capacity.
Troubleshoot the response players see
Check for a parse error after editing, a second status plugin, the wrong domain or an old proxy endpoint. Compare direct and domain-based connections where appropriate without exposing a private backend publicly. Do not change unrelated world or authentication settings to repair a server-list line.
Provide the plugin version, platform, public endpoint and a redacted configuration excerpt when requesting help. See Minecraft domain records. Further reading: MiniMOTD configuration, platform downloads and MiniMessage syntax.
Looking for another plugin? Browse the Minecraft plugin guide directory.
Evaluate legacy Java client support with ViaRewind
ViaRewind extends the Via translation family for legacy Java clients, notably the 1.7 and 1.8 generations. It requires ViaVersion and ViaBackwards. Use the current project's supported combinations; this is not a promise that every old client can use a modern server unchanged.
Decide whether legacy support fits your gameplay
Identify the precise client release your players need and the Minecraft release running on each backend. Review the official ViaRewind release requirements before downloading. A compatibility requirement for a client or proxy build is different from the Java runtime requirement of your server.
Legacy clients lack many newer items, entities and interactions. Include at least one representative survival session in acceptance testing rather than relying only on lobby access. Translation can approximate some of them, while menus, resource packs and combat assumptions may still differ. If a game relies on modern mechanics, keeping a supported native client requirement may provide a more consistent experience.
Prepare a controlled installation
- Read the ViaVersion installation guidance for your platform. Choose the translation location deliberately rather than installing the same stack everywhere.
- Stop that server or proxy. Back up its configuration and preserve the existing Via JARs outside the loaded plugins directory.
- Install mutually compatible ViaVersion, ViaBackwards and ViaRewind releases at the selected location. Follow the platform-specific download instructions.
- Start once and inspect Console. Confirm all required components enable without an unsupported-platform or dependency error.
- Test a native client first. Then test the exact legacy client, including a reconnect and any proxy backend switch.
Build a small acceptance checklist
Check movement around spawn, a representative inventory, item use, chat formatting, teleportation and your server's main minigame or survival features. Include any anticheat in the test environment. Translation affects the packets that those systems observe; a false alert needs investigation rather than an immediate automated punishment.
Use test accounts with ordinary permissions. Administrator exemptions can hide restrictions that real players encounter. Record which client versions pass each task, and publish only the range you actually support. Retest after Minecraft, Via or packet-plugin updates.
Keep network security independent
ViaRewind does not replace player authentication, proxy forwarding or the firewall protecting backend servers. Do not set a public standalone server to offline mode to fix a legacy disconnect. Likewise, it does not add Bedrock support; that requires a separate compatible bridge and its own testing.
If a particular version fails, save the exact disconnect message, first server exception and plugin build list. Compare the same action with a native client. Test a coordinated dependency update on a copy, then return to the previous matched stack if it does not solve the issue. Keep worlds and player data unchanged.
See ViaBackwards testing and ViaVersion compatibility. Further reading: ViaRewind requirements and releases, installation guidance and ViaBackwards.
Looking for another plugin? Browse the Minecraft plugin guide directory.
Fix EssentialsXChat prefixes and chat formatting
EssentialsXChat formats player messages and can show rank prefixes, suffixes and group-specific layouts. It is a separate EssentialsX module. A working EssentialsX installation alone does not prove that the Chat module is installed or that a permissions plugin's prefixes are connected.
Check the formatting chain
Use matching compatible EssentialsX core and EssentialsXChat releases from the official project. Confirm both load without errors in Console. If prefixes come from LuckPerms, check that Vault is installed and that the permissions integration is available. Follow LuckPerms group setup to give a test player a deliberate group and prefix.
Identify other chat formatters, channel plugins or network chat bridges. Choose which plugin owns the final format. Two plugins editing the same message can produce duplicate ranks, ignored settings or different results depending on the event order. Do not remove a plugin blindly if it also provides moderation or channels.
Stop the server and copy plugins/Essentials/config.yml before editing. Use the configuration generated by your installed release. The upstream example is useful for explaining fields, but replacing your complete file with it can overwrite unrelated settings.
Prove a simple format first
Find the existing chat: section. Change its general format to a simple documented-placeholder layout, preserving YAML indentation and keeping the value quoted:
format: '{DISPLAYNAME}: {MESSAGE}'This line belongs inside the existing chat configuration; it is not a replacement for the entire file. Restart normally and send a message as a non-operator test player. Check that the display name and message render rather than appearing literally.
If this layout does not appear, check whether a group-specific format overrides it, another formatter owns chat, or the YAML failed to load. Read the first relevant startup error instead of repeatedly changing colour codes. Check configured chat radius too if messages are visible only to nearby players.
Add prefixes once
The documented formatting fields include {PREFIX}, {SUFFIX}, {GROUP}, {DISPLAYNAME} and {MESSAGE}. Add only the fields you want, then repeat the ordinary-player trial. A display name or nickname may already include a prefix through another setting; adding {PREFIX} again can duplicate it.
Inspect the test player's effective prefix and primary group in LuckPerms. Inheriting a rank does not necessarily mean its name is the primary group used to choose a group format. Check the exact group names and the installed configuration's group-formats section before creating overrides.
Do not assume arbitrary PlaceholderAPI expressions are supported by every formatter. A raw %placeholder% in chat usually means that the chosen formatting path did not expand it. Start with documented EssentialsXChat fields and check any additional integration explicitly.
Test presentation and permissions
Try messages from the default group and one ranked group. Check nicknames, long names and normal punctuation. Verify that messages remain readable without colour and that the actual message text is preserved. Grant chat-colour permissions only if players are supposed to use them; a formatting issue does not justify an administrative wildcard.
Restart once more to confirm persistence. Keep a known-good configuration copy and restore that file if the trial fails. For installation or missing-module errors, use the plugin installation checks. Further reading: EssentialsX modules and official annotated configuration.
Looking for another plugin? Browse the Minecraft plugin guide directory.
Give safe lobby items with ItemJoin
ItemJoin can give configured items when a player joins, respawns or changes worlds. Those triggers can interact with existing inventories, so start with a harmless lobby item on a test account. Do not begin by copying an example that runs commands as an operator.
Preserve inventories before changing triggers
Check the installed plugin release supports your Minecraft version and item material names. Stop and take a completed backup of the worlds and plugin data before adding or replacing it. Include separate inventory plugins and their external storage where used.
Upload one compatible JAR, start to generate configuration and inspect Console. Stop before editing the generated items.yml. Preserve its version marker; changing an internal schema version is not a way to update an item definition.
Build one harmless item
Use the official item-creation guide or the installed release's editor. Create a unique identifier such as lobby-guide, choose an ordinary material such as a compass, and give it a clear display name. Start with a simple informational message when used rather than a command that changes permissions, inventories or game mode.
Limit the item to the exact lobby world name and the one trigger you intend, such as joining. Review the generated inventory overwrite setting and keep replacement of occupied slots disabled during the test. Choose a slot deliberately, and check what happens when that slot or the entire inventory is already occupied.
Give only the test item first
- Join with a test account whose inventory contents you have recorded. Keep valuable items out of this initial test.
- Use the documented
/itemjoin get lobby-guidecommand in chat, replacing the identifier with the one you created. The identifier is not necessarily the displayed item name. - Verify the item material, display text and harmless interaction. Check no unexpected console or operator command runs.
- Reconnect to test the join trigger, then test the relevant world switch or respawn only if you enabled those triggers.
- Confirm other worlds and ordinary inventory items remain unaffected.
Administrative commands require suitable permissions. Panel Console commands omit the leading slash and need an explicit target where the installed command syntax requires one. Avoid commands that give all items to all online players as a first setup test.
Check duplication and command privileges
Repeated join or world-switch triggers can reveal duplication or unwanted replacement. Test with an occupied slot and a full inventory, then compare the original contents. If another plugin restores inventories during the same event, investigate their event ordering on a copy rather than enabling overwrite globally.
Review every configured interaction before deployment. Console and operator execution are privileged features, and player names or placeholders must not become unrestricted commands. Prefer a narrow existing player command with its own permission checks where possible.
If an item behaves incorrectly, disable that definition or trigger using the installed release's documented controls, retain the data and investigate. Do not purge all player inventories as a repair. See plugin installation and player-data recovery. Further reading: creating items, commands and generated item examples.
Looking for another plugin? Browse the Minecraft plugin guide directory.
Install Dynmap and test a bounded world render
Dynmap publishes Minecraft terrain through a web map. Initial rendering can be expensive, especially when several map styles or dimensions are enabled. Confirm a small area works before scheduling a full-world render.
Prepare the installation
Obtain a Dynmap build that explicitly supports your server software and Minecraft version from the project's official release links. Do not assume a build for an older server can render new blocks correctly. Record the current JAR, Java runtime and world identifiers before an upgrade.
Stop the server, take a completed file backup and keep an off-server copy. Preserve plugins/dynmap/, any separately configured tile directory and database details. A world backup alone may not contain an external tile database. Read backups and restores before replacing an existing setup.
Set an allocated map port
- Follow plugin installation, then start once to generate Dynmap's files.
- Confirm that Dynmap enables. Stop again and open
plugins/dynmap/configuration.txt. - Locate the generated web-server settings. Set
webserver-portto an additional TCP port assigned to this service by CloudExa. Do not assume the documented default is available. - Review the enabled worlds and map styles. Begin with the intended public world rather than publishing every dimension automatically.
- Start and check Console for binding, configuration or storage errors. Test the map address from a separate device.
An allocated port and a listening web server are both required. A DNS record does not allocate a port, and an HTTPS browser address requires a TLS-capable arrangement. Ask support about proxying a domain rather than installing a second web server inside a managed game container without a plan.
Render a small test first
For a broader test, consult the installed release's radius-render syntax and choose a small, recorded radius. Monitor the console, tick time and free storage while it runs. Increase one variable at a time, such as the area or number of map styles, so you can see which change affects resource use.
Upstream provides /dynmap pause all to pause rendering and /dynmap pause none to resume. These affect map rendering; they are not game-server power controls. Avoid purge commands as a routine response to a blank map because they remove generated map data and may require an expensive rerender.
Investigate the correct layer
A connection timeout usually calls for checking the listener and allocated port. A working web page with an empty world calls for checking rendering, world selection and storage. Old-looking tiles can also be a browser or proxy cache issue; compare a new private-browser session before deleting anything.
Provide support with the Dynmap version, server ID, failed URL and relevant render error. Further reading: installation, commands and configuration settings.
Looking for another plugin? Browse the Minecraft plugin guide directory.
Install Plasmo Voice and diagnose voice connection errors
Plasmo Voice provides proximity audio using a server plugin or mod and a client mod. Players without its client component can ordinarily join the game but cannot use its voice features. Choose it deliberately rather than running two proximity-voice implementations on the same endpoint.
Prepare matching server and client components
Check the current release's supported Minecraft versions and platforms. A Paper server uses the plugin in plugins/; supported Fabric or Forge installations use the corresponding mod in mods/. Players need the appropriate client mod for their own loader and game version.
Follow plugin installation for Paper and retain a completed backup before changing an existing setup. Start once, inspect startup messages, then stop before editing generated configuration. Preserve any existing add-on data and configuration rather than replacing the whole directory with another community's files.
Configure an assigned UDP allocation
On Paper the documented configuration is plugins/PlasmoVoice/config.toml. Fabric and Forge use config/plasmovoice/config.toml. Read the file generated by your installed release, since platform and future format changes can affect these details.
- Confirm which UDP address and port belong to this game service. Ask support when no suitable allocation is shown.
- Review the
[host]section. Its documented defaults includeip = "0.0.0.0"andport = 0. - A zero port asks Plasmo Voice to use the Minecraft server's numeric port over UDP. Keep it only if that UDP allocation is actually available. Otherwise set the explicitly allocated voice port.
- Do not substitute a public IP as a bind address just because players use it. Containers and routed services may not own that address locally.
- Save, start and read Console. An address-in-use error differs from an unavailable bind-address error; retain the exact message.
There is no need to disable Minecraft account authentication to establish voice. Do not change firewall defaults or allocate yourself a neighbouring port. A proxy network requires the project's proxy deployment instructions, including which machine hosts each voice endpoint.
Identify the stage that fails
Join with a compatible client and open its voice menu, normally with V unless rebound. Check microphone selection, operating-system access, local mute and activation settings. Test two nearby players in both directions before adding extra voice channels or add-ons.
The message that Plasmo Voice is not installed means the client and server have not detected each other; the upstream guide distinguishes that from a UDP-port failure. Check that the component enabled on the correct server and that its client release is compatible before investigating an unrelated port.
Make one controlled change at a time
If the plugin detects correctly but audio will not connect, inspect listener messages and confirm UDP reachability. If only one user fails, compare their client and device settings. Keep the working configuration so a test change can be reversed without removing player or world data.
Include the server ID, platform, Plasmo versions and exact client message in a support ticket. See Minecraft log collection. Further reading: server installation, detection errors and commands and permissions.
Looking for another plugin? Browse the Minecraft plugin guide directory.
Install ProtocolLib and diagnose dependent plugin failures
ProtocolLib gives other Bukkit-based plugins access to Minecraft packets. Installing it alone does not add a minigame or make an incompatible plugin support a new Minecraft release. Use the dependency version required by the plugins that actually need it.
Match the complete software set
Record the Minecraft version, server implementation, Java runtime, ProtocolLib build and names of dependent plugins. Read the release notes for that Minecraft release. Packet internals change, so an old build that starts without an immediate error may still fail when a player opens a menu or joins.
Download from the official release links. A development build is a separate testing decision, not an automatic repair. Confirm its purpose with the dependent plugin's author before using it. Do not turn on an ignore-version-check option to force unsupported internals to load.
Install with a rollback point
- Stop the server normally. Take a completed file backup and preserve matching external plugin databases. Keep the old JAR and configuration together outside the loaded plugins folder.
- Place one supported ProtocolLib JAR in
plugins/. Move duplicate copies out of that directory; renaming a JAR to another JAR name does not disable it. - Start and inspect Console from the first plugin-loading message. Confirm ProtocolLib and its dependent plugin both enable.
- Join with a test player and exercise the specific feature that uses packets. Check both the client and server logs.
Identify which plugin is failing
On builds exposing the documented administrative commands, run protocol listeners in Console to list registered packet listeners. In chat, the equivalent command starts with a slash and requires suitable permission. Listener ownership helps identify consumers; it does not prove a listed plugin is faulty.
Save the first exception and its surrounding lines. An error naming a dependent plugin and a missing packet field can indicate a mismatch between that plugin, ProtocolLib and Minecraft. Repeated final errors often obscure the earlier explanation. Do not paste debug dumps publicly before checking them for player details and private configuration.
Test a supported correction
Reproduce the problem on a separate copy using the same versions. Change one relevant component at a time and repeat the original action. If a dependency update fixes startup but breaks another packet consumer, check all consumers' supported versions before returning the change to production.
Avoid hot-unloading packet libraries: registered listeners and active connections can outlive a partial reload. Use a normal stop and start. Keep the original worlds and plugin data if you roll back; do not downgrade a world to solve a library problem.
Send support the exact versions, first error, time, dependent feature and reproduction steps. See plugin installation and useful Minecraft logs. Further reading: official project, release notes and administrative commands.
Looking for another plugin? Browse the Minecraft plugin guide directory.
Introduce CMI without conflicting with existing server plugins
CMI combines many server-management features in one premium plugin. That convenience also creates overlap with existing chat, homes, teleport and economy plugins. A careful introduction enables one feature at a time instead of replacing several working systems in a single restart.
Prepare the correct files
Obtain CMI from an authorised source using a valid licence and check the author's supported Minecraft and Java requirements for your release. Install the required CMILib version too. Do not use redistributed or modified premium jars; they can differ from the documented build and put your server credentials at risk.
Stop the server and take a completed backup of the plugin directory, worlds and external databases before installation. Preserve the current plugin list and configuration. Use the plugin installation workflow to avoid duplicate jars or editing files while the server writes them.
Start to generate configuration, read Console for errors and stop again before editing. Follow the files generated by your installed build. The online command reference includes historical version notes, so compare its instructions with the help available in your release.
Assign ownership of overlapping features
Write a short list of the features already provided by other plugins: economy balances, chat formatting, homes, warps, teleport requests and kits. Choose one owner for each. Leaving two plugins responsible for the same command or event can produce inconsistent results even when both appear enabled.
Use /cmi checkcommand home to find CMI commands related to home, following the installed help for its output. Check aliases and namespaced routes before removing or replacing anything. Do not assume typing a familiar command proves which plugin processed it.
Leave economy migration out of the initial trial. CMI's economy has specific configuration and Vault integration requirements documented by the author. Installing a random Vault jar is not proof that every economy plugin can read CMI balances. Preserve the current economy provider until a separate migration has been planned and tested.
Enable a small feature set
Select one low-impact feature you actually need and read its permission entry. CMI generally documents command permissions under cmi.command and command-specific nodes, with additional permissions for actions involving other players. Give the test group only the nodes needed for your chosen action.
Use a non-operator account and check both allowed and refused actions. A player should not gain staff capabilities merely because a basic convenience command works. Use LuckPerms group testing to inspect inherited permissions rather than adding a broad wildcard when something is denied.
Check persistence and integrations
Restart normally and repeat the feature test. Review Console for missing-library errors, command conflicts or storage failures. If you later trial an economy integration, compare the same disposable account through the balance display and the consuming shop plugin, using a small controlled transaction.
Do not run a bulk import, reset or conversion against live player data while exploring menus. Test migration tools against an isolated copy with production database access removed, and record how existing homes, balances and identifiers will map.
Get useful support evidence
Supply the CMI, CMILib, server and Java versions; the exact command; the expected behaviour; and a redacted error excerpt. Remove passwords and licence details from screenshots. Further reading: CMI documentation, command reference and CMILib.
Looking for another plugin? Browse the Minecraft plugin guide directory.
Introduce GrimAC alerts before automated punishments
GrimAC checks player behaviour using server-side movement simulation. Introduce it as an observed change: review alerts and legitimate gameplay before turning a violation into an automatic ban. A single flag is evidence to investigate, not a complete moderation decision.
Check the supported environment
Read the current supported-platform and installation documentation for the exact Grim release. Record Minecraft, Java, proxy, Via translation and other packet-plugin versions. Support ranges change, and an older installation article should not decide whether a newly released server version is supported.
Include Bedrock bridging and special movement plugins in your plan. A launch pad, vehicle, teleport or custom ability changes the behaviour players produce. Check the project's integration guidance instead of giving all affected players a permanent anticheat bypass.
Install and inspect the generated rules
- Stop the server and take a completed backup of its current plugin files and configuration.
- Download a supported official build and follow its dependency instructions. Keep only one intended Grim JAR in the loaded folder.
- Start once, inspect Console for startup failures, and review the generated configuration and punishment rules before reopening unrestricted access.
- Use the project's current rule syntax to keep initial monitoring free of automatic ban or kick actions. Check the actual command actions rather than assuming a configuration section named alerts is harmless.
- Start the supervised test with an ordinary player and a separate staff observer.
Give staff specific observation permissions
The documented /grim alerts command toggles violation notifications for an authorised observer. /grim profile TestPlayer shows diagnostic information about the named player. Grant the corresponding grim.alerts and grim.profile permissions only to staff who need them. Replace the example player name with your own test account.
Commands in Console omit the leading slash. Keep administrative reload, exemption and debug-upload capabilities separate. Some diagnostics contain player information; review them before sharing an upload or screenshot publicly.
Test normal gameplay, including difficult conditions
Walk, sprint, swim, climb, use vehicles and test your server's teleports or movement abilities. Repeat representative actions using supported translated clients and any bridged clients covered by the project's guidance. Note the time, client type, ping and action when an alert occurs.
Look for repeatable patterns rather than raising thresholds until every alert disappears. Investigate lag and related plugin changes separately. A temporary, narrowly scoped workaround should have an owner and review date; broad permanent exemptions make later test results misleading.
Enable enforcement only after review
Introduce one documented punishment rule at a time, with a clear staff policy and appeal route. Keep evidence of the behaviour and the configuration that produced it. After an update, repeat the legitimate-player tests before assuming earlier thresholds remain appropriate.
See packet dependency setup and TPS and performance diagnosis. Further reading: commands, punishment rules and permissions.
Looking for another plugin? Browse the Minecraft plugin guide directory.
Let supported older Java clients join with ViaBackwards
ViaBackwards translates supported older Minecraft Java clients for a newer server. It works with ViaVersion. Translation does not downgrade the server world, give an old client every new feature or provide Bedrock crossplay.
Choose the client versions you will actually support
Write down the server release and the oldest and newest Java clients your community needs. Check the current ViaVersion and ViaBackwards support information for that combination. A project mentioning a recent release does not guarantee every older client can use every server feature.
New blocks, items and entities may need substitute representations on older clients. Keep screenshots of important menu tests so staff can recognise the supported presentation. Menus, resource packs and movement behaviour can differ. Plan a test list around your own gameplay rather than advertising an unrestricted version range before testing it.
Install in the right place
- Read the Via installation guide for your platform and network design. Decide whether translation belongs on the proxy or server; do not add duplicate translation layers by guesswork.
- Stop the selected instance. Take a completed backup and keep its current Via configuration and JARs together for rollback.
- Install compatible ViaVersion and ViaBackwards releases in that instance's plugin directory. Keep one intended copy of each.
- Start and inspect Console for the versions loaded and any dependency error. Resolve a failed library before testing clients.
- Join first with a client matching the server, then with each older version you intend to offer. Record failures by exact client version.
Test more than the login screen
Walk through your spawn, open shops and plugin menus, equip representative items and test combat where relevant. Check translated clients can use the server's resource pack or understand the documented alternative. A player reaching spawn does not prove a custom inventory or entity feature works correctly.
For a proxy network, also switch between the actual backends. A destination server may use a different Minecraft release or plugin set. Keep the normal proxy forwarding and backend protection configuration intact; do not disable authentication or expose a backend port to bypass a translation failure.
Investigate a translation problem
Capture the first relevant server error, exact disconnect message, client release and the action that triggered it. Compare the same action using the native server client. If only an old client fails, investigate the supported mapping and related plugin compatibility before changing the world or player data.
Use an isolated copy to test a coordinated Via update. Keep the earlier builds and configuration until ordinary joins, backend switches and plugin interactions pass. An older client seeing a substituted block is a translation limitation, not evidence that the world was converted or lost.
See ViaVersion setup and protected Velocity networks. Further reading: installation placement, official ViaBackwards project and mapping notes.
Looking for another plugin? Browse the Minecraft plugin guide directory.
Link Nether and End worlds with Multiverse-NetherPortals
Multiverse-NetherPortals chooses which world a normal Nether or End portal leads to. It is different from a custom Multiverse-Portals gateway. Changing a link can redirect every portal of that type in the source world, so inspect the current route before changing it.
Inventory the worlds and current routes
Confirm that compatible Multiverse-Core and Multiverse-NetherPortals releases are installed. Record the actual identifiers of the overworld, Nether and End worlds, including any version-specific namespace format. The addon does not create a missing destination world merely because a player enters a portal.
Take a completed backup of every affected world and the Multiverse configuration before altering established travel. Keep a copy outside the server and note the existing links. See game backups and world creation and import.
Inspect automatic links first
Run /mvnp list as an authorised administrator. The output distinguishes explicit routes, automatic routes and disabled portal types. Copy the result into your maintenance notes before changing anything.
Default naming rules commonly pair a world with its Nether and End counterparts, but those rules are configurable. Check the plugin's current configuration and actual world list rather than renaming folders until a naming convention happens to match. Existing worlds may contain valuable builds, farms or player locations.
Set an explicit route when needed
- Choose a source, portal type and destination. Confirm that the destination is loaded and that its environment and spawn area suit your plan.
- Check the installed
/mvnphelp. Current documentation uses/mvnp link nether survival resource_netherfor an example one-way Nether route. - Replace the example identifiers with your recorded values. Console commands omit the slash and should provide both source and destination explicitly.
- Read the success or error response, then inspect
/mvnp listagain. - Create a reverse route only if the design requires it. The documented
--bidirectionalflag changes both directions and can replace existing routes on both sides; review both first.
Do not change all links just because one portal's exit is awkward. A world route and the physical portal-search result are different parts of the process.
Test coordinates and permissions
Use a quiet maintenance window and a non-operator test account. Enter from a safe source portal, record the arrival world and coordinates, then test the return journey. Check ordinary world-access permissions and claim protections at both ends.
Coordinate scaling affects where the destination portal is searched for or created. The usual Overworld-to-Nether relationship differs from a custom world pair. Inspect the worlds' scale properties before adjusting them; changing scale does not move existing terrain or portals into a new position.
If travel does nothing, confirm that a valid destination exists and review bounceback or disabled-route behaviour. If it goes to the wrong world, inspect explicit links before automatic naming. Avoid deleting portal blocks or dimensions during diagnosis.
Send support the route list, source/destination identifiers, portal type and test coordinates. Further reading: linking and scaling and command reference.
Looking for another plugin? Browse the Minecraft plugin guide directory.
Load an existing world safely with MyWorlds
MyWorlds manages Minecraft worlds, travel and world-specific settings. When importing an existing world, the environment and generator matter as much as the folder contents. Loading it under the wrong rules can produce mismatched new terrain.
Choose one manager for the task
Check the MyWorlds release against the server's exact Minecraft and Java versions. Obtain its required BKCommonLib dependency from the maintainer's official links and use a supported combination. Do not treat the presence of another world manager as proof that importing its configuration will be automatic and risk-free.
Record every plugin currently controlling world loading, portals, spawn and inventories. Plan which one will own each feature. Avoid running two competing managers against the same new world while trying to decide which one works better.
Back up and identify the source world
Stop the server and take a completed backup of all worlds, player data and manager configuration. Preserve the source world separately before uploading a copy. Note its Minecraft version, environment and any generator plugin or datapack it needs. Keep external database backups aligned where player state depends on them.
Read backup guidance and world upload guidance. Check the release's current world layout before copying files; a newer dimension layout should not be forced into an older tutorial's folder structure.
Inspect before loading
- Install the compatible MyWorlds and BKCommonLib files using the plugin installation guide. Start once and inspect the earliest dependency errors.
- Upload only the copied source data to the appropriate location while the server is stopped. Do not replace the production world.
- Start and use
/world listto inspect available worlds. - Check
/world listgeneratorsif the world depends on a generator. Confirm that the correct plugin is enabled before proceeding. - Use the installed build's
/world loadsyntax with the correct environment and generator for a first import. A previously known world may retain this metadata; an unknown one needs explicit care.
Commands shown with a slash are for in-game use. Console commands omit it. A load error is a reason to stop and inspect the source details, not to run world-repair or deletion commands against the only copy.
Verify travel, persistence and inventory behaviour
Visit a safe known location and inspect terrain, spawn and borders. Avoid exploring ungenerated areas until the generator is confirmed. Check /world info for the loaded world's settings and test a normal restart to confirm the intended load behaviour persists.
Test with an ordinary player. World permissions, game mode and inventory policy are separate settings; loading a creative world does not automatically make item transfer safe. MyWorlds has inventory features, but enabling or changing those on a populated server requires a separate backed-up test plan. Do not enable a second inventory manager for the same state.
If a world behaves unexpectedly, retain both the original source and current test files. Send support its source version, generator, environment, MyWorlds/BKCommonLib versions and first error. Further reading: managing worlds and the official feature documentation.
Looking for another plugin? Browse the Minecraft plugin guide directory.
Maintain an existing ServerListPlus configuration safely
ServerListPlus customises the Minecraft server-list response, including descriptions and player-dependent presentation. This guide is for maintaining an existing installation. Its development and compatibility history require care: do not assume an older build supports a newly released Minecraft server.
Check support before changing a working setup
Read the official project and release notes for the exact platform and version you run. If a current supported build is unavailable, keep the existing installation unchanged while you test a maintained alternative on a separate copy. A presentation plugin is not a reason to downgrade a live world.
Record which server or proxy answers your public status ping. A backend's configuration will not control a proxy response if that proxy replaces it. Keep the old JAR, configuration and relevant proxy settings together so you can reverse a presentation change.
Review the actual generated file
For documented Bukkit-style installations the configuration file is plugins/ServerListPlus/ServerListPlus.yml. It is not necessarily named config.yml like many other plugins. Confirm the path created by your installed build and retain a copy before editing.
- Schedule a quiet test and read safe plugin installation before replacing a JAR.
- Open the existing YAML and find the description/message section corresponding to the response you want to change.
- Change one plain-text line using the structure already present. Retain indentation and quoted values rather than pasting an entire configuration from another server.
- Use the documented
/slp reloadcommand from an authorised in-game account, or restart normally. Console commands omit the leading slash. - Refresh the public server-list entry from a normal client and inspect Console for parse or compatibility errors.
Understand its enabled state
The upstream setup describes a deliberate enable step: /serverlistplus enable starts modifying status responses. A successful plugin startup alone does not prove its presentation is active. The longer command name also helps when another plugin already owns the short /slp alias.
Use /slp disable to stop ServerListPlus modifying the response while investigating a conflict. Do not delete the whole plugin folder to perform that test. Administrative editing commands require the appropriate ServerListPlus permission; operators' access can hide a missing permission on a staff account.
Test variation and plan a reversible replacement
Player-specific messages, random selections and cached player information can make two clients see different results. Compare the same hostname, client version and refresh conditions. Review every relevant response rule before assuming that a saved file was ignored.
If moving to MiniMOTD or another supported alternative, disable the old status handler and test the new one in a maintenance window. Do not leave both active to race over the ping response. Keep the prior configuration until you have checked text, icons and proxy behaviour.
See MiniMOTD setup for a separate option. Include the exact ServerListPlus build, public endpoint and redacted parse error in a support request. Further reading: official setup and commands, configuration and project status.
Looking for another plugin? Browse the Minecraft plugin guide directory.
Publish a squaremap world map with a separate web port
squaremap provides a top-down Minecraft map in a browser. Its web port, public link and rendering settings have different purposes. Setting a public URL does not open a listener or make an unallocated port usable.
Check the release and preserve existing data
Choose the release for your exact server platform and Minecraft version through the project's download links. A Paper plugin and a Fabric or NeoForge mod are different artifacts. Check that release's Java requirement and dependencies rather than using the build prerequisites for developers as a player installation checklist.
Stop the server normally and create a completed backup. Preserve squaremap's configuration and generated web files when updating, particularly if you have customised markers or extensions. Keep a recovery copy outside the server. See game backups and plugin installation.
Configure web access
- Install the matching file and start once. Confirm that squaremap enables before editing its generated configuration.
- Stop again and open its
config.yml. Findsettings.internal-webserver, preserving the generated YAML indentation. - Use the internal web server for an ordinary installation. Set its
portto a separate TCP allocation assigned to this game server. Ask support if you do not have one. - Review the generated binding setting with support if the listener is not reachable. Do not bind to another customer's address or to an arbitrary private management address.
- Set
settings.web-addressto the intended player-facing map URL. It describes a link; it does not create DNS, enable HTTPS or change the actual listener port.
Start and read the first startup messages. Open the assigned map endpoint from outside the server network. If you require HTTPS on a domain, arrange the web-proxy side separately instead of assuming that changing the URL enables encryption.
Check world identity before requesting a render
Use the installed command help to identify the world argument squaremap expects. Current upstream documentation distinguishes dimension identifiers from legacy Bukkit world names. Copy the identifier reported for the running world rather than guessing from level-name or a folder path.
Start with a small radius render using the documented /map radiusrender syntax for that build. A player can use their current location where the command supports it; Console needs the relevant explicit arguments. Watch render progress, CPU load and disk usage before expanding the test.
A map render is not a terrain-backup operation. Avoid resetmap during diagnosis: upstream documents it as deleting that world's generated tiles without undo. Cancelling or pausing a task and preserving its files is safer than repeatedly resetting the map.
Review visibility and troubleshoot
Decide which worlds and player markers should be public. Inspect visibility limits before a large render; changing a limit does not necessarily remove tiles already generated outside it. Test the map using an ordinary browser session rather than only an administrator account.
If the web page loads but a world is blank, inspect the render target and progress. If it times out entirely, inspect the port and listener instead. Send support the version, server ID and exact error. Further reading: default configuration and commands and permissions.
Looking for another plugin? Browse the Minecraft plugin guide directory.
Replace WorldEdit with FastAsyncWorldEdit safely
FastAsyncWorldEdit, usually called FAWE, is a replacement for WorldEdit on its supported platforms. Its official installation instructions say not to install ordinary WorldEdit alongside it. Plan the replacement as a tested change to the editing stack, not as an extra performance JAR.
Check dependencies and preserve the existing editor
Record the Minecraft, Java, WorldGuard and current WorldEdit versions. Read FAWE's release requirements and check plugins that integrate with WorldEdit. A shared API name does not guarantee every third-party feature behaves identically.
Stop the server and take a completed backup of all affected worlds and plugin files. Preserve your existing schematics and configuration outside the installation. Record where schematics are actually stored; a server may use per-player folders or another configured path. Do not assume an editor's undo history will survive a replacement or restart.
Test the replacement away from production
- Create a separate test installation from the backup. Keep its databases and integrations isolated from production.
- Move the ordinary WorldEdit JAR out of that test server's loaded plugins directory. Keep the original artifact for rollback.
- Install one compatible FAWE build following the platform instructions. Start and inspect Console for dependency or integration errors.
- Check configuration and generated permission limits before allowing edits. Do not copy an unrelated server's unlimited limits.
- Confirm the expected schematic files can be found and a small known schematic can be read on the test copy.
Verify a small selection and its boundaries
Begin with a disposable test area containing no player assets. Use the ordinary WorldEdit selection workflow, then inspect the selection with //size in Minecraft chat. Double slashes are part of this in-game command. Confirm the selected world and dimensions before performing any edit.
When you test a small change, observe resource use and check the documented undo behaviour immediately. An edit completing quickly does not mean it needed no memory or storage. Keep operations bounded and avoid pasting an unknown large schematic into a live world.
Test region restrictions as an ordinary user
Review the specific permissions for your protection integration. FAWE documents separate access for WorldGuard owners, members and other supported region systems. Grant only the role needed, then test both inside an authorised region and just outside it.
Do not use unrestricted editing or bypass commands to make a failed protection test pass. Staff operators may already bypass the boundary, so use a non-operator test builder. Verify the actual blocks changed rather than relying solely on a success message.
Deploy a matched setup or return to the backup
After testing, schedule the production replacement with another completed backup and normal stop. Keep the supported configuration and editor JAR together. If returning to WorldEdit, stop first and restore the matching setup; world changes need their own verified recovery point.
See safe WorldEdit selections and undo and region protection. Further reading: FAWE installation, permissions and current project releases.
Looking for another plugin? Browse the Minecraft plugin guide directory.
Restore a recorded player inventory with InventoryRollbackPlus
InventoryRollbackPlus records player snapshots for events enabled in its configuration and provides a staff interface for inspection or recovery. It cannot recover an inventory from before it was installed unless a suitable snapshot was imported through a supported method. Keep full server backups as well.
Prepare recording before an incident
Choose a release that supports your platform, Minecraft version and Java runtime. Follow plugin installation and preserve the plugin's data when updating. Review which snapshot events are enabled, how many records are retained and where the data is stored.
Use a test player to create a harmless inventory, trigger one enabled snapshot event and confirm a record appears. A plugin that enabled successfully but never recorded your required event is not a verified recovery system. Monitor its storage use and include its data in off-server backups.
Identify the correct player and recovery point
- Record the affected player's identity, incident time and what needs recovery. Confirm the correct UUID where names or authentication arrangements have changed.
- Ask the player to pause trading, dropping items or using storage during the recovery test. Coordinate a quiet maintenance window if other plugins might modify the same inventory.
- Keep a current full backup and preserve the player's present state before replacing anything.
- From an authorised in-game staff account, use
/irp restore PlayerNameto open the recorded backups for that player. The GUI is not a console-only workflow. - Inspect the timestamp and contents before choosing the restore action. Match the snapshot to the incident rather than assuming the newest entry is the desired one.
The documented manual recording command is /irp forcebackup <all / player> <name>. Check the installed help for the exact arguments and confirm a successful new record before relying on it. A command request alone does not establish that storage completed correctly.
Restore only what you intend
Read each interface action carefully. Inventory, ender-chest contents, experience and other recorded properties can have separate effects depending on the release. Do not click through a whole-player restore when you only intend to recover a few lost items.
Restoring older items can create duplicates if replacements were already issued, traded or stored elsewhere. Agree what happens to replacement items and document the decision. An inventory rollback does not automatically reverse an economy payment or repair an external plugin database.
Restrict access and verify the outcome
The plugin distinguishes viewing backups from restoration. Give junior staff only the inspection permission where that meets their role; reserve data-changing restore capabilities for trusted administrators. Review teleport-related permissions separately rather than granting every node together.
Have the player check the resulting inventory and relevant properties, then reconnect to confirm the state persists. Retain the before-state backup until the result is accepted. If the plugin has no suitable record, use the separate full-backup recovery plan rather than deleting current player data and hoping it returns.
See recovering player data from a full backup. Further reading: official project and commands and permission reference. Redact private player information when sending evidence to support.
Looking for another plugin? Browse the Minecraft plugin guide directory.
Separate creative and survival inventories with Multiverse-Inventories
Multiverse-Inventories controls which player state is shared between worlds. Its configuration can overwrite or replace the state a player sees when travelling, so plan the groups before inviting players into a new creative or survival world.
Record the intended sharing rules
List every world and decide which should share inventory contents, ender chests, experience, health and other state. An overworld and its Nether often belong together, while a creative building world usually needs separation. Write this down before editing anything so accidental cross-world transfers are easier to detect.
Use a maintenance window. Stop and back up every world, player data and the full existing Multiverse-Inventories directory. Export external databases used by related inventory or economy plugins while writes are stopped. Keep the matched backup outside the game server. Read backup guidance before changing an existing populated installation.
Inspect the initial groups
Install compatible Multiverse-Core and Multiverse-Inventories releases. Current major-version documentation uses different command names from some older tutorials; check /mvinv help on the installed build.
The plugin creates a default sharing group for default worlds. Inspect it using /mvinv info default rather than assuming that every extra world is included. Obtain exact world identifiers from Multiverse-Core, including the format expected by your Minecraft version. See adding worlds safely.
Create a group on a test setup
- Reproduce the planned world layout on an isolated copy. Keep that copy away from production databases and integrations.
- For a new, unused group, current documentation uses
/mvinv create-groupfollowed by the group name, comma-separated worlds and shares. - For example,
/mvinv create-group eventgroup event,event_nether allshares the documented state between those two example worlds. Replace them with verified worlds that are not already carrying player progress you have not backed up. - Inspect the resulting group and test it before adding further worlds.
- If adding a world to an existing sharing group, review the documented add-worlds operation; do not create overlapping groups as a shortcut.
The keyword all does not automatically activate every optional feature. Upstream identifies optional shares that need separate enablement. Review the shares list for your release, particularly economy and last-location behaviour, rather than assuming the group name describes everything it does.
Test round trips with disposable items
Use a non-operator account with a small, recorded set of test items. Record armour, off-hand, ender-chest contents, experience and health. Travel from survival to creative, modify the test inventory, then return. Verify both directions, logout/login and a normal server restart.
Check other inventory synchronisation plugins and permissions that bypass separation. If a state appears wrong, stop testing before further travel writes new data. Preserve the original backup and current files for investigation. Do not merge groups repeatedly to make missing items reappear.
Send support the player UUID, travel sequence, group configuration and exact versions without private database credentials. Further reading: groups and shares and share definitions.
Looking for another plugin? Browse the Minecraft plugin guide directory.
Set up a BlueMap web map and control rendering load
BlueMap turns a Minecraft Java world into a browser map. Its renderer and web listener are separate from the Minecraft connection, so a working game address does not prove the map is reachable. Start with one small map before rendering every world.
Choose a compatible release and a recovery point
Check the BlueMap release against your Minecraft server platform and Java runtime. Requirements change between releases; use the requirements for the JAR you actually download. A Bukkit plugin belongs in a compatible Paper or Spigot installation, while mod loaders require their matching build. BlueMap does not read Bedrock Edition world storage.
Stop normally and take a completed backup before adding the plugin. Keep a copy outside the game server. Include existing BlueMap configuration when upgrading, and check free storage before generating new map data. See game backups and plugin installation.
Configure the web listener
- Install the matching JAR and start once to generate configuration. Confirm that BlueMap enables, then stop before editing.
- On a plugin installation, open
plugins/BlueMap/core.conf. Read the resource-download notice before deciding whether to setaccept-downloadtotrue. This authorises BlueMap's required resource download; it is not a port setting. - Ask support for an available additional TCP allocation on your game server. Do not pick another customer's port or reuse the Minecraft port.
- Set that allocated port in
webserver.conf. Keep the generated binding setting unless support has given you a specific value for this environment. - Start and inspect the listener and renderer messages in Console. Open the assigned address and port from another connection, then check that the expected world appears.
The example default port in upstream documentation is not an allocation reservation. If you want a domain with HTTPS, arrange a supported reverse-proxy setup with support. Creating a DNS record alone neither configures TLS nor conceals an origin that remains publicly accessible.
Limit the first render and review privacy
Inspect the generated map configuration before publishing it. Decide which worlds should be visible and whether player locations should be shown. Do not expose an event world's hidden builds merely because it was detected automatically. Treat a public map link as public information, even if you only shared it with your Discord initially.
Run bluemap in Console, without the leading slash, to inspect status. Watch CPU usage, tick performance and free storage during initial rendering. Increase the area gradually; a large world or detailed map can require substantial disk and processing time. Do not run several competing map renderers while measuring the first job.
Separate reachability from rendering problems
If the browser times out, check the allocated TCP port, listener startup and the requested protocol before changing map settings. If the website loads but terrain is missing, inspect render progress and the selected world instead. Preserve configuration and generated data while investigating rather than reinstalling the server.
Send support the server ID, BlueMap version, exact URL without private tokens, error time and relevant redacted startup lines. Further reading: BlueMap installation and the official configuration wiki.
Looking for another plugin? Browse the Minecraft plugin guide directory.
Set up a CrazyCrates test and troubleshoot crate keys
CrazyCrates offers configurable crates with physical or virtual keys. Begin with a small test prize and a controlled account. Key balances and delivered rewards are player data, so troubleshooting should preserve them rather than reset everyone to make a crate appear usable.
Match the release before installation
Read the project's current requirements for your chosen build. The current documentation describes a Paper 26-family and Java 25 requirement; an older Minecraft server needs a release explicitly documented for it. This does not mean you should upgrade the entire production server merely to install the newest plugin.
Download through official links and follow the installation guide. Stop first and back up worlds, crate definitions, keys and existing player data. Keep the previous plugin and configuration together. If an update introduces a migration, test it against a copied installation with disposable accounts before allowing production writes.
Build a crate with a harmless reward
- Start and check Console for CrazyCrates errors. Confirm that the expected crate definitions loaded.
- Use the installed command help to identify the crate editor and its valid crate identifiers. Current documentation includes an editor command with a named-crate option; examples from older releases may differ.
- Copy a bundled example into a distinctly named test crate using the supported editor or configuration workflow. Keep it away from public interaction.
- Configure one ordinary item prize with a clearly recorded amount. Review its chance or weight and any additional commands before saving.
- Set up a key of the type the crate expects. Check its identifier rather than relying only on its displayed item name.
A physical key is an inventory item; a virtual key is tracked as a balance. Giving one type does not establish that the other type can open the same configured crate. Avoid using a copied item's appearance as proof of authenticity.
Test the complete transaction
The current command reference documents /crates give <virtual/physical> <crate> <amount> <player>. Fill each argument with the intended type, exact crate ID, a small amount and your test player. Check installed help before running this on another release. In Console, omit the leading slash.
Count the player's keys, open once and confirm the expected deduction and reward. Test with no key, the wrong crate's key and a full inventory. Record the result after reconnecting. If a crate animation succeeds without a reward, inspect prize requirements and the first command error rather than issuing repeated replacement keys immediately.
Keep editor and reward permissions restricted
Crate editors and key-giving commands belong to trusted staff. Do not grant a wildcard permission to let visitors use one crate. Review any reward executed as console, use the plugin's documented player placeholder and test an inexpensive result first. Monetary rewards also require a working economy integration; see Vault and balances.
If an update breaks keys, keep the original key data and inspect the documented migration path for that exact release. Send support the crate ID, key type, versions, time and redacted logs. Further reading: requirements, commands and key troubleshooting.
Looking for another plugin? Browse the Minecraft plugin guide directory.
Set up a FancyHolograms text display on Paper
FancyHolograms creates text, item and block displays. This guide starts with one text display on a supported Paper-based server. Do not assume that another plugin with “holograms” in its name uses the same data files, commands or supported server platforms.
Check platform support first
The project's getting-started documentation supports Paper and Folia, with compatible forks also described there; it does not present Spigot, Bukkit, Sponge or Fabric as supported platforms. Check the current release's Minecraft and Java requirements before downloading. Support for Folia in this plugin does not establish compatibility for every other plugin on the server.
Use the official project download links and follow plugin installation. Stop normally and preserve existing hologram data and configuration before updating. If moving from another display plugin, keep that plugin's data intact and test any migration route on a copy rather than assuming the formats are interchangeable.
Create and edit a small text display
- Start the server and inspect the full startup log. In chat, use
/fancyholograms versionto confirm the plugin responds. - Stand at a safe test position with your trusted administrator account. Run
/hologram create text welcome_test. - Add a line with
/hologram edit welcome_test addLine <green>Welcome to our server</green>. - Replace its first line, if needed, with
/hologram edit welcome_test setLine 1 Server information. - To move that named display to your current location, use
/hologram edit welcome_test movehereand inspect the result.
These are in-game commands that use a player's position where required. Command help for the installed release remains the reference if syntax changes. Use a distinct display name and verify it before editing an existing hologram.
Use formatting and refresh intervals deliberately
FancyHolograms text supports MiniMessage formatting. Start with a small, easily read line; a malformed formatting tag can produce unexpected text. An item or block hologram needs its own supported editing options rather than text-line commands.
When adding a placeholder, first verify that its source is installed and produces the right value. Use a reasonable refresh interval for information that changes infrequently. Refreshing a large collection of displays every few milliseconds can create unnecessary work without improving readability. Test performance before expanding a lobby full of animated information panels.
Test ordinary-player visibility
Join with a non-operator account and walk toward and away from the display. Check relevant viewing conditions, render distance and client compatibility. Editing permissions are different from viewing requirements; do not give visitors administrative access to fix a display they cannot see.
If text vanishes after an update, record the exact server and plugin versions, world, coordinates and log error. Check a static display before investigating optional integrations. Keep the prior data and JAR until a normal stop/start test confirms persistence, and use specific permission grants for staff access.
Further reading: getting started and the hologram command reference.
Looking for another plugin? Browse the Minecraft plugin guide directory.
Set up AdvancedBan with controlled moderation tests
AdvancedBan provides warnings, mutes, bans and punishment history. Before adopting it, check that its maintained release supports your actual server or proxy platform. An older resource listing or Bukkit API declaration is not proof of support for the newest Minecraft release.
Check compatibility before moving records
Review the official release notes and unresolved compatibility issues for your software combination. Test the plugin on a copy first if your Minecraft or Java version is newer than its documented support. If the author has not confirmed the combination, ask before using it as the only moderation system on a public server.
Do not run two punishment systems with overlapping commands without a deliberate migration plan. Their ban commands and data stores may be separate, so a punishment appearing in one history may not be enforced by the other. Record which plugin owns each moderation command.
Preserve configuration and storage
- Stop the selected instance and take a completed file backup. Export an existing external moderation database while writes are paused.
- Install one compatible AdvancedBan JAR in the plugin directory appropriate to your platform. Keep older artifacts outside that directory.
- Start once to generate configuration and inspect Console, then stop before editing it.
- Follow the generated storage configuration for your installed release. Use a dedicated database account where external storage is required, and keep its password private.
- Start again and confirm loading and storage connection both succeed before allowing staff to issue punishments.
Begin with read-only checks
The Bukkit plugin declares commands including history, check and warns. Review the installed release's usage before testing them against an account you control. In Minecraft chat, begin commands with a slash; Console commands omit it. Read the output to confirm you reached AdvancedBan rather than a similarly named command from another plugin.
Grant only the documented permission nodes needed by the staff role. Test using a non-operator moderator account so operator exemptions do not conceal a missing restriction. Separate ordinary warnings from permanent punishments, IP bans and deletion of audit records.
Verify one temporary punishment
In a private test window, choose a short temporary action supported by the installed release and target your own test account. Record its exact duration and reason. Confirm enforcement, then reverse only that test action through the documented command. Check the player can return and the history remains understandable.
Do not test permanent IP restrictions against a real customer or a shared household. Do not use history deletion to make a mistaken test disappear. Preserve evidence and use a correction process that your staff can audit.
If storage or enforcement behaves unexpectedly, stop new moderation writes and investigate the first error before switching databases. Restoring files without the matching database can leave records inconsistent. See plugin database diagnosis and limited staff groups. Further reading: official project, project wiki and declared Bukkit commands.
Looking for another plugin? Browse the Minecraft plugin guide directory.
Set up GSit poses and restrict player interactions
GSit adds sitting and other poses to a supported Minecraft server. It can also react to player interactions, so setup should cover more than whether an administrator can run a pose command. Test how ordinary visitors use it in the places you intend to allow.
Choose the matching build
Check the official release's supported Minecraft and server platforms. Pose plugins can depend on version-specific behaviour; a copied JAR from an older server may not be suitable after a game update. Do not assume that a platform compatibility flag guarantees every other plugin's interaction.
Read safe plugin installation, stop normally and retain the old JAR and generated GSit configuration if upgrading. Preserve a completed recovery copy before experimenting with a production plugin collection.
Enable one feature at a time
- Install the correct release and start the server. Inspect Console for enable errors or missing requirements.
- Join a quiet test area with an administrator and a normal test player.
- Use the release's documented sit command, commonly
/sit, to check the basic pose. Confirm how to leave it before inviting players to test. - Review the generated configuration for enabled poses, interaction behaviour and world restrictions.
- Change one option, save it and use the documented reload command or a normal restart. Re-test the exact action rather than enabling every feature together.
Configuration names and available poses can change between releases. Use the file your installed build generates and the matching reference. Do not replace it wholesale with a much older example simply because the YAML loads without an error.
Apply limited permissions
GSit's declared permissions distinguish ordinary pose use from administrative actions and bypasses. Use the official permission list for your release and grant only the intended feature to a player or group. Keep configuration reloads and broader administrative access with trusted staff.
Operators may have access that visitors do not. Test with the normal player's actual permission context after changing a LuckPerms group. A wildcard grant can conceal the real missing node while also allowing unwanted poses or bypasses.
Where the plugin offers interaction toggles, check how they affect clicking blocks, other players and occupied seats. A command that works correctly in an open field might be undesirable in a crowded spawn or a protected shop.
Check protection and movement edge cases
Test at the boundary of a protected build, during teleportation and after reconnecting. Confirm that a player can leave the pose normally and that their visible position updates for another observer. Do not use a pose feature to work around region access restrictions.
If a pose or interaction fails only in one location, inspect the world's plugin settings and relevant protection rules. If it fails everywhere, collect the first error, plugin versions and a repeatable action on a test copy. Avoid removing unrelated player data to clear a visual glitch.
See LuckPerms group permissions when different ranks behave differently. Further reading: official project, configuration and declared commands and permissions.
Looking for another plugin? Browse the Minecraft plugin guide directory.
Set up Jobs Reborn and check that job payments work
Jobs Reborn rewards configured actions with income, experience or points. Adding a job does not automatically create a functioning money economy. Verify the economy bridge and provider first, then test one profession with small payouts before enabling a wide range of actions.
Preserve existing professions and progress
Check the Jobs release and its declared dependencies against your exact server version. Use the official project links for Jobs and any required libraries. Stop the server and back up job definitions, general configuration and player storage. If Jobs uses MySQL, keep a consistent export alongside the matching files.
Follow plugin installation and inspect the first startup log. Resolve dependency or database errors before joining a job. Check Vault and the economy provider separately: Vault provides an integration interface, while the economy plugin owns balances. An installed bridge without a provider does not establish that deposits can succeed.
Test one profession
- Use a private test account and record its starting balance and Jobs progress.
- Run
/jobs browsein Minecraft chat and inspect the jobs the installed configuration actually offers. - Read the chosen job's information with the installed help, then use
/jobs joinwith its exact job name. - Perform one of that profession's configured actions in an ordinary survival test area.
- Check the recorded payment, balance and job progress. Repeat a small controlled sample rather than running a farm before you know what is paid.
Do not assume a job named Miner pays for every mined block. Action types, material entries, equations, worlds and limits determine the outcome. Use the generated example configuration for your version and change one value at a time.
Review limits and repeatable actions
Set a deliberate policy for jobs per player, income limits and worlds where payments should apply. Inspect place-and-break loops, spawner farms, automated production and interactions with custom blocks or mobs. A profitable repeated action may be working exactly as configured, so test the intended economy rather than treating every large payment as a plugin error.
Keep sensitive administrator commands separate from ordinary browse, join and information permissions. Do not grant the full Jobs command wildcard to let a player select a profession. Check the exact permission and configured job-access rule when only one player cannot join.
Investigate missing or excessive payments
If experience changes but money does not, inspect economy and payout errors. If neither changes, check membership, the action, material, world and applicable limits. Verify whether another plugin cancelled the event. Run compatibility tests on a copy rather than disabling protections across a live market or protected spawn.
Leaving and rejoining can alter progress according to configuration; do not use it as a harmless refresh on an established player. Before changing payment equations, record the previous settings and test expected results at several levels. Send support the job name, action, location, balance before and after, versions and log time. Further reading: Jobs features, declared commands and permissions and example job configuration.
Looking for another plugin? Browse the Minecraft plugin guide directory.
Set up PacketEvents for plugins that require it
PacketEvents is a networking library used by plugins such as anticheats and packet-based features. Its role is to support those plugins, not to enable cross-version joining by itself. Installing every packet library you can find makes dependency diagnosis harder.
Check whether a separate JAR is required
Read the dependent plugin's installation page for its exact release. Some developers bundle PacketEvents inside their plugin, while others expect a separate installation. A bundled copy and a standalone copy are not interchangeable merely because both contain the PacketEvents name.
Record the dependent plugin version, Minecraft version, Java runtime and platform. Paper, Velocity and other supported platforms use their own integration paths. Use a build advertised for the platform where the dependent plugin runs, and confirm its supported Minecraft range. Do not place a proxy dependency on a backend and assume the proxy can use it remotely.
Install and verify the dependency chain
- Stop the affected server or proxy normally. Back up the installation and preserve existing plugin configuration and databases.
- Follow the consumer's requirements. If it needs a standalone plugin, obtain the matching PacketEvents release from the official project and place it in that instance's plugin directory.
- Keep a single intended standalone copy. Move older JARs outside the loaded folder rather than leaving both versions available.
- Start and inspect the complete startup log. Check the library first, then the dependent plugin; a later failure may be a consequence of an earlier load error.
- Test the consumer's actual feature with an ordinary player. For a proxy network, include a backend switch and reconnect.
Interpret class and linkage errors
A missing-class message can mean the required dependency never loaded. A missing-method or linkage error may indicate mismatched library and consumer versions. Save the exact class name and first relevant stack trace instead of replacing several libraries at once.
Do not edit another developer's JAR to remove its embedded library. Bundling and relocation are developer decisions, and an altered artifact can introduce additional failures. Report the combination to the consumer's maintainer or use its documented compatible releases.
Test changes away from active players
Use an isolated copy when investigating conflicts between several packet consumers. Preserve the same configuration initially, reproduce the original action, then adjust one version or consumer at a time. Removing a plugin may disable protection or a gameplay system, so a successful bare-server join is only one diagnostic result.
Keep a record of which installation contains each dependency. On a network, different consumers may have separate requirements. Avoid an unplanned simultaneous proxy and backend update, because it hides where the behaviour changed.
Keep tokens and player information out of public debug reports. Include versions, the dependency requirement you followed and the failed action. See plugin installation and collecting useful logs. Further reading: official PacketEvents documentation and releases and supported integrations.
Looking for another plugin? Browse the Minecraft plugin guide directory.
Set up personal homes and teleport requests with HuskHomes
HuskHomes provides named homes, teleport requests and optional cross-server travel. Start with one backend server and two ordinary test accounts. Personal homes should remain private unless their owner deliberately makes them public; shared warps are a different feature with different permissions.
Install the appropriate release
Check the project's setup instructions for your Minecraft version, platform and Java runtime. A Fabric mod build and a Bukkit-family plugin build are different downloads. Stop the server, make a completed backup and place the correct build in the directory used by that platform. Keep only one installed copy.
Start once to generate configuration, inspect Console for dependency or database errors, then stop before editing. Preserve the generated files rather than replacing them with a configuration copied from another version. See the plugin installation guide for the panel file workflow.
Decide which plugin owns home and teleport commands. EssentialsX or another teleport plugin may already register similar names. Check the installed release's command and alias documentation before changing aliases; a command completing successfully does not prove HuskHomes handled it.
Create and use a private home
For a controlled trial, give the test group the documented permissions for the features you want, rather than an administrator wildcard. The documented command permissions include huskhomes.command.sethome and huskhomes.command.home. Check the release's separate limits and permission defaults before promising a particular number of homes.
Stand at a safe location and run /sethome trial. Move away, use /homelist to check the entry and return with /home trial. Confirm the destination, world and facing direction. Restart normally and repeat the return test to check persistence.
Keep this test home private. If public homes are part of your service, the documented privacy command is /edithome trial privacy public; return it to private afterwards. Check access from the second player rather than assuming the owner's view represents everybody's access.
Check requests, delays and protection
Use /tpa followed by the other test player's name, then have that player use /tpaccept. Check the resulting location and any configured warmup, cooldown or charge. Test refusal or expiry as well as acceptance. Avoid request spam while measuring behaviour.
Confirm that your intended restrictions work in protected areas and excluded worlds. Plugin support for a protection system must be verified with the relevant versions. Test as a non-operator; operators can bypass rules that ordinary customers encounter.
Prepare a network separately
Cross-server homes require the documented shared database and messaging configuration, with distinct backend server names. Use an isolated test database and messaging namespace first. Keep authentication and player UUID handling consistent across the network; changing these can make existing homes appear to belong to different players.
Do not point a live clone at production storage to see what happens. Back up data before a network change, stop affected writers during a planned migration and compare the resulting home records. The shared database is not a replacement for recoverable server backups.
If a command fails, report the exact message, server and plugin versions, backend name and relevant redacted configuration. Never include database passwords. Further reading: official setup and commands and permissions.
Looking for another plugin? Browse the Minecraft plugin guide directory.
Set up Plan analytics without exposing private player data
Plan records Minecraft player activity and presents analysis through a web dashboard. It can help you understand sessions and activity patterns, but it does not replace host monitoring or a lag profiler. Decide who should see the dashboard before exposing its web listener.
Choose the deployment and preserve existing records
Check Plan's supported platform, Minecraft and Java requirements for the release you download. Use its standalone game-server setup for one Paper server. A Velocity or BungeeCord network needs the separate network arrangement; do not point multiple installations at a shared database by guesswork.
Read plugin installation, stop normally and keep a completed backup. When updating Plan, preserve its configuration and database together. If it already uses an external database, export that database as well: a file backup alone does not capture remote records.
Start privately and verify the collector
- Install the appropriate release from Plan's official project links and start once.
- Read Console for configuration, database and webserver startup messages. Fix the first relevant error before opening the dashboard.
- Stop and review the generated configuration. Record the database type and webserver address/port.
- Use only an allocated TCP port for the dashboard. If none is available, ask support instead of copying a default port from a guide.
- Join with a test player, leave normally and allow the collector to process that activity. Confirm the expected server and timeframe in the dashboard.
A new database cannot reconstruct player sessions from before Plan was installed. A missing historical graph is not automatically evidence that the service lost records. Check time filters, the server selected and whether you connected to a fresh database accidentally.
Protect dashboard access
Follow Plan's current login and HTTPS setup before sending a dashboard URL to staff. Use separate accounts and only the web permissions needed for their role. Avoid sharing a single administrator login or placing credentials in screenshots.
If you need a reverse proxy or domain, arrange the supported routing with CloudExa support. A random DNS record cannot add TLS to a plain HTTP listener. Do not expose database ports publicly to make the web interface work; the web application and database connection are different paths.
Plan also supports exporting web files, but the official documentation lists missing features for that mode, including its normal login/access-control functionality. Do not publish exported player pages on a public website and assume the dashboard's authentication still protects them.
Check retention, resources and recovery
Review what information you collect, who can view it and how long you need it. Keep public screenshots free of player IPs and other private information. Monitor database growth and include its matched backup in your recovery plan.
For a blank or unreachable dashboard, distinguish listener failure, incorrect endpoint, HTTPS configuration and login permissions. For absent activity, check collection logs and the intended database. Provide support with the server ID, Plan build, timestamp and redacted error. See plugin database connections. Further reading: game-server setup, login and HTTPS and export limitations.
Looking for another plugin? Browse the Minecraft plugin guide directory.
Set up player land claims with GriefPrevention
GriefPrevention lets players protect land and share selected access with other players. Claims help prevent unwanted changes, but they are not a substitute for backups or a guarantee that every plugin-created action will be blocked.
Use documentation for the installed major version
The project separates legacy version 16 documentation from the changing version 17-and-later documentation. Check your actual release before copying commands or configuration keys. Do not replace a stable installation with an alpha merely because it has a larger version number.
Record other protection plugins and where they apply. Overlapping spawn protection, WorldGuard regions and land claims can produce different results from those in an unprotected test area. Plan which system owns each area and keep existing rules while testing the new one.
Back up and configure the intended worlds
Stop and take a completed backup including worlds, plugin configuration and claim data. Export an external database if your setup uses one, and keep the matching recovery files outside the server. See backup guidance before an upgrade or migration.
Install a release compatible with your server using the plugin guide. Start to generate configuration, then stop before editing. Review the claims mode for each intended world using the comments and documentation for that release. Disabling claims in a world with existing claims can remove their effective protection; do not use that as a troubleshooting shortcut.
Create a small test claim
- Join with an ordinary non-operator player account that has the intended claim allowance.
- Move to an authorised test area outside existing claims and administrative regions.
- Use the configured claiming tool, commonly a golden shovel, to select two opposite corners. Check the displayed boundary and any allowance error.
- Have a second unrelated player attempt a harmless block placement or container interaction inside the claim.
- Confirm that normal actions remain possible outside the boundary and that your test did not accidentally cover a public route.
Keep test items disposable and record the location. If a claim fails, inspect the world mode, available claim blocks and exact denial before granting broader permissions.
Choose a limited trust level
Standing in the intended claim, use the installed command help to review trust types. The documented /AccessTrust PlayerName allows limited interactions; /ContainerTrust PlayerName grants more container-related access; /Trust PlayerName includes building. Use the least access that matches the task.
Review /TrustList, then test with the invited player. A friend who may open a chest does not necessarily need to share claim-management permissions with others. Use the appropriate untrust operation when the collaboration ends, and verify the result rather than assuming membership disappeared everywhere.
Keep recovery and evidence
Test again after a normal restart and after adding another protection integration. Administrators may bypass claims, so an operator-only test cannot demonstrate player safety. If protection fails, record the coordinates, world, involved players and action without deleting the claim or its data.
Further reading: version guidance, commands and world configuration.
Looking for another plugin? Browse the Minecraft plugin guide directory.
Set up Simple Voice Chat with an allocated UDP port
Simple Voice Chat adds proximity audio to a compatible Minecraft Java server. The Bukkit plugin runs on supported Paper-style servers, while each player who wants voice needs the matching client mod. Installing the plugin alone does not put voice controls into an unmodified Minecraft client.
Match the platform before installing
Record the Minecraft version, server platform, Java runtime and plugin release. Choose the server download for that platform; a Fabric or Forge server needs its corresponding mod rather than the Bukkit JAR. Check the project's current compatibility notes instead of assuming that a recent game update is supported.
Use the plugin installation guide for a Paper installation. Keep a completed backup and the previous voice configuration before replacing an existing build. Ask two players to install compatible client builds on their own supported loaders, then join with the ordinary game address.
Assign a usable voice endpoint
- Find a UDP allocation explicitly assigned to this service. Ask support if you cannot identify one. A number that works for Minecraft TCP is not automatically available for another protocol.
- Start once to generate the plugin configuration, then stop normally before editing. Open the generated voice-chat server properties file; the exact location depends on the installed platform.
- Set its
portto the confirmed UDP allocation. The documented default is24454, but it is only usable when assigned and reachable for your service. - Leave binding and advertised-address settings at their generated values unless the service's network arrangement requires a documented change. A public address is not necessarily an address that exists inside the server container.
- Start and inspect Console for a successful listener and any bind error. Keep other services off that same UDP allocation.
The plugin's voice traffic and Minecraft login traffic are separate. Reusing the same numeric TCP and UDP port can work when both allocations are available, but matching numbers alone does not establish that. Do not open every port or replace the game port to test voice.
Test audio in both directions
Open the client voice menu, complete microphone setup, select the intended input/output devices and check mute or push-to-talk state. Have two players stand nearby and speak in turns. A remote third player provides a useful check that the test is not only working on one local network.
Use the installed version's documented voice connection test when diagnosing a failure. Confirm operating-system microphone access on the client. A working text chat does not prove the UDP listener is reachable, and a normal website-based TCP port checker cannot validate this audio path.
Separate network failures from client problems
If everyone sees a disconnected voice icon, check the assigned endpoint, listener startup and UDP reachability with support. If only one player fails, compare client versions, microphone permissions and local security software. Proxy networks need the project's separate proxy instructions; do not copy a standalone endpoint into every backend.
Send support the server ID, voice version, exact error and test time. Redact tokens and private addresses from public logs. See collecting useful Minecraft logs. Further reading: server setup, server configuration and troubleshooting.
Looking for another plugin? Browse the Minecraft plugin guide directory.
Set up SuperVanish for a limited staff role
SuperVanish lets authorised staff hide from ordinary players. Treat it as a moderation tool, not a security boundary or a guarantee that every third-party plugin conceals every trace. Test the actual chat, tab list, map and gameplay integrations your server uses. Keep an ordinary-player test account available after each integration update.
Install without changing existing staff access
Check the supported server and Minecraft releases in the official project. Review integrations listed for your installed build, including any optional ProtocolLib functionality. Do not assume the requirements of an old tutorial still match the current release.
Stop the server, take a completed backup and keep the current staff permission configuration. Upload the compatible JAR through Files or SFTP, keeping one copy in plugins/. Start and inspect Console. If the plugin fails to enable, investigate that startup error before granting additional permissions.
Separate who can vanish from who can see staff
The plugin declares sv.use for ordinary vanish use and sv.see for seeing vanished players. Grant only the permissions needed by a named staff role. Avoid sv.*: it includes administrative capabilities and behaviour changes that a junior moderator may not need.
Using LuckPerms Console commands, a limited example for an existing moderator group is:
lp group moderator permission set sv.use trueConfirm the group name before running it. Decide separately which senior role should have sv.see. Existing inheritance or operator status can already grant visibility, so test with accounts whose effective permissions you understand.
Check behaviour with three accounts
Commands entered through the game panel Console omit the leading slash, but toggling your own player visibility is most clearly tested in-game. Do not use another player's account or share panel credentials to perform these checks.
Review integration leaks and interaction risks
A web map, placeholder, Discord bridge or separate player-list plugin may have its own visibility rules. Check their documented SuperVanish integrations rather than assuming the vanish plugin controls them all. Be explicit with staff about which interactions they may perform while hidden; moderation visibility should not accidentally alter player builds or inventories.
If a staff member becomes visible unexpectedly, record the time, world switch or reconnect, effective permissions and related plugin versions. Restore the prior configuration if a change caused it. See LuckPerms groups and ProtocolLib diagnosis. Further reading: official project, permissions and configuration.
Looking for another plugin? Browse the Minecraft plugin guide directory.
Set up zAuctionHouse and test item sale recovery
zAuctionHouse lets players list items for other players to buy. Listings, money, purchased items and expired items are separate parts of the transaction. Establish how each is stored and recovered before allowing valuable items onto the market.
Match the documentation to your edition
Use the developer's official distribution links and a legitimate licence where your edition requires one. The current V4 instructions require supporting plugins including zMenu and PlaceholderAPI. Check that release's Java, Minecraft and server-software requirements; do not assume an old V3 configuration or dependency list applies unchanged.
Record the installed version and back up the existing plugin folder, database and economy data before upgrading. Stop market activity and stop the server for a consistent copy. If several servers share market storage, coordinate the pause on every writer rather than backing up while another backend continues processing purchases.
Start with one currency and a restricted test
- Follow plugin installation for the compatible dependencies and auction JAR. Keep one version of each.
- Start, read the initial Console output, then stop before editing the generated configuration.
- Select one supported economy and verify it independently. For Vault-based money, confirm the provider actually stores and updates balances.
- Review listing fees, tax, listing lifetime, item rules and per-player listing limits. Give a temporary test group only the intended player permissions.
- Start again and open
/ahin game. On documented V4 releases this useszauctionhouse.use; selling is a separate permission.
Keep administrator removal and data-management commands away from ordinary sellers. Do not grant an auction wildcard to bypass a missing menu permission.
Understand the sale price
V4 documents /ah sell <price> [amount] [economy]. Its price is per item, not a guaranteed price for the whole stack. With a disposable item held, /ah sell 10 1 requests a one-item listing at ten currency units; read the confirmation before accepting it.
Record the seller's inventory and both test players' balances. Buy through an ordinary second account, check the amount charged and inspect where the item is delivered. Review any configured fee or tax and whether sale proceeds must be claimed. Avoid testing with an enchanted or irreplaceable item.
Check purchased and expired items
Inspect the documented /ah selling, /ah purchased and /ah expired views. Check how your settings handle a buyer with a full inventory and how a seller retrieves an expired listing. A listing disappearing from the main menu does not, by itself, mean its item has been deleted.
Repeat one controlled sale after a normal restart. Confirm that the pending item and money state remain consistent. If the release provides transaction history, compare it with the players' reports before making a manual compensation.
If a listing appears missing
Stop further trading if items or money appear to duplicate. Collect the server ID, plugin version, timestamp, seller UUID, item and listing details privately for support. Preserve database records and do not restore only the auction database while leaving newer economy balances live: that can reintroduce already-paid listings.
See database connection troubleshooting. Further reading: installation requirements and V4 commands and permissions.
Looking for another plugin? Browse the Minecraft plugin guide directory.
Test cross-server inventory synchronisation with HuskSync
HuskSync synchronises selected player data between compatible Minecraft backend servers. It can change which stored inventory a player receives when joining. Treat its introduction as a data migration, not a routine cosmetic plugin installation.
Confirm the network is compatible
The official setup requires supported backend platforms, the same Minecraft version on participating servers, a database and Redis. Do not mix Fabric and Bukkit-family installations in one synchronisation setup or install the backend plugin on the proxy. Check the release-specific requirements before downloading.
Decide which server currently contains the authoritative inventory for each player. Two existing servers may have different legitimate inventories for the same UUID; installing synchronisation cannot automatically decide which possessions should survive. Resolve that policy before enabling production writes.
Keep online authentication and proxy UUID forwarding consistent. Do not switch authentication mode to fix an apparent missing inventory. A changed UUID represents a different identity to the data store and can expose a much larger account-security problem.
Make independent recovery possible
Schedule a maintenance window, prevent new logins and stop all participating servers before backing up player files and existing databases. Keep a written record of the source servers, versions and backup time. Follow the backup guide and verify the archives completed.
HuskSync snapshots are useful player-data records, but they do not include every world, plugin database or economy transaction. They do not replace a complete coordinated backup. Do not restore one old inventory while leaving a newer economy balance without considering duplication and fairness.
Build an isolated trial
Use two private test backends with separate test database credentials and a Redis namespace or instance that cannot reach production data. Never start a copied production server against the live synchronisation database merely to test compatibility. Restrict database and Redis access to the intended server addresses.
Install the matching plugin builds, start once to generate files and stop before entering credentials. The initial startup can disable the plugin until database settings are complete. Use the generated configuration for that release to set storage, Redis, cluster identification and backend names.
Select the documented sync mode and data categories deliberately. Read what that mode considers authoritative before accepting defaults. If you only intend inventory sharing, check whether health, experience, ender chests or other categories are also enabled.
Prove a complete transfer cycle
Check /husksync status on each backend. With a disposable test account, record a small identifiable inventory, move from the first backend to the second and verify every selected category. Repeat in the opposite direction, then log out, restart normally and log back in.
Test one short planned loss of test Redis or database connectivity and read the documented failure behaviour. The safe outcome must be understood before real players join. Do not remove player locks or repeatedly force reconnects to bypass an unhealthy synchronisation system.
Roll out and troubleshoot carefully
Use /husksync about and status output to identify builds and dependencies. Player-data viewing and restore commands are administrative recovery tools; restrict them to trusted staff. Avoid uploading diagnostic dumps containing credentials or player records.
Roll out only after the trial passes, with a documented maintenance and rollback plan. If you also offer cross-server homes, configure HuskHomes separately. Further reading: setup, sync modes and administrative commands.
Looking for another plugin? Browse the Minecraft plugin guide directory.
Use MiniPlaceholders with a compatible Minecraft text plugin
MiniPlaceholders lets compatible Minecraft plugins resolve placeholders into Adventure text components. Installing it does not make every chat, scoreboard or MOTD plugin understand its syntax. Start by checking that the plugin displaying the text explicitly supports MiniPlaceholders.
Confirm the producer and consumer
Identify the plugin that supplies the value, such as a permissions expansion, and the plugin that displays it. Both sides must support the relevant integration. PlaceholderAPI percentage-style placeholders and MiniPlaceholders angle-bracket tags are different systems; changing punctuation does not convert one into the other.
Check the current platform and Java requirements on the official download and user guide. These requirements vary between project generations and platforms. Choose the build matching your actual Paper, proxy or supported mod installation instead of assuming one JAR works everywhere.
Use plugin installation for a Paper server. Keep the current text configuration, plugin versions and expansion files before changing an existing setup. A backup helps you return to the matched configuration if an integration update changes output.
Install one required expansion
- Download MiniPlaceholders through the official project links and install the platform-appropriate artifact.
- Read the placeholder catalogue for the value you need. Some integrations are built in; others require a separate expansion download or provider plugin.
- Install only the documented expansion and its requirements. Do not add unrelated expansion collections to solve one missing value.
- Start normally and read Console for dependency or API-version errors. Confirm the provider and text-consuming plugin also enabled.
- Copy one documented placeholder into a test field that the consuming plugin says it processes through MiniPlaceholders. Keep the rest of that field plain text.
Preserve YAML or other configuration syntax around the text. An angle bracket inside a value is not itself an XML file, and a valid MiniMessage formatting tag does not prove the requested expansion is installed. Use the exact identifier and arguments from the catalogue.
Test the right player context
Some values are global, while others need a player or a pair of players. A server-list response may not have the same player context as an in-game chat message. On Paper, use /miniplaceholders expansions to list loaded expansions, then use the documented /miniplaceholders parse command with the intended player context. Velocity uses /vminiplaceholders. Check the consuming plugin's guidance as well; a Console-only test cannot represent every viewer.
Compare an administrator and an ordinary test player. Permission-based prefixes, groups or visibility can legitimately differ. If a relational value works for one viewer but not another, check whether the consuming plugin supports relational placeholders before changing group permissions.
Resolve literal tags and unexpected formatting
If the raw tag remains visible, check integration support, the expansion's loaded state and the exact configuration field. If the tag disappears but the value is empty, inspect its arguments and player context. If the text looks different, check how the consuming plugin serialises components and applies surrounding formatting.
Do not install a PlaceholderAPI bridge or proxy bridge unless the documented deployment needs it. Network bridging adds another component and is not an automatic fix for an incorrect tag. See PlaceholderAPI expansions for that separate system. Further reading: getting started, placeholder catalogue and diagnostic commands.
Looking for another plugin? Browse the Minecraft plugin guide directory.
Write a permission-limited Skript command and reload one script
Use a small information command to learn Skript before adding purchases, inventory edits or scheduled world changes. This example sends text to its caller. You can remove it without changing player balances, locations or stored items.
Check the language and server versions
These instructions concern the SkriptLang Bukkit plugin on a supported server, rather than a client mod or an unrelated scripting engine. Read the release notes for the exact Minecraft, Java and server requirements. Documentation for a newer Skript release can include syntax that your installed release cannot parse. Record the versions from startup output before diagnosing a script.
Keep a copy of existing scripts and Skript data before editing. Choose a command name that no installed plugin uses. The example permission is a new node for this script; it does not grant access to any other plugin.
Add one script
- Open the panel file manager and find
plugins/Skript/scripts/. Createcommunity-info.sk, ensuring the editor does not append.txt. - Paste the example below. Keep indentation consistent and preserve the colon after each structure.
- Save, then run
skript reload community-infoin the server console. In Minecraft chat, add a leading slash. Reload this file rather than the entire script collection. - Read the complete reload result. Resolve the first reported line before treating later errors as separate problems.
command /communityinfo:
    permission: community.info
    permission message: You cannot use this command.
    trigger:
        send "Community information: ask staff for the rules link." to sender
Test the permission boundary
Use a normal, non-operator account. Run the command before granting the node and confirm denial. Give only the test group community.info through your permissions manager, repeat the command, and confirm the message reaches its caller. Remove the test grant afterwards if that group should not retain access. Do not grant skript.* to players: script-management access has a different purpose from using this command.
If the command appears unknown, check the filename, reload result and any duplicate command registration. If it runs with the wrong message, search your own scripts for the same command name. A successful parse confirms syntax, but the permission test confirms the behaviour players receive. Keep console access while testing, so a mistaken permission edit cannot lock you out.
Change or retire it
Edit only the message first and reload the same file. Check that a normal player sees the new wording. Keep commands that run as console, file operations and repeating loops out of this first script; they need a separate review of privileges and workload.
To retire the command, stop the server, move this script outside the active scripts directory, and start again. Preserve a copy for comparison. If an update causes parsing failures, restore the previous script and compatible plugin build from your saved set during a maintenance window. Avoid downloading random addons to silence an error without understanding which syntax the script requires.
Related CloudExa guides
back up the server files · review LuckPerms groups and inheritance
Official references
Fix SkBee syntax errors after a Skript or Minecraft update
A script that uses SkBee can stop parsing after an update even when its ordinary Skript lines still work. Diagnose the addon and the failing expression before replacing scripts or modifying stored item data. NBT-related features deserve care because Minecraft item formats change between releases.
Record the complete version combination
SkBee extends Skript; you need compatible releases of both. Its current support policy targets recent Skript releases and Minecraft drops, while individual features have their own requirements. An old feature example mentioning an earlier Minecraft version does not establish support for your whole current installation. Read the selected download's compatibility information and the wiki page for the expression you use.
Write down the Minecraft version, Paper build, Java version, Skript version and SkBee version. Copy the first addon startup error and the first script parse error with their timestamps. Keep a private backup of scripts and data. Do not publish NBT dumps containing private item metadata or configuration secrets.
Separate plugin loading from script parsing
- Check startup output for Skript enabling, then SkBee enabling. An error about a dependency or unsupported runtime comes before script syntax troubleshooting.
- Check the loaded plugin list against the files in
plugins/. Move obsolete duplicate addon JARs outside that directory while the server is stopped. - Find the exact failing line in its
.skfile. Identify the SkBee feature in the official wiki rather than searching for a similar-looking expression from another addon. - Compare the syntax and version notes with the installed release. Preserve the original file before any edit.
Build a narrow reproduction
Create a separate test script containing the smallest command or event that reproduces the parse error. Use a unique command name and a staff-only permission. Begin with a message-only command that needs no addon. Once that loads, add the specific SkBee expression. Reload only the test file with Skript's file reload command, and record the result after each change.
Choose read-only inspection where the feature allows it. Test data-changing NBT, recipes or world-creation features on a copy of the server with disposable items. Do not repeatedly run an event that writes to every entity or scans all loaded chunks just to check whether the addon parses a line.
Apply a compatible fix
If the addon failed to load, correct the version combination first and perform a normal restart. If only one expression changed, update that expression against the matching documentation and retest its surrounding logic. Removing a parse error does not prove the script gives the same item, recipe or world result as before.
Restore the original test file and previous compatible plugin set if the proposed fix fails. Keep persistent data together with its compatible release when considering rollback; a changed data format may prevent safe binary downgrades. Send support the small reproduction, version list and redacted first error, rather than a whole production data folder.
Related CloudExa guides
plan a compatible Paper and plugin update · collect the relevant Minecraft logs · back up the server files
Official references
Create a Towny starter town and test outsider permissions
Towny combines land claims, town membership and optional economy costs. Set up a small town before inviting residents, then test what an outsider can do. A mayor test alone cannot show whether a public visitor can open doors or change blocks.
Review costs and the intended world
Use a Towny release that lists support for your Minecraft and server platform. Keep the release's command help nearby, because rank permissions and configuration defaults can change. Check whether the target world permits towns, how much creating and claiming costs, and which upkeep rules apply. Town creation can affect an in-game balance; use a private test environment with agreed test funds before experimenting.
Record the town's intended home area and existing protection plugins. Back up Towny's data and configuration with its economy storage before changing an established setup. Avoid creating a trial town over player builds, spawn, another town or a resource world scheduled for resets.
Create the smallest useful claim
- Join as an ordinary account with the intended town-creation permission. Stand in the chosen world and use
/towny mapto inspect nearby townblocks. - After checking the displayed creation cost, create an unused town with
/town new ExampleTown. Replace the name and use your server's documented naming rules. - Inspect
/townand its information output. Confirm the homeblock, membership and balance rather than assuming the message proves all settings are correct. - Use
/town claimonly for an adjacent test townblock whose cost and position you have checked. Keep expansion to the planned area.
Test each outsider action
Towny distinguishes build, destroy, switch and item-use permissions. In the test town, inspect the current town permission display and record its values. For a town where visitors should not place or break blocks, use the installed release's town permission controls, such as /town set perm outsider build off and /town set perm outsider destroy off.
Bring a second non-operator account that belongs to no town, nation or alliance involved in the test. Attempt a harmless block placement and removal inside the claim, then check doors and buttons separately. Do not assume blocking destruction also blocks switching. Keep disposable test blocks away from valuable containers.
Repeat at a plot with its own permissions, if one exists. Plot-level rules and resident-owned land need their own checks. Record which account owns the plot, because testing with the owner can hide an outsider mistake. Review PvP, explosions, fire and mobs as separate town policy choices before opening the area.
Correct rules without deleting land
Adjust the specific town or plot rule responsible for a failed test, then repeat the same visitor action. Grant a resident only the role they need instead of adding administrative bypass permissions. If the result still differs, check Towny ranks, overlapping protection plugins and the world configuration.
Restore the recorded permission values to undo a test. Avoid deleting a live town or unclaiming occupied land as a troubleshooting shortcut. Plan upkeep and staff coverage before inviting players so a test balance or unexpected daily cost does not put their claims at risk.
Related CloudExa guides
back up the server files · review LuckPerms groups and inheritance · check the Vault economy connection
Official references
Set Residence visitor flags without locking out the owner
Residence applies protection flags to a defined area, with separate player and group overrides. Diagnose access from the claim where the problem occurs. A visitor who cannot build may still have another form of access through an override, and an owner using administrative commands can bypass the restrictions you intend to test.
Inspect the claim before changing it
Use the supported Residence build for your Minecraft release and check required dependencies from that release. Keep the current configuration and protection data before adjusting existing rules. These steps assume you own a small test residence or have permission from its owner. They do not require deleting a claim or changing the server's global defaults.
Stand inside the intended claim and use /res current, /res info and /res show. Confirm its name, owner, world and visible bounds. A subzone can have different rules, so note whether you stand in the main residence or a named subzone. Record current flags before saving any edits.
Choose the rule that matches the action
- Use
/res flagsand the official flag reference to identify the setting for the reported action. Building, containers, movement and interactions are different tests. - Inside your test residence, use
/res set build falseto trial general building protection. The command acts on the current residence; verify your location first. - Use
/res check ResidenceName build VisitorName, replacing both names, to inspect the effective value for the visitor. - Ask that non-operator visitor to try placing and breaking disposable blocks inside the claim, then outside its boundary.
If visitors need to walk through a shop but should not use storage, preserve movement access while reviewing the documented container flag. Avoid toggling the movement flag during a public event; it can prevent legitimate visitors entering or leaving as expected. Test doors, buttons and other interactions using the exact block types your build contains.
Review individual overrides
Use the claim information and applicable group settings to find an explicit exception. Residence supports player rules through /res pset, group rules through /res gset, and removal of a local flag value. Review an override before adding another one. A broad trusted-player grant can undermine a narrow container restriction.
Run the tests with the owner's normal permissions too. Use /res for the trial rather than /resadmin, which the command documentation identifies as the administrative form. Keep console or another authorised staff member available in case a mistaken flag prevents normal access.
Undo only the test
Return a changed flag to its recorded previous value. Use remove only when you intend to remove the local setting and allow the applicable defaults or inheritance to take effect; it does not mean the same thing as setting false. Retest both visitor and owner afterwards.
Do not run /res clearflags or delete the residence to fix one denial. Those actions discard unrelated protection choices. If the result remains wrong, collect the residence and subzone names, coordinates, flag check output and plugin versions. Keep staff permission exports and private configuration out of public chat.
Related CloudExa guides
back up the server files · review LuckPerms groups and inheritance · collect the relevant Minecraft logs
Official references
Fix ItemsAdder resource-pack delivery before changing item files
If several ItemsAdder items appear as vanilla materials or missing textures, first identify whether the client received the right pack. Rebuilding item definitions or clearing data can make a download problem harder to diagnose and can affect items players already own.
Keep the failing example intact
Record the server's Minecraft version, ItemsAdder build and the affected player's exact client version. Check the selected ItemsAdder release and dependency requirements against the official documentation. A client admitted through protocol translation can still interpret a resource pack differently from the server's native client version. Start with a matching Java client before investigating translated or Bedrock connections.
Keep copies of the ItemsAdder configuration, content definitions, generated pack and any ID data that your release maintains. Save the current pack delivery settings too. Choose one existing item with a known internal ID and make a note of its expected appearance. Do not rename its namespace or regenerate mappings during this investigation.
Find the failed stage
- Read the first pack-generation error in the console. An invalid model or content configuration needs a generation fix before any hosting change can help.
- If generation completed, identify the exact pack URL that the configured hosting method sends. Check the installed release's hosting documentation; a file in the server directory does not establish that players can download it.
- Open that URL in a private browser window without panel login. It should deliver the intended archive, rather than a sign-in page, sharing preview or security challenge.
- Compare the downloaded archive with the generated output you intended to publish. Inspect its top-level pack metadata and assets without editing the only copy.
Check the client request
Ask the test player to enable server resource packs for this server entry, reconnect and record whether a download prompt or error appears. Open the client's resource-pack or latest log and capture the relevant failure around that time. Redact private paths and unrelated account information before sending it to support.
If the download works outside Minecraft but the game rejects it, check pack format, archive structure and the release-specific ItemsAdder notes for that Minecraft version. A successful HTTP response only proves delivery. A valid ZIP can still contain an incompatible model or assets in the wrong folder.
Check whether the proxy, server properties or another plugin also sends a resource pack. Document which component owns pack delivery. Test one intended sender on a copy or during maintenance rather than disabling several systems on a live network. Custom-item functionality can depend on the pack you temporarily stop sending.
Repair one layer and verify
Correct the generation error, direct-download hosting setting or client compatibility issue you identified. If you self-host, request an allocated TCP port from support; the examples in plugin documentation do not reserve that port for your service. Keep hosting credentials private and use the documented publishing procedure for your installed release.
Reconnect with the matching Java client and inspect the original test item plus a second custom item. Keep the previous pack available until those checks pass. Restore the saved pack and settings if the change fails, without deleting custom blocks or players' inventories.
Related CloudExa guides
check Java resource-pack delivery · back up the server files · collect the relevant Minecraft logs
Official references
- ItemsAdder resource-pack troubleshooting
- ItemsAdder hosting options
- ItemsAdder version-specific documentation
Preserve Oraxen item IDs while changing a custom item texture
Change the appearance of an established Oraxen item as a controlled content update. Keep its internal identity separate from the name players see. Renaming an internal item key or replacing data files during a texture edit can affect integrations and items that already exist in inventories.
Identify the item and supported release
This guide concerns the Oraxen Bukkit plugin's item configuration. Check the installed release's Minecraft and Java requirements and use documentation for that release. Modern components and model definitions differ from older custom-model-data examples. Avoid copying another custom-item plugin's YAML because similar features do not imply the same schema.
Find the item under plugins/Oraxen/items/, where Oraxen stores YAML definitions. Record its internal configuration key, base material, model reference, display name and relevant mechanics. Search your own shop, recipe and quest configurations for that internal key. Keep those references unchanged during a visual-only edit.
Save a recoverable content set
- Stop the server for a consistent backup. Preserve Oraxen configuration, item definitions, pack source assets and generated output, plus persistent mapping data used by your release.
- Keep a copy of the world and player data containing the established item. A configuration-only backup cannot recover a changed inventory.
- Copy the current item to a named test chest on a private server copy. Record its expected properties without exposing private NBT in public screenshots.
- Keep the old pack download available privately for rollback. Avoid overwriting your only previous generated archive.
Edit the appearance, not the identity
Change one texture or its documented model reference in the item's pack configuration. Preserve the existing internal item key and intended base material. Oraxen distinguishes item properties, modern components, pack settings and mechanics; use the section responsible for appearance rather than changing an unrelated behaviour field.
Check filename case and namespace paths when uploading assets. A path that appears correct in a local case-insensitive file browser can differ from the filename on the server. Inspect the JSON model's texture references as well as the PNG itself. Keep copies of edited assets outside the pack build input so an accidental duplicate cannot override the intended file.
Compare existing and fresh copies
Use the documented reload and pack-generation procedure for your exact Oraxen release on the test server. Read generation output before distributing the result. Join with a matching Java client that accepts the server pack. Inspect the old chest item, then obtain a fresh copy using the release's administrative item interface.
Compare appearance, stack behaviour, name and intended mechanics. If fresh items work while old copies differ, investigate the release's item-update mechanism and migration notes before touching player inventories. Do not replace every old item as a shortcut; players may have legitimate durability, enchantment or naming changes.
Release or roll back
Publish the tested pack and matching configuration together during your planned change window. Keep the previous set until players have checked the result. If the change fails, restore the saved configuration and previous pack delivery settings. A failed texture update should not require deleting player items, changing their IDs or reinstalling the server.
Related CloudExa guides
back up the server files · check Java resource-pack delivery · plan a compatible Paper and plugin update
Official references
Trace a Nexo custom-item display failure from pack to client
A Nexo item can exist on the server while the client displays the wrong model. Trace one item through its definition, generated pack and delivery path. This keeps a broken appearance separate from permissions, recipes or other features that might still work.
Match the documented version family
Nexo maintains an explicit version-support table. For example, the table checked for this guide lists Minecraft 1.21.11 with Nexo 1.16 or newer, and Minecraft 26.2 with Nexo 1.25 or newer. Recheck that table for the selected release rather than treating a minimum from one Minecraft version as support for another. The documentation also marks some intermediate Minecraft releases unsupported.
Record your server, Nexo and test-client versions. Preserve existing Nexo configuration, item definitions, pack inputs and generated output. Choose one affected item whose internal ID you know, and keep an established copy in a private test chest. Retain IDs and persistent data while diagnosing appearance.
Follow the item reference
- Find the item's YAML definition and identify which appearance mechanism that release uses. Nexo documents item-model definitions alongside modern item components; older examples can use a different arrangement.
- Check the referenced namespace, path and filename case. Confirm the target texture or model exists in the pack inputs.
- Read the pack-generation log for the first relevant error. Correct a missing file or malformed model on a copy before changing delivery settings.
- Generate the test pack using the installed release's documented command. Preserve the previous generated archive so you can compare the outputs.
Inspect merged pack inputs
Nexo's documented pack structure includes plugins/Nexo/pack/assets/ and plugins/Nexo/pack/external_packs/. Imported packs can contain overlapping model or texture files. Check whether an external pack supplies the same path as your intended asset. Test one suspect imported pack on a copy; keep a record of its original position and do not remove unrelated production assets without a plan.
If obfuscation or pack optimisation runs, retain the original inputs and read the processing errors. Do not hand-edit the generated output as your lasting fix: a subsequent build can replace those edits. Correct the source model or build configuration instead.
Confirm delivery and client loading
Review the configured Pack.server.type in the release's generated settings. The documented NONE mode sends no pack, so it only makes sense where another intended sender handles delivery. A self-hosted mode needs a reachable public address and an allocated TCP port; choose your service's allocation rather than copying an example port.
Join with a matching Java client, accept the pack and examine the client log if loading fails. Test the held item and its inventory icon, then compare an existing copy with a fresh administrative test copy. Protocol translation and Bedrock rendering need separate compatibility checks.
Recover without changing inventories
Restore the previous pack input and delivery configuration if the test regresses other items. Keep item IDs intact. If you need support, send the version combination, one redacted item definition, model path and first generation or client error. Do not include purchased asset archives or private hosting credentials.
Related CloudExa guides
check Java resource-pack delivery · back up the server files · collect the relevant Minecraft logs
Official references
Create a bounded MythicMobs test encounter without natural spawns
Test one MythicMobs definition by spawning one mob in a controlled area. Keep natural spawning, repeating spawners and reward tables out of the first trial. This makes it easier to identify a configuration error without filling a public world with custom entities.
Prepare a contained trial
Use a MythicMobs release that supports your Minecraft and server platform. Check whether the feature you intend to add belongs to a free or paid edition before downloading examples. Use the official wiki for that release, because options and mechanics can change. Start with a basic mob that requires no custom model or separate addon.
Back up MythicMobs files and the test world. Choose an enclosed staff test area away from players, animals and valuable builds. Keep combat consequences in mind even for a weak mob. Do not use an exposed production spawn as the laboratory, and do not grant players broad MythicMobs command permissions.
Add a minimal definition
In the existing MythicMobs configuration layout for your release, add a separate mob YAML file under its mob-definition directory. Use an unused internal name. The following example defines a basic zombie with a readable display name, modest health and damage. It does not configure extra skills, rewards or recurring spawning.
CloudExaTrainingZombie:
  Type: ZOMBIE
  Display: 'Training Zombie'
  Health: 20
  Damage: 1
- Save the new file and use the release's documented reload procedure. Read the first parse error, if present, and fix it before spawning anything.
- Join the test enclosure as an authorised administrator. Confirm your location and ensure another player cannot enter during the trial.
- In chat, run
/mm mobs spawn CloudExaTrainingZombie 1. The amount is one. Check the installed command help if your release requires a different argument arrangement. - Confirm that only the intended mob appears. Inspect its displayed name and behaviour before repeating the command.
Test a feature at a time
Keep a brief test record: definition name, version, location, number spawned and observed outcome. If the mob loads but behaves differently from the file, check for another definition with the same internal name or an inherited template. Do not solve that conflict by editing an unrelated production mob.
Once the basic mob works, add one documented option or skill to the test definition and repeat with one entity. Check target selection and cooldowns on a private copy before using damage, explosions, summons or command-running mechanics. A skill that summons more mobs can increase load even when you initially spawn only one.
Clean up the trial without a global purge
Remove the specific test entity through normal controlled gameplay or a reviewed, narrow administrative action. Avoid global kill or purge commands, which can affect encounters already running elsewhere. Keep existing spawner and random-spawn files untouched.
To retire the definition, stop the server, archive its test file outside the active configuration path and restart. Restore the previous file if a change breaks parsing. For support, provide the minimal mob definition and the first redacted console error; include skill files only when the error actually depends on them.
Related CloudExa guides
back up the server files · install plugins on Paper or Purpur · collect the relevant Minecraft logs
Official references
Tune RoseStacker rules without losing named or custom mobs
Entity stacking changes how several mobs share a representation. Review gameplay and persistence alongside performance. A lower visible entity count does not establish that custom drops, named pets or another plugin's mob logic still behave as your players expect.
Preserve the data that represents existing stacks
Choose a RoseStacker release supported by your Minecraft version. Its generated configuration and per-entity settings take precedence over examples from older releases. Stop the server and back up the worlds, RoseStacker configuration and its data store as a matched set. Download and check the backup before introducing stacking to an established world.
Avoid removing the plugin from a live installation as a quick rollback. Existing stacks can rely on its stored data. First document the current stacking rules, affected worlds and any plugins that customise mobs or loot. Use a copy of that setup for the first trial.
Narrow the trial
- Inspect the generated world inclusion or exclusion settings and per-entity files. Choose one test world and one ordinary mob type instead of applying new rules to every world.
- Check the comments for the exact release before changing a setting. Keep custom-named entities excluded where your community treats names as individual ownership or identity.
- Review MythicMobs integration if present. Current maintainer configuration documents
misc-settings.mythicmobs-allow-stackingand recommends leaving it false except in narrowly compatible uses. - Preserve custom-drop and death-event settings until their owning plugins' integration requirements are understood.
The current source also documents global-entity-settings.dont-stack-custom-named. Confirm that key exists in your generated configuration and check its actual value; do not infer the setting from the display name shown above a stack. Per-entity or release-specific rules may affect the result.
Compare ordinary and special mobs
In the private trial area, start with two ordinary mobs of the chosen type. Record whether they combine and the resulting displayed count. Repeat with a named test mob and, where relevant, a disposable custom mob created through its owning plugin. Keep pets and players' production farms outside the test.
Use small quantities when checking drops and experience. Compare a single death, partial stack loss and any configured whole-stack behaviour. Keep a written expected result for each test instead of assuming a larger drop pile means the integration is correct. Do not enable death events for an entire large stack on a public farm without reviewing the workload.
Check persistence before release
After recording test counts, perform a normal stop and start on the copy. Return to the area and compare the saved counts and special-mob behaviour. Inspect console errors. Commands such as /rs stats can provide plugin information, but they do not replace checking the specific entities.
Restore the recorded rule values if a trial fails and follow the release's supported handling of existing stacks. Avoid /rs clearall as a fix; its purpose is removal. Escalate a persistence mismatch with redacted logs and the exact settings rather than deleting the data store or reinstalling the server.
Related CloudExa guides
back up the server files · collect the relevant Minecraft logs · plan a compatible Paper and plugin update
Official references
Fix an ajLeaderboards board that shows missing or stale values
Check an ajLeaderboards ranking in three places: the original statistic, the board's recorded values and the display plugin. A hologram showing old numbers does not establish that player statistics disappeared. Avoid resetting either store while identifying the failed stage.
Record the board and its source
These steps assume supported builds of ajLeaderboards, PlaceholderAPI and the plugin supplying the statistic. Check their release requirements against your Minecraft version. Note the board's exact name and the placeholder that supplies each player's numeric value. Keep ajLeaderboards data and the source plugin's storage before configuration changes.
ajLeaderboards expects a normal numeric placeholder, allowing commas but not descriptive text. Use a per-player value rather than another plugin's existing top-ten or leaderboard placeholder. A result such as 12 wins differs from a plain number, and a placeholder that remains unexpanded needs fixing at its source.
Check source and registration
- Use the documented PlaceholderAPI parsing command for one known online test player. Confirm that the source returns the expected number for that player.
- Run
/ajlb listas an authorised administrator. Check whether the intended board exists and copy its spelling. - If you intend to create a genuinely new board, use
/ajlb add %statistic_player_kills%as a documented example only after verifying that this is the statistic you want. Do not add a second board simply because the first display is wrong. - Use
statistic_player_kills, without percent signs, where a command or display expects the board name. Keep percent signs around the complete PlaceholderAPI placeholder instead.
Test the display separately
Check one position's complete display placeholder against the official list. For the example all-time board, a name placeholder is %ajlb_lb_statistic_player_kills_1_alltime_name%. Keep the board, position, time type and output field consistent when comparing name and value.
If the placeholder resolves in a parsing test but appears literally on a hologram, inspect the hologram plugin's PlaceholderAPI support and update interval. Do not replace the source statistic or clear the leaderboard data to fix a presentation problem. Start with one temporary line so you can compare the old and new display without changing every board.
Understand offline and timed values
Some source plugins cannot calculate an offline player's value through their placeholder. Test an online player first and read the source plugin's offline support. Avoid launching a full offline-player refresh on a busy server before understanding its workload and storage access.
Use timed boards for cumulative statistics that increase over time. The official setup guide distinguishes those from non-cumulative values such as a high score, where an all-time display is appropriate. A monthly label does not make every metric a meaningful monthly competition.
Recover the display without erasing history
Restore the previous placeholder line or configuration if the trial fails. Keep source stats unchanged. Send support the source result, board name, complete output placeholder, player online state and redacted errors. A board cache reset is a deliberate history change, so reserve it for a reviewed reset plan rather than routine troubleshooting.
Related CloudExa guides
collect the relevant Minecraft logs · back up the server files · check PlaceholderAPI expansion setup
Official references
Match a ChunkyBorder boundary to a pre-generated Minecraft world
Chunky generates terrain; ChunkyBorder controls a playable boundary using a Chunky selection. Match the world, centre, shape and radius between both jobs. An unfinished generation task or a mismatched selection can leave players travelling into terrain you did not intend to open.
Map the current world before setting a border
Install compatible releases of Chunky and its ChunkyBorder addon for your server. Check their platform requirements rather than mixing Bukkit plugins with a mod-loader build. Keep the existing world and plugin configuration before changing an established boundary.
Write down the current spawn, furthest builds, important portals and planned playable area. Keep the full intended build area inside the new border. Shrinking a boundary around player homes can prevent access even though the chunks still exist. A border change does not delete terrain or recover disk space.
Define one explicit selection
The following console example selects a square with a 1,000-block radius around zero in a world named world. Replace the world name, coordinates and radius with your reviewed plan. These values illustrate the command structure; they are not a recommended size for every server.
chunky world world
chunky center 0 0
chunky shape square
chunky radius 1000
- Check the selection feedback before starting work. Radius and total width are different measurements.
- If terrain still needs generation, follow the Chunky generation guide and monitor disk space until the intended task completes. Do not start a second generation task by accident.
- With the reviewed selection active, run
chunky border add world. The world argument identifies where the border belongs; the current selection still supplies its geometry. - Run
chunky border listand inspect the stored border for that world.
Verify the boundary as a player
Use a normal account without bypass access. Approach a safe test point near each edge on foot, with disposable items and no drop nearby. Check that the boundary matches your map and that the player stays inside the intended area. Test a corner when using a square and an off-axis point when using a circular shape.
Review vanilla world-border settings and other boundary plugins too. A player can encounter whichever restriction applies first. Keep portal destinations inside safe generated terrain in each linked dimension; an Overworld border alone does not establish the corresponding Nether or End behaviour.
Avoid enabling wrap by accident
ChunkyBorder offers wrapping modes that move players across a boundary. Leave wrapping unused unless your design calls for it, then test destination safety. A bypass permission or temporary bypass command can also make an administrator's test differ from an ordinary player's experience.
To reverse a mistaken new border, restore the previous documented border configuration. Use chunky border remove world only for the specific border you intended to remove, during controlled access. Do not trim or delete chunks as part of the correction. Keep the old selection record so you can recreate its exact centre, shape and radius.
Related CloudExa guides
pre-generate terrain with Chunky · back up the server files · collect the relevant Minecraft logs
Official references
Diagnose an AdvancedRegionMarket listing without resetting rented land
A land listing can fail because the market record, WorldGuard region, player limit or economy connection differs from your expectation. Inspect those records before recreating a sign or region. AdvancedRegionMarket can restore land on expiry or reset, so careless troubleshooting can affect the owner's build.
Preserve ownership and lease state
Use the AdvancedRegionMarket release supported by your Minecraft, WorldGuard and WorldEdit versions. Its official dependency list also includes Vault and a compatible economy provider. Confirm all of those plugins enable without errors before adjusting a listing.
Back up WorldGuard regions, AdvancedRegionMarket configuration and data, relevant world chunks, and economy storage as a consistent set. Record the region's world and identifier, current owner, market type and expiry. Keep any stored restoration schematic or snapshot. Changing only the market database can leave protection ownership and money inconsistent.
Inspect the listing without buying it
- Find the region through the installed release's administrative interface or documented information command. Confirm that its world matches the WorldGuard region.
- Check whether the listing is a sale, rental or automatically renewing contract. Those states have different ownership and payment consequences.
- Compare price, rental period, extension limit and displayed sign text with the actual market record. A label is not proof of the saved value.
- Record current reset, inactivity and restoration settings before touching them. Do not trigger a reset to test whether the sign works.
Check the requesting player's eligibility
Inspect the player's applicable limit group, region kind and existing holdings. A per-kind cap can prevent a purchase even when their total number of regions looks acceptable. Review effective permissions through your permissions manager rather than granting a market wildcard or operator status.
Check the economy provider and Vault hook separately. Read errors around the failed interaction and confirm the affected player's identity. A balance display from a different economy plugin may not represent the provider AdvancedRegionMarket uses. Do not add real money or run repeat purchase attempts while finding the hook.
Use a separate trial for transactions
If information checks do not explain the failure, reproduce the same listing type on a private copy with a new empty region and disposable test balance. Match the relevant limit group and protection flags. Keep the production region's owner and expiry unchanged during this comparison.
Test one permitted interaction and one denied interaction with non-operator accounts. For a rental, review the documented expiry and reset behaviour before simulating time changes. Avoid changing the system clock on a production server to make a rental expire; other plugins and scheduled jobs depend on that clock.
Repair the narrow cause
Correct the specific missing dependency, limit assignment, price display or region reference and repeat the same information checks. Recheck the original owner's build access afterwards. If a transaction might already have completed, compare the transaction evidence and saved ownership before trying it again.
Restore recorded settings if the change fails. Do not delete and recreate occupied regions or use restoration as a debugging tool. Send support the release versions, redacted region state, exact player-facing error and timestamp, without including a full private economy database.
Related CloudExa guides
inspect a WorldGuard region · check the Vault economy connection · back up the server files
Official references
- AdvancedRegionMarket features and dependencies
- AdvancedRegionMarket region settings
- AdvancedRegionMarket player limits
Test InteractiveChat item previews without exposing staff inventory
InteractiveChat can share a held item, an inventory or an ender chest through chat. Start with the held-item feature and two disposable accounts. Staff inventories can contain private tools or named items, so use test items rather than a real moderator's inventory for screenshots and previews.
Check dependencies and chat ownership
Choose an InteractiveChat release that supports your Minecraft version and chat platform. The project lists dependencies including ProtocolLib, PlaceholderAPI and Vault. Verify the requirements of the exact download and confirm those plugins load before diagnosing message formatting. A proxy installation needs its own documented network setup.
Record which plugin formats chat, whether a proxy relays it, and whether Discord receives copies. Preserve InteractiveChat and chat-plugin settings before editing. Keep tokens and private message content out of support captures. A successful local preview does not establish that a relay handles the same component correctly.
Limit the first feature
- Open the configuration generated by your installed release. In the documented
ItemDisplaysection, inspect the separateItem,InventoryandEnderChestoptions. - For this trial, leave held-item sharing enabled and disable whole-inventory and ender-chest sharing. Record the previous values so you can restore your intended policy later.
- Review the held-item keyword and a modest cooldown. In the current reference configuration, the default keyword recognises
[item]and[i]. - Apply changes using the release's documented reload procedure or a normal restart, then check startup output for configuration errors.
Run a two-player preview
Join as a normal test player holding a disposable named item. Send a short public message containing [item]. Have a second normal player inspect the tooltip and, if your configuration allows it, open the read-only preview. Confirm the item name, quantity and lore match the shared test item.
Try an empty hand and a second message during the configured cooldown. Check that neither case floods chat or produces a stack trace. Attempt to move an item from the preview using disposable contents and verify that the viewer gains no inventory items. Do this on a private copy before enabling unfamiliar view integrations.
Review information exposure
Custom lore, map previews and compass metadata can reveal more than the base material. Current configuration includes a setting for hiding lodestone compass position. Review its comments if your server uses tracking compasses. Decide whether you want clickable maps and container previews before enabling those features.
Test private-message commands and external relays separately. The plugin can parse configured commands as well as public chat. Keep staff-only channels out of the trial until you have checked their audience and permissions. An addon may be required for a particular relay; do not assume the local preview transfers unchanged.
Recover from formatting conflicts
If a keyword remains literal, first check feature enablement, effective permissions and the chat formatter's compatibility notes. If a preview breaks only across a proxy, preserve the working local configuration while investigating the relay. Restore the previous InteractiveChat settings to reverse the trial; avoid disabling authentication or granting broad staff access as a workaround.
Related CloudExa guides
back up the server files · review LuckPerms groups and inheritance · collect the relevant Minecraft logs
Official references
Create a separate BentoBox BSkyBlock island world safely
BSkyBlock adds a SkyBlock game mode to BentoBox. Keep its worlds separate from your existing survival worlds and review generation settings before players create islands. Changing island spacing after a community starts needs a migration plan, rather than a casual configuration edit.
Match the core and game-mode releases
Install a supported BentoBox core and the BSkyBlock addon that matches it. The official BSkyBlock page checked for this guide states that BSkyBlock 1.20.0 requires BentoBox 3.13.0 or newer and Paper 1.21.11. That is one documented combination, not a claim that every newer server release works. Read the selected releases' requirements before downloading either file.
Keep existing worlds, player data and plugin configuration. List every loaded world name and choose unused names for the new game mode. Check free disk capacity and available memory for additional dimensions. A separate world still consumes resources within the same game-server plan.
Generate configuration in a safe place
- Use a private copy for the initial configuration trial. Install BentoBox through its supported plugin procedure and run it once to create its data folders.
- Stop that test server and place the compatible BSkyBlock JAR in BentoBox's
addonsdirectory, rather than treating the addon as an independent top-level plugin. - Start and read the addon load result. Note which worlds and addon configuration it creates.
- Stop before editing the generated game-mode configuration. Review world names, island distance, protection range and starting template choices.
Plan geometry before opening islands
BSkyBlock documents island distance and protection range as radius values. Do not interpret them as full island width. The documentation also describes adjustment to chunk boundaries. Use the generated comments and current release notes to understand the exact geometry before publishing a promised island size.
Choose settings on the private copy before any real player islands exist. If a world already contains islands, preserve it and ask for a supported migration approach. Do not follow world-deletion instructions against a populated world. For an unused trial world, archive it and record its origin rather than deleting directories whose names merely look similar.
Test two separate player roles
Join with an ordinary account and use the game mode's documented island command to create a test island. Confirm the spawn platform, inventory expectations and safe return path. Use a second non-operator account to test visitor block breaking, containers and island invitations.
Inspect protection at the edge as well as beside the starting chest. Check the intended Nether and End configuration if those dimensions form part of your plan. Test a normal stop and start, then confirm the test player's island ownership and spawn persist. Keep a record of the generated world names for future backups.
Open access with a recovery path
Transfer only the reviewed configuration to the real rollout and verify the exact target names before starting. Preserve the test results and a completed backup. If setup fails, keep players on the existing game mode while restoring the previous addon configuration. Avoid resetting islands or player records to resolve a dependency error.
Related CloudExa guides
back up the server files · install plugins on Paper or Purpur · collect the relevant Minecraft logs
Official references
Trace a denied Minecraft command with LuckPerms verbose
Use LuckPerms verbose recording to find the permission check behind a failed command. This is useful when a player belongs to the right-looking group but still receives a denial. Keep the reproduction small so routine background checks do not hide the relevant result.
Establish the failing action
These steps concern a supported LuckPerms installation on the server handling the permission check. A proxy command can use a different permissions instance from a Paper backend command. Record where the command runs, the player's exact name and UUID, world and any server context. Check the owning plugin's permission documentation too.
Use a consenting normal test account with the same intended memberships. Keep console access and save the current permission state before editing. Do not make the account an operator to collect evidence; that changes the access path you need to inspect. Avoid recording unrelated players' activity.
Record one attempt
Run the following from the relevant server console, replacing PlayerName. The current command implementation accepts record, off and upload. Check the installed version's help if it differs.
lp verbose record PlayerName
- Ask the test account to run the single failing command once. Keep the exact spelling and arguments in your private test notes.
- If you accept uploading the captured permission metadata to the LuckPerms viewer, run
lp verbose uploadimmediately afterwards. This ends collection and uploads the active capture. Keep its resulting link private. - Do not run
lp verbose offbefore upload: it discards that capture. If you do not want an upload, use the documented live verbose mode and local output instead, then end it withlp verbose off. - Inspect the checks around the attempted command. Find the relevant node and result rather than treating every false check as a fault.
Interpret the result in context
A plugin may check several nodes to choose a feature or branch. Some false results are expected. Compare the observed node with that plugin's official command permission, then inspect the user's direct entries, inherited groups and applicable contexts. A positive entry in another world or server context may not apply to this request.
If LuckPerms reports the required permission as true, investigate another restriction: claim membership, a command cooldown, plugin configuration or a proxy routing issue. Adding more permission grants cannot resolve every denial. Keep the exact player-facing message and timestamp for that next investigation.
Apply one narrow correction
Give the documented node to the smallest suitable group and context, or correct an unintended explicit denial after reviewing why it exists. Avoid a global wildcard, an administrative bypass or changing the default group merely to make the test pass. Record the previous value and scope before applying the edit.
Repeat the original action with the same account. Check a related action that must remain denied, then remove any temporary diagnostic permission or group membership. Disable verbose collection when finished and keep viewer links out of public support posts.
Roll back a failed grant
Restore the node's prior value or absence in the same scope if the change does not explain the issue. Do not erase the player's entire permissions record. Keep the short trace and plugin versions so support can investigate without recreating a broad production capture.
Related CloudExa guides
review LuckPerms groups and inheritance · back up the server files · collect the relevant Minecraft logs
Official references
Fix overlapping WorldGuard region flags with a small permission test
A WorldGuard flag can look correct on one region while another overlapping region changes the outcome. Diagnose the exact location and action before raising priorities or adding build allowances. A priority change can affect membership protection as well as a single gameplay flag.
Record the location and intended policy
Use matching supported WorldGuard and WorldEdit builds. This guide follows WorldGuard 7 documentation; check the installed release before applying its commands. Save the current world and WorldGuard region data, and keep console access during the trial.
Write down the world, coordinates and failed action. Describe the intended roles: for example, visitors should walk through a lobby, builders should edit a workshop, and neither should edit the surrounding spawn. Use disposable test blocks away from valuable builds. Check both the ground and the height where the reported problem occurs.
Inspect the overlapping regions
- At the affected location, use the installed region inspection commands to identify the regions covering it. Inspect each named region with
/rg info RegionName, replacing the name. - Record its priority, parent, owners, members and explicit flags. Include
__global__where it supplies relevant rules. - Check whether the test account owns or belongs to one of those regions, and whether it has a WorldGuard bypass permission.
- Look for a more specific interaction flag before changing
build. WorldGuard documents build as a special protection mechanism rather than a general switch to enable everything.
Understand the effective rule
WorldGuard evaluates explicit flags using the highest applicable priority where that flag has a value. At an equal priority, deny takes precedence for conflicting state flags. An unset flag can leave another region's value relevant. Inheritance and region groups add further context, so one region's summary does not describe the whole location.
Membership also matters. In overlapping regions without a deliberate priority or inheritance arrangement, a player can need building access across the applicable regions. Raising a small workshop above spawn can change whose membership grants building there. Review that consequence even if you originally wanted to alter only PvP or interaction.
Make a bounded correction
Choose one small existing test region whose intended role you understand. If the design genuinely needs a higher priority, record the old value before using a command such as /rg setpriority workshop_test 5. Replace the region name and choose a value relative to the recorded surrounding regions, rather than escalating priorities until an error disappears.
Test with normal, non-operator accounts for a member and a visitor. Check placement, breaking and the original interaction inside the test region, then immediately outside it. Verify that the surrounding spawn retains its expected protection. An administrator with bypass access cannot establish a visitor's result.
Undo the precise change
Restore the previous priority or individual flag value if the correction opens unintended access. Do not delete the region, clear all flags or grant broad bypass permissions. If a second claims plugin also protects the area, record its decision separately before making another WorldGuard edit.
Related CloudExa guides
inspect a WorldGuard region · review LuckPerms groups and inheritance · back up the server files
Official references
LuckPerms tasks
Task guides and troubleshooting for LuckPerms. Check the installed release before changing configuration or data.
Give a LuckPerms permission an expiry without leaving permanent access
A temporary event permission should expire even if the player forgets to contact staff. Use a time-bound node and test the expiry with a short trial before issuing the real grant.
Follow the procedure
- Record the player UUID, exact permission node and intended end time. Confirm that no inherited rank already supplies the same permission permanently.
- Inspect the user with
/lp user PLAYER permission info. Check both direct entries and the relevant group membership before adding another value. - On a test player, run
/lp user PLAYER permission settemp example.event true 5m. Replace the example node with the feature’s documented permission. - Check the effective result with
/lp user PLAYER permission check example.event. Exercise the actual feature as that player without operator rights. - Wait beyond the trial duration and repeat the permission check and feature action. Record whether another parent still grants access after the temporary entry disappears.
- For the real player, use the approved duration and context. Avoid replacing several existing temporary grants until you understand the installed release’s duplicate-node modifier behaviour.
Check the result
The temporary entry should disappear at expiry and the ordinary player should lose only the selected feature. A failed feature test after expiry proves the intended outcome more clearly than an entry disappearing from an editor. Keep a record of the grant, duration and account so another administrator can review it.
If the result is wrong
If access continues, inspect inherited groups, another context and cached application behaviour before issuing a negative permission. Remove only the new temporary node with the documented unsettemp command when ending the trial early. Do not clear the user’s permission data or shorten an unrelated paid entitlement.
References and related help
- LuckPerms maintainer reference
- LuckPerms maintainer reference
- Create Minecraft ranks and inheritance with LuckPerms
- Trace a denied Minecraft command with LuckPerms verbose
Make a LuckPerms event rank expire while preserving other ranks
An event rank can coexist with a player’s usual groups. Add it temporarily so the end of the event removes its benefits without replacing the player’s permanent memberships.
Follow the procedure
- Choose an existing event group with only the required event permissions. Inspect its parents to ensure it does not inherit general staff or administrative access.
- Run
/lp user PLAYER parent infoand save the current parent list. This gives you a precise comparison after the trial. - Use
/lp user PLAYER parent addtemp event 5mon a consenting test account. Do not use parent set, which can replace other memberships. - Inspect the user’s groups and test an event-only action. Also test a normal rank feature such as an existing home allowance to detect unintended inheritance changes.
- After expiry, verify that the event group has gone while the original parent list remains. Rejoin if the affected plugin caches rank-dependent state.
- Apply the approved real duration only after the trial. Keep an explicit expiry in the staff record rather than relying on someone to remember a manual demotion.
Check the result
The user should receive the event group for the stated duration and retain their original groups throughout. Test both the event benefit and a normal entitlement. After expiry, confirm that the event membership disappears and the rest of the membership list matches the saved baseline.
If the result is wrong
If the user retains event benefits, look for a permanent event membership or permission inherited elsewhere. Remove only the trial’s temporary parent with the matching removetemp syntax for your release. Restore a mistakenly replaced membership from the recorded baseline; avoid clearing the whole user to rebuild one rank.
References and related help
- LuckPerms maintainer reference
- LuckPerms maintainer reference
- Create Minecraft ranks and inheritance with LuckPerms
- Trace a denied Minecraft command with LuckPerms verbose
Limit a LuckPerms command permission to one Minecraft world
A build-world permission should not leak into survival. Add a world context to the exact node and verify the boundary with the same ordinary account in both worlds.
Follow the procedure
- Write down the internal world folder names, not the display names shown in a menu. Confirm the target world exists and the player can reach it.
- Inspect the group or user’s current node entries for an unconditional grant. A contextual permission does not cancel a separate global grant.
- For a test account, set the intended node with a world context, such as
/lp user PLAYER permission set example.build true world=buildworld. - Enter the target world and use the feature. Repeat from survival and the Nether, noting the world name and result for each attempt.
- If the node still applies everywhere, inspect direct and inherited global entries. Remove a global entry only after checking who else depends on it.
- Copy the verified rule to the intended group, then remove the test account’s direct exception. Re-test group members and a player outside that group.
Check the result
The feature should succeed in the named world and fail elsewhere for an ordinary player. A command permission check alone does not prove the action behaves correctly across worlds, because another plugin may enforce its own world list. Test a complete action in each relevant destination.
If the result is wrong
If the wrong world loses access, check spelling, world aliases and any global node left behind. Revert only the contextual entry you introduced. Avoid changing the default group or disabling protection across every world to work around a single incorrectly scoped permission.
References and related help
- LuckPerms maintainer reference
- LuckPerms maintainer reference
- Create Minecraft ranks and inheritance with LuckPerms
- Trace a denied Minecraft command with LuckPerms verbose
Keep a LuckPerms permission local to one network backend
A lobby convenience command may be inappropriate on a survival backend. Give each backend a deliberate server context before applying a permission that should stay local.
Follow the procedure
- Identify the LuckPerms instance that owns the permission check: backend, BungeeCord or Velocity. A proxy command and a backend command can use different stores and contexts.
- Inspect the relevant instance’s server identifier in its LuckPerms configuration. Keep distinct names for distinct backends and record the current value before editing.
- With shared storage already working, create a small test node scoped to the intended server context. Use the matching
/lp,/lpbor/lpvcommand. - Join the target backend as an ordinary account and test the actual command. Switch to another backend and repeat without changing the user’s groups.
- Check for unconditional copies of the same node and for proxy-side aliases. Both can make a backend-specific rule appear broader than intended.
- Apply the final contextual rule to the smallest relevant group and remove the temporary test entry. Keep a record of the backend names used in the policy.
Check the result
The feature should work only where the server context matches the rule. Verify a reconnect and a backend switch, not just two commands in the same session. Confirm that unrelated shared ranks continue working across the network and that the proxy still has its own intended permissions.
If the result is wrong
If every backend reports the same context, correct duplicated server identifiers during a controlled change. If the check belongs to the proxy, move the rule to that permission scope instead of adding broad grants everywhere. Restore the previous configuration if storage or messaging stops working.
References and related help
- LuckPerms maintainer reference
- LuckPerms maintainer reference
- LuckPerms maintainer reference
- Create Minecraft ranks and inheritance with LuckPerms
- Trace a denied Minecraft command with LuckPerms verbose
Move a player along a LuckPerms track without replacing unrelated groups
A promotion track describes a sequence of ranks; it does not create inheritance. Check the track and current parents before promoting a real player through it.
Follow the procedure
- Inspect the track using
/lp track staff info. Write down the expected order and ensure each named group already exists with appropriate permissions. - Check the candidate’s current parents and their position on the track. Look for memberships in multiple track groups before trying a promotion.
- Use a test account at the first intended rank, then run
/lp user PLAYER promote staff. Read the response instead of repeating the command blindly. - Compare the test account’s parent list before and after the promotion. Check that an unrelated donor, builder or event group remains present.
- Exercise the new rank’s allowed feature and a feature reserved for the next rank. Tracks do not automatically provide the permissions of earlier groups.
- Promote the real account once, record the old and new track position, and verify that its unrelated memberships survived the change.
Check the result
The player should move one intended position on the chosen track and keep memberships outside it. Confirm effective permissions rather than assuming the track order implies inheritance. A successful staff command and a denied higher-level command provide a useful acceptance test for the promotion.
If the result is wrong
If promotion fails because the user belongs to several track groups, inspect that ambiguity before changing anything else. Demote only through the same reviewed track when reversing the trial. Do not use parent set or clear to force the result; those operations can remove unrelated entitlements.
References and related help
- LuckPerms maintainer reference
- LuckPerms maintainer reference
- LuckPerms maintainer reference
- Create Minecraft ranks and inheritance with LuckPerms
- Trace a denied Minecraft command with LuckPerms verbose
Fix a LuckPerms prefix priority without changing chat formatting
Two ranks can provide competing prefixes even when permissions work. Inspect the metadata priorities first so you can fix the selected prefix without rewriting your chat plugin.
Follow the procedure
- Confirm that the affected chat or TAB integration already displays some LuckPerms metadata. A raw placeholder points to a separate integration problem.
- Run
/lp user PLAYER meta infoand inspect inherited group prefixes. Record the text, numeric priority, source group and applicable contexts. - Decide which existing prefix should win for the player. Do not delete a donor or staff group merely to change its displayed label.
- Use a scoped editor session for the relevant group to adjust that prefix’s priority. Save the session and apply the generated command to the correct server instance.
- Test the same ordinary player with their real combination of ranks. Compare chat, player list and any scoreboard because each integration may choose metadata differently.
- Check a player who has only the edited group as well. This detects a priority adjustment that accidentally hides a label used outside the original report.
Check the result
The intended prefix should appear while the account keeps all its groups and permissions. Confirm the text in every integration you support. If LuckPerms reports the right prefix but one display remains wrong, investigate that display’s cache or placeholder settings instead of changing more metadata.
If the result is wrong
If a different group label disappears, restore the recorded priority in the same context. Avoid adding several direct user prefixes as a permanent workaround; they can hide later rank changes. Keep the original prefix text and priority in the change record so another administrator can reverse the test.
References and related help
- LuckPerms maintainer reference
- LuckPerms maintainer reference
- Create Minecraft ranks and inheritance with LuckPerms
- Trace a denied Minecraft command with LuckPerms verbose
Remove a direct LuckPerms exception without weakening its parent rank
A one-off user permission can outlive the incident that created it. Remove that exception alone and confirm the account falls back to the intended group policy.
Follow the procedure
- Ask which feature should change and confirm the player UUID. A renamed account or similar username can lead you to inspect the wrong entry.
- Open
/lp user PLAYER permission infoand identify the direct node, its value, expiry and contexts. Save that exact entry before changing it. - Compare the effective permission with the user’s group policy. Decide whether removing the exception should grant or deny the feature through inheritance.
- Use
/lp user PLAYER permission unset NODEwith the matching contexts for a permanent entry, or the documented unsettemp form for a temporary entry. - Re-check the effective value and exercise the feature as that account. Also test another member of the parent group to confirm its policy has not changed.
- Record why the exception ended and leave the user’s unrelated direct nodes untouched. A full user clear is unnecessary for a single stale permission.
Check the result
The account should follow its existing parent group policy after the exception disappears. That outcome might be either access or denial, depending on the parent. Compare the recorded expectation with the real action and verify a second group member still behaves as before.
If the result is wrong
If the result differs from the expected fallback, inspect another inherited parent, an explicit false value or a different context. Restore the exact saved exception if the test removes needed access. Do not edit the whole group to compensate for a user-specific error.
References and related help
- LuckPerms maintainer reference
- LuckPerms maintainer reference
- Create Minecraft ranks and inheritance with LuckPerms
- Trace a denied Minecraft command with LuckPerms verbose
Apply a small LuckPerms web-editor session to the correct server
An editor link does not apply changes by itself. Use a narrowly scoped session and review the generated apply command before changing a shared permissions store.
Follow the procedure
- Choose one group or one test user and open its editor using
/lp group GROUP editoror/lp user PLAYER editor. Keep the link private. - Before editing, check the group name, contexts and server instance. On a proxy, use the corresponding LuckPerms command prefix rather than the backend command.
- Change one permission or metadata item and leave unrelated rows untouched. Record the old value so you can reverse this specific edit.
- Save in the web editor and inspect the generated apply command. Run it on the intended LuckPerms instance, then read the change summary it prints.
- Open a fresh editor session or inspect the node list to confirm the server accepted the saved value. A browser tab alone can show an unapplied draft.
- Test the affected action with a normal account and close the old editor tab. Avoid returning to an old session later and applying stale changes over newer work.
Check the result
The server’s node list should match the saved edit, and the target account should demonstrate the expected access. A new editor session is a useful independent check that the change reached storage. Verify the selected context too; the same node can exist with several scopes.
If the result is wrong
If the apply command targets the wrong instance or the change summary is broader than expected, stop and compare the current live entries with your baseline. Reverse only the unintended nodes. Do not share editor URLs in public support channels or apply old sessions after another administrator changes the same group.
References and related help
- LuckPerms maintainer reference
- LuckPerms maintainer reference
- Create Minecraft ranks and inheritance with LuckPerms
- Trace a denied Minecraft command with LuckPerms verbose
Export LuckPerms data before changing its storage configuration
A permissions-storage change needs a usable export and a tested restore plan. Capture the current state before pointing a working server at a different database.
Follow the procedure
- Record the installed LuckPerms version, current storage method, server identifier and messaging configuration. Keep database passwords out of shared notes and screenshots.
- Use the installed release’s
/lp exportcommand with a descriptive export name. Read the completion message and note the resulting file location. - Copy the completed export off the game server through the panel file manager or SFTP. Check its size and keep a protected copy with the change record.
- Prepare a separate test instance with a separate data store. Test importing the export there, using the same relevant LuckPerms version and documented import procedure.
- Compare representative groups, contextual permissions, temporary grants and UUID memberships in the test copy. Check that expired temporary permissions behave as expected.
- Plan the production cutover only after the test succeeds. Keep the old data store untouched and document which store should receive writes during the migration window.
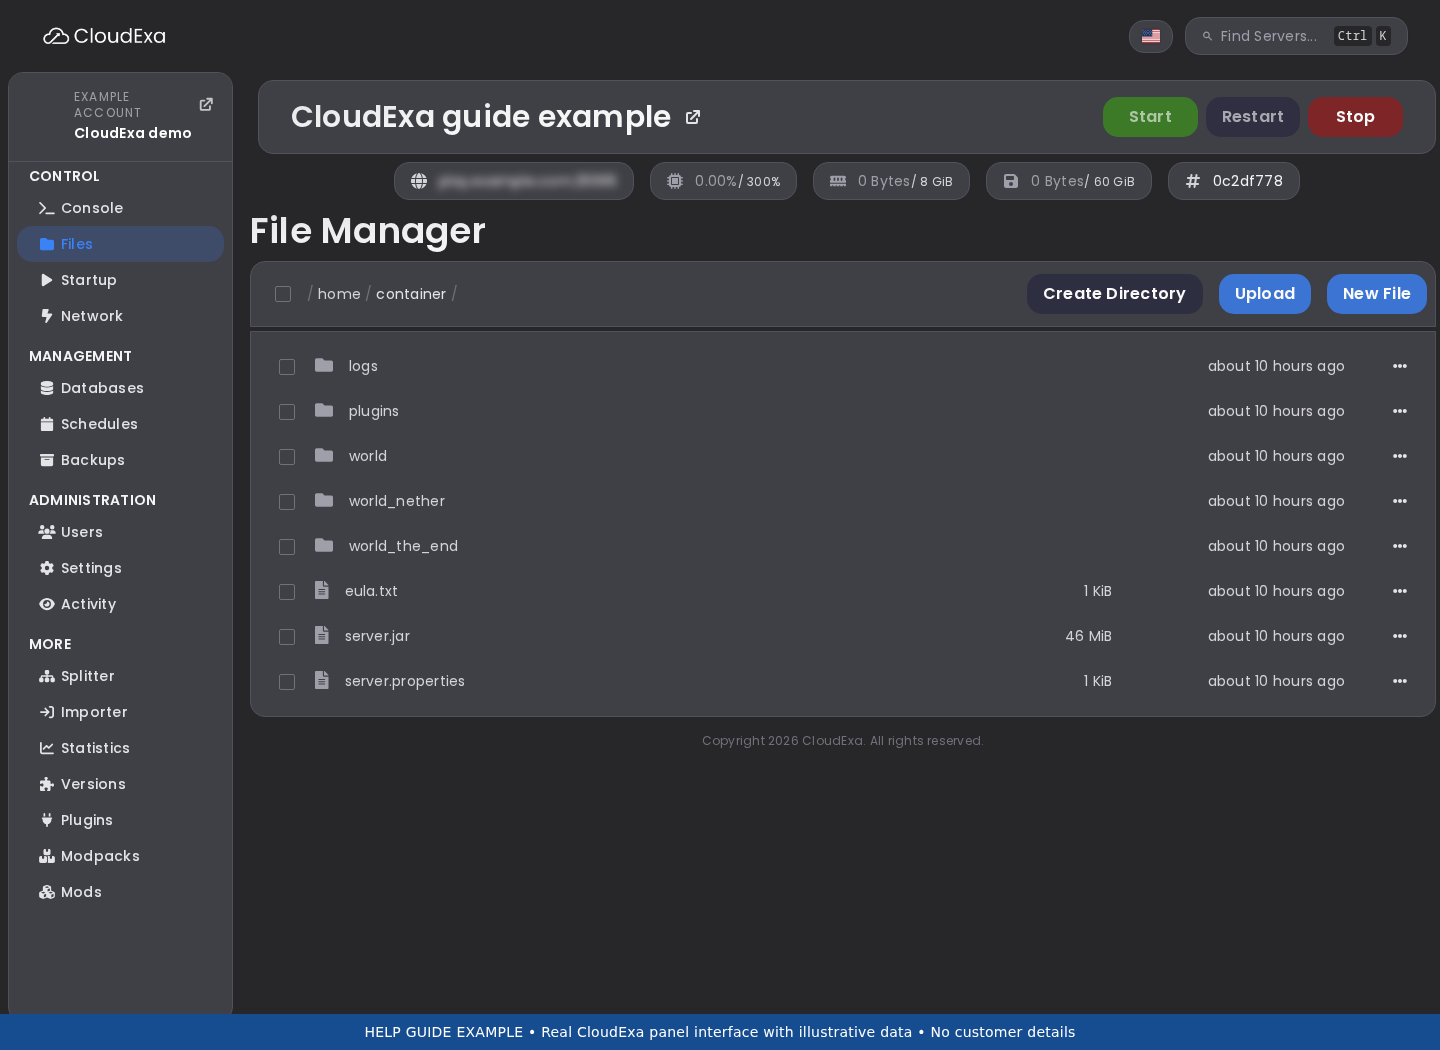
Check the result
The export should exist outside the original server and recreate a representative permissions state in an isolated test. Include a normal player, staff member and contextual rule in the acceptance checks. A file with a plausible name is insufficient evidence that the import process will work.
If the result is wrong
If the export is incomplete or the import differs, retain the working production storage and investigate the version or import error. Do not empty database tables or overwrite the original export to retry. Reverting a storage cutover requires knowing which instance accepted newer edits after the checkpoint.
References and related help
- LuckPerms maintainer reference
- LuckPerms maintainer reference
- Create Minecraft ranks and inheritance with LuckPerms
- Trace a denied Minecraft command with LuckPerms verbose
Find an inheritance cycle before it complicates a rank change
Groups should have a clear inheritance direction. Inspect a suspected cycle before adding another parent that could make permission results difficult to explain.
Follow the procedure
- List the affected groups and write down the intended hierarchy in plain language. Separate staff, donor and event roles when they serve different purposes.
- Inspect each group’s parents through a fresh web-editor session or the parent info command. Follow every inherited edge in the part of the hierarchy you plan to change.
- Look for a route that returns to the starting group. A relationship such as helper inheriting moderator while moderator inherits helper is a design error.
- Choose the one parent edge that contradicts the intended hierarchy and record its exact contexts. Remove that edge alone in a test copy or controlled session.
- Compare effective permissions for a member of each affected group. Pay attention to negative nodes and metadata priorities as well as command access.
- Apply the reviewed edge removal and keep the new hierarchy diagram with the staff record. Adding a track does not repair or replace group inheritance.
Check the result
Each group should inherit from the intended lower-level parents without a path back to itself. Test a representative ordinary account at each affected rank. Confirm that a helper still has basic player features but does not gain the higher rank’s administration commands.
If the result is wrong
If an expected feature disappears after removing the cycle, locate the specific node and put it in the appropriate parent group. Restore the saved edge only as a temporary recovery step if needed. Avoid compensating with a broad wildcard, which can conceal the hierarchy problem while granting unrelated access.
References and related help
- LuckPerms maintainer reference
- LuckPerms maintainer reference
- LuckPerms maintainer reference
- Create Minecraft ranks and inheritance with LuckPerms
- Trace a denied Minecraft command with LuckPerms verbose
Keep default-player permissions separate from staff inheritance
A default group shared by every player should contain only ordinary-player access. Audit it before moving common commands into a convenient but overpowered staff parent.
Follow the procedure
- Choose two test accounts: an ordinary player and a limited staff member. Record their current parent groups and a small list of actions each should perform.
- Inspect the default group’s direct permissions and parents. Look for moderation, bypass, administrative or broad wildcard nodes that ordinary players do not need.
- For each suspicious node, identify the plugin feature it controls and who actually needs it. Do not remove unknown nodes without checking their documented behaviour.
- Move one staff-only grant into the appropriate staff group during a controlled change, preserving its old value and contexts in the change record.
- Test the ordinary account for denial and the staff account for allowed access. Also confirm ordinary commands still work for both accounts through the intended inheritance.
- Continue in small groups of related nodes. Keep an explicit list of the base player features so future administrators can add permissions without using a staff group as a shortcut.
Check the result
Ordinary players should retain useful player commands and lose staff-only features. Staff should receive those features from their reviewed role. Test an actual action such as a harmless read-only staff command, not an operator account whose default permission behaviour can hide mistakes.
If the result is wrong
If a common player action fails, restore only that action’s required node to the base role after checking documentation. Avoid restoring all removed grants at once, because that also restores the unsafe ones. Use the recorded baseline to distinguish an intended denial from an accidental loss of normal access.
References and related help
- LuckPerms maintainer reference
- LuckPerms maintainer reference
- LuckPerms maintainer reference
- Create Minecraft ranks and inheritance with LuckPerms
- Trace a denied Minecraft command with LuckPerms verbose
Diagnose LuckPerms edits that reach one backend but not another
Follow the procedure
- Identify one affected UUID, one node and two backends with different results. Record the exact time and the LuckPerms command prefix used for the original edit.
- Inspect each instance’s configured storage method and database identity without exposing credentials. Check whether both instances are meant to share the same data store.
- Compare server contexts and the saved node’s scopes. Different effective results can be correct when the permission has a server or world context.
- Review LuckPerms startup and messaging errors on the stale backend. A failed database connection and a missing update notification require different repairs.
- After confirming storage is healthy, use the release’s documented synchronization command on the relevant instance. Re-check the exact node and actual player action.
- If the problem recurs, repair the mismatched storage or messaging configuration during a planned window. Keep one authoritative permission policy rather than duplicating direct user grants.
Check the result
Both intended instances should show the same stored node while evaluating their own contexts correctly. Reconnect the player and test a new edit in a controlled role to confirm synchronization continues working. Record whether the issue was storage identity, connectivity, messaging or legitimate contextual behaviour.
If the result is wrong
If synchronization reports an error, preserve the logs and do not switch database settings by guesswork. Restore a recently changed configuration from its recorded baseline. A rank export is useful evidence, but importing it over a live shared database can overwrite newer changes and should not be the first diagnostic step.
References and related help
- LuckPerms maintainer reference
- LuckPerms maintainer reference
- LuckPerms maintainer reference
- Create Minecraft ranks and inheritance with LuckPerms
- Trace a denied Minecraft command with LuckPerms verbose
Check a player UUID before changing LuckPerms account data
A name change or authentication change can make a familiar username point at unexpected permissions. Confirm identity before moving ranks between account records.
Follow the procedure
- Ask the player which authenticated account they use and when the issue started. Keep account evidence private and do not request their login password.
- Use the LuckPerms user information command and server logs to record the UUID associated with the current connection. Compare it with the account record you intend to change.
- Check whether a proxy, Floodgate or a recent online-mode change altered identity handling. Do not change authentication settings merely to make two records look alike.
- Inspect both relevant records read-only and record their groups and direct nodes. A stale username in a data file is not sufficient evidence that the records belong to one person.
- If an identity migration is required, prepare an isolated test and a complete permissions export. Follow the documented account migration procedure for the actual authentication system.
- Apply a minimal approved membership correction only after ownership is established. Keep the old record until the broader player-data migration is understood and verified.
Check the result
The live connection should resolve to the confirmed UUID and receive only that account’s intended permissions. Test a normal reconnect and any proxy or Bedrock route the player uses. Keep inventory, homes, claims and punishment records in mind because those systems can use the same UUID independently.
If the result is wrong
If ownership or forwarding is unclear, stop the rank move and fix the identity path first. Do not copy an administrator’s permissions to an unverified name. Revert a mistaken direct grant by its exact node or parent entry, preserving both original account records for investigation.
References and related help
- LuckPerms maintainer reference
- LuckPerms maintainer reference
- Create Minecraft ranks and inheritance with LuckPerms
- Trace a denied Minecraft command with LuckPerms verbose
Remove a staff member from one LuckPerms track without clearing their account
Ending a staff role should remove staff membership while preserving unrelated player entitlements. Inspect the relevant track and parent list before performing the demotion.
Follow the procedure
- Record the player UUID, current groups and the staff track’s group order. Identify donor, event or builder groups that must remain outside this staff change.
- Inspect the user’s memberships on the staff track. Multiple staff parents or direct administrative nodes need an explicit review rather than a blind demotion.
- Use the documented track-specific parent removal or demotion operation appropriate to the intended destination. Avoid the generic user clear or parent set operations.
- Inspect direct user permissions and temporary staff memberships for remaining access. Remove only entries that belong to the departed staff role, preserving their context and values in the record.
- Ask the account to rejoin and test one former staff command plus one retained player entitlement. Check proxy-side roles if the server runs a network.
- Revoke separate panel, Discord or integration access through the appropriate system when it belongs to the same departure. LuckPerms alone does not control those accounts.
Check the result
The account should lose the reviewed staff commands and retain its normal player roles. Confirm denial on every relevant backend and on the proxy where applicable. A changed chat prefix does not prove administrative access has gone; direct permissions and a second group can still grant it.
If the result is wrong
If a retained feature disappears, restore the specific unrelated membership from the baseline. If staff access remains, inspect direct nodes and external permission systems before changing the entire default group. Keep the departure record private because it can contain account identifiers and information about staff access.
References and related help
- LuckPerms maintainer reference
- LuckPerms maintainer reference
- LuckPerms maintainer reference
- Create Minecraft ranks and inheritance with LuckPerms
- Trace a denied Minecraft command with LuckPerms verbose
EssentialsX tasks
Task guides and troubleshooting for EssentialsX. Check the installed release before changing configuration or data.
Give an EssentialsX rank a fixed home limit
Home allowances combine configuration and permissions. Define a small named allowance, then test its limit with an ordinary player before assigning it to a real rank.
Follow the procedure
- Record the intended home count and the affected rank. Check whether another homes plugin also handles the same commands before editing EssentialsX.
- Open the generated EssentialsX configuration and find the multiple-home allowance section. Preserve its indentation and add or adjust one named allowance using the installed release’s comments.
- Grant the relevant role
essentials.sethome.multipleand its matching named allowance permission. Do not grant the unlimited-home node to make the test pass. - Check the test player’s inherited permissions for another allowance or an unlimited bypass. Keep the player’s existing home files intact throughout the trial.
- Using a disposable test account, create named homes until it reaches the intended count. Try one additional home and confirm the server refuses it.
- Raise the real rank’s allowance after the trial. When reducing an allowance, tell existing players how surplus homes will behave rather than deleting their saved homes.
Check the result
The role should create the configured number of homes and receive a clear denial at the next attempt. Verify teleporting to existing homes too. Test a member of another rank to confirm that the named allowance changed only the intended role and did not alter the default player limit.
If the result is wrong
If the player exceeds the limit, inspect inherited unlimited or higher-limit permissions and command ownership. If no additional homes are allowed, check the base multiple-home permission and spelling of the allowance name. Revert the configuration entry and its matching grant together; leave saved home data untouched.
References and related help
- EssentialsX maintainer reference
- EssentialsX maintainer reference
- Set up EssentialsX commands and player permissions
- Find Minecraft logs and send useful troubleshooting details
Restrict one EssentialsX warp to an approved player group
A staff or event warp should be usable only by its intended audience. Check per-warp permissions and test the destination without giving the group permission to create or delete warps.
Follow the procedure
- Choose an existing safe warp and record its exact name. Check that the arrival position has solid ground and does not expose a private staff area.
- Inspect the EssentialsX configuration’s per-warp-permission option. Save the previous setting because enabling this policy can affect every existing warp.
- List the public warps that ordinary players must keep using. Prepare the required individual permissions for those destinations before changing a live server’s policy.
- Grant the intended role the base warp permission and the documented node for the selected warp. Keep warp creation, deletion and wildcard destination access separate.
- Test arrival with a group member and denial with a normal player outside the group. Repeat for a previously public warp to detect an accidental loss of normal travel.
- Confirm menu buttons and aliases use the same restricted command path. A menu that runs the teleport as console may bypass the player’s intended permission check.
Check the result
The approved group should reach the selected warp while other ordinary players cannot use either the command or its menu shortcut. Existing public warps should remain usable by their intended audience. Check the actual teleport and destination rather than relying only on whether the warp appears in a list.
If the result is wrong
References and related help
- EssentialsX maintainer reference
- EssentialsX maintainer reference
- Set up EssentialsX commands and player permissions
- Find Minecraft logs and send useful troubleshooting details
Test EssentialsX teleport delay and movement cancellation
A teleport delay gives players time to cancel an accidental journey. Test the delay and movement behaviour with a controlled pair of accounts before changing an active PvP server.
Follow the procedure
- Write down the intended delay in seconds and which teleport commands should use it. Separate the warm-up delay from the cooldown between completed teleports.
- Inspect the teleport delay and related cancellation comments in the generated EssentialsX configuration. Record the previous values rather than copying an old configuration from another server.
- Check the test account for teleport-delay and cooldown bypass permissions. An operator account is unsuitable for measuring the ordinary player experience.
- Apply one delay change during a quiet period using a controlled restart or the plugin’s documented configuration reload. Avoid reloading the whole server.
- Issue a request-based teleport between consenting test players. First stand still to measure completion; then repeat while moving to check the documented cancellation behaviour.
- Try the affected home or warp command too. Record which commands share the same delay so your player-facing rules describe the behaviour people will experience.
Check the result
A stationary ordinary player should complete the teleport after the intended wait, and the tested cancellation action should interrupt it according to the installed release. Check the arrival location and any charged cost as well. A delay message without a completed safe arrival does not prove the whole teleport flow works.
If the result is wrong
If teleporting is immediate, inspect bypass permissions and command ownership before increasing the delay again. If players cannot complete a teleport while standing still, check external combat or movement plugins. Restore the recorded delay and retain the logs from the failed controlled test.
References and related help
- EssentialsX maintainer reference
- EssentialsX maintainer reference
- Set up EssentialsX commands and player permissions
- Find Minecraft logs and send useful troubleshooting details
Add an EssentialsX cooldown to one utility command
A command-specific cooldown can limit repeated utility use without delaying unrelated player actions. Start with a single exact command and test both the wait and its bypass policy.
Follow the procedure
- Choose the command and a short trial duration. Identify whether EssentialsX or another plugin actually receives that command, including any player-facing alias.
- Find the command-cooldowns section in the EssentialsX configuration. Use the command name without its leading slash and preserve the YAML indentation.
- Add one exact entry such as
feed: 30for a thirty-second trial where that command is enabled. Avoid a wildcard that matches unrelated moderation commands. - Check that the test account lacks
essentials.commandcooldowns.bypassand any other relevant exception. Give it only the utility command permission it needs. - Run the command once, repeat before expiry, then try again after the cooldown. Test a similar command to confirm the rule does not match too broadly.
- If cooldowns must survive a restart, review the persistence option and perform a planned restart test. Record that expectation in the staff notes.
Check the result
The selected command should work, refuse an early repeat and work again after the configured interval. Test any alias players use and a command outside the rule. A permission denial is different from a cooldown response, so confirm that the player can execute the command once before timing the repeat.
If the result is wrong
If nothing changes, check YAML validation, the active configuration and command routing. If too many commands acquire a wait, remove the broad matching rule and use a specific entry. Restore only the edited cooldown item; do not reset the whole EssentialsX configuration or grant a bypass to every player.
References and related help
- EssentialsX maintainer reference
- EssentialsX maintainer reference
- Set up EssentialsX commands and player permissions
- Find Minecraft logs and send useful troubleshooting details
Resolve an EssentialsX command alias conflict without removing either plugin
Two installed plugins can claim the same short command. Find which implementation runs before changing aliases, because each implementation can have different arguments and permission rules.
Follow the procedure
- Reproduce the conflict with a harmless read-only or utility command on a test account. Record its output and the two plugins expected to handle it.
- Inspect both plugins’ documented command names and aliases. Where supported, test the namespaced form so you can distinguish a routing problem from a permission failure.
- Review EssentialsX disabled-commands and overridden-commands entries. Save their current values and check whether a server commands.yml alias also affects the command.
- Choose one authoritative implementation for the public short command. Keep a deliberate namespaced route for staff who need the other implementation.
- Apply the smallest documented routing change and restart in a planned window if command registration requires it. Do not remove a working data folder or plugin jar just to test ownership.
- Test the short command, any menu button and the explicit alternate route. Use an ordinary player and a limited staff account to compare the resulting permission checks.
Check the result
Each public command should reach the chosen implementation and follow that plugin’s intended permissions. Verify the actual effect and arguments, not just a help response. Existing menus or scripts may depend on the old implementation, so include their harmless test paths before announcing the change.
If the result is wrong
If the result still alternates, inspect duplicate aliases and startup registration messages. Restore the specific configuration or commands.yml entry you changed and restart if needed. Avoid adding a permission wildcard to make the newly selected implementation work, because that changes access as well as command routing.
References and related help
- EssentialsX maintainer reference
- EssentialsX maintainer reference
- Set up EssentialsX commands and player permissions
- Find Minecraft logs and send useful troubleshooting details
Check EssentialsX AFK kick exemptions for a staff role
An AFK kick policy can affect ordinary players and staff differently. Verify the timeout and exemption nodes with controlled accounts before changing the live player experience.
Follow the procedure
- Record the intended AFK indication time and kick time. Check whether another plugin or server setting also disconnects idle players so you can identify the actual cause.
- Inspect the AFK options in the generated EssentialsX configuration. Note their units and disabled-value behaviour for the installed release.
- Choose an ordinary test player and a staff test player. Inspect their inherited AFK-related permissions, especially any kick exemption granted through a broad staff parent.
- Use a short temporary trial window on a test server or quiet maintenance session. Leave both accounts idle under the same conditions and observe the messages and disconnect reason.
- Test a deliberate movement or activity action to confirm it resets the expected timer. Keep a record of what EssentialsX considers activity in your configuration.
- Restore the approved production timeout after the trial and keep only the intended staff exemption. Document the policy so an AFK disconnect is not mistaken for a crash.
Check the result
The ordinary account should follow the configured kick policy while an explicitly exempt staff role follows its reviewed exception. Compare timestamps and disconnect messages. A server that pauses when empty or another idle-kick component can change the observation, so identify which system issued the actual disconnect.
If the result is wrong
If every role avoids the kick, inspect inherited exemptions before shortening the timeout further. If staff are kicked unexpectedly, compare the exact exemption node with the official permission list. Restore the previous policy if the trial disrupts players; do not disable all idle protections without understanding the conflicting component.
References and related help
- EssentialsX maintainer reference
- EssentialsX maintainer reference
- Set up EssentialsX commands and player permissions
- Find Minecraft logs and send useful troubleshooting details
Limit EssentialsX nickname changes without granting formatting control
A nickname permission should not automatically allow impersonation or unrestricted formatting. Separate the ability to change a nickname from the permissions that add colours, length exceptions or other-player changes.
Follow the procedure
- Write down the intended nickname policy, including length, formatting and whether staff may change another player’s name. Identify any chat integration that displays account names separately.
- Inspect the installed EssentialsX nickname options and official permission list. Save the current values and note the exact nodes for the features you intend to permit.
- Grant a test role only the basic nickname permission. Remove test-only formatting or length bypass grants and check inherited parents for the same exceptions.
- Try a normal permitted nickname, an overlong name and a formatted name on a disposable account. Use names that cannot be confused with real staff members.
- Test tab completion, private messages and moderation history with the nickname active. Staff still need a reliable route to the authenticated account identity.
- Apply the reviewed grants and explain how players can remove a nickname using the installed command syntax. Keep staff impersonation handling separate from decorative formatting preferences.
Check the result
The role should set an allowed nickname and receive clear denials for features outside the policy. Check every display that players use, because TAB or a chat plugin can format names independently. The nickname should not prevent moderators from finding the real account associated with a report.
If the result is wrong
If colours or long names remain available, inspect inherited nickname bypass nodes and the rendering plugin’s own permissions. Reverse the exact test grants and restore the prior configuration values if legitimate names stop working. Do not erase player userdata or change account authentication to remove a display name.
References and related help
- EssentialsX maintainer reference
- EssentialsX maintainer reference
- EssentialsX maintainer reference
- Set up EssentialsX commands and player permissions
- Find Minecraft logs and send useful troubleshooting details
Give staff a read-only EssentialsX player-information role
A helper who answers support questions may need player information without punishment or inventory-edit access. Build the role around specific read-only commands and consider the privacy of their output.
Follow the procedure
- Choose the support questions the helper should answer. Distinguish public last-seen information from outputs that can reveal addresses, locations or other private account details.
- Review the official permission list for the chosen information commands. Note separate permissions for inspecting other players and for additional details.
- Grant only the selected nodes to a trial helper group. Do not use
essentials.*, operator status or an existing administrator parent as a shortcut. - Test the commands against a consenting account and inspect what the helper can see. Check that ordinary players outside the helper role still lack the private information commands.
- Try a harmless denied administrative action, such as changing another account’s state, to confirm the role did not inherit edit or punishment access.
- Write a short handling rule for private output. Helpers should provide redacted evidence to support rather than pasting player addresses or private account information into public chat.
Check the result
The helper should answer the approved support questions with the minimum required output and remain unable to modify another player. Verify the effective permission path through every parent group. A command that succeeds for an operator does not demonstrate the limited role’s behaviour or privacy exposure.
If the result is wrong
If the output includes more private data than the role needs, remove that command’s permission or use a less revealing documented command. Reverse any trial administrative grant immediately. Keep existing player records intact; the task is to restrict who can read them, not to delete evidence or hide a support issue.
References and related help
- EssentialsX maintainer reference
- EssentialsX maintainer reference
- Set up EssentialsX commands and player permissions
- Find Minecraft logs and send useful troubleshooting details
Recover from an accidental EssentialsX ignore setting
A player who cannot see another player’s private messages may have an ignore entry rather than a network fault. Check the account’s message preferences before changing chat plugins or resetting player data.
Follow the procedure
- Ask the affected players to reproduce one private message and record its time. Keep the message harmless and avoid collecting private conversation history.
- Check whether public chat, private messages and mail fail in the same way. A problem affecting one sender-recipient pair suggests a user preference or specific permission.
- Ask the recipient to inspect the installed EssentialsX ignore command help and their current ignore list using the documented syntax. Do not guess a userdata field name.
- Remove only the intended test sender from the ignore list, with the recipient’s agreement. Leave other blocked accounts untouched.
- Have the sender send a new message and ask the recipient to confirm receipt. Test the reverse direction too because each account can have its own ignore preferences.
- If the problem persists, inspect private-message toggle state and command ownership. Another chat or moderation plugin can intercept the same message command.
Check the result
The recipient should receive a new message from the unignored account while their other ignore choices remain unchanged. Check the actual client display rather than assuming a server success message proves delivery. Record whether the cause was an ignore entry, a message toggle or a different command provider.
If the result is wrong
If removing the entry does not help, restore it if the recipient still wants that account blocked. Investigate permissions and the active messaging plugin with a consenting test pair. Never clear the whole ignore list or expose private messages through a new staff spy permission simply to troubleshoot one failed conversation.
References and related help
- EssentialsX maintainer reference
- EssentialsX maintainer reference
- Set up EssentialsX commands and player permissions
- Find Minecraft logs and send useful troubleshooting details
Restrict EssentialsX repair commands to the intended tool policy
A repair benefit can cover more items than you intended if its bypass nodes are inherited. Test the base command and its additional permissions with disposable equipment before offering it to a rank.
Follow the procedure
- Decide whether the role may repair one held item, all inventory items or enchanted equipment. Treat each capability as a separate part of the policy.
- Inspect the EssentialsX repair command and permission reference for the installed release. Record any configuration restriction that affects the items used in the trial.
- Grant only the required basic repair node to a test group. Check parents for repair-all, enchanted-item and cooldown bypass permissions before measuring the result.
- Use damaged disposable equipment with known durability. Test the held item first, then a second inventory item to detect accidental all-item access.
- Repeat with a disposable enchanted item if the policy distinguishes it. Check any configured cost or cooldown with a small test balance and no valuable inventory.
- Publish the benefit only after the tested combinations match the written policy. Keep the rank’s repair permissions separate from item-spawn and inventory-edit powers.
Check the result
The role should repair only the approved equipment through the approved command form. Confirm durability changes on each test item and verify that disallowed combinations receive a denial. If a command takes payment, compare the balance and item result together so a partial failure does not pass the trial.
If the result is wrong
If too many items change, remove the specific additional repair permission and repeat with fresh disposable equipment. If an allowed item fails, inspect item restrictions and command ownership before granting broader access. Restore the earlier permission set if necessary; do not compensate players by spawning untracked replacement equipment during diagnosis.
References and related help
- EssentialsX maintainer reference
- EssentialsX maintainer reference
- EssentialsX maintainer reference
- Set up EssentialsX commands and player permissions
- Find Minecraft logs and send useful troubleshooting details
Review EssentialsX command-disabled entries after a plugin change
A command can remain unavailable after its replacement plugin is removed. Check the disabled-command policy and registration logs before assuming the EssentialsX permission system is broken.
Follow the procedure
- Identify the missing command and the plugin change that preceded the report. Record whether the player sees unknown command, no permission or a replacement plugin’s help.
- Inspect the EssentialsX disabled-commands list and any server-level alias. Save the exact entries; a similar command name can be unrelated.
- Confirm that the installed EssentialsX release actually provides the desired command. Read its command reference rather than relying on an alias remembered from another server.
- Remove only the obsolete disabled entry in a controlled change. If command registration needs a restart, schedule one and keep the existing userdata folder unchanged.
- Test the explicit command and its intended alias with a limited account that has the exact documented permission. Check a command that should remain disabled too.
- Update menus or instructions that still point at the removed plugin’s syntax. Keep one documented command owner so later plugin changes do not recreate the ambiguity.
Check the result
The intended command should register and execute through EssentialsX, while unrelated disabled commands remain unavailable. Confirm the effect, not merely the presence of an autocomplete suggestion. An alias can route to a different provider even when the base command appears correct in help.
If the result is wrong
If the command remains unknown, inspect startup errors and the installed module rather than changing more permission nodes. Restore the saved disabled entry if the old replacement still handles the command. Do not reinstall EssentialsX or regenerate its data folder to resolve a single registration policy entry.
References and related help
- EssentialsX maintainer reference
- EssentialsX maintainer reference
- Set up EssentialsX commands and player permissions
- Find Minecraft logs and send useful troubleshooting details
Test an EssentialsX jail location without trapping a real player
A jail destination needs a safe release path as well as a working detention command. Verify both with a disposable account before staff use it for real moderation.
Follow the procedure
- Review the jail command and permissions for your installed EssentialsX release. Choose a trial destination with solid ground and no dangerous blocks or inaccessible escape requirements.
- Create or inspect the named jail using the documented administrative command. Record the previous destination if you are changing an existing jail.
- Use a consenting disposable account with no valuable items. Ensure an administrator retains console access and knows the documented command for releasing that account.
- Apply a short test detention using the release’s command syntax. Check arrival, allowed actions and the effect of a reconnect while the trial remains active.
- Release the account and verify its destination, movement and normal command access. Test any return-location behaviour described by your installed configuration.
- Give the actual moderation role only the required jail-related permissions and write down the approved jail name. Keep emergency console access separate from routine moderator access.
Check the result
The account should arrive at the safe jail and return to usable normal play after release. A successful detention alone does not prove the configuration is ready. Confirm reconnect behaviour and a clean release before exposing the destination to real moderation cases.
If the result is wrong
If the account is stuck or arrives in an unsafe block, release it through console and restore the previous jail location. Inspect conflicting teleport, world-access or protection plugins before repeating. Do not delete the account’s userdata, use an uncontrolled kill command or move a real punished player as a test subject.
References and related help
- EssentialsX maintainer reference
- EssentialsX maintainer reference
- Set up EssentialsX commands and player permissions
- Find Minecraft logs and send useful troubleshooting details
Change the EssentialsX starting balance for new players only
A new-player allowance should not reset established accounts. Treat the starting balance as an onboarding rule and verify it with an account that has no existing EssentialsX economy record.
Before you start
EssentialsX economy settings affect player money and the plugins that use its economy service. Keep player UUIDs, the active provider and the exact EssentialsX build in your change record. Use a normal test account rather than an operator.
Work through the check
- Choose the intended allowance and record the balances of an established test player before changing anything.
- Open the generated EssentialsX configuration and locate starting-balance; compare its comment with the template for your installed release.
- Save the previous value, edit only the allowance, and apply it during a controlled restart rather than altering player-data files.
- Join with a genuinely new test identity, then rejoin with the established player and compare both balances.
What to compare
Use a genuinely new test identity on an isolated copy to check the first-join amount. Reconnecting an established player does not demonstrate how newly created economy accounts receive their initial money.
Confirm the result
The new player should receive the chosen allowance once. Existing players should retain their previous balances after joining again.
If the result differs
If an old account receives another allowance, investigate first-join reward plugins and command automation. If the new balance differs, confirm EssentialsX is the active economy provider and inspect other onboarding rewards.
Recover safely
Restore the previous starting-balance value if the policy is wrong. Correct only verified test transactions through supported economy commands; do not mass-reset user files to repeat the experiment.
Documentation and related help
Check the EssentialsX Economy maintainer documentation and EssentialsX Economy maintainer reference against your installed release before applying changes.
Set EssentialsX maximum and minimum money limits with a boundary test
Balance limits can affect deposits from shops, jobs and administrative adjustments. Check the limits around actual transactions before adopting a new ceiling or allowing a negative balance.
Before you start
EssentialsX economy settings affect player money and the plugins that use its economy service. Keep player UUIDs, the active provider and the exact EssentialsX build in your change record. Use a normal test account rather than an operator.
Work through the check
- Record the current max-money and min-money settings from the generated configuration and choose test values that do not affect live accounts.
- Use a staging copy and a test player near the proposed boundary; keep the player identity and original amount in your notes.
- Apply one permitted deposit and one transaction that would cross the ceiling, checking the response and resulting balance each time.
- If testing a negative minimum, also inspect the documented loan permission and test ordinary players separately from staff.
What to compare
Check a value just below the proposed boundary as well as the boundary itself. Document whether the provider rejects an excessive payment or handles the amount another documented way, without assuming silent clipping.
Confirm the result
Accepted payments should change balances once, and rejected boundary transactions should not consume items or deliver purchases without the matching charge.
If the result differs
A consumer may handle a failed deposit differently from the provider. Investigate its log and transaction result rather than assuming a displayed error guarantees no item moved.
Recover safely
Restore the old limits if any connected consumer handles boundaries incorrectly. Reconcile the controlled test amounts, and avoid lowering a live ceiling until you understand accounts already above it.
Documentation and related help
Check the EssentialsX Economy maintainer documentation and EssentialsX Economy maintainer reference against your installed release before applying changes.
Change the EssentialsX currency symbol without changing stored money
Players may confuse a new currency label with a conversion. A symbol change should leave the numeric account values alone and should not imply a real-world exchange rate.
Before you start
EssentialsX economy settings affect player money and the plugins that use its economy service. Keep player UUIDs, the active provider and the exact EssentialsX build in your change record. Use a normal test account rather than an operator.
Work through the check
- Record one whole-number and one fractional balance as displayed by the provider and an affected shop.
- Find currency-symbol and its related formatting comments in the generated EssentialsX configuration for your release.
- Change only the display symbol, keeping YAML quoting valid, then apply the change in a planned restart.
- Check the balance command, payment confirmation and one Vault consumer; inspect that consumer’s own formatter if its label remains unchanged.
What to compare
Compare a direct balance command and a shop message after changing the display. If only one changes, identify which plugin formats the remaining label instead of repeatedly editing the EssentialsX symbol.
Confirm the result
The numeric balances and transaction deltas should remain identical while the intended EssentialsX messages use the new symbol.
If the result differs
Recover safely
Restore the previous display setting if clients render the symbol poorly. Do not run conversion or balance-reset commands to fix a formatting inconsistency.
Documentation and related help
Check the EssentialsX Economy maintainer documentation and EssentialsX Economy maintainer reference against your installed release before applying changes.
Test an EssentialsX pay dispute using two controlled accounts
A payment complaint needs evidence from sender and recipient. Repeating a payment to see what happens can multiply the loss, so reproduce with small amounts and controlled identities.
Before you start
EssentialsX economy settings affect player money and the plugins that use its economy service. Keep player UUIDs, the active provider and the exact EssentialsX build in your change record. Use a normal test account rather than an operator.
Work through the check
- Confirm both player identities and record their balances using the active provider before the test.
- Read the installed command help for pay and check sender access, recipient acceptance settings and any configured minimum payment.
- Transfer a small exact amount once, retaining the confirmation or error text and the server timestamp.
- Read both balances again and check whether another plugin handles the same command name or a menu wraps the payment.
What to compare
Calculate the sender debit and receiver credit together for the same attempt. One player’s screenshot cannot establish whether a transfer reached another account, particularly when display names differ from login names.
Confirm the result
A successful transfer should debit the sender and credit the intended recipient by the documented amounts; no result should depend only on a cached scoreboard.
If the result differs
If a recipient blocks payments, distinguish that choice from a balance failure. If another economy plugin owns the command alias, use its documented help rather than assuming EssentialsX processed it.
Recover safely
Return the verified test amount through the supported provider command. For a real dispute, preserve logs and reconcile the actual transaction before awarding credit or rerunning it.
Documentation and related help
Check the EssentialsX Economy maintainer documentation and EssentialsX Economy maintainer reference against your installed release before applying changes.
Review EssentialsX worth prices before enabling item selling
An item-selling price can turn a renewable resource into a money generator. Evaluate a small set of sellable materials and their supply paths before exposing selling to every player.
Before you start
EssentialsX economy settings affect player money and the plugins that use its economy service. Keep player UUIDs, the active provider and the exact EssentialsX build in your change record. Use a normal test account rather than an operator.
Work through the check
- Back up worth.yml and list the materials you intend players to sell, noting farms, crafting recipes and existing server-shop buy prices.
- Compare each material name and worth entry with the format generated by your installed EssentialsX release.
- Trial the price with a non-operator account holding a counted stack and no valuable custom items.
- Run only the documented sell action for that test stack, then compare inventory quantity and balance against the expected unit value.
What to compare
Test exactly which inventory items the supported selling command selects before enabling it for players. Keep valuable enchanted tools outside the test inventory so a broad sale cannot consume them during diagnosis.
Confirm the result
The test should remove the intended quantity and credit the expected amount. Buying the same item elsewhere should not create a profitable repeatable loop.
If the result differs
If a custom or renamed item sells unexpectedly, review metadata handling and the affected command permission before offering bulk selling. Do not test sell-all with a real player’s mixed inventory.
Recover safely
Restore the previous worth entry and restrict the selling command if pricing is exploitable. Keep an audit of verified test credits instead of resetting the entire server economy.
Documentation and related help
Check the EssentialsX Economy maintainer documentation and EssentialsX Economy maintainer reference against your installed release before applying changes.
Explain an EssentialsX balance leaderboard that looks out of date
A balance leaderboard may lag behind the provider’s current account values. Establish whether the issue is the ranking display, the underlying balance or a different economy service.
Before you start
EssentialsX economy settings affect player money and the plugins that use its economy service. Keep player UUIDs, the active provider and the exact EssentialsX build in your change record. Use a normal test account rather than an operator.
Work through the check
- Choose two test accounts with known different balances, and record the active provider’s direct balance output.
- Read the installed EssentialsX help and configuration comments for balance ranking and excluded accounts before changing anything.
- Make one small documented balance adjustment on the test copy, then compare the direct result with the next leaderboard output.
- Check whether a separate scoreboard or hologram plugin supplies the displayed ranking, including its refresh and placeholder settings.
What to compare
Compare a known player’s direct balance with their expected ordering rather than judging the first page alone. Offline-player inclusion and cached ordering can differ from a live balance lookup.
Confirm the result
The direct balance should reflect the controlled adjustment. The leaderboard should eventually order the included accounts according to its documented refresh behavior.
If the result differs
Do not assume the richest visible account represents every account in storage. Offline identity records, exclusions and another plugin’s cached ranking can make separate lists disagree.
Recover safely
Remove the test adjustment through a supported command. Keep the old display settings if changing exclusions exposes accounts you intended to hide; do not rewrite player balances to force a ranking refresh.
Documentation and related help
Check the EssentialsX Economy maintainer documentation and EssentialsX Economy maintainer reference against your installed release before applying changes.
Trace an unexpected EssentialsX command charge
An action can cost money through EssentialsX command-costs, a shop menu or another plugin. Identify which component charges the player before changing the economy provider.
Before you start
EssentialsX economy settings affect player money and the plugins that use its economy service. Keep player UUIDs, the active provider and the exact EssentialsX build in your change record. Use a normal test account rather than an operator.
Work through the check
- Record the exact command or clicked menu action and the player balance before using it once.
- Inspect the EssentialsX command-costs section and compare the command name with the installed release’s format.
- Check the account’s effective permission for cost exemptions, then repeat with a normal test user and a staff test role.
- Review wrapper menus or scripted commands for a second charge and compare the total deducted amount with each configured cost.
What to compare
Check whether the player repeated the charged command or whether an alias invokes another command. Keep one command attempt per test so the total debit can be matched to a single action.
Confirm the result
One allowed action should produce only the intended charge. An exempt role should behave according to the documented permission without needing operator access.
If the result differs
If the debit occurs only through a menu, its action list may contain a separate payment. If the command fails but still charges, inspect that plugin’s failure handling before changing prices.
Recover safely
Revert the single command-cost entry or menu action you changed and refund only the reproduced excess. Preserve the original permission state; a blanket exemption can hide rather than solve duplicate charging.
Documentation and related help
Check the EssentialsX Economy maintainer documentation and EssentialsX Economy maintainer reference against your installed release before applying changes.
Back up EssentialsX money before a player-data migration
An economy migration needs a consistent record of the accounts that EssentialsX owns. Copying a few displayed balances cannot preserve player identities or the other data connected to those accounts.
Before you start
EssentialsX economy settings affect player money and the plugins that use its economy service. Keep player UUIDs, the active provider and the exact EssentialsX build in your change record. Use a normal test account rather than an operator.
Work through the check
- Confirm that Vault consumers are using EssentialsX economy, then list any separate databases or reward queues that can change balances.
- Schedule a quiet maintenance window, stop new transactions and create a completed game backup before copying the relevant EssentialsX data.
- Preserve the matching configuration, user identity records and plugin build; record a sample of balances for later reconciliation.
- Restore the checkpoint to a disconnected test server and compare the same UUIDs, then exercise a low-value debit and credit.
What to compare
Preserve player UUID mapping alongside the money data when changing authentication or proxy arrangements. A technically valid restore under different identities can make existing balances appear missing without actually deleting their records.
Confirm the result
The restored copy should show the recorded accounts and amounts before any live players or automated rewards connect to it.
If the result differs
If the copy produces new accounts, check authentication and UUID handling before continuing. Avoid connecting the test copy to live reward webhooks or a shared writable provider database.
Recover safely
Keep the original consistent checkpoint until the migration passes its account checks. If the new copy fails, reopen the original service with its matching data rather than importing partial balances.
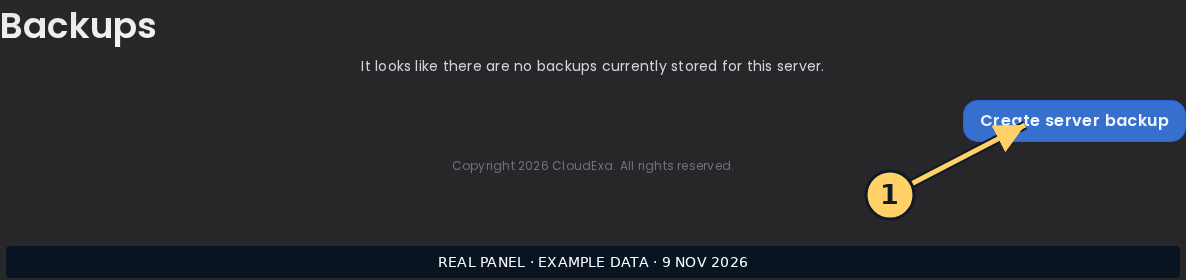
Documentation and related help
Check the EssentialsX Economy maintainer documentation and EssentialsX Economy maintainer reference against your installed release before applying changes.
LiteBans tasks
Task guides and troubleshooting for LiteBans. Check the installed release before changing configuration or data.
Verify a LiteBans temporary ban expires at the intended time
A temporary ban should end at the recorded expiry without staff manually clearing it. A short controlled trial catches duration mistakes before they affect a real appeal.
Follow the procedure
- Identify a disposable player account and record its UUID. Check
/checkban PLAYERfirst so the trial cannot replace an existing disciplinary restriction. - Read the duration formats supported by your installed release. Use minutes for this test; a month and a minute have different suffixes and should never be inferred from appearance.
- Issue
/tempban PLAYER 2m Duration verificationfrom an authorized staff account. In the server console, omit the leading slash. Record the punishment ID and displayed end time. - Try joining before expiry and retain the refusal message privately. Confirm the displayed reason belongs to this trial rather than a proxy or another ban plugin.
- Wait beyond the recorded expiry, then repeat
/checkban PLAYERand join through the normal public address. Check history separately to confirm the expired record is retained. - If testing ends early, reverse this specific trial by its punishment ID using the documented unban syntax. Record that staff reversal separately from a natural expiry.
Check the result
The account is blocked during the trial and allowed afterward, while its historical record remains visible to authorized staff. Compare the server time, displayed expiry and actual successful connection rather than assuming a delayed client retry means the ban still exists.
If the result is wrong
If the account remains blocked, inspect the active punishment and its server scope before changing anything. Another account-based or IP restriction can survive this expiry. Do not prune history or reset the database to remove a single trial; reverse only the identified record.
References and related help
- LiteBans maintainer reference
- LiteBans maintainer reference
- Configure LiteBans moderation and preserve punishment history
- Connect a Minecraft plugin to a MySQL database
Test whether a LiteBans mute covers a private-message command
A mute may stop public chat while another plugin still accepts private messages. Test the exact command route your players use instead of treating every chat-like feature as equivalent.
Follow the procedure
- List the public and private message commands available on this server, including namespaced aliases and proxy commands. Identify which plugin handles each route.
- Prepare two consenting test accounts without mute bypass permissions. Check the sender’s existing mute status and save the relevant LiteBans configuration before editing its command controls.
- Apply a short
/tempmute PLAYER 2m Message-route trialto the sender. Record the punishment ID, scope and expiry; keep the recipient account unrestricted. - Try ordinary public chat, then the actual private-message command and its documented aliases. Record whether the server rejects the command or the recipient receives the text.
- If an unintended route remains open, use the installed release’s documented muted-command configuration to cover that specific route. Check proxy-owned commands in the proxy configuration too.
- Repeat the same messages after applying the supported configuration change and after the mute expires. Confirm normal private messaging returns without additional staff intervention.
Check the result
During the mute, each command covered by your moderation policy should be rejected and the recipient should receive no message through those routes. After expiry, both public chat and the approved private-message command should work. A blocked public message alone is insufficient evidence.
If the result is wrong
If the test still leaks messages, inspect command ownership and aliases before adding broader restrictions. A backend cannot necessarily block a command intercepted by the proxy first. Remove only the trial mute when finished and restore the specific configuration edit if it blocks unrelated player commands.
References and related help
- LiteBans maintainer reference
- LiteBans maintainer reference
- Configure LiteBans moderation and preserve punishment history
- Connect a Minecraft plugin to a MySQL database
Build a LiteBans appeal-review role without punishment access
An appeal reviewer often needs punishment history but should not be able to ban, delete evidence or inspect players’ IP history. Separate those capabilities before assigning the role.
Follow the procedure
- Choose the exact records reviewers need: a player’s history, current ban status and perhaps the staff executor’s history. Keep account linkage and IP investigations outside this role.
- Look up each command’s permission in the installed LiteBans permissions reference. Grant the specific read permissions through your permission manager rather than assigning a broad administrative node.
- Use a non-operator test reviewer with only the proposed group. Query
/history PLAYERand/checkban PLAYERfor an approved trial record, then compare the output with an administrator’s view. - Try a harmless permission-denial check for a punishment or history-deletion command without supplying a real player target. Confirm the reviewer cannot invoke the protected operation.
- Check whether staff-history and notification permissions expose more information than expected. Limit silent notifications and avoid granting IP-history access simply to make one command work.
- Write down the review procedure: collect the punishment ID, reason, executor and timestamps privately, then pass any reversal request to the authorized moderation role.
Check the result
The reviewer can inspect the approved evidence and cannot create punishments, erase records or retrieve unnecessary network identifiers. Verify permissions with the actual reviewer account, since an administrator’s successful history query does not demonstrate a restricted role works.
If the result is wrong
If a history command is denied, identify its documented permission and inherited context rather than adding a wildcard. If sensitive information appears unexpectedly, remove the new grant immediately and retest a clean session. Keep the underlying punishment history intact while correcting the role.
References and related help
- LiteBans maintainer reference
- LiteBans maintainer reference
- Configure LiteBans moderation and preserve punishment history
- Connect a Minecraft plugin to a MySQL database
Check a LiteBans moderator’s maximum punishment duration
A junior moderator’s temporary-ban permission should not accidentally allow permanent or excessive bans. Check the release-specific duration limits with a short authorized test before granting the role widely.
Follow the procedure
- Read the maximum-duration permission section for your installed LiteBans build and record the intended limit in ordinary language. Distinguish the right to issue a command from the limit on its duration.
- Inspect the moderator group’s inherited permissions for unrestricted ban access, permanent-punishment rights or competing limit entries. A restrictive-looking direct node may not describe the effective result.
- Create a non-operator test moderator and a separate disposable target. Ensure the target has no active punishment and that a senior administrator can reverse this trial.
- Apply the documented limit permission, then try one short duration within policy. Record the accepted duration and reverse that specific trial punishment after checking its output.
- Test a duration above the policy limit using the same disposable target. Confirm the command is refused or constrained exactly as the installed reference describes; do not assume it silently clamps the value.
- Check permanent punishment and other punishment types separately. A temporary-ban duration limit does not automatically establish the policy for mutes, warnings or IP-based restrictions.
Check the result
The restricted moderator can perform the approved short action but cannot exceed the chosen policy or issue an unintended permanent restriction. Save the effective permission result and command response as a staff training example without publishing the target’s identifiers.
If the result is wrong
If the upper-limit test succeeds unexpectedly, remove the trial role’s punishment access while investigating inherited permissions. Do not experiment on a real disciplinary case. Reverse only trial records, then use the exact limit syntax from the matching release before testing again.
References and related help
- LiteBans maintainer reference
- LiteBans maintainer reference
- Configure LiteBans moderation and preserve punishment history
- Connect a Minecraft plugin to a MySQL database
Find which plugin handled a ban command on a mixed-plugin server
When multiple moderation plugins register the same command, a successful-looking response can update the wrong punishment system. Identify the command owner before correcting any player record.
Follow the procedure
- Record the exact command, execution location and response that caused confusion. A command entered through Velocity may be handled before a Paper backend sees it.
- Inspect the installed plugin lists on the proxy and relevant backend. Compare command aliases in their maintainer documentation and the server’s command registration information.
- Query LiteBans directly using a read-only status or history command for the affected account. Compare the record, executor, timestamp and punishment ID with the message staff originally received.
- On a disposable account, use the documented plugin-qualified command where your platform supports it. Confirm the selected namespace actually resolves before issuing any trial punishment.
- Review custom command aliases and command-routing plugins. Adjust only the ambiguous alias or staff procedure, keeping the original punishment records unchanged during diagnosis.
- Repeat an approved trial through the same public route staff normally use. Record the correct command form in the moderation handbook, including whether it runs on the proxy or backend.
Check the result
A staff command should create a record in the intended system, and the corresponding read-only query should identify that same action. The public join result and the record must agree. A console response alone cannot establish which database was changed.
If the result is wrong
If two systems contain active restrictions, have an authorized moderator review each record independently. Do not remove both or disable a moderation plugin merely to permit a login. Restore the old alias if routing changes affect unrelated commands and retain the diagnostic timestamps.
References and related help
- LiteBans maintainer reference
- LiteBans maintainer reference
- Configure LiteBans moderation and preserve punishment history
- Connect a Minecraft plugin to a MySQL database
Verify the server scope of a LiteBans network punishment
A local punishment and a network-wide punishment can produce different results when players change backends. Confirm the scope explicitly so staff do not overreach or leave an unintended bypass.
Follow the procedure
- List the backend names shown by
/litebans serversand identify the public connection path. Use the names LiteBans recognizes rather than a hosting-panel label that may differ. - Choose a test account and inspect existing bans or mutes before starting. Record which backends should enforce this trial and which should remain usable.
- Read the Server Scopes documentation linked from the commands reference. Confirm the installed configuration’s default scope and the permission required to choose a different scope.
- Issue an approved short trial with an explicit
server:NAMEargument using a recognized backend name. Record the resulting punishment ID and reported scope. - Test through the proxy on the selected backend and a second backend. Repeat the relevant action, such as joining or sending chat, rather than relying only on a server-switch message.
- Reverse the specific trial and verify normal access returns on both backends. Document when staff should choose local scope and when a separately authorized global action is appropriate.
Check the result
Only the intended backend scope should enforce the local trial, and the punishment record should display the expected scope. A global trial requires its own approval and check. Shared database connectivity by itself does not prove all punishments are network-wide.
If the result is wrong
If scope results differ from policy, inspect server names, plugin placement and shared database configuration. Avoid broad global bans as a diagnostic shortcut. End the trial by its exact record and keep the observed backend results before adjusting default scopes.
References and related help
- LiteBans maintainer reference
- LiteBans maintainer reference
- Configure LiteBans moderation and preserve punishment history
- Connect a Minecraft plugin to a MySQL database
Investigate a LiteBans database connection failure without losing history
A database connection error does not mean punishment history is gone. Preserve the existing database and inspect connectivity before changing storage type or allowing players around active restrictions.
Follow the procedure
- Capture the first LiteBans startup error and its timestamp from the game console. Remove passwords and connection tokens before sharing the log with support.
- Run the read-only
/litebans infocommand when available and record the reported pool state. Distinguish authentication failures from DNS, connection timeout and schema errors. - Compare the configured database host, port, database name and username with the panel’s database details. Check which source host is allowed to connect without opening the database publicly.
- Have the database administrator verify service health and the existing schema. Take a consistent database backup before any migration or schema repair, including the current configuration.
- Correct only the identified connection detail. Use the installed release’s supported reload procedure, noting that
/litebans reloadreconnects the database and can briefly change availability. - Query a known historical record and a current trial restriction after reconnecting. Confirm both persisted data and current enforcement before marking the incident resolved.
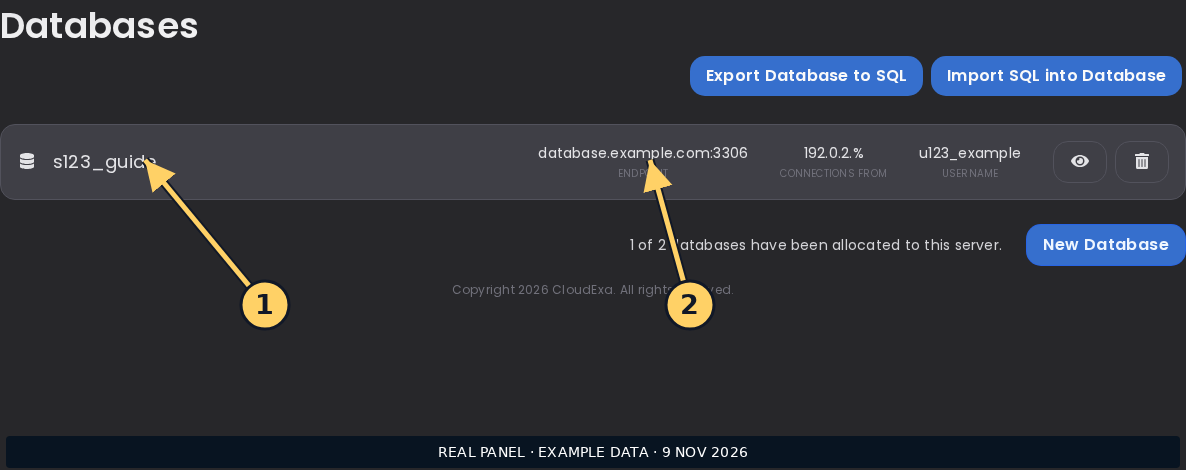
Check the result
The original database should reconnect and return known punishment records with their previous identifiers and dates. A clean startup alone is insufficient if the plugin has accidentally connected to a new empty database. Compare several established records before resuming routine moderation.
If the result is wrong
If the connection still fails, restore the prior connection configuration and retain the first error for support. Do not reset tables, switch to an empty database or run an upgrade command repeatedly without a matching recovery plan. Database errors require preserving evidence, not erasing it.
References and related help
- LiteBans maintainer reference
- LiteBans maintainer reference
- Configure LiteBans moderation and preserve punishment history
- Connect a Minecraft plugin to a MySQL database
Reverse one appealed LiteBans punishment while preserving the audit trail
An accepted appeal usually needs a targeted reversal, not removal of the entire punishment history. Use the record identifier to avoid lifting a different restriction on the same account.
Follow the procedure
- Confirm the appeal decision and the player UUID through your normal ownership process. Collect the relevant punishment ID, type, reason and issuing staff member privately.
- Use
/history PLAYERand the matching active-status command to distinguish the appealed record from expired warnings or later punishments. Check whether the restriction is account-based or IP-based. - Confirm that your staff role can reverse this record under the installed permissions policy. Some roles can reverse their own actions but cannot reverse another moderator’s punishment.
- Use the documented unban, unmute or unwarn command with the specific punishment ID. Avoid a delete flag: reversal and destruction of historical evidence are different operations.
- Read the resulting history entry and active status again. Ask the player to test the previously blocked action through the normal connection route.
- Add the appeal decision and reversal identifier to your private moderation record. Keep unrelated active restrictions in place until separately reviewed by an authorized moderator.
Check the result
The appealed restriction is inactive, the historical action remains available for review, and the player can perform the action that decision permits. If another independent restriction still blocks access, explain that separately rather than claiming the first reversal failed.
If the result is wrong
If the wrong trial record was targeted, stop and have a senior moderator assess the exact action before issuing another punishment. Do not use staff rollback or history pruning for a single appeal. Retain command output and timestamps so the correction remains accountable.
References and related help
- LiteBans maintainer reference
- LiteBans maintainer reference
- Configure LiteBans moderation and preserve punishment history
- Connect a Minecraft plugin to a MySQL database
AdvancedBan tasks
Task guides and troubleshooting for AdvancedBan. Check the installed release before changing configuration or data.
Test an AdvancedBan time layout before staff use it
A time layout can increase a punishment duration as a player repeats an offence. Test the progression on isolated records before using a layout name in a real moderation command.
Follow the procedure
- Open the installed AdvancedBan configuration and its maintainer’s Features reference. Identify the exact time layout and reason shortcut staff intend to use; syntax varies with the release.
- Write the expected first, second and later durations in a small table. Include the outcome after the final configured entry, since that is where an unexpected long punishment can appear.
- Use an isolated staging copy with disposable account records and no connection to the production punishment database. Copy the relevant layout configuration without real player information.
- Issue the documented temporary punishment using the layout and inspect its actual expiry. Reverse the trial restriction while retaining the history needed for the next progression test.
- Repeat the offence on the same test account and compare each duration with the table. Separately test a new account to confirm progression is not incorrectly shared.
- Apply only the reviewed layout change to production using the release’s supported configuration procedure. Give staff the exact approved reason shortcut and escalation policy.
Check the result
Each trial should produce the documented duration for its position in the progression. Reversing a punishment may interact with progression differently from deleting history, so record the exact sequence used. Staff should be able to predict the next action before applying it.
If the result is wrong
If the layout yields a surprising duration, restore its previous definition and keep the staging records for diagnosis. Do not reset production history to make a layout appear correct. Check spelling, layout selection and prior offences before changing the escalation policy.
References and related help
- AdvancedBan maintainer reference
- AdvancedBan maintainer reference
- Set up AdvancedBan with controlled moderation tests
- Find Minecraft logs and send useful troubleshooting details
Check AdvancedBan warnings without accidentally escalating a real player
Warning tests can trigger escalating moderation rules. Use disposable records and inspect the warning policy first so a demonstration cannot accidentally ban an established player.
Follow the procedure
- Read the installed warning and temporary-warning configuration. Identify any thresholds, time layouts or actions that depend on accumulated history rather than the latest warning alone.
- Create a test environment with independent punishment storage. Choose a clearly labelled test account whose prior records can be inspected without mixing them with real player cases.
- Use the documented history or warning-list command to establish the account’s starting position. Record active warnings separately from expired or reversed entries.
- Issue one controlled warning with an unmistakable trial reason. Inspect its displayed duration, identifier and any action AdvancedBan reports as a consequence.
- Repeat only the number of warnings needed to verify the chosen threshold. Stop if an unexpected action occurs; do not continue adding warnings merely to see whether the system eventually behaves.
- Review the staff instructions against the observed result. Document when a warning is temporary and what staff must check before applying another warning to an existing account.
Check the result
The warning count and any configured escalation should agree with your written policy in the isolated test. A successful warning command proves only that a record was created; it does not establish that the next warning or an expiry will produce the intended result.
If the result is wrong
If the threshold is wrong, revert the warning-layout edit and inspect the complete trial history. Use targeted documented reversals for trial restrictions. Avoid deleting real punishment data or changing a customer’s warnings to manufacture a clean test case.
References and related help
- AdvancedBan maintainer reference
- AdvancedBan maintainer reference
- Set up AdvancedBan with controlled moderation tests
- Find Minecraft logs and send useful troubleshooting details
Give an AdvancedBan helper access to history without ban powers
A support helper may need to explain a moderation message without being allowed to punish players. Build the role from the specific history commands your installed AdvancedBan version exposes.
Follow the procedure
- List the information helpers actually need, such as an account’s punishment reason and expiry. Exclude IP-based account discovery and administrative database operations unless they are separately required.
- Find the exact read-command permissions in the Commands and Permissions reference. Keep a note of each node and whether it applies on the proxy or Bukkit server.
- Assign those nodes to a test group in your permission manager. Remove operator status from the test helper and inspect inherited groups for accidental moderation privileges.
- Query an approved disposable account’s history using the installed command syntax. Check whether the output includes hidden reasons or other information that should remain with senior staff.
- Test denial of a punishment command without supplying a live target. Confirm the helper cannot remove records, reload the plugin or issue bans through an alternative alias.
- Provide a support procedure that records the punishment identifier and passes appeals to authorized moderators. Keep screenshots of real player history out of public help channels.
Check the result
The helper should be able to retrieve the approved history and explain its status while failing administrative permission checks. Verify using the helper account itself. A console query or operator account cannot demonstrate that the restricted group is correctly configured.
If the result is wrong
If access fails, inspect the command’s documented node and execution platform before granting more permissions. If the role exposes too much, withdraw the new node and reassess the workflow. Do not solve a missing read permission by granting the plugin’s entire administrative permission tree.
References and related help
- AdvancedBan maintainer reference
- AdvancedBan maintainer reference
- Set up AdvancedBan with controlled moderation tests
- Find Minecraft logs and send useful troubleshooting details
Check AdvancedBan storage before changing from local files to MySQL
A storage change can make existing punishments appear to disappear when the plugin simply reads an empty destination. Establish the supported migration route before switching the live connection.
Follow the procedure
- Identify the AdvancedBan version, current storage mode and number of known records. Save examples of an active restriction and an older historical entry for comparison.
- Read the matching installation and migration guidance. Confirm whether your release offers a documented importer; do not assume changing the storage setting transfers existing records.
- Arrange a consistent backup of the current punishment storage and configuration while writes are paused. Keep a separate copy of any destination database before testing a migration.
- Create an isolated server copy and an independent empty test database. Rehearse only the officially supported migration procedure and capture the complete startup output.
- Compare the known record identifiers, account identities, reasons and expiry times in the destination. Verify an active test restriction is enforced as well as visible in history.
- Schedule production work only after the rehearsal succeeds. Prevent staff punishment writes during the final copy and keep the previous storage available for a coordinated rollback.
Check the result
The destination should contain the same historical and active records, with a supported plugin startup and working enforcement. A database connection that succeeds but returns zero familiar records is not a completed migration. Confirm identity and time fields as well as counts.
If the result is wrong
If no supported migration path is documented for the installed release, retain the current storage and request maintainer guidance. Do not merge tables by guessed column names or restore only a plugin jar after schema changes. Roll back the matched configuration and storage together.
References and related help
- AdvancedBan maintainer reference
- AdvancedBan maintainer reference
- Set up AdvancedBan with controlled moderation tests
- Find Minecraft logs and send useful troubleshooting details
Lift one AdvancedBan restriction after an approved appeal
An appeal reversal should affect the intended punishment while leaving the player’s other records available. Review the record and command syntax before applying an unban or unmute.
Follow the procedure
- Confirm the account identity and the approved appeal decision privately. Record the punishment type, issuing moderator, reason and timestamp rather than relying on the latest chat screenshot.
- Inspect the account’s history and current restrictions with the documented read commands. Distinguish the appealed action from a later independent ban, mute or warning.
- Check the installed reversal command and permission. Use an identifier where that release supports it; otherwise confirm exactly how the account-based command chooses the active record.
- Execute the targeted reversal from the correct proxy or backend. Retain its response and ask the player to retry the previously restricted action through the usual public route.
- Read history and current status again. Confirm the appeal’s record is inactive while unrelated restrictions and historical evidence remain available.
- Attach the decision and reversal timestamp to your moderation case. Tell the player what was changed without exposing staff-only notes or another account’s network information.
Check the result
The selected restriction should cease enforcement and the audit trail should still explain the original action and its reversal. If access remains blocked by another system or restriction, identify that independently before making a second change. Do not assume every refusal belongs to AdvancedBan.
If the result is wrong
If the command targets an unexpected record, stop and ask a senior moderator to review the captured output. Avoid bulk unban, database edits or deleting the player’s entire punishment history. Correct the specific action with the release’s documented controls and preserve the case record.
References and related help
- AdvancedBan maintainer reference
- AdvancedBan maintainer reference
- Set up AdvancedBan with controlled moderation tests
- Find Minecraft logs and send useful troubleshooting details
Locate AdvancedBan correctly on a proxy network
A moderation command can run on a proxy or a backend, but those placements do not automatically share enforcement. Map the installed copies before troubleshooting a player who can bypass a restriction by switching servers.
Follow the procedure
- Draw the normal connection path from the public proxy to each backend. List where AdvancedBan is installed and which storage mode each copy uses.
- Read the official installation guidance for the platform actually running each copy. Bukkit and BungeeCord support does not establish compatibility with every proxy product or fork.
- Compare the configuration of each intended participating copy without sharing database credentials. Identify separate databases or local files that explain different player histories.
- Use read-only history queries for one approved test record on each execution platform. Record the command response and which plugin owns any overlapping ban alias.
- Test a short authorized restriction on a disposable account through the public route, then try the intended server-switch paths. Keep backend addresses protected rather than opening them for convenience.
- Choose a documented deployment design and make one planned correction at a time. Update staff instructions so they know where commands run and which services enforce them.
Check the result
The same intended moderation decision should be visible and enforced wherever your documented network policy requires it. Different histories on different copies reveal a placement or storage problem, not necessarily a broken command. Verify actual public login and switching behaviour after correction.
If the result is wrong
If the architecture is unsupported, leave existing restrictions intact while planning a supported setup. Do not duplicate plugin files blindly or point unrelated production copies at shared tables without documentation. Restore the previous placement if a trial causes command or startup conflicts.
References and related help
- AdvancedBan maintainer reference
- AdvancedBan maintainer reference
- Set up AdvancedBan with controlled moderation tests
- Find Minecraft logs and send useful troubleshooting details
SuperVanish tasks
Task guides and troubleshooting for SuperVanish. Check the installed release before changing configuration or data.
Test SuperVanish visibility with separate staff and player accounts
A vanished administrator seeing themselves normally does not prove ordinary players can see them. Use observers with different roles to verify the visibility rules you actually intend to enforce.
Follow the procedure
- Confirm you are using LeonMangler’s SuperVanish and record the version. Other similarly named projects have different settings and should not be configured from this procedure.
- Prepare a vanished staff account, an ordinary non-operator observer and a trusted staff observer. Inspect each observer’s effective
sv.seeand any layered visibility permissions. - Vanish the staff account using the installed command. Have the ordinary observer check the world, player list and tab display from the same server.
- Have the staff observer repeat those checks. Compare the result with your policy: some staff should see vanished colleagues while ordinary players should not.
- If using layered permissions, read the release’s level comparison rules and enabled setting. Assign only the intended level to each test role, then rejoin if the release requires refreshed state.
- Reappear and repeat the checks. Confirm all observers see the staff account normally again and the staff member has not retained an unintended invisible state.
Check the result
The ordinary observer should fail to see the vanished account through the tested in-game surfaces, while the authorized observer sees it only as policy permits. Record the two accounts’ roles with the result. Testing solely with an operator often masks the very problem you are investigating.
If the result is wrong
If ordinary players still see staff, check inherited visibility permissions and conflicting tab-list plugins before broadening vanish permissions. If staff cannot see colleagues, fix the observer role rather than granting it operator status. Revert the specific level change if it reverses the intended hierarchy.
References and related help
- SuperVanish maintainer reference
- SuperVanish maintainer reference
- Set up SuperVanish for a limited staff role
- Invite a teammate to your game server
Check whether a vanished SuperVanish moderator can pick up items
Follow the procedure
- Inspect the SuperVanish command list and item-pickup configuration for the installed release. Record the current staff state so the trial can restore it afterward.
- Choose a safe test area with no hoppers, valuable items or unrelated players nearby. Use a small named stack of ordinary blocks that can be counted easily.
- Vanish the test moderator and drop the blocks from a separate account. Observe whether the item entity disappears and whether the moderator’s inventory gains the stack.
- Use
/sv tipuif that command is supported by your installed release to toggle the vanished account’s pickup behaviour. Repeat with a fresh disposable stack. - Reappear, then verify normal pickup works as expected. Test another vanish cycle to learn whether the toggle persists or follows the configured default.
- Document the approved default and the command staff should use for exceptions. Keep item pickup separate from permissions to modify blocks or interact with inventories.
Check the result
If the result is wrong
If the result is inconsistent, repeat away from collection mechanics and inspect other vanish or inventory plugins. Restore the original pickup state after the trial. Do not clear the moderator’s inventory to solve the symptom; identify where the disposable items actually went.
References and related help
- SuperVanish maintainer reference
- SuperVanish maintainer reference
- Set up SuperVanish for a limited staff role
- Invite a teammate to your game server
Verify flight is safe when a SuperVanish moderator reappears
Reappearing in mid-air can expose a staff member to a fall if flight state changes unexpectedly. Check the transition above a safe platform before relying on vanish during moderation.
Follow the procedure
- Read the installed SuperVanish flight settings and the documented
sv.keepflypermission. Record other flight providers such as EssentialsX, creative mode or a lobby plugin. - Prepare a non-operator test moderator in the game mode used for normal investigations. Choose a low platform over water or another controlled landing area.
- Enter vanish, enable only the permitted flight route and rise a small safe distance. Reappear while an observer watches the movement state and any fall damage.
- Repeat with the role’s intended
sv.keepflyresult. A keep-flight permission affects this transition and should not be treated as proof that all flight commands are authorized. - Test landing, switching worlds and a fresh vanish cycle. Confirm that an unrelated flight plugin does not immediately overwrite the state after SuperVanish changes it.
- Publish a staff procedure requiring a safe landing before reappearing where flight cannot be retained. Keep emergency movement access limited to the appropriate staff role.
Check the result
The moderator should experience a predictable flight state on reappearance and have a safe way to return to the ground. Verify with the actual staff game mode and permissions. Creative-mode testing alone can conceal a survival-mode problem.
If the result is wrong
If flight is removed unexpectedly, stop airborne tests and return to the platform before editing permissions. Compare competing flight providers and the installed configuration. Restore the prior flight grant if the change enables unintended player flight; do not blanket-enable flight for all users.
References and related help
- SuperVanish maintainer reference
- SuperVanish maintainer reference
- Set up SuperVanish for a limited staff role
- Invite a teammate to your game server
Check silent chest inspection without changing container contents
A vanished moderator opening a chest may still create a visible lid movement or sound. Test the client-side effect separately from the right to read or change the container.
Follow the procedure
- Review the installed release’s silent-container support, including
sv.silentchestand any documented OpenInv or ProtocolLib dependency. Do not assume every inventory type behaves like a normal chest. - Place a disposable chest in a quiet test area and fill it with a counted set of unimportant items. Position an ordinary observer where both the lid and sound can be noticed.
- Use a non-operator moderator with only the intended vanish and silent-inspection permissions. Enter vanish and open the test chest without moving any items.
- Ask the observer whether the lid moved or a sound played. Close it and repeat from a second position; the moderator’s own client animation is not the observer’s evidence.
- Check a second supported container type only if your release documents it. Record dependency versions and startup errors if silence differs between container types.
- Confirm the original item count and reappear. Keep the staff instruction explicit: silent viewing does not authorize taking, replacing or modifying player possessions.
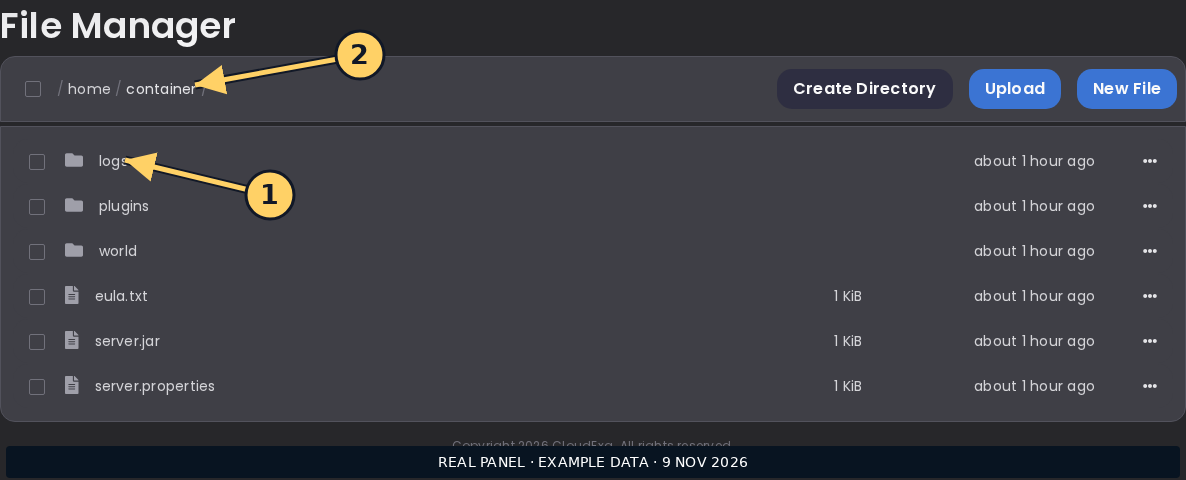
Check the result
The observer should see the documented silent behaviour for the tested container, while its contents remain unchanged. Report the exact container and dependency combination. One successful chest test does not establish support for every modded or plugin-provided inventory.
If the result is wrong
If the observer sees activity, inspect the documented dependency integration and permission result. Use the panel console to collect startup errors before changing versions. Restore the prior plugin combination if compatibility fails, and avoid testing by repeatedly opening real player storage.
References and related help
- SuperVanish maintainer reference
- SuperVanish maintainer reference
- Set up SuperVanish for a limited staff role
- Invite a teammate to your game server
Find a SuperVanish join or player-list information leak
A player may learn that a hidden moderator is online through a join message or another plugin’s player list. Check each source of information rather than treating entity invisibility as complete concealment.
Follow the procedure
- List the surfaces ordinary players can use: tab display, list command, join messages, server-switch notices and any public map or status integration.
- Prepare a staff account that is already vanished and an ordinary observer without visibility bypass. Record whether the installed settings preserve vanish state across reconnects.
- Reconnect the staff account through the normal public route. Have the observer record the exact message, list entry or notification that reveals the account.
- Identify which plugin produced that surface. Compare SuperVanish’s supported integrations and settings with the responsible tab, join-message or proxy plugin documentation.
- Make a narrow supported change and repeat the reconnect. Test both hidden joins and normal visible joins so fixing one does not suppress all useful player notifications.
- Check reappearance and subsequent departure too. Document any unsupported external status integration rather than promising that vanish hides all network activity.
Check the result
The tested ordinary-player surfaces should follow the intended vanish policy without suppressing unrelated users’ legitimate join and quit messages. Retain the source and exact text of any remaining leak. Entity hiding and public status reporting are different systems and require separate verification.
If the result is wrong
If a third-party integration still leaks the account, disable only its relevant disclosure feature or seek supported integration guidance. Do not expose staff permissions or plugin configuration publicly while demonstrating the issue. Revert the last message-format change if it hides normal player activity.
References and related help
- SuperVanish maintainer reference
- SuperVanish maintainer reference
- Set up SuperVanish for a limited staff role
- Invite a teammate to your game server
Remove vanish access from a staff role without leaving a hidden account
Removing a permission while an account is already vanished can leave confusing state. Reappear first, then verify the role can no longer enter vanish through commands or inherited access.
Follow the procedure
- Identify the departing staff account and the group supplying SuperVanish access. Record whether the player is currently vanished and whether it has any direct permission grants.
- Have the account reappear through the supported command, or use the documented administrative control. Confirm an ordinary observer sees the account before removing access.
- Remove only the intended
sv.useor layered-use grant through your permission manager. Check inherited groups and direct nodes rather than assuming a single group change is enough. - Rejoin with the account and attempt the normal vanish command. Verify denial without changing unrelated staff tools or player entitlements.
- Check automatic vanish-on-join behaviour and any alternate command aliases. A denied manual command does not prove an unrelated plugin cannot restore a hidden state.
- Review who still has observer permissions such as
sv.see. Removing the ability to vanish and removing the ability to see vanished colleagues are separate policy decisions.
Check the result
The account should be visibly present and unable to re-enter vanish through the tested routes. Normal player actions should remain available. Record the effective permission result and the account’s visible state so another administrator can confirm the access removal was complete.
If the result is wrong
If the account stays hidden, restore a controlled administrative path long enough to reappear it, then remove access cleanly. Inspect persisted vanish settings and overlapping plugins. Do not delete player data or reset all permissions merely to clear one staff feature.
References and related help
- SuperVanish maintainer reference
- SuperVanish maintainer reference
- Set up SuperVanish for a limited staff role
- Invite a teammate to your game server
PremiumVanish tasks
Task guides and troubleshooting for PremiumVanish. Check the installed release before changing configuration or data.
Check PremiumVanish layered visibility after changing staff ranks
Layered visibility can let senior staff observe junior vanished staff while preserving the reverse boundary. Test the actual rank combination after a change rather than relying on broad staff inheritance.
Follow the procedure
- Confirm the installed PremiumVanish release and read its layered-permission instructions. The maintainer documents
LayeredSeeAndUsePermissionsalongsidepv.use.levelXandpv.see.levelXnodes. - Write the intended relationship between two staff ranks. Record their effective use and see levels, including direct grants that may remain after a promotion or demotion.
- Enable or review the documented layered mode without changing unrelated vanish settings. Give the test accounts only the explicit levels required by that relationship.
- Rejoin the affected accounts where required by the release. Vanish each in turn while the other account checks visibility, then repeat from an ordinary player account.
- Test the opposite direction deliberately. A senior account seeing a junior one does not prove the junior account cannot also see the senior one.
- Remove the temporary trial grants and record the final rank policy. Avoid assigning
pv.*as a shortcut because broad permissions can change how the hierarchy resolves.
Check the result
The two staff accounts should see each other only in the directions your policy allows, while the ordinary account sees neither when vanished. Keep the observed matrix with the rank configuration. Rejoining is important when a release caches visibility levels on login.
If the result is wrong
If both accounts see everything, inspect operator status, inherited permissions and the layered-mode setting. If neither sees the intended colleague, check the documented level comparison rather than guessing a higher wildcard. Restore the previous explicit levels if the hierarchy becomes less restrictive.
References and related help
Verify PremiumVanish network vanish across Velocity backends
A vanished state on one backend does not establish network-wide visibility. PremiumVanish’s documented network feature requires compatible proxy and backend components with the intended shared storage.
Follow the procedure
- Check the installed PremiumVanish release against the maintainer’s Velocity instructions. Confirm that the network-vanish command exists in that version rather than borrowing an older Bungee-only procedure.
- List the proxy and participating backends, their plugin versions and the shared MySQL connection they are meant to use. Keep credentials out of screenshots and public logs.
- Use read-only connection and startup logs to establish that each component reaches the intended database. Do not point unrelated servers at a shared schema merely to test visibility.
- Give a test moderator the documented
pv.networkvanishpermission and use the release’s/networkvanishcommand. Keep ordinary observers on two participating backends. - Move the moderator through the public proxy between those backends. Check entity visibility, tab entries and join or switch messages from both observer accounts.
- Reappear through the supported network control and repeat the movement. Confirm normal visibility returns across the same backend set before staff rely on the feature.
Check the result
If the result is wrong
If one backend leaks the moderator, inspect that component’s version, shared storage and startup errors before changing permission levels. Avoid disabling backend connection protection to simplify testing. Restore the previous visibility state and use local vanish only within the verified scope until integration is corrected.
References and related help
Check vanished staff interactions before a live investigation
Follow the procedure
- Inspect the installed PremiumVanish configuration and its matching documentation for interaction controls. Identify whether your policy allows staff to open containers, break blocks, attack or pick up items while vanished.
- Build a small disposable test area containing ordinary blocks, a counted chest and a few harmless dropped items. Keep real player possessions outside this trial.
- Use a non-operator staff account with its actual moderation role. Enter vanish and attempt each action once while another account records visible effects.
- Compare the actions with the intended configuration and permission bypasses. Change only the supported setting responsible for the unexpected action, not every interaction option together.
- Repeat the restricted actions and an explicitly permitted staff action. Confirm the change prevents disruption without making the approved investigation workflow unusable.
- Reappear and verify normal play. Record any action that requires a separate investigation tool rather than granting broader vanish permissions to make it convenient.
Check the result
The vanished account should affect the test area only in ways your staff policy permits. The chest count and block state should match the expected result. Observer invisibility alone is insufficient when an accidental pickup or block break can alter a real case.
If the result is wrong
If an action remains possible, inspect effective bypass permissions and integrations with protection plugins. Restore the trial area from its recorded state, not by rolling back unrelated player activity. Return the configuration to its previous value if the change creates unexpected normal-play restrictions.
References and related help
Recognize the PremiumVanish API jar before installing an integration
Follow the procedure
- Read the integration developer’s installation requirements and the PremiumVanish API repository notice. Determine which jar is the actual server plugin and which is only a compile-time API artifact.
- Open the game panel Files view and list existing vanish-related jars. Record filenames, versions and their legitimate download sources before moving anything.
- If an API-only jar was uploaded accidentally, stop the server for a controlled correction. Keep a copy outside the plugin load directory rather than deleting unrelated plugin data.
- Install the supported actual plugin from the authorized source, together with the integration version it supports. Do not use an unverified third-party fork as a substitute for the licensed dependency.
- Start the server and read the first plugin-loading messages. Confirm the vanish plugin and integration both enable without a stub-API warning or missing-class error.
- Exercise one read-only integration feature with a test account, then confirm ordinary vanish still works. Preserve the previous working jar and configuration until the check is complete.
Check the result
The server should load the actual PremiumVanish plugin and the integration should find its runtime API. A jar named after an API does not establish that the feature is installed. Verify the startup result and one practical integration action before closing the maintenance task.
If the result is wrong
If class-loading errors persist, restore the matched previous plugin set and capture the first exception for the integration maintainer. Do not keep multiple versions of the same plugin in the load directory or remove configuration folders to force a clean startup.
References and related help
GrimAC tasks
Task guides and troubleshooting for GrimAC. Check the installed release before changing configuration or data.
Give GrimAC alerts to one observer without granting exemptions
An anticheat observer needs to read alerts without bypassing checks or gaining configuration access. Separate the alert permission from exemption permissions before assigning a monitoring role.
Follow the procedure
- Check the installed Grim version and its Permissions reference. Identify
grim.alertsfor alert access and distinguish it from debug, verbose and configuration permissions. - Create a limited observer group in your permission manager. Grant only the documented alert capability and inspect inherited groups for exemptions such as
grim.exemptorgrim.disabled. - Use a non-operator test observer and the documented
/grim alertscontrol. Confirm the account can enable or disable its own supported alert view. - Observe genuine existing test activity or a maintainer-supported diagnostic example. Do not encourage players to use a cheating client on production to manufacture evidence.
- Confirm an ordinary player without the observer role does not receive staff alerts. Review what alert messages disclose before allowing screenshots in public channels.
- Check that the observer cannot reload configuration or exempt itself. Record where alerts are expected to appear and who should review them before taking moderation action.
Check the result
The observer receives the permitted alert stream and remains subject to normal checks. A quiet period does not prove alert delivery is broken; record the toggle result and verify against a known diagnostic event when available. Alerts are evidence to review, not automatic proof of cheating.
If the result is wrong
If alerts are absent, inspect the role’s effective node, personal alert state and current punishment configuration. If alerts reach ordinary users, withdraw the unintended grant immediately. Avoid broad administrative permissions or exemption nodes as a way to fix a missing monitoring feature.
References and related help
- GrimAC maintainer reference
- GrimAC maintainer reference
- Introduce GrimAC alerts before automated punishments
- Diagnose Minecraft lag with TPS, MSPT and spark
Remove a GrimAC exemption and verify when checks resume
Grim has different exemption mechanisms, and some require a player to rejoin after removal. Identify the actual node before concluding that an exemption change has failed.
Follow the procedure
- Inspect the player’s effective permissions and identify the precise exemption. The current documentation distinguishes
grim.disabled, which stops checks, fromgrim.exempt, which unregisters the player. - Record why the exemption exists and confirm permission to end it. Check direct grants, parent groups and server contexts so an inherited node cannot immediately restore access.
- Remove only the intended exemption in your permission manager. Do not clear the entire user profile or remove unrelated staff permissions.
- For
grim.exempt, follow the documented rejoin requirement after removal. For other nodes, check their own refresh behaviour rather than assuming every exemption is identical. - Use the documented profile or debug controls to verify that Grim tracks the account again. Perform ordinary movement and observe the expected diagnostic state without introducing prohibited client modifications.
- Check related per-check, no-setback and packet-modification exemptions separately. Record which specific protections are active instead of treating any one node as a complete on/off switch.
Check the result
The account should return to the intended tracking and checking state after the documented refresh step. Removing grim.exempt without a rejoin can produce a misleading result. Verify the effective permissions and profile information together before reporting that checks have resumed.
If the result is wrong
If the account remains exempt, inspect inherited groups and the release’s supported platform integrations. Reapply only the prior approved exemption if troubleshooting requires preserving a known state. Do not repeatedly reload Grim as a diagnostic shortcut, since its reload command resets online violations.
References and related help
- GrimAC maintainer reference
- GrimAC maintainer reference
- Introduce GrimAC alerts before automated punishments
- Diagnose Minecraft lag with TPS, MSPT and spark
Collect a GrimAC prediction log for a false-positive report
A useful false-positive report needs the matching prediction evidence, versions and circumstances. Collect a narrow diagnostic log while protecting player information and avoiding changes to enforcement during the capture.
Follow the procedure
- Record the Grim build, server software, client version, ViaVersion-related components and the exact movement circumstance. Include a timestamp and the alert check name from the incident.
- Read the current command reference for debug and prediction logging. Confirm the staff role has the documented diagnostic permissions without granting those tools to ordinary players.
- Use
/grim helpto confirm syntax on the installed build. The documented/grim logcommand accepts a prediction entry index within its supported range; choose the entry corresponding to the observed problem. - Capture the generated diagnostic link or output privately. Debug material can include player identifiers and should be reviewed before attaching it to a public issue.
- Reproduce only the legitimate action that caused the concern, ideally on a staging server with the same plugin combination. Avoid changing thresholds halfway through a capture.
- Provide the maintainer with the narrow reproduction, versions and relevant log. State whether the event caused an alert, setback or punishment so those outcomes are not conflated.
Check the result
The report should identify a specific check event and contain the corresponding diagnostic evidence, not merely a screenshot saying the player lagged. A reproducible ordinary action with matching versions is more useful than a large unrelated console dump.
If the result is wrong
If the chosen prediction entry is unavailable, capture a fresh occurrence with the supported diagnostic workflow. Turn off any temporary verbose view afterward. Do not upload complete private logs blindly or exempt all players while waiting for analysis; use only a reviewed narrow mitigation if needed.
References and related help
- GrimAC maintainer reference
- GrimAC maintainer reference
- Introduce GrimAC alerts before automated punishments
- Diagnose Minecraft lag with TPS, MSPT and spark
Review a GrimAC punishment interval before enabling enforcement
Grim’s punishment configuration can run an action repeatedly after a threshold. Check both the starting threshold and repeat interval so one noisy check cannot trigger an unintended action loop.
Follow the procedure
- Open the punishment file generated by your installed Grim release. Save a copy through the panel Files view and identify the exact check group you intend to review.
- Read the maintainer’s threshold-and-interval explanation. In the documented
N:Mnotation, the first number selects the threshold and a positive second number controls later repetitions. - Write out the first several firing points for each configured action. A zero repeat interval has a different one-time meaning in the documented format and should be reviewed explicitly.
- Check the violation-removal window and the checks included in that group. Do not assume counts accumulate forever or that every alert belongs to the same group.
- Rehearse edits on staging using notification or logging actions before adding a punitive command. Verify command ownership, player substitution and permissions against the installed example file.
- Have another administrator review the expected sequence. Enable a reviewed production policy only after normal movement and known compatibility cases have been observed without unexplained enforcement.
Check the result
The configured action sequence should match the written thresholds and intervals, including repetition and violation expiry. Alerting, logging and punitive commands can have different firing points. Checking the first action alone does not prove later repetitions are safe.
If the result is wrong
If an action repeats unexpectedly, revert that group to its saved definition and preserve the alert sequence. Avoid fixing a repeat loop by globally exempting players or deleting evidence. Remember that Grim reload resets online violations, so record the pre-change state before using the supported reload control.
References and related help
- GrimAC maintainer reference
- GrimAC maintainer reference
- GrimAC maintainer reference
- Introduce GrimAC alerts before automated punishments
- Diagnose Minecraft lag with TPS, MSPT and spark
Check a GrimAC issue against the actual client and protocol path
A movement problem limited to one client version may depend on protocol translation rather than the player’s connection alone. Record the full path before changing anticheat thresholds.
Follow the procedure
- Collect the affected client version and edition, backend Minecraft version, proxy software and any protocol translation plugins. Record where each component runs.
- Compare this combination with Grim’s current supported-platform and compatibility guidance. A plugin enabling successfully is not a guarantee that every translated client path is supported.
- Ask the affected player to describe the exact ordinary action and location. Note whether the result is an alert, setback, disconnection or another plugin’s punishment.
- Repeat that action with an unmodified test client matching the affected version. Compare a directly supported client version through the same public route without opening protected backend ports.
- Collect the matching Grim profile or prediction diagnostic and relevant server timing evidence. Change one compatibility variable at a time in staging, not several production plugins together.
- Use an official compatible update or documented mitigation when the evidence identifies a known integration issue. Keep the previous matched plugin set available for rollback.
Check the result
The comparison should establish whether the symptom follows the client/protocol combination, a location or general server load. Record a result for both test clients. Different symptoms should remain separate rather than being grouped under a generic false-positive label.
If the result is wrong
If compatibility remains uncertain, send the maintainer the exact version matrix and narrow diagnostic log. Do not promise support from a different release’s documentation. Restore any unsuccessful trial update with its matching configuration, and avoid weakening all movement checks for an unconfirmed cause.
References and related help
- GrimAC maintainer reference
- GrimAC maintainer reference
- Introduce GrimAC alerts before automated punishments
- Diagnose Minecraft lag with TPS, MSPT and spark
Preserve GrimAC incident evidence before reloading configuration
A Grim reload resets violations for online players according to its command documentation. Capture the evidence first so a configuration correction does not erase the context needed to review an incident.
Follow the procedure
- Record the incident time, player identity, check names and relevant alert sequence privately. Separate a current enforcement problem from a routine configuration edit.
- Use supported profile and diagnostic commands to capture the current state. Save only the necessary console excerpt rather than distributing a complete private server log.
- Back up the current Grim configuration and identify the exact file and setting being changed. Check the installed release’s reload behaviour before scheduling the operation.
- Notify moderators that online violation counts will reset when using
/grim reload. Avoid treating post-reload low counts as proof that the earlier incident was false. - Apply the reviewed change and use the supported reload command during a suitable window. Read the output for parsing failures and confirm the intended configuration is active.
- Check normal movement and alert delivery afterward. Retain the before-and-after timestamps so staff can explain the reset when reviewing later enforcement decisions.
Check the result
The configuration should load cleanly while the saved incident material remains available outside the reset live counters. Verify normal operation after reload and document the reset boundary. A fresh zero count is expected behaviour here, not independent evidence that the underlying issue is fixed.
If the result is wrong
If parsing fails, restore the saved configuration and use the documented control to return to the previous policy. Preserve both error output and prior evidence. Do not repeatedly reload during an active investigation or fabricate a continuous violation history across the reset.
References and related help
- GrimAC maintainer reference
- GrimAC maintainer reference
- Introduce GrimAC alerts before automated punishments
- Diagnose Minecraft lag with TPS, MSPT and spark
CoreProtect tasks
Task guides and troubleshooting for CoreProtect. Check the installed release before changing configuration or data.
Investigate one chest withdrawal with a bounded CoreProtect lookup
A missing item report needs the correct container, time window and transaction type. Query a small area first so an unrelated server-wide result does not become an accusation.
Follow the procedure
- Ask the owner for the chest location, approximate time and missing item type. Record the world and coordinates privately and avoid moving items during the investigation.
- Check
/co statusand confirm CoreProtect was logging the relevant container actions at the time. A plugin installed afterward cannot reconstruct an earlier withdrawal. - Stand at the reported chest and use a bounded query such as
/co lookup t:1h r:5 a:-container. Adjust the time to the report rather than searching every historical transaction. - Read the actor, item amount and timestamp for each relevant row. Use the documented include parameter to narrow the item type if the first result contains unrelated transactions.
- Compare deposits as well as withdrawals when calculating the change. Check linked containers or automation separately; a net missing count is not necessarily one player’s single action.
- Save the relevant evidence and discuss any restoration with the owner. A lookup is read-only and should remain separate from an authorized inventory or container rollback.
Check the result
The result should identify relevant withdrawals in the selected area and period, or establish that no matching logged transaction was found. It does not by itself prove malicious intent. Correlate the item count and ownership context before applying moderation or restoring possessions.
If the result is wrong
If no rows appear, verify the world, time range, logging configuration and retention before widening the search. Do not treat an empty result as proof that the owner invented the loss. Avoid a global rollback or manual database edits while the transaction scope remains uncertain.
References and related help
- CoreProtect maintainer reference
- CoreProtect maintainer reference
- Inspect block changes and preview a CoreProtect rollback
- Recover a Minecraft server after griefing
Exclude routine block types from a CoreProtect investigation
A busy build area can produce thousands of ordinary block records. Use a bounded lookup and a deliberate exclusion list to inspect the incident without changing the world.
Follow the procedure
- Record the incident area, world and relevant time range. Decide which block actions are under investigation before excluding anything that could itself be evidence.
- Stand at the affected location and run an explicit small-radius block lookup, such as
/co lookup t:30m r:10 a:block. Read a sample before adding filters. - Identify routine materials you can safely exclude for this question. Use the documented
e:parameter with exact material names supported by your installed Minecraft and CoreProtect versions. - Repeat the lookup with the exclusion list and compare the result count and examples. Keep the unfiltered query in the case notes so another reviewer can reproduce the reasoning.
- If the excluded material becomes relevant, remove that exclusion rather than assuming the filtered view is a complete history. Include and exclude parameters answer different questions.
- Save only the necessary rows and keep the final filter with the evidence. Do not reuse the lookup as a rollback until an administrator has reviewed its full scope.
Check the result
The filtered result should remove the selected routine materials while retaining the incident’s relevant actions within the same time and area. Compare at least one known included and excluded action. A quieter result is useful only if the filter has not removed the evidence you need.
If the result is wrong
If expected rows vanish, return to the original read-only query and inspect material names and parameter syntax. Broaden one constraint at a time. Do not compensate by running a global search or a world-changing rollback with an exclusion list you have not verified.
References and related help
- CoreProtect maintainer reference
- CoreProtect maintainer reference
- Inspect block changes and preview a CoreProtect rollback
- Recover a Minecraft server after griefing
Limit a CoreProtect lookup to a WorldEdit selection
An irregular incident boundary can be easier to select than describe with a radius. CoreProtect supports a WorldEdit-selection scope, but you must confirm the active selection before using it.
Follow the procedure
- Confirm that compatible WorldEdit and CoreProtect versions are installed. Read the radius parameter reference for
r:#worldeditor its documented alias on your release. - Select the intended area in the correct world using WorldEdit’s supported selection controls. Check both horizontal bounds and height; a shallow selection can omit relevant blocks.
- Run a read-only lookup such as
/co lookup t:1h r:#worldedit a:block. Keep the time and action constraints explicit even though the selection already limits space. - Compare a known action inside the selection with a known action outside it. Review the displayed locations rather than assuming the selection used by another administrator is yours.
- If results are incomplete, inspect the selection again before increasing the time range. A newly selected world or region can change the meaning of the same command.
- Record the bounds, world and query in the case notes. If a rollback is later approved, preview that exact selection and filter again before any world-changing action.
Check the result
The lookup should return relevant logged actions inside the selected volume and omit the outside test action. An empty result may indicate a wrong selection rather than absent history. Confirm the spatial scope with known examples before drawing a conclusion.
If the result is wrong
If CoreProtect does not recognize the selection, check the installed integration and permission without replacing plugins during an active investigation. Fall back to a clearly bounded radius query if appropriate. Do not run a rollback while the active selection or world remains uncertain.
References and related help
- CoreProtect maintainer reference
- CoreProtect maintainer reference
- Inspect block changes and preview a CoreProtect rollback
- Recover a Minecraft server after griefing
Review an inventory rollback before restoring missing player items
Inventory recovery can duplicate items if the original transactions are not understood. Inspect the specific account and time window before approving a CoreProtect inventory rollback.
Follow the procedure
- Confirm the player identity and collect the exact loss time, item types and any container or trade involved. Ask the player to avoid further transfers while the incident is reviewed.
- Check that the installed release logged inventory transactions when the loss occurred. A current setting cannot recreate records that were never collected.
- Use a read-only query for the named account with a narrow time range and the documented inventory action parameter. Review both additions and removals to understand the full transaction chain.
- Look for corresponding container, pickup or trade activity that could leave the same items elsewhere. Returning a withdrawal without checking its destination can create an unintended duplicate.
- Rehearse the proposed recovery on an isolated copy containing matching world and database state. Use the installed release’s supported preview and inventory rollback behaviour where available.
- Have an authorized administrator approve the exact recovery scope and capture pre-change item counts. Keep normal backups and a targeted reversal plan available before touching production inventories.
Check the result
The review should explain which transactions caused the loss and whether a targeted inventory recovery can restore the intended state without duplicating items. A list of removals alone is insufficient. Record the account, filters and expected item totals before any authorized live action.
If the result is wrong
If the transaction chain remains ambiguous, stop the rollback proposal and preserve the evidence. Consider a documented manual restitution decision instead of guessing a broad rollback. Never combine unrelated players or long time ranges merely because the desired item appears somewhere in the output.
References and related help
- CoreProtect maintainer reference
- CoreProtect maintainer reference
- Inspect block changes and preview a CoreProtect rollback
- Recover a Minecraft server after griefing
Reverse an accidental CoreProtect rollback with the matching scope
An accidental rollback should be reversed from its recorded parameters, not followed by a broader repair. Capture the operation details before another administrator changes the same area.
Follow the procedure
- Pause building in the affected area and record the rollback command, executor, completion time and reported scope. Identify whether the action was a rollback, restore or only a preview.
- Read the installed command documentation for restore and
/co undo. The documented undo performs the opposite of the relevant rollback or restore; verify which operation the current context will target. - Take a current recovery copy before making a second world change. Preserve the CoreProtect database and any before-incident backup so later review has both states.
- Rehearse a matching restore or supported undo on an isolated copy when the affected area is valuable. Keep the same user, time, action and spatial filters rather than widening them.
- Have the authorized administrator execute the reviewed reversal once. Watch completion output and keep other staff from starting overlapping recovery commands.
- Compare the affected blocks and containers with the recorded expected state. Check work performed after the first rollback separately, since a reversal may not preserve every intervening player action.
Check the result
The incorrectly reversed actions should return to the intended state within the matching scope, with completion output retained. Verify both the original damage and any legitimate later work. A command saying finished does not establish that every affected player’s possessions are correct.
If the result is wrong
If the reverse preview or rehearsal is wrong, stop and retain the current state for review. Do not alternate broad rollback and restore commands repeatedly. Use the exact recorded operation or a coordinated backup recovery plan, with world and database state kept consistent.
References and related help
- CoreProtect maintainer reference
- CoreProtect maintainer reference
- Inspect block changes and preview a CoreProtect rollback
- Recover a Minecraft server after griefing
Turn off CoreProtect inspection without granting rollback access
Inspection mode changes what happens when staff click blocks, so leaving it enabled can confuse routine building. Teach inspectors the toggle while keeping world-changing recovery permissions separate.
Follow the procedure
- Check the installed CoreProtect permissions reference and identify the inspector capability. Do not grant rollback, restore, purge or administrative access simply to let a helper inspect a block.
- Use a non-operator helper account with the intended role. Run
/co inspector the documented/co ialias and click a disposable test block. - Confirm the expected inspection output appears. Check whether the helper’s ordinary block action is replaced by inspection so they understand why clicking behaves differently.
- Run the same inspection toggle again to disable it. Click another test block and verify the account has returned to its normal allowed building behaviour.
- Test reconnect behaviour on your installed release and record whether inspectors must toggle the mode again. Avoid assuming state persists or resets identically across plugin versions.
- Confirm the helper cannot invoke recovery or purge operations. Keep the staff guide clear that a block-history result is evidence for review, not permission to alter another player’s build.
Check the result
The helper can enter inspection, read the expected block history and leave inspection cleanly, while recovery commands remain denied. A successful read demonstrates the inspector role; normal block interaction after the second toggle demonstrates that the apparent building problem is resolved.
If the result is wrong
If clicking still does not behave normally, check region protection, game mode and other inspection plugins before changing CoreProtect permissions. If history is unavailable, verify logging and retention. Do not grant operator status or reset player data to clear an inspection-mode misunderstanding.
References and related help
- CoreProtect maintainer reference
- CoreProtect maintainer reference
- Inspect block changes and preview a CoreProtect rollback
- Recover a Minecraft server after griefing
Plan CoreProtect retention without losing evidence needed for recovery
Older audit records consume storage but may be the only evidence for a delayed grief report. Decide a retention policy from actual recovery needs before scheduling any irreversible purge.
Follow the procedure
- Measure the current database size and growth over several normal days. Record the existing retention policy, backup coverage and the oldest report staff are expected to investigate.
- Check which logging categories account for growth and which are needed for your moderation workflow. Do not disable essential logging merely to make a storage graph smaller.
- Read the installed purge documentation carefully. Time cutoffs remove records older than the chosen age, and database optimization behaviour differs between storage backends.
- Agree a retention period that covers your published support and appeal expectations. Keep a consistent archived database copy if older records must remain available outside the live server.
- Rehearse the proposed purge on an isolated restored database and compare record availability before and after. Measure actual reclaimed space rather than assuming row deletion immediately shrinks every database file.
- Only schedule a separately approved production purge after backup recovery has been checked. Restrict purge access to administrators and record the cutoff, scope and completion result.
Check the result
The retention plan should state what remains searchable live, what can be recovered from archives and what will be permanently unavailable. Its storage estimate should come from a rehearsal on the same backend. A purge is a data-loss decision, not a routine fix for an unexplained full disk.
If the result is wrong
If the rehearsal removes records you still need, increase the retention period and keep production unchanged. Restore the isolated test from its backup when comparing alternatives. Do not run a shorter production purge first and expect a later setting change to recover deleted history.
References and related help
- CoreProtect maintainer reference
- CoreProtect maintainer reference
- Inspect block changes and preview a CoreProtect rollback
- Recover a Minecraft server after griefing
Investigate a growing CoreProtect consumer queue without discarding it
A growing write queue can explain why recent actions do not appear in lookups yet. Preserve queued evidence and inspect database performance before pausing processing or restarting the server.
Follow the procedure
- Capture
/co statusand the relevant startup or database error messages. Record the time so you can compare queue behaviour against the server’s player count and workload. - Check disk space and database availability through the panel or database administrator. A connection failure, full disk and slow storage require different corrections.
- Repeat the supported status observation after a short interval. Determine whether the queue is shrinking, stable or growing rather than relying on one large number.
- Read the
/co consumerdocumentation before touching it. It is a console control that pauses or resumes processing; running it blindly can worsen an existing backlog. - Reduce avoidable high-volume work such as a planned mass edit while investigating. Keep ordinary logging enabled and ask support to assess persistent database errors.
- After the underlying issue is corrected, observe the queue draining and query a known recent disposable block action. Record how long it takes to become searchable.
Check the result
The backlog should trend downward and newly recorded test actions should become visible after processing catches up. An enabled plugin with delayed lookups is not the same as lost evidence. Confirm both storage health and the recent test record before declaring recovery complete.
If the result is wrong
If processing remains stalled, preserve logs and request database-specific support before restarting or changing backends. Do not delete database files, discard queued records or repeatedly toggle the consumer. Restore a paused consumer only through the documented control once you know its current state.
References and related help
- CoreProtect maintainer reference
- CoreProtect maintainer reference
- Inspect block changes and preview a CoreProtect rollback
- Recover a Minecraft server after griefing
Explain why CoreProtect has no record of an older action
An empty lookup can reflect scope, retention or logging settings rather than a broken database. Work through those possibilities before telling a player that an event did not happen.
Follow the procedure
- Write down the reported world, location, account, action type and approximate time. Check the server’s timezone and whether the report refers to a different backend or restored world.
- Run a read-only lookup with an explicit time range, small radius and appropriate action category. Check the exact world and position before broadening filters.
- Inspect the relevant logging option in the installed CoreProtect configuration. Establish what was enabled at the incident time, using saved configurations or change records where available.
- Check retention and recent purge history. Also identify any database replacement, migration or backup restore that could explain why older records differ from current gameplay.
- Create a disposable action of the same supported type and query it after processing catches up. This distinguishes current logging failure from unavailable historical evidence.
- Report the narrow conclusion: no matching retained record was found under the tested conditions. Keep uncertainty explicit and use other evidence before moderation or restitution decisions.
Check the result
The investigation should identify a concrete scope mistake, current logging fault or historical coverage limit where possible. A successful new test proves present logging only. It does not prove older events were recorded, and an empty historical result does not prove no event occurred.
If the result is wrong
If current actions are also missing, collect status and database errors and investigate the processing queue. Preserve the existing database while seeking support. Do not reinitialize storage, import random tables or accuse a player solely because one filtered query returned nothing.
References and related help
- CoreProtect maintainer reference
- CoreProtect maintainer reference
- Inspect block changes and preview a CoreProtect rollback
- Recover a Minecraft server after griefing
Rehearse a supported CoreProtect database-backend migration
CoreProtect’s migration command is available only in specific supported builds and backends. Rehearse the matching procedure before changing where a live server stores its audit history.
Follow the procedure
- Record the installed CoreProtect build and current backend. Check the migration documentation for feature availability, supported destination types and any release or licensing requirement.
- Take a consistent backup of the database and plugin configuration. Preserve a matching world recovery copy if the audit history is part of an ongoing restoration workflow.
- Prepare an isolated server copy and a new destination namespace with no existing CoreProtect data. Keep the source database and production connection untouched during rehearsal.
- Follow the documented console-only migration workflow for that release. Review its validation mode and ensure the required database-lock setting remains in the documented state.
- Compare known historical records and active logging after migration. Where supported, choose full validation when the rehearsal’s time budget permits rather than assuming sampled validation checks every row.
- Record duration, disk requirements and the configuration changes made by the migration tool. Plan a controlled production window only after the rehearsal has completed and its data checks pass.
Check the result
The isolated destination should contain the expected records and accept new test actions through a clean plugin startup. Verify several old locations and a new action, plus the migration’s reported validation result. Successful connectivity alone is insufficient evidence of a complete history transfer.
If the result is wrong
If validation fails or the installed build lacks the feature, keep production on its current backend and retain the rehearsal logs for support. Do not bypass checks by copying guessed tables. Roll back the matched database and configuration rather than swapping only a jar across schema changes.
References and related help
- CoreProtect maintainer reference
- CoreProtect maintainer reference
- Inspect block changes and preview a CoreProtect rollback
- Recover a Minecraft server after griefing
WorldGuard tasks
Task guides and troubleshooting for WorldGuard. Check the installed release before changing configuration or data.
Give a WorldGuard plot member access without making them its owner
A region member can receive ordinary access without being granted the owner’s region-management powers. Confirm the intended role before adding someone to a shared build.
Follow the procedure
- Stand in the correct world and inspect the plot with
/rg info REGION. Record its owners, members, bounds and parent before changing the domain. - Confirm the invited player’s exact identity and the plot owner’s authorization. Check whether the player already belongs through a group entry or inherited parent membership.
- Use the documented
/rg addmember REGION PLAYERcommand for ordinary plot membership. Do not use addowner merely because the member cannot perform one unrelated action. - Have the invited non-operator player test an approved build action inside the plot and attempt the same action outside it. Keep the trial away from valuable blocks.
- Check whether region management commands remain denied to the member under your permission policy. Membership and the server’s command permissions are separate controls.
- Inspect the region again and record the new member. If the invitation is temporary, schedule a documented review rather than assuming region membership expires automatically.
Check the result
The invited player should receive the intended plot access while remaining unable to manage region ownership unless separately authorized. Verify both inside and outside behaviour. An owner account’s successful test cannot establish that the member role is limited correctly.
If the result is wrong
If access remains denied, inspect relevant flags, parent membership and other protection plugins before changing ownership. Remove only the newly added member if the invitation was mistaken. Do not remove all domain entries or raise region priority to fix an unidentified permission issue.
References and related help
- WorldGuard maintainer reference
- WorldGuard maintainer reference
- Protect a Minecraft spawn with WorldGuard regions
- Fix overlapping WorldGuard region flags with a small permission test
Extend a WorldGuard region vertically without replacing its members
A region selected too shallowly may protect the floor while leaving an upper build exposed. Redefine the bounds carefully so the region identity, membership and policy remain intact.
Follow the procedure
- Inspect the existing region in the correct world with
/rg info REGION. Save its bounds, flags, parent, priority, owners and members before selecting new geometry. - Use the documented WorldGuard selection command to load the region into your WorldEdit selection. Confirm the selected world and both horizontal corners.
- Adjust only the intended vertical bounds with supported WorldEdit selection controls. Choose the actual required height range rather than assuming every world uses the same build limits.
- Check the new volume and any neighbouring protected areas. A full-height expansion may protect more underground or aerial space than the plot owner intended.
- Use the documented
/rg redefine REGIONcommand on the reviewed selection. Reinspect the region immediately and compare flags and domain entries with the saved values. - Test a disposable build action just inside the new upper boundary and just outside it using an ordinary player. Check a previous protected point to confirm old coverage remains.
Check the result
The region should cover the revised vertical volume while preserving its existing identity and recorded policy. Verify the geometry and player behaviour together. Seeing the same region name in a list does not prove the new selection was in the intended world.
If the result is wrong
If the bounds are wrong, reselect the saved original volume and redefine that same region. Do not delete and recreate it as a shortcut, since that risks losing domain and flag settings. Restore from a coordinated region backup only if the recorded configuration cannot be recovered directly.
References and related help
- WorldGuard maintainer reference
- WorldGuard maintainer reference
- Protect a Minecraft spawn with WorldGuard regions
- Fix overlapping WorldGuard region flags with a small permission test
Remove a WorldGuard greeting without confusing blank and inherited values
A blank region greeting and an unset greeting are different states. Unsetting can reveal an inherited message, so decide whether the region should inherit or deliberately show nothing.
Follow the procedure
- Inspect the region’s current flags, parent and overlapping regions at the tested location. Record the exact greeting that appears and the account used to observe it.
- Read the installed WorldGuard flag-command syntax. The documented command can unset a flag by omitting its value, while the empty-value option represents an explicit blank string where supported.
- Choose the intended result: inherit the applicable greeting policy or suppress this region’s message with a supported blank value. Do not remove the parent merely to silence text.
- Apply the narrow greeting change to the named region in the correct world. Keep the previous text privately so it can be restored exactly if needed.
- Leave the region fully and re-enter with an ordinary player. Check both chat greeting and title-related flags if your server uses more than one greeting surface.
- Inspect the stored flag value again and record whether it is unset or explicitly empty. Test another region to ensure its greeting remains unchanged.
Check the result
The player should see the intended message behaviour when crossing the boundary, and the stored state should match your inheritance decision. Testing while standing still inside the region may not trigger a new greeting. Check an actual exit and re-entry before reporting success.
If the result is wrong
If a message remains, identify its source region or another join-message plugin before clearing more flags. Restore the original greeting if the change suppresses useful messages elsewhere. Avoid editing region files while the running server may later save over them.
References and related help
- WorldGuard maintainer reference
- WorldGuard maintainer reference
- WorldGuard maintainer reference
- Protect a Minecraft spawn with WorldGuard regions
- Fix overlapping WorldGuard region flags with a small permission test
Restrict entry to a WorldGuard region’s approved members
A members-only area needs an entry policy as well as build protection. Check the region group and movement routes so the rule does not accidentally lock out its own members.
Follow the procedure
- Inspect the target region, its members, owners and relevant parent. Confirm that the intended users actually resolve as members rather than relying on a similar permission-group name.
- Read the entry flag and region-group documentation for your release. Choose the documented group restriction that applies the denial to nonmembers, not to everyone.
- Apply the reviewed entry flag using the installed
/rg flagsyntax. Keep an administrator outside the area with a recovery path before testing access. - Use one ordinary member and one nonmember to walk across the boundary. Repeat from more than one side if the region has unusual geometry.
- Test the teleport routes players are meant to use, including a warp or home if applicable. Check interactions with other plugins rather than assuming a walking test covers every transport route.
- Remove any temporary test memberships and record the approved access list. Confirm ordinary movement outside the region remains unaffected.
Check the result
The member should enter through the approved routes while the nonmember is refused according to the documented policy. Verify an exit path as well. A protected build that still permits entry is a different policy and should not be mistaken for a malfunction.
If the result is wrong
If legitimate members are blocked, restore the previous entry flag and inspect domain membership and group selection. Do not grant bypass to all players or delete the region to release one account. Use the retained administrator recovery route while correcting the specific rule.
References and related help
- WorldGuard maintainer reference
- WorldGuard maintainer reference
- WorldGuard maintainer reference
- Protect a Minecraft spawn with WorldGuard regions
- Fix overlapping WorldGuard region flags with a small permission test
Test WorldGuard chest access separately from block building
A player may be able to open storage while being unable to build, or the reverse. Test container access directly instead of treating a successful block-protection check as complete spawn protection.
Follow the procedure
- Identify the exact region and a disposable chest inside it. Record current flags, membership and any separate chest-lock plugin that may also control the container.
- Read the chest-access and interaction flag descriptions for the installed WorldGuard release. Avoid setting the general build flag merely to solve a container-specific problem.
- Prepare an ordinary nonmember, an approved member and a counted set of disposable chest items. Keep operator and bypass permissions off the test accounts.
- Apply the intended narrow container policy and have each account try opening the chest, taking one trial item and returning it. Record each result separately.
- Test a normal block action beside the chest and another container outside the region. This checks that the change has not accidentally widened building rights or global storage access.
- Reinspect the region and confirm the final trial item count. Document whether a chest-lock plugin adds another ownership requirement beyond WorldGuard membership.
Check the result
Container access and build access should each match the intended policy, with no missing trial items. A successful chest-open animation alone does not prove withdrawals are allowed or denied. Test the actual permitted transaction with disposable contents.
If the result is wrong
If results conflict, inspect the effective region flags and other storage-protection plugins before granting broader access. Restore the previous chest-related flag when needed. Do not remove container ownership, disable all protections or test by taking valuable items from a real player’s storage.
References and related help
- WorldGuard maintainer reference
- WorldGuard maintainer reference
- Protect a Minecraft spawn with WorldGuard regions
- Fix overlapping WorldGuard region flags with a small permission test
Verify a WorldGuard no-PvP area at its actual boundary
A no-PvP area should protect the intended space without disabling combat elsewhere. Check the boundary with ordinary accounts and distinguish direct attacks from other damage sources.
Follow the procedure
- Inspect the region’s bounds, relevant flags and world. Note any arena or combat plugin that may independently control damage or delay escape from combat.
- Read the WorldGuard PvP flag description for your installed release. Apply the intended value to the named region rather than changing the whole world’s combat settings.
- Use two consenting non-operator test accounts with no valuable items. Choose low-risk attacks and keep a safe recovery area available.
- Test a direct player attack well inside the region, then outside its boundary. Repeat near the edge with each attacker and victim position recorded.
- Check the specific projectile or combat interaction your players report. Do not infer protection against fire, fall damage or every plugin skill from one blocked melee hit.
- Review any neighbouring regions and combat-plugin rules only if the observed result requires it. Record which attack routes were tested and what remains outside this policy.
Check the result
Direct PvP should follow the selected region policy in the tested positions while combat outside remains as intended. Keep the attacker and victim locations with the result. A blocked attack from an administrator account can be distorted by bypass or unrelated game-mode rules.
If the result is wrong
If damage still occurs, identify the source and controlling plugin before broadening flags. Restore the prior region setting if legitimate combat outside the intended area changes. Avoid treating no-PvP as universal invulnerability; use a separately reviewed damage policy where that is the actual requirement.
References and related help
- WorldGuard maintainer reference
- WorldGuard maintainer reference
- Protect a Minecraft spawn with WorldGuard regions
- Fix overlapping WorldGuard region flags with a small permission test
Find the correct WorldGuard region when names repeat across worlds
WorldGuard region names belong to worlds, so the same label can describe different areas. Check the world explicitly before editing a spawn or plot with a familiar name.
Follow the procedure
- Collect the affected player’s world and coordinates from an authorized source. A screenshot of a region name alone is insufficient when multiple worlds use the same naming scheme.
- Use the documented world option with a read-only region query, such as the installed
/rg infoform using-w WORLD. Confirm syntax with command help on your release. - Compare the reported bounds with the player’s location. If necessary, list the relevant world’s regions rather than assuming the first result is the right one.
- Inspect the same region name in any other likely world and record the differences. Keep all queries read-only until the intended target is certain.
- For the eventual change, include the world explicitly where supported or move to the correct world and verify again. Record both world and region in the staff instruction.
- Have an ordinary player repeat the reported action at the original coordinates after the reviewed change. Check another world’s similarly named region remains unchanged.
Check the result
The investigation should identify one unambiguous world-and-region pair whose bounds contain the affected location. A region with the right name but the wrong coordinates is not the target. Include the world in support notes and future maintenance commands.
If the result is wrong
If the region cannot be found, check world loading and spelling before creating a replacement. Do not define a new overlapping region merely because a query in the wrong world returned nothing. Restore any mistaken flag edit on the other world using its recorded previous value.
References and related help
- WorldGuard maintainer reference
- WorldGuard maintainer reference
- Protect a Minecraft spawn with WorldGuard regions
- Fix overlapping WorldGuard region flags with a small permission test
Change a WorldGuard parent without losing track of inherited membership
Changing a region’s parent can alter inherited members and policy even when its own member list stays the same. Review those effects before reorganizing a group of plots.
Follow the procedure
- Inspect the child, current parent and proposed parent in the correct world. Record explicit owners, members, flags and priority for each relevant region.
- Read the installed priority-and-inheritance documentation. Distinguish inherited values from entries stored directly on the child; a short member list may not describe effective access.
- Write a small access matrix for an existing child member, a parent-only member and an ordinary nonmember. State which accounts should retain access after the change.
- Rehearse the parent change on staging or a disposable region with comparable policy. Use the documented set-parent command and check that no inheritance cycle is introduced.
- Test the selected build and interaction actions using the three ordinary accounts. Include a flag inherited from the parent so the test covers policy as well as membership.
- Apply the reviewed relationship to production and reinspect the child. Record the previous parent and the observed access results for a precise rollback if required.
Check the result
The child should inherit only the intended parent policy and grant access to the expected accounts. Explicit entries should remain as recorded unless separately changed. A parent label changing successfully does not prove the resulting membership and flags are appropriate.
If the result is wrong
If unexpected users gain or lose access, restore the saved previous parent and retest. Do not compensate with broad owner grants or random priority increases. Review the inheritance chain and explicit child overrides before attempting the organizational change again.
References and related help
- WorldGuard maintainer reference
- WorldGuard maintainer reference
- WorldGuard maintainer reference
- Protect a Minecraft spawn with WorldGuard regions
- Fix overlapping WorldGuard region flags with a small permission test
Limit a WorldGuard mob-spawn restriction to one region
A spawn restriction can cover an event area without changing survival spawning across the world. Select the intended entity rule and verify the source of the mobs you are investigating.
Follow the procedure
- Identify the target region, mob type and spawn source. Natural spawning, spawn eggs, spawners and plugin-created entities may not follow identical event paths.
- Read the installed WorldGuard spawning flags and entity-set syntax. Choose a general spawning rule or a specific deny-spawn list according to the actual policy.
- Record the current flag and any existing entity list before editing. Preserve intentional entries rather than replacing the list with only the newest reported mob.
- Apply the reviewed narrow rule to the named region. Use the documented entity identifier for the installed server version instead of guessing from a display name.
- Test the relevant spawn source inside and outside the region using a controlled disposable setup. Existing mobs should be counted separately from new spawn attempts.
- Observe normal gameplay for the area and document unsupported plugin-created cases. Keep the outside world’s intended spawning behaviour unchanged.
Check the result
The selected new spawn attempts should follow the intended regional policy, while outside spawning remains unchanged. Existing entities may remain present after a spawn rule changes, so their continued presence alone does not demonstrate failure. Record the exact source and entity tested.
If the result is wrong
If mobs still appear, identify their spawn source and check integration with the responsible plugin. Restore the previous flag list if legitimate entities are blocked unexpectedly. Do not remove every existing entity or disable all world spawning as a diagnostic shortcut.
References and related help
- WorldGuard maintainer reference
- WorldGuard maintainer reference
- Protect a Minecraft spawn with WorldGuard regions
- Fix overlapping WorldGuard region flags with a small permission test
Review a WorldGuard blocked-command rule without relying on it for permissions
A regional command block can support an event rule, but it is not a substitute for securing the command itself. Check aliases and execution paths before describing it as complete protection.
Follow the procedure
- List the exact player commands you intend to restrict inside the region, including known aliases and namespaced forms. Identify the plugin that actually owns each command.
- Read the installed WorldGuard blocked-command flag description and syntax. Save the current list so adding one command does not remove an existing restriction.
- Use a non-operator test player who ordinarily has the command permission. Apply the reviewed regional list and try the intended command inside the area.
- Test the same command outside the region and inspect its documented aliases inside. Record routes WorldGuard does not intercept, such as a command handled by a proxy first.
- Check the actual permission policy independently. Sensitive administrative actions must remain denied to unauthorized users regardless of their position or spelling of the command.
- Document the regional rule as a convenience or gameplay control with its verified coverage. Route unsupported proxy restrictions to the responsible platform’s supported controls.
Check the result
The tested player command should be restricted in the chosen region and remain available outside where intended. Sensitive commands should still be permission-protected everywhere. A blocked short alias alone does not prove the namespaced or proxy-owned command is covered.
If the result is wrong
If an alias bypasses the rule, adjust the documented list or command owner’s supported policy after review. Restore the previous flag value if unrelated commands stop working. Do not grant more command permissions to test a restriction or claim a region flag replaces backend and administrative security.
References and related help
- WorldGuard maintainer reference
- WorldGuard maintainer reference
- Protect a Minecraft spawn with WorldGuard regions
- Fix overlapping WorldGuard region flags with a small permission test
WorldGuard ExtraFlags tasks
Task guides and troubleshooting for WorldGuard ExtraFlags. Check the installed release before changing configuration or data.
Test regional flight with WorldGuard ExtraFlags before opening an area
A regional flight rule needs a safe exit as well as a working entry. Test the ExtraFlags fly flag near the ground before letting players cross the boundary at height.
Follow the procedure
- Confirm the installed WorldGuard ExtraFlags plugin is aromaa’s project and that its version supports your WorldGuard and server build. Check startup output for flag-registration errors.
- Create or choose a small disposable test region over safe ground. Inspect its existing flags and any other plugin that enables flight for the test account.
- Read the registered
flyflag type in the maintainer source and use the installed WorldGuard flag command to apply the intended state to this test region. - Use a normal survival test account without global flight access. Enter the region and check whether the documented regional flight behaviour becomes available.
- Leave at a low safe height, then test walking out, teleporting out and rejoining as relevant. Record whether another plugin restores or removes flight after the boundary transition.
- Remove the trial flag or restore its previous value once the exit policy is verified. Only apply the reviewed rule to a public high-altitude area after its landing route is safe.
Check the result
The test account should gain and lose the intended regional flight behaviour predictably, with a safe landing during every tested exit route. A successful entry alone is insufficient. Record any dependence on another flight plugin or server game mode.
If the result is wrong
If flight persists or disappears unexpectedly, restore the previous flag and test the competing flight provider independently. Do not perform repeated high-altitude falls or grant global flight to mask the transition. Use a full supported restart if dependency changes are required; ExtraFlags does not support arbitrary plugin reloading.
References and related help
- WorldGuard ExtraFlags maintainer reference
- WorldGuard ExtraFlags maintainer reference
- WorldGuard ExtraFlags maintainer reference
- Add and test WorldGuard ExtraFlags in one region
- Protect a Minecraft spawn with WorldGuard regions
Check regional keep-inventory without changing the whole world rule
A region-specific death policy can conflict with world gamerules or other death plugins. Verify the ExtraFlags keep-inventory result using disposable items before promising players their possessions are protected.
Follow the procedure
- Confirm the installed ExtraFlags build registers
keep-inventoryand read its Boolean flag type. Record the existing world keep-inventory gamerule and any grave, death-chest or inventory recovery plugin. - Choose a small isolated test region and save its current flags. Prepare a disposable non-operator account carrying only a counted set of ordinary items.
- Apply the intended regional Boolean value through the supported WorldGuard flag command. Do not use an allow/deny value merely because some other flags are state flags.
- Perform a controlled test death inside the region and record retained inventory, ground drops and any grave created. Check experience separately;
keep-expis a distinct flag. - Repeat outside the region with another disposable set if your world policy permits. Ensure the test demonstrates a regional difference rather than the world gamerule preserving everything.
- Restore the test account’s ordinary state and document the exact death-plugin combination. Keep the region’s inventory and experience policies explicit for players.
Check the result
The inventory outcome should match the reviewed regional policy without producing duplicate dropped or grave items. Experience may follow a separate rule. Count retained and external items together so an apparently successful respawn does not conceal duplication.
If the result is wrong
If the result conflicts with a grave or death plugin, restore the previous regional value and consult that integration’s supported ordering. Do not test with valuable player inventories or change the whole world gamerule just to force a regional demonstration to pass.
References and related help
- WorldGuard ExtraFlags maintainer reference
- WorldGuard ExtraFlags maintainer reference
- WorldGuard ExtraFlags maintainer reference
- Add and test WorldGuard ExtraFlags in one region
- Protect a Minecraft spawn with WorldGuard regions
Change regional walking speed without leaving players with a stale speed
A regional speed effect should end predictably when a player leaves. Test entry, exit and reconnect behaviour so an event area does not leave a persistent movement change behind.
Follow the procedure
- Confirm the installed ExtraFlags build provides the
walk-speedflag and review its numeric type and supported range in the matching documentation or implementation. - Record the target region’s existing speed setting and identify other plugins that adjust movement speed. Use a short flat test route with a visible start and finish.
- Apply a modest supported trial value to a disposable region through the WorldGuard flag command. Avoid extreme values and do not guess a range from another plugin’s speed command.
- Have a non-operator account walk the same route before entry, inside the region and after exit. Keep sprinting, potion effects and game mode consistent.
- Test the intended teleport and reconnect paths. Inspect whether another movement provider overwrites the state and whether the normal walking speed returns afterward.
- Remove the trial value or restore the saved one and repeat the outside walk. Record the approved setting only after confirming a clean return to ordinary movement.
Check the result
The account should show the intended movement change inside the region and return to its normal state through the tested exit paths. A timing comparison is more useful than a subjective claim that movement feels faster. Keep external potion and speed effects out of the trial.
If the result is wrong
If the speed remains altered, restore the previous flag and use the supported movement provider to return the test account to its recorded normal state. Check plugin conflicts before increasing the value. Do not reset all player data or apply a global speed command to solve one regional transition.
References and related help
- WorldGuard ExtraFlags maintainer reference
- WorldGuard ExtraFlags maintainer reference
- WorldGuard ExtraFlags maintainer reference
- Add and test WorldGuard ExtraFlags in one region
- Protect a Minecraft spawn with WorldGuard regions
Fix an unknown ExtraFlags flag after a plugin or server update
An unknown flag usually means the extension did not register it, not that the region needs to be recreated. Inspect startup and dependency compatibility before changing protection data.
Follow the procedure
- Record the exact unknown flag name and the versions of WorldGuard, WorldEdit, ExtraFlags and the server. Confirm you are using the intended aromaa project rather than a similarly named extension.
- Open the panel console or startup log and find the first ExtraFlags error. A flag-registration error after a plugin reload has a different cause from a missing dependency or unsupported server API.
- Compare the flag with the matching maintainer source. Some desired flags belong to a different project, and a name from an online example does not establish that your installed plugin provides it.
- Preserve the region configuration and current plugin files before a correction. Do not delete or recreate a region merely because its extension flag cannot currently be recognized.
- Arrange a controlled full restart with a documented compatible dependency set if needed. ExtraFlags explicitly rejects unsupported reload-time flag registration in its implementation.
- Check startup for successful enablement, then inspect the existing region and test the specific flag on a disposable area before changing the public region.
Check the result
The intended extension should enable cleanly and register the documented flag, while existing region ownership and other protections remain intact. A recognized flag name is only the first check; test its practical behaviour with an ordinary account before considering the compatibility issue resolved.
If the result is wrong
If startup still fails, restore the previous matched plugin set and configuration and provide the first exception to the maintainer. Avoid repeated live plugin reloads, random forks or editing stored flag data by hand. Keep the region’s ordinary WorldGuard protections active while the extension is investigated.
References and related help
- WorldGuard ExtraFlags maintainer reference
- WorldGuard ExtraFlags maintainer reference
- Add and test WorldGuard ExtraFlags in one region
- Protect a Minecraft spawn with WorldGuard regions
LoginSecurity tasks
Task guides and troubleshooting for LoginSecurity. Check the installed release before changing configuration or data.
Change a LoginSecurity password without exposing it to staff
A player who knows the current LoginSecurity password can change it privately through the plugin command. Keep both passwords out of tickets, screenshots and shared console transcripts.
Follow the procedure
- Confirm the server uses lenis0012’s LoginSecurity and read the command syntax for the installed version. The documented change command uses the current password followed by the new password.
- Log in normally on the account whose password is being changed. If the current password is unknown, use the server’s verified ownership recovery process instead of guessing or sharing credentials with helpers.
- Choose a unique random password within the configured length limits and character rules. Do not reuse the CloudExa panel, email or another game server’s password.
- Enter
/changepasswith the required current and new password arguments privately in the Minecraft command interface. Never paste the full command into public chat or a support ticket. - Read the private result, then end the authenticated session through the supported logout or reconnect procedure. Check whether session continuation could otherwise bypass the password prompt.
- Log in with the new password and verify the old one is no longer accepted in a controlled test. Store the new password in your password manager without sending it to staff.
Check the result
The account should authenticate with the new password after the old session is ended. A successful reconnect without a prompt may only demonstrate remembered-session behaviour. Verify an actual password authentication path before assuming the change worked.
If the result is wrong
If the command fails, check the installed length limits and exact syntax without disclosing the password. Avoid repeated failed attempts that trigger login limits. If the account becomes inaccessible, retain the error and use verified recovery; do not unregister it or remove its authentication record as a shortcut.
References and related help
- LoginSecurity maintainer reference
- LoginSecurity maintainer reference
- LoginSecurity maintainer reference
- Protect your CloudExa accounts with 2FA and recovery codes
- Find Minecraft logs and send useful troubleshooting details
Check remembered LoginSecurity sessions after a password change
A reconnect that skips the password prompt may be a remembered session rather than a failed password change. Review the documented session policy without weakening authentication for every player.
Follow the procedure
- Confirm the LoginSecurity version and read its current session-continuation documentation. The maintainer describes IP- and time-based sessions, but the exact controls depend on the release.
- Record the intended session duration and whether the test account has an authentication bypass permission. Do not publish its IP address while collecting evidence.
- Use a disposable account to log in, disconnect and reconnect through the normal public route. Record whether the prompt is skipped and the elapsed time between connections.
- End the session through the supported logout control and reconnect again. Test an actual login with the current password rather than treating a remembered session as a password acceptance test.
- If policy requires shorter continuation, change only the documented session setting for your installed release and use its supported application procedure. Keep a saved configuration for rollback.
- Repeat both immediate and post-expiry reconnects. Explain the resulting policy to players so a skipped prompt is not mistaken for proof that anyone can access their account.
Check the result
The account should remain authenticated only under the documented continuation conditions and require a fresh login when those conditions end. A prompt-free reconnect is not enough to judge a password reset. Verify session expiry or explicit logout with the disposable account.
If the result is wrong
If authentication is bypassed unexpectedly, inspect ls.bypass, trusted integrations and the network’s forwarded identity path. Restore the previous session configuration if a change causes widespread login trouble. Do not disable registration security or clear authentication tables to force everyone to see a prompt.
References and related help
- LoginSecurity maintainer reference
- LoginSecurity maintainer reference
- LoginSecurity maintainer reference
- Protect your CloudExa accounts with 2FA and recovery codes
- Find Minecraft logs and send useful troubleshooting details
Investigate an inventory hidden by LoginSecurity before declaring item loss
LoginSecurity can hide a player’s inventory until authentication completes. Check the login state and supported inventory-hiding integration before restoring items that may still exist safely.
Follow the procedure
- Ask the player whether the inventory is empty before login, after login or both. Record the client version and timestamp without collecting the player’s password.
- Inspect the installed LoginSecurity configuration and the documented inventory-hiding feature. The source describes a safe hiding option that requires ProtocolLib; verify the matching release’s requirements.
- Check startup logs for LoginSecurity and ProtocolLib errors, especially after a server update. Do not assume the integration works merely because both jar files are present.
- Use a disposable account with a counted set of ordinary items. Reconnect, observe the unauthenticated view, then complete login and compare the inventory afterward.
- Check whether the real player’s login actually completed or remains blocked by another authentication step. Avoid moving items, changing game modes or running recovery commands during diagnosis.
- If the hiding integration is incompatible, plan a supported dependency correction with matching backups. Verify the disposable inventory before and after the controlled change.
Check the result
The disposable account’s recorded items should return to the correct authenticated view without duplication. A hidden pre-login inventory is a different issue from persisted item loss. Confirm login completion and item counts before proposing any restitution or database recovery.
If the result is wrong
If items remain missing after confirmed authentication, preserve the player data and logs for a separate inventory investigation. Do not unregister the account, delete player files or grant replacement items before identifying the state. Roll back a failed integration change with its matched configuration.
References and related help
- LoginSecurity maintainer reference
- LoginSecurity maintainer reference
- LoginSecurity maintainer reference
- Protect your CloudExa accounts with 2FA and recovery codes
- Find Minecraft logs and send useful troubleshooting details
Resolve a LoginSecurity username-case refusal without resetting the account
LoginSecurity can require the exact capitalization used at registration. A name-case refusal should be checked against the account record rather than treated as a forgotten password or missing registration.
Follow the procedure
- Record the exact refusal text and the username capitalization the player is using. Do not ask for their password and do not expose the authentication database in a public ticket.
- Check the installed
login.username-match-exactpolicy and matching release documentation. Establish whether exact-name matching is enabled intentionally for account protection. - Verify the player’s ownership through your established support process. Use authorized read-only account information to determine the registered spelling without changing the record.
- Ask the verified player to connect using the documented correct identity path and capitalization. Check the proxy or launcher identity handling if it changes the name unexpectedly.
- Have the player authenticate privately and confirm normal access. If an actual account rename is required, follow the release’s supported migration or recovery procedure rather than inventing a database edit.
- Record the resolved spelling or integration correction privately. Keep exact-name protection enabled unless an administrator has separately reviewed a policy change for the whole server.
Check the result
The verified owner should reach the existing account and authenticate normally without losing its registration, inventory or other player data. A successful new registration under a second spelling is not equivalent to recovering the original identity and may create a separate account.
If the result is wrong
If the refusal continues, retain the exact error and review proxy identity forwarding with support. Do not disable authentication, grant bypass or unregister the original record to make the message disappear. Preserve the existing account while arranging a documented identity correction.
References and related help
- LoginSecurity maintainer reference
- LoginSecurity maintainer reference
- LoginSecurity maintainer reference
- Protect your CloudExa accounts with 2FA and recovery codes
- Find Minecraft logs and send useful troubleshooting details
WorldEdit tasks
Task guides and troubleshooting for WorldEdit. Check the installed release before changing configuration or data.
Fix a WorldEdit schematic that pastes at the wrong offset
An unexpected offset usually starts with the position where you copied the build. WorldEdit records an origin relative to your player position. Diagnose that reference point on a disposable plot before moving a valuable build or editing the source structure.
Work through the change
- Write down the intended anchor block and its coordinates. Photograph a distinctive corner so you can compare direction, height and distance after the test paste.
- Load the schematic into your clipboard without cutting the original build. Check the file name, dimensions and the world where you intend to paste it.
- On an empty test area, stand at a marked anchor and paste once. Compare the distance from your feet to the same distinctive corner of the pasted structure.
- If you control the source, copy it again while standing at a deliberate anchor. Save under a new schematic name and repeat the test at another marked location.
Check the result
The second paste should preserve the chosen relationship between the anchor and the build. Inspect its lowest blocks as well as the visible roof. Keep the original schematic until someone else can reproduce the placement from your written coordinates.
For repeated placements, put the anchor coordinates in the schematic’s staff notes and identify which corner was used. A screenshot showing only the front elevation cannot establish the original copy offset, particularly when the build extends below ground or has an asymmetric basement.
Recover or stop safely
Undo the last test paste in the same editing session if history is available. For an interrupted session, restore the test area from its checkpoint. Do not use repeated blind pastes to find an offset in a populated town.
Related guidance and maintainer reference
For the broader setup, read Use WorldEdit selections, limits and undo safely. Check the installed plugin version before applying syntax from the official WorldEdit documentation.
Paste a WorldEdit structure without erasing surrounding blocks with air
A schematic often contains empty space around its walls. A normal paste can place that air over existing terrain. Choose the paste behaviour from the clipboard documentation, then test it beside a few expendable blocks that represent your destination.
Commands beginning with a slash are player chat commands. Use them in game with the required role; check console support before adapting them for the hosting panel.
Work through the change
- Inspect the schematic bounds and identify whether interior air is essential to rooms, tunnels or redstone. Ignoring all air can preserve unwanted terrain inside the building.
- Prepare a small test floor with a column outside the structure and another inside it. Copy or load the same clipboard you plan to use in production.
- Use the documented ignore-air paste option,
//paste -a, for the trial. Keep your position fixed so a changed anchor cannot disguise the effect of the flag. - Compare the test columns and the interior. If you need a hollow interior, clear only a deliberately selected destination area after making a recoverable copy of that area.
Check the result
The outside test column should remain where the clipboard contained air. Solid clipboard blocks can still replace existing blocks, so this option does not protect every part of the destination. Walk through doors and inspect underground spaces before accepting the result.
Keep a separate test for water and other non-air materials. Ignore-air applies to air; it does not turn a paste into a general non-destructive merge. Check a doorway at floor level where retained terrain is easiest to overlook during a roof-level inspection.
Recover or stop safely
Undo the trial and check the undo result before preparing a fresh selection. If the destination contains player containers, stop and make a world checkpoint; a visual copy alone may miss ownership or plugin records.
Related guidance and maintainer reference
For the broader setup, read Use WorldEdit selections, limits and undo safely. Check the installed plugin version before applying syntax from the official WorldEdit documentation.
Rotate a WorldEdit clipboard without changing the source build
Clipboard rotation changes how your next paste faces. It does not turn the original building in place. Treat orientation and paste offset as separate checks, particularly when a schematic includes stairs, signs or an entrance that must meet a road.
Work through the change
- Mark the front of the source structure with an expendable block. Record your copy position and facing, then copy without cutting or moving the original.
- Use the rotation syntax from your installed WorldEdit help for a ninety-degree clipboard turn. Avoid repeated turns while you are unsure which clipboard is loaded.
- Paste into an empty test area from a marked position. Compare the entrance with a north arrow or a known road direction rather than relying on your camera view.
- Inspect stairs, doors and other directional blocks. If the orientation is wrong, undo that paste, reload the original clipboard and apply one corrected rotation before repeating.
Check the result
The source should remain untouched while the test entrance points in the intended direction. Check the full width and depth after rotation: a rectangular build needs a different destination footprint when turned. Confirm there is room for its hidden foundation.
Check directional blocks individually after rotation. A staircase that looks correct from the entrance can still leave a misplaced sign or connection behind it. Keep the test marker outside the final saved structure so a later builder does not mistake it for decoration.
Recover or stop safely
Reload the unchanged schematic to discard uncertain clipboard transformations. Keep a named original and save a separate rotated variant only after the test succeeds. A server restart should not become your method for resetting clipboard state.
Related guidance and maintainer reference
For the broader setup, read Use WorldEdit selections, limits and undo safely. Check the installed plugin version before applying syntax from the official WorldEdit documentation.
Use a WorldEdit mask to replace one block type without touching its neighbours
A broad replace can damage decoration that shares a similar colour or shape. A mask lets you constrain a change to identified source blocks. Start with an exact block type and a small selection rather than combining several filters during the first test.
Work through the change
- Pick a short wall containing the block you want to replace and at least one neighbouring material you intend to keep. Record the selection corners and current block counts.
- Read the mask syntax for your WorldEdit release. Use a simple material filter first; block state, negation and combined expressions need their own controlled checks.
- Apply the replacement once within the small region. Stay in the same world and do not enlarge the selection until you have inspected both sides of the wall.
- Compare the source count, replacement count and untouched neighbour count. If a session-wide mask was set, clear or record it before issuing an unrelated editing command.
Check the result
Only the selected source material should change. A zero-change report may indicate a mismatched block state or an older global mask, rather than a permission failure. Inspect actual block names instead of guessing from their appearance in a resource pack.
Write the exact source material identifier beside the tested selection. Two blocks that share a texture may have different identities, and one block can have several states. Change only one filter at a time so a zero-result operation has a useful diagnostic meaning.
Recover or stop safely
Undo the most recent edit and confirm the original materials return. Restore the previous mask state if you changed a session-wide setting. For a larger job, keep the small tested command in your change notes rather than expanding it from memory.
Related guidance and maintainer reference
For the broader setup, read Use WorldEdit selections, limits and undo safely. Check the installed plugin version before applying syntax from the official WorldEdit documentation.
Unbind a WorldEdit brush from a tool before normal building
A tool can retain a brush binding after an editing session. The next click may alter blocks instead of performing the tool interaction you expected. Remove the binding while you are away from finished builds, then test both mouse buttons on expendable terrain.
Work through the change
- Move to a safe work area without clicking the suspect tool at structures or containers. Note the tool item and which click previously triggered the edit.
- Consult the tools and brushes help for your WorldEdit build. Use its documented unbind or tool-removal action while holding the bound item; do not assume changing slots removes a binding.
- Test the item against a few expendable blocks. Repeat with the other mouse button and check whether a separate selection or navigation tool still responds.
- Review other items used during the session. Store bound editing tools separately from normal building equipment and tell shared-account staff which bindings remain active.
Check the result
The former brush should no longer place or reshape blocks. If navigation still occurs, identify that tool binding rather than removing permission protections from the player. A selection wand message can be separate from a brush action on the same material.
Avoid testing an uncertain brush by clicking a chest or a valuable wall. Hold the same item stack you used for editing and check its binding in the safe area first. A newly crafted item may not reproduce the staff member’s original session behaviour.
Recover or stop safely
Undo any accidental edit while the session history remains available. Rebind a required brush only from the recorded settings after finishing normal building. If another plugin uses the same item, test with its own documented controls before declaring a conflict.
Related guidance and maintainer reference
For the broader setup, read Use WorldEdit selections, limits and undo safely. Check the installed plugin version before applying syntax from the official WorldEdit documentation.
Change a bounded WorldEdit biome area and verify the client view
A biome edit changes biome data rather than replacing terrain blocks. A successful command can look unchanged until the client receives updated chunk information. Check a small area with visible grass or water colour before applying a biome change to a whole district.
Work through the change
- Record the existing biome at several test coordinates and select a compact region. Include its vertical bounds because biome storage and editing behaviour depend on the Minecraft version.
- Check the biome command syntax in your installed WorldEdit release and choose a valid biome identifier. Avoid using an example from a different server generation without checking completion.
- Apply the change once on the test area. Move away and return or reconnect so the client requests fresh information, while keeping the server running normally.
- Compare the biome reading inside and outside the selection. Inspect colour transitions from another client and note any terrain generator or world plugin that can override your expectations.
Check the result
The chosen biome should appear within the edited bounds, while nearby control points retain their earlier value. Grass colour alone is insufficient evidence when resource packs or client settings change the display. Confirm the data as well as the visual result.
A biome trial needs coordinates on both sides of the boundary. If every observation is inside the edited region, you cannot show that neighbouring land was left alone. Keep the original biome names with those coordinates rather than relying solely on colour screenshots.
Recover or stop safely
Use history only if your installed release recorded the biome change, and verify a small reversal before relying on it. Otherwise restore the area from a known checkpoint. Retain the old biome coordinates so you can reverse the trial deliberately.
Related guidance and maintainer reference
For the broader setup, read Use WorldEdit selections, limits and undo safely. Check the installed plugin version before applying syntax from the official WorldEdit documentation.
Remove a small patch of snow with WorldEdit without flattening terrain
Snow layers and full snow blocks can require different filters. A wide air replacement may also remove buildings or ice that you meant to preserve. Identify the actual block types on a test path and keep the selection shallow enough to exclude underground spaces.
Work through the change
- Inspect several snowy blocks and note whether each is a layer, a full block or decoration from a resource pack. Keep a short untouched path for comparison.
- Select a narrow section of the path and record its corner coordinates. Check the replacement or utility command in your WorldEdit help before deciding how to target the snow.
- Run one filtered operation on the trial section. Avoid a broad replace-to-air command covering everything above the terrain, especially beside roofs, fences and plants.
- Walk the entire test path and inspect its edges. Check that the original surface, slabs, lighting and plants remain in place before extending the same method to another small section.
Check the result
The path should reveal its existing surface with no holes or changed roofline. Snow may return if weather and biome conditions still allow it. Resolve that ongoing world behaviour separately instead of running increasingly large edit commands to hide the symptom.
Inspect roof edges and stair recesses before extending the operation. Thin snow layers can be easy to miss from above, while removing a full snow block may expose an unexpected cavity. Treat cosmetic resource-pack differences as a reason to inspect block data first.
Recover or stop safely
Undo the trial if any protected material changes and review the filter against the actual block data. Keep the original selection coordinates in your notes. For a large seasonal change, make a world backup and plan the weather policy before continuing.
Related guidance and maintainer reference
For the broader setup, read Use WorldEdit selections, limits and undo safely. Check the installed plugin version before applying syntax from the official WorldEdit documentation.
Check WorldEdit chunk selections before editing a region boundary
Chunk-aligned selections help when a job follows region boundaries, but a highlighted corner can include more land than you intended. Confirm the footprint from coordinates before changing blocks near a neighbouring claim or a protected spawn.
Work through the change
- Write the intended boundary coordinates and identify buildings near each edge. Ask the claim owner to stop concurrent edits while you check the selection.
- Use the documented chunk selection mode for your installed WorldEdit version. Read the reported minimum, maximum and volume rather than relying only on a client outline.
- Compare every edge with the intended boundary and walk the corners. Check the vertical extent as well: a chunk footprint can still include basements and structures above you.
- Run a read-only count or distribution check first. If the footprint is too large, rebuild the selection from deliberate corners rather than compensating with a broad permission bypass.
Check the result
The selected area should cover the target chunk footprint without including the neighbouring control block. If the reported volume surprises you, stop before the first write. A selection message proves only what you selected, not that a protection plugin will allow the edit.
Chunk boundaries are horizontal grid boundaries, not ownership records. Compare the selection with actual claim or region coordinates before editing. If those systems disagree, settle the intended work area with the owner instead of assuming chunk alignment grants permission to change it.
Recover or stop safely
Deselect the uncertain region and choose it again from the recorded coordinates. No world restore is necessary for a selection-only mistake. If you already edited blocks, use the recorded operation history or a checkpoint and check the claim edge after recovery.
Related guidance and maintainer reference
For the broader setup, read Use WorldEdit selections, limits and undo safely. Check the installed plugin version before applying syntax from the official WorldEdit documentation.
Diagnose a schematic that WorldEdit cannot load without replacing the original file
A download ending in .schem is not proof of a valid schematic. A failed load can come from an incomplete transfer, an unsupported format or a newer block data version. Preserve the original download and investigate a copy before trying conversions.
Work through the change
- Record the complete load error, schematic size and source version. Keep any creator-supplied format notes, and check whether an archive still needs extracting.
- List the formats supported by the installed WorldEdit build using its documented help. Check filename case and the expected schematics directory without renaming several files at once.
- Upload a fresh copy with a distinct test name and compare its size with the local file. Load it without pasting, then capture any new error lines from that single attempt.
- If conversion is necessary, use a compatible isolated server or trusted documented tool. Keep both the untouched original and the converted result, labelled with their source and target versions.
Check the result
A successful load should report a clipboard with plausible dimensions. Paste that clipboard only on a test world and inspect block types, signs and containers. Loading without an error does not prove that a conversion preserved every detail of the original build.
Keep the original schematic filename, size and error message together. A renamed extension does not convert a file’s format. If another release created the schematic, test a compatible loader on a copy before deciding that the build data itself is damaged beyond recovery.
Recover or stop safely
Remove only the failed test copy from your working list after retaining the error evidence. Restore the original plugin version if a trial update introduces unrelated failures. Do not overwrite a working schematic with a converted file until the paste has passed inspection.
Related guidance and maintainer reference
For the broader setup, read Use WorldEdit selections, limits and undo safely. Check the installed plugin version before applying syntax from the official WorldEdit documentation.
Choose whether a WorldEdit clipboard should include entities
Copying a build with entities can duplicate decorative or gameplay objects when you paste it. Excluding them may leave an armour display empty. Decide what belongs in the build before copying, and keep live animals or valuable inventories away from the test.
Work through the change
- Inventory the entities in the source area, including item frames, armour stands and named mobs. Record which should appear in the destination and which should stay unique.
- Check the clipboard entity flags supported by your WorldEdit release. Copy the region with the chosen behaviour while keeping a separate note of the source coordinates.
- Paste once in an isolated area. Count entities near each display and inspect facing, carried items and attachments without letting players take items during the trial.
- Walk outside the selection and compare the original source count. Before a second paste, undo the first test or use a different labelled area so duplicate entities remain obvious.
Check the result
The destination should contain only the intended entity types, in the expected quantity. Plugin-managed NPCs, shops and ownership records may not travel with a WorldEdit clipboard. Recreate those through their own plugin tools instead of treating a copied visible entity as a working service.
Entities can contain references or behaviour managed by another plugin. A copied visible object is not proof that its ownership, shop or NPC record moved with it. Test the specific interaction after the paste, and leave the original entity available until the comparison is complete.
Recover or stop safely
Use session history only after confirming it removes the test entities in your release. If not, restore the test checkpoint or remove only individually identified trial entities. Never use a world-wide entity purge to clean up a clipboard experiment.
Related guidance and maintainer reference
For the broader setup, read Use WorldEdit selections, limits and undo safely. Check the installed plugin version before applying syntax from the official WorldEdit documentation.
FastAsyncWorldEdit tasks
Task guides and troubleshooting for FastAsyncWorldEdit. Check the installed release before changing configuration or data.
Assign a finite FAWE edit limit to one builder group
A finite limit helps a builder correct a mistake before a huge edit affects the world. Define a named FAWE limit group for a real workload, then prove the limit applies to an ordinary builder account rather than an administrator with bypass permissions.
Work through the change
- Record the largest legitimate edit the builder needs and create a small test region. Read the limit group settings generated by the installed FAWE release.
- Add a named group with a bounded change limit and grant its documented fawe.limit group permission to the intended staff role. Keep administrator and bypass nodes out of the trial account.
- Apply the configuration using the release-supported method in a planned window. Confirm the startup log accepts the limit group before testing an edit near the chosen limit.
- Try one operation below the limit and one controlled operation above it on disposable blocks. Record which group FAWE selects when the player inherits more than one relevant permission.
Check the result
The permitted operation should finish and the oversized trial should stop according to the installed limit behaviour. Inspect the actual world after a rejected operation; a message alone does not establish that no partial changes occurred. Recheck with a fresh non-operator session.
Check the permission group actually assigned to the builder, including inherited grants. A limit configured under an unused group name will not govern their edit. Record the smallest successful edit and the deliberately rejected larger one so both sides of the allowance are demonstrated.
Recover or stop safely
Remove the trial group grant or restore its previous values if the result differs from the policy. Recover any partial test edit from history or the checkpoint. Do not grant an unlimited group just to suppress a confusing limit message.
Related guidance and maintainer reference
For the broader setup, read Replace WorldEdit with FastAsyncWorldEdit safely. Check the installed plugin version before applying syntax from the official FastAsyncWorldEdit documentation.
Test FAWE region restrictions with a claim owner and a visitor
A protection integration must distinguish someone who owns the work area from someone who merely stands inside it. Verify both identities on a test claim before giving builders access to fast editing commands across a populated server.
Work through the change
- Record the installed protection plugin, FAWE version and region restriction setting. Select a disposable claim with a clearly marked inside block and outside block.
- Grant the documented integration permission to a limited builder account. Make that account an owner or member only where your protection integration requires it; retain a visitor account with no build role.
- As the builder, attempt a tiny edit inside the allowed area and a second edit crossing the boundary. Keep screenshots of the coordinates and resulting messages.
- Repeat from the visitor account and inspect all control blocks. Test overlapping regions or plots separately, since the integration can combine ownership with an administrator bypass.
Check the result
The intended builder should edit the authorised area without modifying the outside control block. The visitor should not gain editing rights through proximity alone. A test as an operator can conceal a missing region rule, so finish with the exact player role you intend to deploy.
Use the same selection for the owner and visitor tests so different geometry cannot explain the result. Include one control block outside the claim. A plugin message alone is insufficient evidence if blocks across the boundary still changed during the operation.
Recover or stop safely
Revoke the trial editing permission if a boundary test changes protected blocks. Restore the small test region and review the integration setting rather than disabling protection globally. Keep the before-and-after role grants with the support evidence.
Related guidance and maintainer reference
For the broader setup, read Replace WorldEdit with FastAsyncWorldEdit safely. Check the installed plugin version before applying syntax from the official FastAsyncWorldEdit documentation.
Investigate a FAWE edit that appears queued or unfinished
An unfinished edit can reflect queue pressure, a stopped task, a limit or a protection failure. Repeating the same command may add more work and obscure the original operation. Preserve its timestamp and inspect progress before changing queue settings.
Work through the change
- Write down the initiating player, command, selection volume and start time. Ask other builders to pause new edits while you examine the single affected operation.
- Check server responsiveness and the FAWE log around that timestamp. Separate a queue warning from an exception or an explicit edit limit, and note whether blocks continue appearing.
- Use the task or queue information supported by your installed release. Avoid copying undocumented cancellation commands from another FAWE generation into a live console.
- If you must stop the task, use the documented control and then inspect the whole selected area. Capture a checkpoint of the current partial state before attempting a compensating edit.
Check the result
Your notes should establish whether the original operation is still progressing and which error, if any, stopped it. Compare block counts at fixed intervals instead of clicking the command again. Normal server ticks do not prove the asynchronous edit has completed.
Keep a second administrator from submitting unrelated edits during the observation window. Several concurrent jobs can make an apparently stationary queue harder to interpret. Record which account submitted the operation and its bounds so the next log review follows the correct piece of work.
Recover or stop safely
For a failed partial edit, choose a verified history entry or restore the world checkpoint in a maintenance window. Restore the previous queue configuration if a trial change worsens responsiveness. Do not assume a restart reverses the blocks FAWE already placed.
Related guidance and maintainer reference
For the broader setup, read Replace WorldEdit with FastAsyncWorldEdit safely. Check the installed plugin version before applying syntax from the official FastAsyncWorldEdit documentation.
Check FAWE disk history before relying on a later undo
Undo availability depends on the history configuration and retained files. A builder may remember an edit that the server can no longer recover through its current history. Test the recovery path using a small named operation before promising a rollback for a larger job.
Work through the change
- Read the history settings from your installed FAWE configuration and note the storage location, retention controls and available disk space. Keep a separate completed world backup.
- Make a distinctive tiny edit in a test area with a dedicated builder account. Record the time, world and player identity so you can distinguish it from earlier operations.
- Use the documented history interface to locate that operation. Inspect the files or reported entry without manually changing their contents or moving the active history directory.
- Perform a controlled undo and verify the actual blocks. If you need recovery after a restart, schedule that separate test on a staging copy rather than restarting a busy server for an assumption.
Check the result
The recorded test operation should be discoverable and reversible within the retention policy you observed. Disk history consumes storage and can contain useful audit information. An entry count alone does not prove every original block or entity state remains recoverable.
Compare the timestamp of the history record with the edit you intend to undo. An available history folder does not prove every operation was retained, and storage policies can remove older records. Keep a normal world backup for recovery beyond the history retention window.
Recover or stop safely
Return any history setting to its previous value after an unsuccessful experiment and preserve existing history files for diagnosis. Recover the test area from its backup if history fails. Keep world backups independent of FAWE retention so one storage problem does not remove both options.
Related guidance and maintainer reference
For the broader setup, read Replace WorldEdit with FastAsyncWorldEdit safely. Check the installed plugin version before applying syntax from the official FastAsyncWorldEdit documentation.
Limit FAWE schematic access for a shared building team
Schematic permissions can cover reading, writing and sharing different files. A builder who needs to paste an approved structure does not necessarily need to overwrite the team library or upload it to an external service. Test those capabilities separately.
Work through the change
- Create a small approved schematic library and keep an offline copy. Record which builders should load existing files and which maintainers may save new library versions.
- Consult FAWE and WorldEdit permission documentation for the installed release. Grant only the relevant load or save capabilities instead of an administrator or blanket WorldEdit permission.
- With a non-operator builder, load one approved file and paste into a test plot. Then try the restricted save or share action against an expendable test name.
- Check the library after the negative test. Confirm the original file size and name remain unchanged, and that the test account cannot access a sharing feature you intended to restrict.
Check the result
The builder should complete the approved paste while the restricted write or share operation fails. Inspect inherited permission groups if the account retains extra access. Folder names and permissions vary between releases, so an old library path should not become your only security assumption.
Agree which staff role can load shared schematics and which can save new ones. Those are separate responsibilities even when the interface feels similar. Keep an untouched known-good schematic for the permission trial, and avoid using a live customer build as an access-control test.
Recover or stop safely
Revoke the trial grants if the library becomes writable beyond policy. Restore any changed test file from the offline library copy and keep its version label. Do not replace the whole library with files from a player-provided archive without reviewing each entry.
Related guidance and maintainer reference
For the broader setup, read Replace WorldEdit with FastAsyncWorldEdit safely. Check the installed plugin version before applying syntax from the official FastAsyncWorldEdit documentation.
Bound FAWE brush radius without removing a builder’s other tools
A brush can affect more land with one click than a builder expects. Keep the brush radius tied to the role and test a boundary case in an empty area. Changing the brush limit is more precise than withdrawing every editing command from the team.
Work through the change
- Record the current role grants and the largest brush the builder needs for approved work. Check the radius controls in the installed FAWE limit group configuration.
- Create or adjust one finite limit group and assign it to a test builder without bypass grants. Keep the existing group definition available for rollback.
- Bind a harmless small brush on disposable terrain, then attempt to choose a radius beyond the planned cap. Use the documented syntax for that brush type and installed release.
- Inspect the actual affected footprint and repeat with another bound item. Verify that the builder can still make ordinary selections and perform the smaller authorised brush operation.
Check the result
The role should retain useful editing access while the oversized radius fails or clamps as the documented release specifies. A radius limit does not cap every other operation, so also retain a finite block-change limit and protection integration. Test as a normal builder after reconnecting.
Test a deliberately oversized radius on the disposable area as well as an allowed one. A successful small brush proves only that basic editing works. Record the rejection message so staff can distinguish the agreed size limit from a broken tool or missing plot permission.
Recover or stop safely
Restore the previous group settings if normal work stops functioning and remove the test brush binding. Undo the small trial operation while its history remains available. Investigate inherited unlimited or bypass roles before increasing any cap to satisfy an unexplained result.
Related guidance and maintainer reference
For the broader setup, read Replace WorldEdit with FastAsyncWorldEdit safely. Check the installed plugin version before applying syntax from the official FastAsyncWorldEdit documentation.
Verify FAWE disallowed blocks with a non-admin account
A disallowed block list can prevent accidental use of materials that create server or gameplay problems. An administrator bypass can make the list appear broken. Check one harmless denied material on a test copy before relying on the policy for other blocks.
Work through the change
- Copy the current disallowed-block settings and note the configuration file used by your FAWE release. Pick one expendable material for the policy test rather than a dangerous block.
- Check the documented relationship between the block list and the worldedit.anyblock permission. Remove that bypass from the trial builder while preserving other required edit permissions.
- Attempt a small edit with the denied material and another edit with an allowed material. Keep both commands and the complete response in the change notes.
- Inspect the world and reconnect the builder before repeating. If an unexpected grant remains, inspect inherited roles and temporary permissions instead of changing the list repeatedly.
Check the result
The denied test material should not appear, while the ordinary material should work within the same selection and region. That comparison separates a block policy from a general editing or region denial. Review command patterns and brushes that players actually use, not just one set command.
A player can receive a bypass through a parent group even when the direct role looks restricted. Save effective permissions from the actual test account and repeat after reconnecting. Keep the prohibited-material trial tiny so an unexpected grant cannot scatter dangerous blocks across the world.
Recover or stop safely
Restore the test list entry and previous role grants when the check ends. Undo the expendable allowed edit. Keep the production list narrow and documented; removing all restrictions to diagnose one denied command can allow unrelated risky materials across the entire world.
Related guidance and maintainer reference
For the broader setup, read Replace WorldEdit with FastAsyncWorldEdit safely. Check the installed plugin version before applying syntax from the official FastAsyncWorldEdit documentation.
Inspect lighting and side effects after a FAWE terrain edit
A finished block placement can leave an area looking wrong because lighting or physics-related side effects need attention. Inspect the saved world from another client before assuming the edit failed and repeating a large terrain operation.
Work through the change
- Record the FAWE build, affected coordinates and command. Keep builders out of the test area until you have compared its block layout with the intended result.
- Reconnect or revisit the chunks and ask another player to view the same location. Compare client visual artefacts with server-side block and light conditions at fixed points.
- Read the side-effect and queue guidance for the installed FAWE release. Trial only a documented update or relighting method on a compact section before applying it elsewhere.
- Observe server responsiveness and inspect fluids, falling blocks and nearby redstone after the trial. These behaviours can matter even when the terrain now appears visually correct.
Check the result
The test section should retain the intended blocks and show consistent lighting to both clients. If a resource pack or client shader causes the display difference, server-wide relighting may add load without changing the underlying issue. Save before-and-after views from matching positions.
Inspect a test tunnel as well as an exposed surface. Lighting faults can be hidden at midday and obvious underground. Keep clients at comparable brightness settings, and record whether the anomaly survives a reconnect before deciding that stored light data needs repair.
Recover or stop safely
Undo only the demonstrated faulty test operation or restore the area checkpoint if the repair changes terrain. Return any trial side-effect setting to its earlier value. Avoid toggling several performance controls at once, because that removes your ability to identify which behaviour changed.
Related guidance and maintainer reference
For the broader setup, read Replace WorldEdit with FastAsyncWorldEdit safely. Check the installed plugin version before applying syntax from the official FastAsyncWorldEdit documentation.
Multiverse-Core tasks
Task guides and troubleshooting for Multiverse-Core. Check the installed release before changing configuration or data.
Set a Multiverse world spawn without changing the main server world
A world-specific spawn can differ from the main server spawn, a player bed and a first-join plugin destination. Record which arrival path you intend to change before moving the point, so you can test that path without disturbing other worlds.
Work through the change
- Identify the exact managed world name from Multiverse information. Stand on a safe solid platform with room above the player and record its coordinates and facing.
- Check the set-spawn command in the installed Multiverse command help. Set the spawn for that named world rather than changing server.properties or the server main-world name.
- Use the documented world-spawn teleport from an ordinary test account. Record where the player lands and whether Multiverse adjusts the target to a nearby safe location.
- Test a second arrival method, such as the portal that players normally use. If it has an explicit coordinate destination, inspect that destination separately instead of repeatedly moving the world spawn.
Check the result
The world-spawn route should reach the platform with the intended facing. A bed respawn or EssentialsX first-join action may still choose another location. Compare these routes independently and keep the results with the world name so staff do not mistake a different arrival rule for a failed save.
Check whether the login plugin or a first-join plugin teleports players after Multiverse selects a spawn. Those later actions can make a correct world spawn appear ineffective. Compare an established player’s world teleport with a new account’s login before changing another spawn setting.
Recover or stop safely
Return to the recorded old spawn and restore it with the same world-specific control if the new location is unsuitable. Preserve the platform until players have tested it. Avoid deleting and reimporting a world merely to update a spawn point.
Related guidance and maintainer reference
For the broader setup, read Add and import Minecraft worlds with Multiverse-Core. Check the installed plugin version before applying syntax from the official Multiverse-Core documentation.
Find why a player can teleport to one Multiverse world but not another
A world access denial can come from the target world, the teleport command or a portal permission. Compare those layers with one ordinary player account. Using an operator account hides the permission path that your players actually need.
Work through the change
- Record the source world, target world and exact command or portal used. Check that the target is loaded and listed under the expected name rather than only an alias.
- Read the installed Multiverse access enforcement setting and the documented target-world access permission. Inspect the player’s inherited and temporary grants without adding a wildcard.
- Test a permitted world through the same command or portal. Then test the denied world and record both responses, including any protection or permission plugin messages.
- Grant only the missing documented capability to a test role if your policy permits access. Reconnect that account and repeat the original route before changing permissions for the full player group.
Check the result
The approved player should reach the target through the intended route while a control account remains denied. If a direct teleport works but the portal fails, inspect the portal-specific permission instead of expanding world access again. Record the exact grant that changed the result.
Write down the exact world name used by the permission node and the command. A display alias can look identical to the intended destination while referring to another internal name. Test denial from a second source world if players normally arrive through more than one route.
Recover or stop safely
Remove the temporary grant if the route remains broken or grants extra access. Restore the previous role assignment and keep the denial messages for support. An unloaded or renamed destination needs a world-reference repair, not a broad administrator permission.
Related guidance and maintainer reference
For the broader setup, read Add and import Minecraft worlds with Multiverse-Core. Check the installed plugin version before applying syntax from the official Multiverse-Core documentation.
Choose a Multiverse respawn world and test bed behaviour separately
Players can follow different respawn rules after death, a bed use or an End exit. Set a deliberate destination for one source world and test those cases with expendable inventory before announcing a server-wide respawn policy.
Work through the change
- Record the source world’s respawn-world and bed-respawn settings along with its normal spawn coordinates. Keep the intended target world loaded and confirm its landing point is safe.
- Use the world-property control documented for your Multiverse release to set the target respawn world. Keep bed behaviour unchanged during this first trial so you change one cause at a time.
- Test a controlled death with an ordinary account that has no valuable items. Compare an account with a valid bed to one without a bed, and note the arrival world in each case.
- If the source is an End world, test its exit route separately. Inspect other spawn or inventory plugins when their policies redirect the player after Multiverse chooses a destination.
Check the result
The no-bed test should follow the intended world rule, and the bed test should follow your documented bed policy. Confirm hunger, inventory and game mode after arrival when other multi-world plugins manage them. A correct coordinate in the wrong world is still a failed respawn test.
Use separate trial deaths for a valid bed, an invalidated bed and no bed. Record the entry world and final world each time. Testing only the default death case leaves the common complaint unresolved when a player’s saved bed or anchor changes the selected destination.
Recover or stop safely
Restore the earlier respawn-world property and any bed setting you changed. Return the test account to its starting location and preserve its original player data. Do not erase bed records or reset a whole world to investigate a respawn conflict.
Related guidance and maintainer reference
For the broader setup, read Add and import Minecraft worlds with Multiverse-Core. Check the installed plugin version before applying syntax from the official Multiverse-Core documentation.
Stop weather changes in one Multiverse event world
An event map can need stable weather while survival worlds keep normal conditions. Apply the policy to the named event world and check its persisted property, rather than running an unspecific weather command from whichever world an administrator happens to occupy.
Work through the change
- Record the event world name and its current weather property. Check scheduled commands or event plugins that may also change rain and storms during the same period.
- Read the weather property documentation for your installed Multiverse release. Apply the intended world-specific weather policy and record the value returned by its information command.
- Observe the event world over an interval that normally allows a weather change. Check a separate survival world during the same interval to confirm you did not apply a global rule.
- Return after a normal planned server restart to verify persistence. If a scheduler changes the weather, disable only that conflicting test action or adjust its target after recording its previous behaviour.
Check the result
The event world should keep the chosen conditions while the control world follows its existing policy. Client weather effects, region settings and visual packs can differ from actual server weather, so verify from more than one position and compare the world information output.
Observe a full weather transition rather than checking only the immediate sky. Another weather plugin may reapply its schedule later. Record whether the goal is clear weather, rain or a frozen current state, because those are different policies with different checks after a restart.
Recover or stop safely
Restore the original weather property when the event ends and remove any temporary schedule override. Keep the earlier values in the event checklist so another staff member can return the world to normal without guessing which command produced the temporary result.
Related guidance and maintainer reference
For the broader setup, read Add and import Minecraft worlds with Multiverse-Core. Check the installed plugin version before applying syntax from the official Multiverse-Core documentation.
Diagnose Multiverse animal and monster spawn rules in one world
A quiet world may reflect a configured spawn category, a gamerule, light conditions or a mob cap. Begin with the world’s entity spawn configuration and a controlled natural-spawn test rather than changing every server-wide mob setting.
Work through the change
- Identify the world and record its difficulty, entity spawn categories and exceptions. Read the current Multiverse entity-spawn-config documentation because older animals and monsters examples may use different controls.
- Choose one category and one safe observation area. Check time, light and player distance so the trial does not depend on conditions that already prevent normal natural spawning.
- Change only the documented category property required for the trial. Leave exception lists intact until you have recorded which species they permit or exclude.
- Observe natural spawns over a suitable interval and compare another world. Keep command-spawned and plugin-spawned mobs out of the result, since they may follow different event paths.
Check the result
The test should show the chosen natural-spawn policy without changing the control world or existing animals. A successful configuration message does not prove a species has room under the cap. Inspect competing plugins and actual spawn conditions if the result remains empty.
Test an actual new spawn attempt separately from already-present mobs. Existing entities can remain after future spawning is restricted. Keep the test in appropriate light and biome conditions so normal Minecraft spawn requirements do not disguise whether the world rule is functioning.
Recover or stop safely
Restore the original category value and exceptions if the trial creates unwanted activity. Move players away while you assess extra entities; do not use a blanket world purge that could remove pets, named mobs or plugin-managed creatures along with the test population.
Related guidance and maintainer reference
For the broader setup, read Add and import Minecraft worlds with Multiverse-Core. Check the installed plugin version before applying syntax from the official Multiverse-Core documentation.
Apply a world-specific PvP rule without bypassing region protection
World PvP and region PvP can both influence a fight. Check the broader Multiverse property and a small unprotected test area before altering spawn regions. A permission bypass on staff accounts can conceal the policy that ordinary players experience.
Work through the change
- Record the target world’s PvP property and any nearby region or claim rules. Choose a test area where both players can stand safely without valuable equipment.
- Use the installed world-property command to change PvP only for the named world. Retain the previous value and avoid touching unrelated combat or invulnerability settings.
- With two ordinary accounts, try one controlled hit in the test area. Then repeat in the protected spawn without changing its flags, noting whether each hit applies damage.
- Test another world that should keep its original policy. If results differ between identical positions, inspect staff bypass, team rules or a combat plugin before broadening any permission.
Check the result
The world policy should behave as intended in the control area while existing region rules continue protecting their areas. Check projectile and melee behaviour separately if your gameplay depends on both. A test with a single operator cannot establish what two regular players can do.
Use disposable equipment and willing players for damage tests. Verify neighbouring regions too, because a global combat setting can resemble a local rule during a single encounter. Keep any invincibility or event protection in the notes so later staff do not misdiagnose the interaction.
Recover or stop safely
Restore the earlier Multiverse PvP value if the world-wide change affects an event or minigame. Keep region flags at their recorded values. Recover any test inventory from the prepared checkpoint rather than changing global death rules to make the trial convenient.
Related guidance and maintainer reference
For the broader setup, read Add and import Minecraft worlds with Multiverse-Core. Check the installed plugin version before applying syntax from the official Multiverse-Core documentation.
Change difficulty for one Multiverse world and confirm it persists
A difficulty change for an event or resource world should not silently alter the main survival world. Record the target world and the player impact first, especially when a peaceful setting could remove hostile entities that are important to an existing encounter.
Work through the change
- List the world through Multiverse and record its current difficulty. Identify any saved or plugin-managed mobs that require a staged copy before trying a different difficulty.
- Choose the named world-property control from your installed documentation. Apply one intended difficulty value and read back the value from world information.
- Test with a normal account in that world and inspect the relevant gameplay effect. Check the main world separately rather than assuming a command context selected the right target.
- After the next planned restart, compare the persisted difficulty with your notes. If it changes back, inspect scheduled commands and world management plugins before rewriting the property repeatedly.
Check the result
The target world should retain the chosen difficulty and the control world should retain its earlier one. Existing entities and combat plugins may not produce an immediate obvious demonstration, so use the reported property alongside a controlled gameplay test. Record the restart result for later staff changes.
Check the saved value after a normal restart rather than treating immediate feedback as persistence proof. If the difficulty returns to its former value, identify the configuration or plugin that reapplies it. Avoid repeatedly increasing difficulty while the underlying source of the overwrite remains unknown.
Recover or stop safely
Restore the original difficulty if the trial disrupts play. Restoring a difficulty value does not resurrect entities removed during a peaceful trial, so use the staging checkpoint when recovering those encounters. Avoid a live peaceful test on a world with irreplaceable hostile mobs.
Related guidance and maintainer reference
For the broader setup, read Add and import Minecraft worlds with Multiverse-Core. Check the installed plugin version before applying syntax from the official Multiverse-Core documentation.
Use a Multiverse world alias without renaming the world folder
An alias gives players a friendlier label while the world’s internal identity remains stable. That separation can prevent broken portals and inventories, but commands and third-party plugins may resolve aliases differently. Test the display change before telling staff to use it everywhere.
Work through the change
- Record the managed world name, folder name and existing alias. Identify portals, menus and commands that currently refer to the world so you can verify they still resolve it.
- Use the alias property documented for the installed Multiverse version. Choose a label that is distinct from another world name and avoid formatting codes during the first trial.
- Check the world list and any menu that displays the label. Test an existing teleport with the original internal name before trying the alias as a command argument.
- Inspect dependent plugin settings without renaming their references by rote. Keep the real world name in maintenance notes and use the alias only where that plugin explicitly supports it.
Check the result
Players should see the new label in the intended display while existing destinations still reach the same saved world. An alias should not create a new folder, reset a seed or move inventories. A plugin that ignores the alias may need its own display setting rather than a world rename.
Keep the folder name and alias in separate columns of the change record. That distinction matters when another plugin expects an internal world identifier. Give players the friendly label while retaining the exact source name for portals, permission nodes and recovery notes.
Recover or stop safely
Restore the earlier alias if a label collision confuses a menu or command. Keep the world folder and internal name unchanged throughout the trial. If a dependent command fails, revert that one display edit and collect its exact argument instead of reimporting the world.
Related guidance and maintainer reference
For the broader setup, read Add and import Minecraft worlds with Multiverse-Core. Check the installed plugin version before applying syntax from the official Multiverse-Core documentation.
Prevent an unused Multiverse event world from loading automatically
An event world can consume resources even when no event is scheduled. Disabling its automatic load changes startup behaviour, not the contents of its folder. Audit every route to that world before leaving players with a portal that points at an unavailable destination.
Work through the change
- List players, spawn rules and portals that refer to the event world. Move test accounts to a stable lobby and record the world’s current auto-load property.
- Use the installed Multiverse property control to disable auto-load for that named world. Leave the world folder and its managed-world record intact for the planned return.
- If you need to unload it now, use the documented world unload path only after checking players and dependent tasks. Record any refusal rather than forcing files away while the server is running.
- At a planned restart, confirm the event world stays unloaded and the lobby loads normally. Disable or explain its public menu link until the next event so players do not interpret the closure as lost data.
Check the result
The startup world list should omit the closed event world without creating another world under a similar name. Retain a verified backup and the exact folder name. A plugin with its own world loader may still load it, so inspect that plugin’s startup behaviour if it reappears.
Ask the event owner whether any scheduled task, portal or backup routine expects the world to be loaded. Disabling automatic load changes availability, not merely resource consumption. Keep the documented manual return path with the event calendar so staff can prepare the map before participants arrive.
Recover or stop safely
Re-enable auto-load and use the documented load command when reopening the event. Verify portals and player arrival before advertising access. Do not delete the managed record or folder to achieve a temporary startup policy; those actions introduce unnecessary recovery work.
Related guidance and maintainer reference
For the broader setup, read Add and import Minecraft worlds with Multiverse-Core. Check the installed plugin version before applying syntax from the official Multiverse-Core documentation.
Investigate a Multiverse world player limit that staff can bypass
A world player limit can protect a small event, while staff bypass permissions let particular accounts enter. Check the limit and bypass separately. A working staff teleport does not establish that a normal participant should be admitted when the world is full.
Work through the change
- Record the named world’s configured player limit and current occupancy. Check which staff or test accounts inherit a player-limit bypass, including world-specific and broad grants.
- Create a small controlled admission trial with expendable accounts. Use the limit property from your installed Multiverse release and keep a route back to the lobby.
- Fill the test capacity with ordinary accounts and attempt another ordinary admission. Then try a staff account with the documented limited bypass to compare the two responses.
- Check reconnect behaviour and the event’s usual portal or menu route. If a separate queue or minigame plugin also enforces admission, keep its result distinct from Multiverse’s world count.
Check the result
Ordinary accounts should respect the intended capacity while authorised staff follow your bypass policy. Confirm that the configured world count is not being confused with your hosting plan’s server slots. Changing this property does not add RAM, CPU or a larger service allocation.
Use an agreed fallback lobby for capacity tests and check its own entry permission. A rejection message is not enough if the rejected player becomes trapped at a portal. Keep the trial limit small and restore normal admission promptly after the observation window.
Recover or stop safely
Restore the earlier world limit after the trial and remove temporary bypass grants. Return the test accounts to the lobby before closing access. If the event becomes overfull, use its documented evacuation procedure with a player notice rather than killing processes or deleting player files.
Related guidance and maintainer reference
For the broader setup, read Add and import Minecraft worlds with Multiverse-Core. Check the installed plugin version before applying syntax from the official Multiverse-Core documentation.
Multiverse-Portals tasks
Task guides and troubleshooting for Multiverse-Portals. Check the installed release before changing configuration or data.
Allow one player role through a Multiverse portal without opening every portal
A portal access node can be narrower than world access or a teleport command. Use that distinction to give event participants one route while keeping staff portals private. Test the rule with an ordinary role and a separate denied account.
Work through the change
- Record the exact portal name and destination from portal information. Check whether portal access enforcement remains enabled and whether the destination world has its own access requirement.
- Find the documented multiverse.portal.access permission for that named portal. Grant the specific portal capability to a temporary test role without a wildcard or operator status.
- Walk through the portal as the role and as the denied account. Capture both results, then try a different restricted portal from the same source world.
- If arrival still fails, check destination-world access and safety separately. Keep the successful portal permission unchanged while tracing the next denial so one working layer remains clear.
Check the result
The selected role should use the approved portal and remain denied at the unrelated restricted portal. A successful teleport by an administrator is not the acceptance test. Check inherited groups and temporary permissions if the denied account unexpectedly passes.
Test direct portal use rather than a staff teleport command that skips the portal check. Keep the source world entry permissions and destination access in the notes. A visitor may pass one layer and still be correctly denied by another, so record the actual denial message.
Recover or stop safely
Remove the trial grant if it opens more access than intended and restore the earlier role policy. Leave access enforcement enabled while you investigate the exact permission. A temporary event route should not require publishing unrestricted staff teleport commands to all players.
Related guidance and maintainer reference
For the broader setup, read Create a controlled Multiverse-Portal between worlds. Check the installed plugin version before applying syntax from the official Multiverse-Portals documentation.
Set a Multiverse portal landing position and facing without moving its frame
A portal’s destination can point to a world spawn, a second portal or exact coordinates. Choose a coordinate destination when visitors need to face a walkway rather than a wall. Keep the portal region unchanged while you test the landing details.
Work through the change
- Record the portal name, current destination and region bounds. Prepare a safe landing platform with enough headroom and mark which direction a visitor should face.
- Read the installed destination syntax, including its pitch and yaw fields. Use the documented exact-position or current-location destination rather than guessing the coordinate field order.
- Select the named source portal and change only its destination. Walk through as an ordinary visitor and record the arrival coordinates, facing and any safety adjustment.
- Repeat from the other side of the source frame and with a second visitor. Inspect whether another teleport plugin moves the player again after the portal action completes.
Check the result
Visitors should arrive on the platform and face the intended route without immediately entering another trigger. Check both the visible orientation and the world name. If the safety system adjusts an unsafe point, repair the landing area before attempting to disable the safety control.
Check the landing position with the destination chunks fully available. A safe-looking coordinate can still face a player into a wall or drop them off an edge during movement. Leave several blocks of clear standing space and repeat the arrival without staff flight enabled.
Recover or stop safely
Restore the recorded destination if the trial produces a loop or unsafe arrival. Keep a staff return route available during testing. Moving the physical frame is unnecessary when the destination alone needs correction, and can leave a hidden trigger at its old coordinates.
Related guidance and maintainer reference
For the broader setup, read Create a controlled Multiverse-Portal between worlds. Check the installed plugin version before applying syntax from the official Multiverse-Portals documentation.
Stop an arrival loop between two Multiverse portals
A landing point inside an active return portal can send a player back at once. Portal safety and other teleport plugins can also move the arrival into a trigger. Separate the destination pad from both portal regions before changing global portal behaviour.
Work through the change
- Record both portal regions, their destinations and the direction of each link. Keep a staff teleport or console recovery route available for the test account.
- Prepare a landing point beyond the destination trigger with clear walking space. Check its world, height and facing using the documented destination format for your installed release.
- Change one source destination to the pad and walk through with an ordinary account. Wait without moving, then step toward the return portal to distinguish automatic loops from deliberate re-entry.
- Test the opposite route separately and inspect any spawn or last-location plugin that can override the pad. Keep each destination change recorded so you know which leg fixed the loop.
Check the result
The visitor should remain on the landing pad until choosing to enter the next portal. If a loop remains at a location outside both recorded regions, check for an overlapping hidden portal or another teleport action. Breaking frame blocks does not necessarily remove a configured portal region.
Distinguish immediate retriggering from a later scheduled teleport. Ask the tester to stand still on arrival, then walk out deliberately. Timestamped observations help identify whether the destination intersects a portal region or another plugin moves the player after the first transition.
Recover or stop safely
Restore the prior destination only after moving the test player to a safe world. If you need to close a route, use the portal’s documented access or configuration controls and notify participants. Avoid deleting both portal records before recording their bounds and links.
Related guidance and maintainer reference
For the broader setup, read Create a controlled Multiverse-Portal between worlds. Check the installed plugin version before applying syntax from the official Multiverse-Portals documentation.
Find an invisible or overlapping Multiverse portal trigger
A configured portal can remain active without a visible frame. When a player teleports from an unexpected floor tile, inspect portal bounds and debug information before rebuilding the area. A second hidden trigger can overlap the decorative portal you already recognise.
Work through the change
- Record the exact world and coordinates where the teleport begins. List portals in that world and keep the player outside the suspected trigger during inspection.
- Use the documented portal information and debug controls for your installed release. Identify the portal selected at the test position without creating a new region over it.
- Compare the stored corners with the intended doorway. Walk a marked perimeter with an expendable account and record which blocks trigger the action, including upper and lower levels.
- Correct one portal’s region using the supported modify workflow if its bounds are wrong. Recheck any neighbouring portal rather than assuming the corrected region was the only trigger.
Check the result
The portal should activate only within its intended bounds after debug mode is turned off. Confirm that ordinary walking on the neighbouring path no longer teleports players. Debug mode itself can change whether teleporting occurs, so repeat the acceptance test in normal operation.
Portal regions can remain active when their decorative frame is removed. Record the coordinates of the trigger, not just a screenshot of the visible frame. Inspect vertically overlapping selections so an upstairs entrance does not accidentally include the corridor below it.
Recover or stop safely
Restore the earlier region bounds if the adjustment excludes a required part of the doorway. Keep the original portal record until its references are understood. Removing decorative blocks alone is not a reliable way to disable a hidden configured trigger.
Related guidance and maintainer reference
For the broader setup, read Create a controlled Multiverse-Portal between worlds. Check the installed plugin version before applying syntax from the official Multiverse-Portals documentation.
Test a Multiverse portal fee without charging live players
A portal fee can fail because the route uses the wrong currency or because another world entry fee also applies. Trial the charge with a funded test account and a zero-balance account, then compare balances before opening the route to visitors.
Work through the change
- Record the portal’s price and currency plus any destination-world entry charge. Check the installed portal documentation and the actual economy provider rather than assuming every Vault integration behaves the same.
- Build an isolated test route or limit access to test accounts. Set a small documented fee, retaining the earlier values and avoiding changes to live player balances.
- Use the funded account once and record its before-and-after balance or item count. Try the unfunded account and confirm whether entry is denied without losing unrelated items.
- Repeat the return trip and any deliberate loop scenario. Check whether players can be charged twice by a portal fee and a separate world entry rule before enabling the production route.
Check the result
The allowed trip should deduct the intended amount once, while the unfunded trip should produce the documented denial. Confirm that failed or unsafe destinations do not create an unexpected debit. A successful teleport and a successful economy transaction need separate checks.
Keep the test balance and transaction record together, including the currency provider. A displayed portal price does not establish a successful charge, and a successful teleport does not establish that the debit happened exactly once. Repeat the denied-balance case with an expendable test account.
Recover or stop safely
Restore the original price and currency after an unsuccessful trial. Reconcile only the documented test transactions through the economy provider’s supported controls. Do not reset an economy database or refund every player to reverse a test that involved two controlled accounts.
Related guidance and maintainer reference
For the broader setup, read Create a controlled Multiverse-Portal between worlds. Check the installed plugin version before applying syntax from the official Multiverse-Portals documentation.
Repair a Multiverse portal destination after a target world is renamed
A portal can retain a destination string that no longer matches the managed world name. An alias change and a real world rename are different events. Trace the stored target before creating replacement worlds or overwriting the original destination folder.
Work through the change
- Record the portal name and complete destination string. Compare the target with Multiverse’s current world list, including aliases and the names used by other portals.
- Confirm that the intended world data exists and is loaded under the expected identity. If the saved world is unavailable, stop and locate it rather than generating a new world with a similar name.
- Use the documented portal modification command to change the single stale reference. Preserve any coordinate or facing part of the destination only after verifying it belongs to the same map.
- Test the repaired route with an ordinary account and then test its return route. Inspect menus or other portals that refer to the same old world name without performing an unreviewed global text replacement.
Check the result
The route should reach the existing intended map with its builds intact. Check a landmark and the world identity, not just a successful teleport response. If the destination was another portal, repair that portal reference instead of changing the world portion of an unrelated exact-position string.
Check all references to the old internal world name before reopening the portal. An attractive display alias is insufficient if an action still names the former folder. Keep the old destination text in the change record so recovery restores the precise route rather than a guessed equivalent.
Recover or stop safely
Restore the previous destination string if the trial reaches the wrong area and keep the route closed to regular players. Recover any missing world reference through its saved configuration or backup. Reinstalling the server is not required to correct one stale portal target.
Related guidance and maintainer reference
For the broader setup, read Create a controlled Multiverse-Portal between worlds. Check the installed plugin version before applying syntax from the official Multiverse-Portals documentation.
Multiverse-Inventories tasks
Task guides and troubleshooting for Multiverse-Inventories. Check the installed release before changing configuration or data.
Find conflicting Multiverse-Inventories groups before changing player profiles
When one world belongs to overlapping groups, its shared data can behave differently on different travel routes. Audit membership before editing player inventories. Keep players out of the test worlds so a new transition cannot overwrite the evidence you need.
Work through the change
- Back up the Multiverse-Inventories data and group configuration as one checkpoint while the relevant players are offline. Record the source and destination world names for the reported mismatch.
- Use the installed group list and information controls to map each world to its groups. Check the documented group-conflict diagnostic where your release provides it.
- Compare each overlapping group’s shares, disabled shares and any optional features. Draw the two-world route and write which inventory, experience or health state should persist across it.
- Reproduce the route on a staging copy with a marked test inventory. Change one conflicting membership or share rule only after selecting which existing profile should remain authoritative.
Check the result
The test account should retain or change each data type exactly as the intended route specifies. Test the reverse journey too: overlapping groups can affect saving and loading in different ways. Keep the original profile files alongside the before-and-after observations.
Conflicting groups can make arrival results depend on the route taken. Record source and destination worlds for each trial rather than saying only that an inventory vanished. Keep the player offline while checkpointing profile data so the saved files represent a consistent state.
Recover or stop safely
Restore the matching configuration and profile checkpoint if the revised membership loads an unexpected inventory. Restoring only the old YAML after players have travelled can leave their data altered. Do not delete a group or bulk-clear profiles merely to remove a diagnostic warning.
Related guidance and maintainer reference
For the broader setup, read Separate creative and survival inventories with Multiverse-Inventories. Check the installed plugin version before applying syntax from the official Multiverse-Inventories documentation.
Share bed spawns between selected worlds without sharing every player statistic
Bed spawn data is a separate share from inventory contents. Select it deliberately for worlds that belong to the same survival experience. A shared bed can still point at a location that is unavailable or unsafe when the player respawns.
Work through the change
- Record the group’s current world members and shares, then back up its configuration and player profiles. Choose two test worlds with safe beds and a known return route.
- Read the bed_spawn share definition for the installed Multiverse-Inventories release. Add or retain that specific share only where your policy requires it, without changing an entire all or stats bundle blindly.
- Use an expendable account to set a bed in the first world and travel to the second. Record inventory, experience and health before and after the trip as separate control values.
- Test a controlled respawn and then a broken-bed case on the staging copy. Check Multiverse-Core bed and respawn-world settings if the bed share exists but another rule sends the player elsewhere.
Check the result
The intended bed location should carry across the selected route while unrelated player data follows its existing policy. Confirm the destination world loads and the bed remains valid. A stored coordinate does not by itself guarantee that Minecraft accepts the bed as a respawn point.
Use a valid bed in each relevant world when checking the shared bed-spawn policy. A destroyed or obstructed bed tests fallback respawn instead. Keep the inventory observations in the same test record so a successful bed link cannot conceal an unintended item-profile change.
Recover or stop safely
Restore the prior share configuration and matching test profile data if the trial changes more than intended. Return the account to a safe lobby first. Avoid deleting bed data or changing every world’s spawn to compensate for one invalid shared location.
Related guidance and maintainer reference
For the broader setup, read Separate creative and survival inventories with Multiverse-Inventories. Check the installed plugin version before applying syntax from the official Multiverse-Inventories documentation.
Isolate experience between world groups while preserving their inventories
You can keep experience separate even when players share other data. Decide whether the policy covers the level, total experience and progress bar together, then test the full trip. Changing only the visible level may leave another experience value shared.
Work through the change
- Copy the group configuration and player data during a quiet checkpoint. Record which worlds should share inventory and which should maintain separate experience progress.
- Read the documented individual and grouped experience shares for the installed release. Inspect an all or stats group before excluding experience so you understand what the shorthand includes.
- On staging, use a test account with a distinctive inventory and experience amount. Travel between the selected worlds and change experience in only the destination before returning.
- Compare the level number, progress bar and inventory contents on both sides. Repeat after reconnecting, while keeping the account offline during any profile inspection or restoration.
Check the result
Each world group should restore its intended experience state while the inventory follows its unchanged sharing rule. Check the reverse trip and a second ordinary account. A permission bypass or a separate experience plugin can make an administrator’s result differ from normal players.
Compare displayed levels and the underlying experience progress before and after travel. A near-empty progress bar can be hard to judge visually. Use a known disposable experience amount, record both routes, and check a second group transition rather than relying on one outward trip.
Recover or stop safely
Restore both the earlier sharing rule and the matching profile checkpoint if the trial produces an unwanted state. Do not repair the result by granting experience to every player or clearing all profiles. Keep the recorded source amount so an individual recovery remains auditable.
Related guidance and maintainer reference
For the broader setup, read Separate creative and survival inventories with Multiverse-Inventories. Check the installed plugin version before applying syntax from the official Multiverse-Inventories documentation.
Check why a staff account bypasses Multiverse inventory separation
A staff player may keep items between worlds because a bypass permission applies, while ordinary players switch profiles as intended. Diagnose that difference without deleting the staff member’s inventory or weakening the world-group policy for everybody.
Work through the change
- Record the account’s source world, destination world and current inventory. Make a matched backup of player data and configuration before any travel intended to reproduce the problem.
- Check the installed plugin’s enable-bypass-permissions setting and its documented group or world bypass nodes. Inspect inherited staff roles, including broad grants that may imply a bypass.
- Compare the same route using a non-operator test account with no bypass. Keep the test inventory distinct from real player items so an unexpected transfer remains easy to recognise.
- Remove only the trial account’s unwanted bypass or apply a documented explicit denial through your permission manager. Reconnect and repeat the complete out-and-back journey before touching the live staff role.
Check the result
The ordinary test account and the limited staff account should follow the same separation policy where you intend that behaviour. Verify inventory, armour and ender chest according to the configured shares. A working result for an operator with a broad permission grant is not a valid control.
An administrator’s bypass can make separated worlds appear broken while ordinary players are working correctly. Keep the exact account and effective nodes in the test record. Test without operator privileges and recheck after reconnecting so cached access does not blur the result.
Recover or stop safely
Restore the prior role grants and matched profile checkpoint if the trial loads an unexpected inventory. Do not turn bypass support on merely to debug a staff role. Keep the previous permission evidence so future role changes do not silently reintroduce cross-world transfers.
Related guidance and maintainer reference
For the broader setup, read Separate creative and survival inventories with Multiverse-Inventories. Check the installed plugin version before applying syntax from the official Multiverse-Inventories documentation.
Add an existing world to an inventory group with a profile checkpoint
Adding a world to a group can change which stored inventory players receive when they cross its boundary. Treat that membership change as a data migration. Choose the intended authoritative state before allowing anyone to travel through the newly grouped world.
Work through the change
- Close access to the affected route and take a completed checkpoint of world player data, Multiverse-Inventories profiles and the group configuration. Record the existing group membership and shares.
- On a staging copy, identify a test player with recognisable items in both the ungrouped world and the target group. Record which set you expect to keep when they first join the combined route.
- Use the installed add-worlds or group-management workflow documented by the maintainer. Change only that world’s membership, keeping unrelated share policies and optional features unchanged.
- Test first entry, return entry and reconnect with the test player. Inspect all configured data types, including armour, ender chest and experience where those shares matter to the group.
Check the result
The chosen profile should appear on every intended transition without duplicating or replacing it with an unexpected world-local state. Document the first-entry result because later successful trips can hide an incorrect initial migration. Keep regular players out until the staging result matches your policy.
Before admitting players, compare one named test profile across the old and proposed group memberships. Keep the original group definitions alongside the checkpoint. Adding a world changes which profile is selected; it should not be treated as a harmless menu-label edit for active inventories.
Recover or stop safely
Restore configuration and player profiles from the same checkpoint if the result differs from the intended authority. Removing the new membership alone may not restore data already saved during a trip. Avoid bulk migration commands without a separate tested recovery copy.
Related guidance and maintainer reference
For the broader setup, read Separate creative and survival inventories with Multiverse-Inventories. Check the installed plugin version before applying syntax from the official Multiverse-Inventories documentation.
Diagnose an optional last-location share that overrides a portal destination
An optional last-location share can redirect a player after another plugin chooses a destination. This can look like a broken portal even when the portal’s target is correct. Compare the first and second arrival positions on a test route before changing either system.
Work through the change
- Record the portal’s intended destination, the player’s actual arrival and the relevant world groups. Back up configuration and test profiles before changing their travel state.
- Read the installed plugin’s last_location share behaviour and optional-share toggle. Check whether the share appears in a group but remains inactive, or is active through a broader configuration.
- On staging, set a marked last position in one world, leave it and return through the portal. Record whether the player appears there immediately or moves again after the initial teleport.
- Trial the intended last-location policy for that group while keeping the portal target unchanged. Repeat first entry, return entry and travel from an ungrouped control world.
Check the result
The player should follow the chosen policy consistently: either the saved group location or the explicit portal route. Document which behaviour your server promises. A group can send a returning player to a different world than the portal’s target, so inspect the world name as well as coordinates.
Write down the expected destination for a first visit and a return visit separately. Last-location sharing can make those experiences intentionally different. A portal is not necessarily malfunctioning if the inventory plugin redirects a returning player to a previously recorded place under the enabled policy.
Recover or stop safely
Restore the earlier optional-share configuration and matched profile state if the trial confuses travel. Do not move the portal landing repeatedly to counteract a later redirect. Keep the reproduction route and timestamps so support can trace both teleport decisions.
Related guidance and maintainer reference
For the broader setup, read Separate creative and survival inventories with Multiverse-Inventories. Check the installed plugin version before applying syntax from the official Multiverse-Inventories documentation.
Multiverse-NetherPortals tasks
Task guides and troubleshooting for Multiverse-NetherPortals. Check the installed release before changing configuration or data.
Correct a Nether portal pair that only works in one direction
An explicit NetherPortals link is directional. A working journey from the overworld does not prove the return world points back. Inspect both arrows before rebuilding portals or adjusting coordinates, especially when a custom Nether name prevents automatic matching.
Work through the change
- Record the source and destination managed world names and confirm both worlds are loaded. Use the documented link listing to inspect the Nether links in each direction.
- Check whether each arrow comes from an explicit link or the naming convention. Preserve any existing custom reverse destination before replacing it with a bidirectional pair.
- Use the link syntax for the installed release to create the intended reverse direction or a verified bidirectional link. Change only the Nether portal type during this trial.
- Travel out and back with an expendable account from known portal coordinates. Test another portal in the source world because the link applies to that world’s portal type, not just one frame.
Check the result
Both directions should arrive in the intended managed worlds. Coordinate placement still depends on scaling and counterpart portal search, so a correct reverse world can produce a different physical frame. Keep link policy and coordinate alignment as separate acceptance checks.
Draw both arrows in the maintenance notes rather than writing only that the worlds are linked. Testing the outward trip proves one direction. Keep existing arrow destinations before using a bidirectional operation because updating the return link can replace another route that players already depend on.
Recover or stop safely
Restore the earlier arrows if the trial breaks a custom resource-world route. An unlink can return a world to automatic naming rather than disabling travel entirely. Retain the old listing and verify it again before reopening the route to regular players.
Related guidance and maintainer reference
For the broader setup, read Link Nether and End worlds with Multiverse-NetherPortals. Check the installed plugin version before applying syntax from the official Multiverse-NetherPortals documentation.
Check Nether coordinate scaling before moving a portal network
World scale controls the coordinate ratio between linked worlds. Changing it does not move old portals or terrain. Inspect the existing scales and link arrows before rebuilding a transport network that appears to exit too far from its intended location.
Work through the change
- Record both managed worlds, their scale properties and the source portal coordinates. Confirm the destination link points to the world you actually intend to use.
- Calculate the documented source-scale to destination-scale ratio for a test coordinate. For an ordinary overworld and Nether pair, compare that expectation with the installed world properties rather than assuming their defaults.
- Use a staging copy or isolated portal area to trial one corrected scale if needed. Keep the original values and do not change both worlds at once while diagnosing the result.
- Travel each direction and record the requested and actual destination coordinates. Inspect nearby existing counterpart portals, since the search may choose a frame near the calculated position.
Check the result
The coordinate relationship should follow the chosen scale ratio within the portal search behaviour of the installed server. Test a second, more distant portal before accepting the correction. A short-distance test close to the origin can hide a large proportional error.
Check both positive and negative coordinates near the trial portals. Rounding and portal search can make the final landing differ from a simple mental calculation. Keep the documented scaling ratio separate from the game’s later search for an existing valid destination portal.
Recover or stop safely
Restore the old scale if the trial disrupts established travel and retain the original frames. Recheck both directions after recovery. Do not delete destination chunks or move player bases to compensate for an unverified ratio; fix the world property and document the network policy first.
Related guidance and maintainer reference
For the broader setup, read Link Nether and End worlds with Multiverse-NetherPortals. Check the installed plugin version before applying syntax from the official Multiverse-NetherPortals documentation.
Diagnose a Nether portal with no destination world
A lit portal can fail when NetherPortals cannot resolve a managed destination. The plugin does not create the missing world just because a player enters the frame. Confirm the intended saved world exists before generating anything under a guessed name.
Work through the change
- Record the source world and portal type, then inspect the link listing. Check whether an explicit destination overrides the configured automatic naming convention.
- List managed and loaded worlds through Multiverse-Core. Compare the destination’s exact name with the world data you expect, taking care not to confuse an alias with an internal name.
- If the intended world exists, load or repair its managed reference through the documented workflow after a backup. If this is a new dimension, plan its creation separately with a distinct name and confirmed generator.
- Test the route with a single expendable account, then verify its return link. Read the bounceback or no-destination message as diagnostic evidence instead of treating it as a reason to suppress all warnings.
Check the result
The portal should reach the intended existing dimension and its expected landmarks. An empty newly generated world is not a successful repair when players expected their saved Nether. Check both the managed name and the actual map contents before allowing traffic.
List the destination world’s loaded state and environment before repairing a link. A plausible world name does not prove that the destination exists or is managed. Preserve its files and check startup errors if loading failed; do not create a replacement world over an unexplained folder.
Recover or stop safely
Restore the prior explicit link if the new target is wrong and keep access closed while locating the intended world. Preserve any existing dimension folder untouched. A backup and an explicit world inventory are safer recovery tools than repeatedly creating worlds until a portal responds.
Related guidance and maintainer reference
For the broader setup, read Link Nether and End worlds with Multiverse-NetherPortals. Check the installed plugin version before applying syntax from the official Multiverse-NetherPortals documentation.
Disable Nether travel for one event world while keeping its saved dimension
An event may need normal Nether travel closed for a limited period. Use a world-specific link policy and preserve the dimension data. Removing the saved Nether folder changes far more than whether players can enter it during the event.
Work through the change
- Record the event world’s current Nether arrow, reverse arrow and naming convention. Move test players to a safe lobby and keep an administrator recovery route available.
- Read the installed NetherPortals documentation for disabling one portal type through a self-link. Apply the policy only to the named event world and retain the previous explicit target.
- Try a normal lit Nether portal with an ordinary player account. Check the response and verify that End travel and an unrelated survival world still follow their existing rules.
- Inspect menus and command-based warps that could still send players to the dimension. Decide whether those independent routes should remain available rather than assuming the portal policy closes every access path.
Check the result
The selected portal type should remain unavailable in the event world while other worlds and dimensions retain their intended routes. The dimension’s saved data should remain present and unchanged. Tell players whether a temporary denial is intentional so they do not rebuild frames to work around it.
Check whether the event should block Nether travel only, End travel only or both. Each route needs its own observation. Keep the saved dimension available for later use and record the difference between disabling a route and removing a link that allows automatic discovery again.
Recover or stop safely
Restore the recorded explicit target or remove the self-link according to your intended automatic naming policy when reopening travel. Test a round trip before the event ends. Removing an explicit link may restore automatic travel, so verify the resulting arrow instead of assuming unlink means disabled.
Related guidance and maintainer reference
For the broader setup, read Link Nether and End worlds with Multiverse-NetherPortals. Check the installed plugin version before applying syntax from the official Multiverse-NetherPortals documentation.
MyWorlds tasks
Task guides and troubleshooting for MyWorlds. Check the installed release before changing configuration or data.
Keep an unused MyWorlds map unloaded without deleting its data
MyWorlds remembers loaded worlds for future starts. Use its load state to close an unused event map after checking its players and routes. Preserve its folder and configuration so the next event can reopen the same map with its existing builds.
Work through the change
- Record the world name from the MyWorlds listing and inspect any players, portals or scheduled actions that still use it. Keep a verified backup and a safe lobby destination.
- Use the documented evacuation or normal player exit route before unloading. Tell participants why the map is closing and avoid forcing an unload while they are actively building.
- Run the installed world unload command for that named world and read the result. If it refuses, inspect the reported dependency or player state instead of moving the world directory by hand.
- Check the world list after the next planned restart and test that the lobby still works. Hide or label the closed map’s public menu route without deleting unrelated portal definitions.
Check the result
The closed world should remain available on disk but absent from the loaded-world list until you reopen it. Check whether another plugin independently loads the same map. MyWorlds startup behaviour cannot prevent a separate scheduled loader from issuing its own load request.
Confirm nobody is currently building or travelling there before unloading. A quiet player list does not reveal every scheduled integration. Keep the map’s folder and import information intact so the next event can load the same world rather than accidentally create a fresh one.
Recover or stop safely
Use the documented load command for the existing folder when reopening, then verify its landmarks and portal routes before inviting players. Retain any custom generator requirement with the map notes. Do not create a replacement map just because the closed world is currently unloaded.
Related guidance and maintainer reference
For the broader setup, read Load an existing world safely with MyWorlds. Check the installed plugin version before applying syntax from the official MyWorlds documentation.
Set a MyWorlds spawn facing away from a dangerous landing edge
A safe position and a useful facing direction both matter at a world spawn. MyWorlds uses the player’s position and rotation when setting a spawn. Prepare the landing surface before changing it so the test does not rely on an unsafe teleport.
Work through the change
- Record the existing world spawn coordinates and orientation, then mark the new landing platform. Confirm the world name through MyWorlds information rather than a decorative display alias.
- Stand on the safe platform facing the intended path and use the documented setspawn control for that world. Avoid setting the target while flying over an unfinished floor.
- Test the world-spawn route with an ordinary account. Remain still after arrival and check whether a portal, last-position feature or another spawn plugin moves the player again.
- Repeat from a different source world and inspect the approach in both first-person and third-person views. Keep enough headroom and walking room for players who arrive before the area finishes loading.
Check the result
The player should arrive on solid ground facing the intended route, with the same map identity as before. A valid bed or a return-to-last-position route may intentionally choose another location. Record those routes separately so staff do not undo a correct spawn to fix another feature.
Test the landing without flight and with the same game mode used by visitors. Facing is part of the result: a safe standing block can still point a player toward a drop or a trigger. Photograph the approach route as well as the final spawn block.
Recover or stop safely
Restore the recorded old spawn from its safe position if the trial is unsuitable. Keep a console or staff teleport recovery path while testing. Do not delete player spawn records or rename the world folder to correct a world-specific landing direction.
Related guidance and maintainer reference
For the broader setup, read Load an existing world safely with MyWorlds. Check the installed plugin version before applying syntax from the official MyWorlds documentation.
Check MyWorlds world entry permissions without granting teleport administration
Entering a world and teleporting other players are separate permissions in MyWorlds. Give players only the route they need, then test the exact portal or command they use. An administrator’s successful teleport can hide a missing entry permission.
Work through the change
- Record the source world, target world and normal player route. Confirm the target is loaded and the test player’s role does not contain operator status or a broad administrative grant.
- Read the documented world-enter and world-specific teleport permissions for the installed MyWorlds release. Check inherited grants before adding a narrowly scoped test permission.
- Attempt the same route with an allowed test account and a denied control account. Capture the messages and note whether denial occurs before or after a portal action starts.
- Grant only the missing approved entry or self-teleport capability to the trial role. Retest another restricted world to confirm the change did not give access beyond the intended target.
Check the result
The allowed role should enter the selected world while the control account and unrelated restricted world remain denied. Confirm that the player cannot teleport other people merely because it can use its own world route. Keep the actual successful grant with your access policy.
Compare entry through the normal public route with a direct staff command. These exercise different permissions and can produce apparently contradictory results. Keep the player’s effective nodes and destination world name together, particularly when the visible world label differs from its internal name.
Recover or stop safely
Remove temporary permissions if the result differs from policy and restore the previous role assignment. A failure at a world-specific portal can need a portal permission rather than teleport administration. Do not resolve a narrow admission problem by enabling per-world operator behaviour for ordinary players.
Related guidance and maintainer reference
For the broader setup, read Load an existing world safely with MyWorlds. Check the installed plugin version before applying syntax from the official MyWorlds documentation.
Measure the effect of keeping a MyWorlds spawn area loaded
Keeping a spawn area loaded can trade faster arrival for ongoing memory and tick work. Test the option on one map with comparable player activity. A quiet server at one timestamp does not show what will happen during a busy event.
Work through the change
- Record the current spawn-loaded setting, online player count and a short baseline of memory and tick measurements. Identify farms, entities or redstone around the spawn that could keep doing work.
- Read the keepspawnloaded behaviour for your installed MyWorlds and Minecraft versions. Choose a low-traffic interval and change only the named world’s setting through the documented control.
- Wait for measurements to settle, then have one ordinary player leave and return to the world. Compare arrival behaviour and server metrics with the baseline under similar conditions.
- Repeat the observation without new terrain generation or a map render running. Record the result over several samples so a backup or garbage collection pause does not dominate your conclusion.
Check the result
The measurements should show whether the change helps this particular spawn enough to justify its cost. Do not claim that less reported memory automatically means smoother play. Version-specific server loading rules can limit the option’s effect, so retain the installed versions in the notes.
A lower memory reading after changing spawn retention is not sufficient proof on its own. Compare the same observation window and player population. Current Minecraft and server implementations can change spawn-loading behaviour, so confirm what the installed MyWorlds build actually supports before promising a resource saving.
Recover or stop safely
Restore the original world setting if arrival worsens or background work rises. Keep the area’s farms and entities unchanged during the trial. If the setting has no effect on your server version, investigate its current loading rules rather than changing several performance plugins at once.
Related guidance and maintainer reference
For the broader setup, read Load an existing world safely with MyWorlds. Check the installed plugin version before applying syntax from the official MyWorlds documentation.
Lock time in one MyWorlds lobby and verify other maps keep their cycle
A lobby can use a fixed daytime scene while survival maps keep normal time. MyWorlds provides a world-specific time control, but a scheduled command or event plugin can still change the visible result. Record each actor before applying a lock.
Work through the change
- Identify the lobby’s managed name and record its current time policy. Check for existing day-cycle gamerules or schedules that would make a short trial misleading.
- Read the installed MyWorlds time command and its documented lock syntax. Apply the intended fixed time to the lobby, explicitly naming the world when the command supports that target.
- Wait through an interval long enough to observe a normal day-cycle change. Compare the lobby with a survival control world while keeping weather and resource-pack settings unchanged.
- Test after the next planned restart and through the normal player arrival route. If only one client sees a different time, inspect client-specific or region time features before reapplying the world command.
Check the result
The lobby should retain the chosen time and the control world should continue its prior cycle. Check both the reported world time and the view from ordinary accounts. A clear sky alone does not prove that time is fixed, since weather is a separate property.
Check a neighbouring map at the same real time to establish that the lock is local. If a personal-time plugin also affects the account, repeat with an ordinary visitor. Keep cosmetic sky appearance separate from mechanics that depend on the server’s actual world time.
Recover or stop safely
Restore the documented previous time policy when the lock no longer serves the lobby. Remove only a temporary schedule you added for the trial. Keep the original value in the event notes so a future staff member does not need to guess how to resume the cycle.
Related guidance and maintainer reference
For the broader setup, read Load an existing world safely with MyWorlds. Check the installed plugin version before applying syntax from the official MyWorlds documentation.
Set a MyWorlds admission limit for a small event map
A per-world player limit can keep an event area manageable without changing the server’s overall slots. Check how MyWorlds handles additional arrivals and reconnects before relying on the limit to protect a live competition.
Work through the change
- Record the world’s current limit and choose a safe lobby for players who cannot enter. Inspect the bypass permission for staff roles and use ordinary accounts for capacity tests.
- Apply a small trial limit using the documented MyWorlds playerlimit control. Keep the main server slot setting unchanged so the result tests only this world’s admission rule.
- Fill the event map with test accounts and attempt one extra entry through its normal portal. Record the denial or fallback destination rather than assuming it matches a direct command test.
- Test reconnect behaviour and then an authorised staff bypass. Check that the lobby and another event world remain accessible under their existing limits.
Check the result
The world should admit only the intended ordinary participants while staff access follows your recorded bypass policy. Confirm that rejected players land safely rather than becoming stuck in a portal loop. A world limit controls admission; it does not reserve CPU or RAM for the map.
Test denial through the event’s real entrance rather than only by command. The player must have a safe place to remain when capacity is reached. Record what happens on reconnect too, because a world admission cap should not leave an existing participant stranded without staff assistance.
Recover or stop safely
Restore the earlier limit after the trial and remove temporary bypass grants. If you need to lower a live limit, announce the change and use a documented evacuation path where necessary. Do not kick everyone or unload the map without checking ongoing player progress and saves.
Related guidance and maintainer reference
For the broader setup, read Load an existing world safely with MyWorlds. Check the installed plugin version before applying syntax from the official MyWorlds documentation.
PlotSquared tasks
Task guides and troubleshooting for PlotSquared. Check the installed release before changing configuration or data.
Allow visitors to use plot doors without granting building access
A public showroom needs usable entrances, but visitors rarely need permission to break walls or open every container. PlotSquared’s use flag accepts a material list. Build that list from the actual entrance blocks and keep the change local to the demonstration plot.
Commands beginning with a slash are player chat commands. Use them in game with the required role; check console support before adapting them for the hosting panel.
Work through the change
- Identify the plot ID, owner and current use flag. Check inherited world defaults too; an absent local value can still produce an effective rule. Record both before editing.
- Use
/plot flag info useto confirm the installed flag format. Choose the precise door, button or gate materials needed for the entrance, rather than granting every interaction type. - As the authorised plot owner, apply the material list to the test plot. Use an ordinary visitor account to approach from the road and operate each entrance component.
- Try a chest, an unrelated lever and a removable decoration as negative tests. Ask the owner to test normal building while the visitor remains present.
Check the result
The visitor should pass through the intended entrance while unrelated interactions and building remain restricted. Check both sides of double doors and any pressure plate used for exiting. A successful owner test cannot establish visitor permissions because ownership changes the protection result.
The use list concerns block materials rather than how important a particular door is. If the same permitted material appears elsewhere on the plot, include it in the visitor test. Choose the build’s entrance hardware with that scope in mind before enabling the flag.
Recover or stop safely
Restore the recorded local flag or remove the override using the installed flag help. Do not replace world defaults to repair one doorway. If another protection plugin still denies access, investigate its matching region rule separately and keep plot protection enabled.
Related guidance and maintainer reference
For the broader setup, read Create a separate creative plot world with PlotSquared. Check the installed plugin version before applying syntax from the official PlotSquared documentation.
Test a PlotSquared PvP arena without enabling combat on every plot
Combat rules can come from PlotSquared, the server and another protection plugin. A plot-level PvP flag is one part of that chain. Test a single enclosed arena with willing participants before describing it as safe for public fights.
Commands beginning with a slash are player chat commands. Use them in game with the required role; check console support before adapting them for the hosting panel.
Work through the change
- Record the arena plot ID and existing pvp and invincible flags. Note world-level PvP settings and any region plugin that also covers the site. Store valuables outside the test area.
- Inspect
/plot flag info pvpand apply the chosen boolean value only to the arena plot. Leave road and default world flags unchanged during this test. - Have two ordinary players test a single low-damage melee hit in the arena, then repeat on the neighbouring road and a control plot where combat should remain disabled.
- Check a projectile separately and test entry and exit with combat equipment removed. Inspect death and inventory rules before conducting a lethal test; damage permission alone says nothing about dropped items.
Check the result
Combat should match the arena’s policy without changing the control plot. If damage remains blocked, compare invincibility and other protection layers rather than granting a global bypass. Record whether projectiles follow the same boundary so event organisers know the tested limits.
Check the arena boundary after participants leave combat mode as well as when they enter. Other plugins may retain combat tags or impose teleport rules. Those systems need their own documented policy rather than a broader plot flag intended to compensate for an unexplained interaction.
Recover or stop safely
Restore the earlier arena flags and stop the trial if unexpected damage occurs outside it. Return test equipment from the staging chest. An arena rule does not reverse inventory loss, so use disposable equipment until death handling has been verified independently.
Related guidance and maintainer reference
For the broader setup, read Create a separate creative plot world with PlotSquared. Check the installed plugin version before applying syntax from the official PlotSquared documentation.
Restrict a PlotSquared flag to the values a building role actually needs
Flag administration can grant more authority than a building role requires. A player who needs to toggle one cosmetic option should not automatically gain access to plot combat, movement and interaction policies. Test permissions on an ordinary role with one specific flag.
Commands beginning with a slash are player chat commands. Use them in game with the required role; check console support before adapting them for the hosting panel.
Work through the change
- Choose the exact flag and allowed values. Read its information with
/plot flag infoand record any basic flag-command permissions already inherited by the role. - Review the maintainer’s flag-specific permission schema for the installed release. Grant the required command permissions and the narrow permitted value nodes; avoid a wildcard that includes every flag or value.
- Use a non-admin account that owns a disposable plot to set the approved value. Then attempt a different flag and an unapproved value so the denial path is tested too.
- Reconnect the player and repeat the checks after permission caches settle. Inspect inherited groups if either denied operation succeeds, and compare the effective permission output rather than adding competing grants blindly.
Check the result
The player should manage the intended option while receiving a clear denial for unrelated flag changes. Verify that staff retain their separate administration path. A successful command as operator is not evidence that the limited building role has the correct permissions.
Keep the final permission nodes with the flag’s accepted values in the role documentation. A later plugin update may add options under a wildcard. Specific grants make the intended authority easier to review without trying every new flag on a populated plot.
Recover or stop safely
Remove the trial grants and restore the test plot’s flags from your notes. If a broad inherited permission caused the leak, adjust the responsible group deliberately and retest affected roles. Do not solve a single missing value by giving the entire flag namespace.
Related guidance and maintainer reference
For the broader setup, read Create a separate creative plot world with PlotSquared. Check the installed plugin version before applying syntax from the official PlotSquared documentation.
Distinguish a PlotSquared weather display from actual weather mechanics
A plot can look sunny while the underlying world still follows its weather cycle. PlotSquared documents its weather flag as simulated weather, without changing weather-dependent mechanics. Check that distinction before using a cosmetic setting to protect a farm or a public event.
Commands beginning with a slash are player chat commands. Use them in game with the required role; check console support before adapting them for the hosting panel.
Work through the change
- Choose a test plot beside an unchanged control plot. Record the current weather flag, world weather and any weather plugin that personalises what players see.
- Read
/plot flag info weatherfor supported values in your release. Apply a clear-weather display to the trial plot without changing the world’s weather cycle or another plot’s flags. - Walk across the plot boundary with two ordinary accounts. Compare the displayed rain and sky while also recording the world’s actual weather state through its existing administration controls.
- Test the specific mechanic you care about separately, using expendable blocks or entities. Keep cosmetic appearance and game behaviour as different observations in the change notes.
Check the result
The selected weather appearance should apply inside the trial plot and end at the intended boundary. It should not be described as a world weather lock. Server plugins, client settings and version differences can alter what players see, so compare more than one client.
Tell event staff whether the setting is cosmetic or mechanical in the handover notes. That prevents a later organiser relying on a sunny-looking plot to suppress a weather-dependent hazard. Keep a screenshot of the control area and the actual world state with the trial result.
Recover or stop safely
Restore the earlier weather override or remove the local flag to return to inherited behaviour. If the aim was to change crop, mob or lightning behaviour, stop this cosmetic test and choose an appropriately scoped world or protection setting with its own recovery plan.
Related guidance and maintainer reference
For the broader setup, read Create a separate creative plot world with PlotSquared. Check the installed plugin version before applying syntax from the official PlotSquared documentation.
Give a PlotSquared build a fixed-looking time without stopping the world clock
Builders may want a permanent sunset for screenshots without freezing the whole world. PlotSquared’s time flag changes the simulated time seen on the plot. It does not change time-dependent game mechanics, so document that limitation before using it for a public build.
Commands beginning with a slash are player chat commands. Use them in game with the required role; check console support before adapting them for the hosting panel.
Work through the change
- Record the plot ID, local time flag and any inherited default. Pick a neighbouring plot as a control and note whether a personal-time plugin is already active.
- Inspect
/plot flag info timefor the installed release’s accepted format. Apply the chosen display time only to the trial plot, preserving the world’s ordinary daylight-cycle setting. - Enter and leave the plot with an ordinary visitor. Compare the sky at the same real moment with another player standing in the control area, then reconnect and check again.
- If the build includes daylight sensors or sleeping behaviour, test those separately. Record their actual response rather than assuming a visible sunset means the server clock is also fixed.
Check the result
The visual time should match the selected value inside the plot while the world continues its normal cycle. Test any resource pack or shader used for screenshots because it can change perceived brightness. Visitors should regain the expected display after leaving the area.
If you publish a screenshot location, include the selected display time in its build notes. Another player may otherwise change the world clock trying to reproduce the same image. A local visual setting keeps that artistic choice separate from the rest of the server’s schedule.
Recover or stop safely
Restore the original flag or remove the override to inherit the world default. If the display remains fixed elsewhere, check personal-time permissions and other plugins before altering the global clock. Keep a screenshot of the control area to distinguish a client display issue from world state.
Related guidance and maintainer reference
For the broader setup, read Create a separate creative plot world with PlotSquared. Check the installed plugin version before applying syntax from the official PlotSquared documentation.
Limit plot entity counts without changing every world’s mob settings
A crowded creative plot can accumulate more entities than its owner intended. PlotSquared exposes separate entity-cap flags, including animal, hostile and vehicle categories. Choose the category that matches the actual load rather than applying an unexplained global mob restriction.
Commands beginning with a slash are player chat commands. Use them in game with the required role; check console support before adapting them for the hosting panel.
Work through the change
- Inspect the affected plot and list its entities by purpose: displays, pets, villagers and vehicles. Record the existing cap flags and any other entity-management plugins before changing admission rules.
- Use
/plot flag infofor the specific cap you need. Read the maintainer’s entity categories because a familiar creature or object may fall under more than one relevant group. - Apply a conservative trial cap on an empty demonstration plot. Add expendable examples of the target category and check what happens at the boundary without testing on valuable named pets.
- Check a different category and a neighbouring plot as controls. Observe both player-created entities and any natural spawning relevant to the intended policy, then document the behaviour of your installed build.
Check the result
The trial should constrain the intended category while preserving unrelated plot behaviour. Count actual entities rather than relying only on visible mobs, particularly for small decorative objects. A cap does not establish that a plugin will clean up existing entities in the way you expect.
Choose an operational policy for existing over-cap plots before rolling out the limit. An admission restriction and an automatic cleanup are different behaviours. Owners should know how their retained decorations or animals are handled rather than discovering the policy through a failed interaction.
Recover or stop safely
Restore the original cap if the trial affects the wrong category. Do not clear a live plot to force compliance with a new limit. Agree a separate preservation or cleanup plan with the owner before changing valuable entities already stored in their build.
Related guidance and maintainer reference
For the broader setup, read Create a separate creative plot world with PlotSquared. Check the installed plugin version before applying syntax from the official PlotSquared documentation.
Disable redstone on one PlotSquared test plot and check its boundaries
An event plot may need redstone disabled while nearby building plots continue normally. A local PlotSquared flag can scope that policy, but existing clocks and devices deserve careful testing. Start with a simple circuit instead of a finished storage system.
Commands beginning with a slash are player chat commands. Use them in game with the required role; check console support before adapting them for the hosting panel.
Work through the change
- Identify the target plot and record its redstone flag, inherited defaults and nearby merged plots. Ask the owner to pause active machinery and save the current server state before testing.
- Create a small expendable lever-and-lamp circuit wholly inside the plot and a second circuit on a control plot. Record the initial states so delayed updates are easier to distinguish.
- Inspect
/plot flag info redstoneand apply the local disabled setting. Toggle both trial circuits, observing the target and control area separately without altering road defaults. - Test boundary-adjacent components within permitted build space. Review any redstone optimisation plugin if the result differs from the flag description, and keep high-value machinery out of the trial.
Check the result
The intended plot should follow the local redstone policy while the control circuit retains its previous behaviour. Existing powered states can make a single screenshot misleading; repeat the interaction after the normal update interval and record the actual device response.
Keep machinery paused until the local test is complete. Restoring redstone permission can trigger queued or newly permitted updates in a complex build. Have the owner inspect item paths and storage capacity before returning a large machine to normal unattended operation.
Recover or stop safely
Restore the earlier flag and verify the small circuit responds again before restarting larger machinery. If a device remains stuck, diagnose that component’s saved state with its owner. Do not remove blocks from a working storage machine to demonstrate that protection has changed.
Related guidance and maintainer reference
For the broader setup, read Create a separate creative plot world with PlotSquared. Check the installed plugin version before applying syntax from the official PlotSquared documentation.
Check PlotSquared claim allowances against the permission-search range
PlotSquared determines claim allowances from permissions. Its configured limit.max-plots value controls the integer-permission range searched; it does not itself grant players that number of plots. Diagnose the effective allowance and lookup range separately, using a trial account rather than changing live ownership.
Work through the change
- Record the player’s current claimed plots and relevant effective claim permissions. Note group inheritance and whether the account is operator or has a bypass role.
- Read the installed PlotSquared permissions documentation and inspect limit.max-plots in the generated settings. The maintainer defines it as the maximum integer-permission range to check. Raising it alone does not change a player’s allowance; keep the configuration and permission export together.
- Use an ordinary test account with a small known allowance in a disposable plot area. Claim up to that allowance and attempt one extra claim, recording the response and plot count.
- Set the intended account allowance through the documented claim-limit permission. Adjust the search range only if it would prevent that permission from being considered. Repeat the trial after the supported permission refresh or controlled configuration restart.
Check the result
The trial account should claim its permission-derived number of plots and receive a denial for the next one. Existing ownership should remain untouched. If the result differs, inspect effective permissions and per-area behaviour; changing the global search range is not a replacement for granting the intended allowance.
Keep a sample permission-derived allowance for each paid rank in the test record. That catches inheritance mistakes while retaining the shared permission-search range as a separate setting. An increase for one customer should change that role’s intended grant, not rely on changing a global lookup setting.
Recover or stop safely
Restore the trial allowance and release only the disposable test claims using the installed owner controls after checking they contain no builds. Keep live player claims intact. A commercial downgrade needs a separate policy for excess plots rather than silently deleting them.
Related guidance and maintainer reference
For the broader setup, read Create a separate creative plot world with PlotSquared. Check the installed plugin version before applying syntax from the official PlotSquared documentation.
The official PlotSquared settings source explains the permission-search limit; compare it with your installed release and generated configuration.
Verify WorldEdit cannot cross a PlotSquared owner boundary
Plot protection and WorldEdit must agree before builders edit near a neighbour. PlotSquared provides integration features, while broad editing bypass permissions can defeat the intended boundary. Use a marked test strip and a normal builder account to verify the combined result.
Work through the change
- Prepare two adjacent test plots with different owners and expendable blocks along their edges. Record the builder’s WorldEdit, FAWE and PlotSquared bypass permissions before making any edit.
- Confirm the installed WorldEdit or FAWE integration matches the supported versions. Check whether the plot has a no-worldedit flag and distinguish a complete editing denial from a boundary restriction.
- With the ordinary builder, select a tiny area spanning both plots and perform one reversible material change. Compare the report with the blocks on each owner’s side.
- Repeat at a road edge and on the builder’s own interior. Restore the test blocks between trials so a previous selection or mask cannot hide the effect of protection.
Check the result
Edits should affect only the area authorised for that account, or fail according to the installed integration’s documented policy. A successful administrator test proves little because bypass roles differ. Keep screenshots and coordinates of each control block with the permission snapshot.
Preserve a screenshot of the selection and the resulting edge blocks. A command rejection and a partial edit are different outcomes that staff should recognise. Repeat the small trial after major integration updates before allowing routine editing beside valuable neighbouring builds.
Recover or stop safely
Undo the trial immediately and check both plot edges. Remove any temporary bypass grant used for diagnosis. If integration is missing or incompatible, disable ordinary access to editing commands until a supported combination is installed; do not rely on verbal boundary instructions.
Related guidance and maintainer reference
For the broader setup, read Create a separate creative plot world with PlotSquared. Check the installed plugin version before applying syntax from the official PlotSquared documentation.
Add plot entry and exit messages without changing the world’s chat format
A plot greeting can tell visitors where they are without replacing the server’s chat plugin. Keep the message short, local and free of account or connection details. Test repeated entry so an attractive signpost does not become constant chat noise.
Commands beginning with a slash are player chat commands. Use them in game with the required role; check console support before adapting them for the hosting panel.
Work through the change
- Record the plot’s current greeting and farewell values, including whether each is inherited from world defaults. Choose a short location description rather than promotional links or commands.
- Check
/plot flag info greetingand farewell for your installed release. Apply the greeting only to the trial plot and test its accepted text format before adding elaborate formatting. - Enter from several directions with an ordinary visitor and leave again. Note whether the message appears in chat and whether repeated boundary crossings produce excessive notices.
- Compare a neighbouring plot and normal chat messages. If another plugin also sends region greetings, decide which system should own this particular location before enabling both publicly.
Check the result
The visitor should receive the correct local message without changes to global chat prefixes or unrelated plots. Check colour readability with the server’s normal resource pack and chat settings. A greeting should identify the place clearly even when formatting is unavailable.
Choose a message that still makes sense without colour formatting or clickable text. Visitors may use different chat settings and clients. If a boundary is crossed frequently, prefer one useful location name over a long paragraph that hides normal conversation and event instructions.
Recover or stop safely
Restore the prior text or remove the local overrides to inherit defaults. If duplicate messages remain, identify the second region or greeting plugin rather than changing global chat format. Keep the original text in your notes so punctuation and links can be restored exactly.
Related guidance and maintainer reference
For the broader setup, read Create a separate creative plot world with PlotSquared. Check the installed plugin version before applying syntax from the official PlotSquared documentation.
Chunky tasks
Task guides and troubleshooting for Chunky. Check the installed release before changing configuration or data.
Pause a Chunky task without discarding its saved progress
Pausing is useful when players arrive during terrain generation or the server needs a maintenance window. Chunky distinguishes pausing from cancelling: cancel removes the task’s progress record. Choose the pause path when your intention is to continue the same job later.
Work through the change
- Read the current task status and record the world, shape, centre, radii and completion count. Check that the task you intend to pause belongs to this world rather than another simultaneous job.
- Run
chunky pausewith the exact world argument supported by the installed release. In the game chat include the leading slash; the panel console usually uses the command without it. - Watch the console until the task reports its paused state. Allow outstanding work to settle, then record disk usage and server response so the pause has a measurable operational result.
- When the quieter period returns, use
chunky continuefor that same world. Check the resumed status against your recorded task rather than issuingchunky startwith a new selection.
Check the result
The task should resume from its saved work and retain the intended selection. Progress and elapsed-time estimates may change after a long break, so compare completed chunks and world identity rather than expecting the old ETA to remain exact. Test ordinary player movement while the job runs.
Keep the planned continuation time in staff notes so the task is not forgotten after players arrive. Check that the named world remains available before resuming the saved job.
Recover or stop safely
If the task cannot be found, stop and inspect the task files and recent restart logs before starting over. Do not substitute cancel while investigating a pause problem. Existing generated terrain is separate from the progress record, so preserve both the world and the diagnostic evidence.
Related guidance and maintainer reference
For the broader setup, read Pre-generate Minecraft terrain with Chunky and monitor disk space. Check the installed plugin version before applying syntax from the official Chunky documentation.
Catch an off-centre Chunky selection before generating terrain
A radius does not establish where a pregeneration task is centred. An old selection can leave a new world generating around coordinates from a previous job. Read the complete selection before starting so the finished terrain covers the actual spawn and intended playable area.
Work through the change
- Write down the target world’s exact folder name and the planned centre coordinates. Decide whether the centre follows world spawn or a fixed location agreed with the map owner.
- Select the target world in Chunky and set the centre explicitly using the installed command syntax. Set shape and radii too; avoid treating the current defaults as evidence of the intended area.
- Use
chunky selectionto read the resulting world, centre, shape and radii together. Compare the minimum and maximum footprint with the playable border and any existing distant builds. - Start a modest trial area first and inspect new chunk growth around the intended centre. Record the selection output before extending to the full planned radius.
Check the result
Generation should expand around the written centre and cover the intended corners or circular edge. A map preview can help, but its own rendering delay may hide recent terrain. Confirm coordinates in game and the active Chunky task status before leaving a large job unattended.
The selection readback is the approval point for the job. Save it where the next administrator can compare a running task with the original plan without reconstructing coordinates from memory.
Recover or stop safely
Pause the task if its centre is wrong. Record what has already been generated, then plan a corrected selection without deleting terrain. Cancelling progress does not remove generated chunks, and a misplaced pregeneration area is not permission to trim a live world with player builds.
Related guidance and maintainer reference
For the broader setup, read Pre-generate Minecraft terrain with Chunky and monitor disk space. Check the installed plugin version before applying syntax from the official Chunky documentation.
Compare circular and square Chunky selections for the same playable area
A circular border and a square selection with the same radius cover different terrain. Choosing by radius alone can generate unnecessary corners or leave intended areas uncovered. Sketch the playable footprint before deciding which Chunky shape should match it.
Work through the change
- Record the world, centre and boundary shape used for ordinary players. Include any border wrapping or portal exits that can place players near the edge.
- Read the installed Chunky shape and radius controls. Prepare a circle selection and inspect it with
chunky selection, then record the corresponding square selection without starting either job. - Compare both footprints against several known coordinates: the cardinal edges and the square’s corners. Use the footprint that matches actual access rather than the one with the more attractive initial ETA.
- Run a small trial of the selected shape during a quiet period. Check chunk growth, free disk space and normal player response before committing to the larger radius.
Check the result
The accepted selection should cover the reachable play area without an unexplained mismatch at its corners. Generated area grows roughly with the square of radius, so a small radius increase can still have a large disk cost. Keep the precise shape in the maintenance record.
Border shape and pregeneration shape need separate records even when they match today. A later border change can expose terrain beyond the prepared area unless someone compares the updated footprint deliberately.
Recover or stop safely
Pause a running job before changing the plan. Existing terrain outside the new footprint remains part of the world and may contain player activity. Preserve it unless a separate, backed-up trimming procedure has been authorised. Restore the previous border policy if access was altered only for testing.
Related guidance and maintainer reference
For the broader setup, read Pre-generate Minecraft terrain with Chunky and monitor disk space. Check the installed plugin version before applying syntax from the official Chunky documentation.
Check a Chunky ETA that stops changing before assuming the task has crashed
A stationary ETA can reflect expensive terrain, a paused task or a reporting interval rather than a dead process. Compare multiple signals before restarting a busy server. Interrupting generation repeatedly can make diagnosis harder and affect players who are otherwise connected normally.
Work through the change
- Record the exact time, active world, completed chunk count and task state. Wait through more than one configured reporting interval so a short-lived delay is not mistaken for a permanent stall.
- Read the current console for generation errors, watchdog messages and disk failures. Check free storage through the panel and collect the log around the last visible progress update.
- Compare CPU activity and player response with changes in completed chunks. If the server is overloaded, pause the specific task and see whether ordinary play recovers before making any resource changes.
- Once the underlying issue is understood, continue the saved task and compare a fresh pair of status samples. Report both the observation interval and completed chunks instead of quoting a single ETA screenshot.
Check the result
A healthy task should eventually show advancing work, while a paused or failed task should have an identifiable state or error. ETA is an estimate based on observed throughput, not a completion guarantee. Expensive generator features can make one part of the same world much slower than another.
Take a second sample after recovery. One advancing counter confirms movement, but sustained progress and responsive players show whether the original capacity problem has actually been resolved.
Recover or stop safely
Leave the task paused if disk errors or repeated generation exceptions continue. Save logs and the selection before seeking support from the generator or Chunky maintainer. Avoid deleting task files or force-killing Java merely to clear a frozen-looking estimate when players are still online.
Related guidance and maintainer reference
For the broader setup, read Pre-generate Minecraft terrain with Chunky and monitor disk space. Check the installed plugin version before applying syntax from the official Chunky documentation.
Verify Chunky can continue its task after a planned server restart
A saved pregeneration task should be checked before maintenance, not rediscovered afterward. Chunky’s pause and continue controls let you make the handover explicit. Test a modest task once so you know how your installed release handles startup and persisted progress.
Work through the change
- Record the running task’s world, bounds and completion count. Pause that world with the documented control and wait for the paused state to appear in the console.
- Create the usual recoverable checkpoint of configuration and task data with the world save. Review the installed auto-continuation behaviour so maintenance does not unexpectedly restart heavy generation during peak play.
- Perform the planned normal server restart and watch startup logs for Chunky loading errors. Check task status before issuing any new start command or changing the selection.
- Continue the saved world task when capacity is available. Compare its identity and bounds with the maintenance notes, then monitor a fresh progress interval to confirm it is doing work.
Check the result
The resumed job should retain the planned area and recognise completed work according to the installed release. Confirm normal player access as well as generation progress. A server that starts successfully but silently resumes several heavy tasks may still need its startup policy adjusted.
Include the restart time in the progress notes. That distinguishes a resumed saved task from a newly submitted job when several administrators are reviewing the same console later.
Recover or stop safely
If progress is absent, preserve the current files and compare them with the checkpoint before making changes. Do not overwrite task state with a new job as the first diagnostic action. Previously generated chunks remain valuable world data even if a progress record needs separate recovery.
Related guidance and maintainer reference
For the broader setup, read Pre-generate Minecraft terrain with Chunky and monitor disk space. Check the installed plugin version before applying syntax from the official Chunky documentation.
Measure a Chunky pilot area before estimating full-world disk needs
World size depends on terrain, structures, dimensions and generator behaviour. A small pilot area gives a better estimate than a generic megabytes-per-chunk claim. Keep the measurement tied to the same world and settings you intend to use for the full task.
Work through the change
- Record available disk space and the world’s current saved size. Note active players and backups that may also write data during the measurement so their growth is not attributed to Chunky.
- Choose a modest ungenerated pilot region that represents the target terrain. Record shape and radii with
chunky selection, then run that task in a quiet maintenance window. - Wait for the job to complete and allow normal world saves to finish. Compare disk usage with the baseline and record the number of chunks processed and elapsed time.
- Estimate the larger footprint from the area ratio, leaving headroom for player data, later exploration, map renders and backups. Stop the expansion plan if the estimate approaches the storage allowance.
Check the result
The result should be a documented estimate with its assumptions, not a promise that every later region compresses identically. A pilot dominated by ocean may not represent a city-heavy custom generator. Repeat with a second representative area if the first sample is clearly unusual.
Keep backup sizes separate from live-world growth in the calculation. A scheduled archive can consume space during the pilot without representing new terrain generated by the selected task.
Recover or stop safely
Pause further work if free space falls faster than expected. Keep completed terrain intact and reduce the future generation footprint or arrange more storage. Do not delete random region files to recover space; they can contain builds and are not interchangeable cache files.
Related guidance and maintainer reference
For the broader setup, read Pre-generate Minecraft terrain with Chunky and monitor disk space. Check the installed plugin version before applying syntax from the official Chunky documentation.
Schedule two Chunky world tasks without doubling peak generation load
Pregenerating the overworld and a second dimension together can compete for the same CPU, disk and memory. A short controlled comparison tells you whether parallel work is worthwhile. Keep player experience and available storage as the deciding measures, rather than the number of active tasks.
Work through the change
- List each planned world task with its centre, shape and bounds. Check available disk space and choose a quiet test period where ordinary player response can still be observed.
- Start or continue only the first world’s small trial. Record completed chunks over a fixed interval, console errors and the server’s existing performance measurements.
- Add the second small task only if the first leaves comfortable capacity. Compare combined throughput and player response using the same interval rather than comparing dissimilar ETA snapshots.
- Pause the second world if response worsens or combined progress provides little benefit. Document a sequential order and continue the saved second task after the first has finished.
Check the result
Your schedule should have an explicit capacity-based reason for running jobs together or separately. Two progress bars do not prove two jobs finish sooner overall. Dimensions and custom generators can have very different costs, so keep their measurements separate in the maintenance record.
Keep an explicit owner for the paused second task. Otherwise different staff can each resume a job independently and recreate the peak load the sequential schedule was intended to avoid.
Recover or stop safely
Return to one active task by pausing specific worlds, preserving their progress. If disk pressure persists even with one task, pause all generation and investigate storage growth before continuing. Do not change Java memory or restart the entire service solely to make more task slots appear.
Related guidance and maintainer reference
For the broader setup, read Pre-generate Minecraft terrain with Chunky and monitor disk space. Check the installed plugin version before applying syntax from the official Chunky documentation.
Rerun Chunky over existing terrain without treating it as world regeneration
Pregeneration fills terrain; it is not the same operation as replacing an existing world with a new seed. Before rerunning a familiar area, decide whether you are verifying coverage or expecting blocks to change. Existing player builds must remain outside any destructive regeneration plan.
Work through the change
- Record the world identity, seed and generation settings, along with a recent world backup. Mark a few existing builds and an ungenerated edge as reference locations for the trial.
- Read the current Chunky documentation on existing chunks and check your installed configuration. Do not enable an unfamiliar force or regeneration option copied from a different tool.
- Select a small area that includes known terrain and the intended edge. Run the ordinary pregeneration task and compare progress with actual world changes at the recorded coordinates.
- Inspect the reference builds after the task and check the new edge terrain. If your goal was a new seed or replaced landscape, stop and plan that separately rather than increasing Chunky’s radius.
Check the result
The result should match ordinary pregeneration behaviour for the installed version while preserving established terrain. Counts may include checks or skipped chunks and do not necessarily mean each reported chunk was newly generated. Verify the world itself instead of interpreting the progress number as a rewrite total.
A generated map is not a clean test map merely because it has few players. Check claims and scheduled activity before selecting the pilot area used to demonstrate existing-terrain behaviour.
Recover or stop safely
Pause if unexpected changes appear and preserve logs, settings and the world checkpoint. Restore only through a deliberate recovery procedure after identifying the cause. Do not continue a larger task to see whether a damaged area repairs itself; Chunky is not a backup restoration mechanism.
Related guidance and maintainer reference
For the broader setup, read Pre-generate Minecraft terrain with Chunky and monitor disk space. Check the installed plugin version before applying syntax from the official Chunky documentation.
ChunkyBorder tasks
Task guides and troubleshooting for ChunkyBorder. Check the installed release before changing configuration or data.
Enable a visible ChunkyBorder edge for unmodified clients
A working custom border is not necessarily visible. ChunkyBorder’s visualizers are disabled by default, and the server-side option uses particles rather than the vanilla border renderer. Check enforcement first, then add the visual aid that ordinary clients can see.
Work through the change
- Read
chunky border listand record the world’s existing bounds. Test the actual restriction with an ordinary account so a missing visual effect is not confused with a missing border. - Back up the installed ChunkyBorder configuration and inspect visualizer-enabled. Confirm the setting exists in your release, then enable it using the documented configuration application method.
- Approach the border with an unmodified client while remaining inside the safe playable area. Check particle visibility and distance before changing range or colour from their documented defaults.
- Compare the view from a second account and check server response near a busy edge. Keep the effect’s range modest because server-side particles have a performance cost.
Check the result
Unmodified clients should see the particle guide within its configured range while the actual restriction remains unchanged. A Fabric client with the supported Chunky and ChunkyBorder mods can use a different visualizer, so record which client you tested. Neither display is a substitute for enforcement checks.
Leave the enforcement test in the change record alongside the screenshot. A visible particle wall can look convincing even when the actual border rule applies to a different world.
Recover or stop safely
Restore the previous visualization settings if particle load or visibility is unsuitable. Keep the border itself in place during that rollback. If players still cannot see particles, inspect their client particle settings and confirm the world identity before altering the playable boundary.
Related guidance and maintainer reference
For the broader setup, read Match a ChunkyBorder boundary to a pre-generated Minecraft world. Check the installed plugin version before applying syntax from the official ChunkyBorder documentation.
Test a temporary border bypass without leaving a player exempt
A temporary bypass can help staff inspect generated terrain outside a border, but it should not become an undocumented way around normal access. ChunkyBorder provides a player bypass command. Record its state carefully and test the return path before using it on a live expedition.
Work through the change
- Choose a staff test account and record the world, border bounds and safe return coordinates. Check whether another role or plugin already allows the player beyond the intended boundary.
- Read
chunky border bypasshelp for your installed release. Use the command for the named test player and record the response so you know whether the action enabled or disabled their bypass. - Cross a short distance beyond the border, then return inside before reversing the bypass. Avoid teleporting directly into ungenerated terrain or using the test to carry valuable inventory outside the map.
- With the exemption removed, approach the same edge again and confirm normal restriction. Reconnect and repeat the check if your release treats bypass state as session-specific.
Check the result
The account should cross only during the intended inspection period and should be restricted afterward. Test an ordinary visitor as a control. A staff account that still crosses may have a separate permission bypass, so compare effective permissions instead of repeatedly toggling the temporary state.
If the account has several staff roles, inspect their combined effective permissions. Removing one temporary exemption does not prove an inherited bypass disappeared as well.
Recover or stop safely
Return the test account to the recorded safe coordinates and clear the exemption through the documented control. Keep a short audit note identifying the account and completion time. Do not remove the entire border to recover one player stranded outside it; use the normal safe teleport path.
Related guidance and maintainer reference
For the broader setup, read Match a ChunkyBorder boundary to a pre-generated Minecraft world. Check the installed plugin version before applying syntax from the official ChunkyBorder documentation.
Check how a wrapping border returns players across a world edge
Wrapping changes the destination when a player crosses the boundary. That can place them near another build or in terrain that has not been prepared. Test the exact wrap mode on a disposable area before enabling it for a populated survival map.
Work through the change
- Record the existing border and whether wrapping is already enabled. Choose safe test points at several edges, including a diagonal approach if the border shape makes that meaningful.
- Read the installed
chunky border wrapsyntax and supported modes. Select the deliberate mode for the trial rather than assuming that radial, axis-based and default behaviour produce the same destination. - Cross each test edge with an expendable inventory and write down the arrival coordinates and facing. Check ground height, water, nearby claims and whether the destination terrain is already generated.
- Test the reverse journey and compare a normal walking crossing with any portal or teleport route players use. Keep a safe administrator return path available throughout the trial.
Check the result
Arrival should follow the selected wrapping policy and land players in a safe prepared area. A successful east-to-west walk does not validate northern or diagonal crossings. Document the tested mode so a later border adjustment is not mistaken for an unrelated teleport bug.
Try the mode at ground level with normal movement speed before testing vehicles or flight. A safe walking destination does not establish the behaviour of every travel method.
Recover or stop safely
Restore the recorded wrapping mode after testing. The documented wrap command without a type disables wrapping in current releases; verify help before using it on an older build. Keep the border restriction intact and return stranded testers through a safe teleport rather than shrinking the world.
Related guidance and maintainer reference
For the broader setup, read Match a ChunkyBorder boundary to a pre-generated Minecraft world. Check the installed plugin version before applying syntax from the official ChunkyBorder documentation.
Load an existing border into Chunky without replacing the border itself
A saved ChunkyBorder can be loaded as Chunky’s working selection. This is useful for inspecting its footprint before a generation job, but it should not be confused with creating or changing the border. Read back the selection before starting any task.
Work through the change
- Record the current border entry with
chunky border listand note the world’s exact name. Save the current Chunky selection too if another administrator is preparing a different task. - Use
chunky border loadwith the intended world according to the installed command help. This loads the existing border into the selection; do not substitute border add, which creates a border from a selection. - Run
chunky selectionand compare its world, centre, shape and radii with the saved border entry. Check several edge coordinates in game before approving generation within that footprint. - Decide whether to run a task now or simply retain the inspected notes. If another task was already planned, coordinate with its owner before replacing the shared working selection again.
Check the result
The readback should reproduce the saved boundary without changing what players can cross. A task’s current progress and a working selection are separate pieces of state, so check both if generation was already active. No start command is required merely to inspect the loaded bounds.
Coordinate with other administrators before replacing a selection. A read-only border inspection should not quietly alter the bounds someone else expects when they issue the next generation command.
Recover or stop safely
Restore the earlier working selection from your notes if this was only an inspection. Leave the existing border untouched. If the wrong world was loaded, correct the selection before starting a task; there is no reason to remove a valid border or delete any generated chunks.
Related guidance and maintainer reference
For the broader setup, read Match a ChunkyBorder boundary to a pre-generated Minecraft world. Check the installed plugin version before applying syntax from the official ChunkyBorder documentation.
BlueMap tasks
Task guides and troubleshooting for BlueMap. Check the installed release before changing configuration or data.
Find why a BlueMap build still shows old blocks
A stale-looking build can come from rendering, a frozen map or the browser’s cached view. Check those layers separately before deleting map data. BlueMap normally detects changed chunks automatically, so a full purge should not be the first response to one outdated roof.
Commands beginning with a slash are player chat commands. Use them in game with the required role; check console support before adapting them for the hosting panel.
Work through the change
- Write down the affected world, map ID and coordinates. Confirm the build is saved in the running world and compare it with another recently changed location on the same map.
- Use
/bluemap mapsand/bluemapto check the loaded map and render status. Inspect whether that map is frozen or rendering has been stopped, preserving the reason if it was an intentional maintenance setting. - Inspect
/bluemap tasksand use the documented troubleshoot command at the affected coordinates. Save the output before requesting a small targeted update using the syntax for your installed release. - Wait for that work to finish, then open the map in a fresh browser session and compare the exact location. Check a second client before concluding the rendered files are still outdated.
Check the result
The changed blocks should become visible after the relevant task completes and the client fetches current data. If only one browser remains stale, inspect its requests or cache rather than restarting Java. If every client shows the old build, retain the task and troubleshooting output for diagnosis.
Check the exact map ID in any targeted command. Similar display names can conceal several views of the same world, each with a different render queue and storage location.
Recover or stop safely
Restore any intentional freeze or rendering pause changed during the test. Avoid /bluemap purge for a small update problem: it deletes rendered map data and starts a much larger job. Keep world files untouched while investigating an issue confined to the web map.
Related guidance and maintainer reference
For the broader setup, read Set up a BlueMap web map and control rendering load. Check the installed plugin version before applying syntax from the official BlueMap documentation.
Hide live player locations on BlueMap without removing the terrain map
A public terrain map does not have to publish online player positions. BlueMap separates live player markers from the rendered landscape. Test the public page as a logged-out visitor after changing privacy settings, rather than relying only on an administrator’s browser.
Work through the change
- Identify every public map URL and any external web host serving the same data. Back up the installed BlueMap plugin configuration and record the current live-player-markers value.
- Read the current plugin configuration reference. Disable live player markers in the documented setting and review related player-list or third-party marker integrations if your privacy policy requires those to be hidden too.
- Apply the configuration using BlueMap’s supported method for the installed release. Keep terrain rendering and the web service enabled, then join with a consenting test player and move between several locations.
- Open the public map in a fresh browser without staff access. Check the player list, position markers and any separate marker layer supplied by another plugin, including after a normal page refresh.
Check the result
The landscape should remain available while the selected live player information is absent. A removed position marker does not automatically erase names written into signs, static markers or chat integrations. Review those separately before claiming that the entire map is anonymous.
Ask the test player to change worlds as well as move within one map. Privacy should be checked across every public view that can expose their current position.
Recover or stop safely
Restore the recorded configuration if the change breaks the web app, then inspect logs for configuration errors before trying again. Do not remove world data or rendered terrain to hide one information layer. If another plugin republishes player markers, disable that integration through its own supported controls.
Related guidance and maintainer reference
For the broader setup, read Set up a BlueMap web map and control rendering load. Check the installed plugin version before applying syntax from the official BlueMap documentation.
Exclude a private area from a BlueMap render and verify existing tiles
A render mask controls which part of a world BlueMap renders. It is useful for limiting a public map’s scope, but it is not authentication. Already downloaded images and third-party copies cannot be recalled by changing a mask, so plan privacy before publishing sensitive builds.
Work through the change
- Record the map ID and the exact horizontal and vertical bounds of the area that should remain public. Back up the map configuration and inspect existing render-mask rules for combined or overlapping shapes.
- Read the official mask reference for your BlueMap release. Construct the intended allowed or excluded shape using its documented combination rules, checking boundary coordinates instead of guessing from a zoomed-out map.
- Apply the changed map configuration through the supported method. Monitor rendering and removal of tiles outside the new limits, allowing the resulting update work to finish before testing the public page.
- Inspect the boundary from several zoom levels and a fresh browser. If edges remain incorrect, review the documented fix-edges control for that map rather than purging every world’s rendered data.
Check the result
The served map should display only the intended footprint after updates complete, with no unexpected cut through a neighbouring public build. Check both low-detail and close-up views. A render mask changes content generation and should not be described as a substitute for access controls on a private map.
Inspect a known coordinate just outside the mask as a negative test. Checking only the public centre proves visibility there but says little about the intended exclusion boundary.
Recover or stop safely
Restore the previous mask configuration if the public area is wrong, then monitor the correction job. Keep private map access restricted while investigating. Do not assume that restoring the old configuration removes previously cached public copies; review web caching and any external storage separately.
Related guidance and maintainer reference
For the broader setup, read Set up a BlueMap web map and control rendering load. Check the installed plugin version before applying syntax from the official BlueMap documentation.
Check a BlueMap resource pack when custom blocks render incorrectly
A custom block that looks right in Minecraft can look wrong on BlueMap if its rendering resources differ. Treat the server map renderer and the player’s resource pack as separate consumers. Test one unmistakable block before adding a large collection of packs.
Work through the change
- Record the installed BlueMap version, Minecraft version and exact resource-pack release. Check pack licensing and compatibility before placing a copy where the renderer loads resources.
- Read the maintainer’s resource-pack instructions for your installation type. Add the pack in the documented location and preserve the existing pack order, since later resources can override earlier definitions.
- Apply a full resource reload through the supported BlueMap control; a light reload deliberately skips resources. Watch the console for missing textures, invalid models and pack-loading errors.
- Render a small test area containing the chosen custom block and compare it with the client’s view. Check another vanilla block nearby so a general lighting or missing-chunk issue is not mistaken for a pack problem.
Check the result
The renderer should load the expected resource without new model errors, and the test block should resemble the intended design within BlueMap’s supported features. Client-only rendering features may not have a direct server-map equivalent. Record those limits rather than promising perfect visual parity.
Keep the pack-loading log with the exact tested asset name. A successful resource reload can still contain warnings about one model that explain the remaining visual difference.
Recover or stop safely
Remove only the newly added pack and restore the prior resource order if rendering regresses. Reload resources again and retest the small area. Keep original world blocks intact; replacing a build’s materials is not an appropriate fix for a renderer that cannot interpret one pack feature.
Related guidance and maintainer reference
For the broader setup, read Set up a BlueMap web map and control rendering load. Check the installed plugin version before applying syntax from the official BlueMap documentation.
Diagnose BlueMap mixed-content errors behind an HTTPS map address
An HTTPS map page can still request resources through HTTP if its public and internal addresses are confused. Browsers may block those requests and leave an empty map. Diagnose the failing URL before opening extra ports or changing the Minecraft server’s network rules.
Work through the change
- Open browser developer tools on the public map address and record a failed request and its console message. Remove session tokens from any screenshot before sharing it with support.
- Compare the public HTTPS hostname with the internal BlueMap web service and the reverse proxy’s documented upstream. Keep the internal service private where the existing design requires it; do not expose it merely to bypass the proxy.
- Read BlueMap’s reverse-proxy guidance for your web server. Check path handling and forwarded request settings against the actual deployment, then back up and validate the proxy configuration before applying a targeted correction.
- Reopen the public URL in a fresh session and inspect both page assets and map-data requests. Test a deep map link too, since a working homepage can hide an incorrect subpath rule.
Check the result
The public page should load map resources through the intended secure origin without mixed-content blocks. Check the certificate and HTTP response status for the actual failed request. A browser success on a local HTTP address does not establish that the public reverse-proxy path is correct.
Test another map page after correcting a proxy rule. Shared host configuration can affect unrelated views even when the originally failing URL now responds correctly.
Recover or stop safely
Restore the previous validated proxy configuration if unrelated pages fail after the change. Preserve the failing URL and logs so the next adjustment remains targeted. Do not disable browser security or publish internal credentials as a workaround for a map address mismatch.
Related guidance and maintainer reference
For the broader setup, read Set up a BlueMap web map and control rendering load. Check the installed plugin version before applying syntax from the official BlueMap documentation.
Add a second BlueMap view without accidentally pointing it at the wrong world
BlueMap can show several views of the same world or maps of different worlds. The map identifier, displayed name and world save path have different jobs. Set each deliberately so a new menu entry does not silently show terrain from the existing survival map.
Commands beginning with a slash are player chat commands. Use them in game with the required role; check console support before adapting them for the hosting panel.
Work through the change
- List current map IDs with
/bluemap mapsand record the intended world’s actual save-folder path. Back up the map configuration you will use as a starting point. - Create the new map configuration using the documented map directory structure. Give it a distinct configuration identity and display name, then set world and dimension to the intended save and dimension.
- Check storage choice and render footprint before loading the map. A second view can create additional rendered data even when it reads the same underlying world, so verify available space first.
- Apply the configuration and inspect the newly loaded map list. Visit known landmarks on the public menu entry and compare them with the exact target world, not merely with a similar spawn design.
Check the result
The new entry should have its own clear identity and show the intended world or deliberate alternate view. Renaming the displayed name alone does not change the source world. Keep an eye on the render queue so the additional view does not compete unexpectedly with active players.
Record which new data belongs to the extra view before cleanup. Several views may share a source world while keeping separate rendered assets and configuration identities.
Recover or stop safely
Disable the mistaken map configuration through the supported process if it references the wrong save, preserving its files while you inspect the error. Restore the prior map list before deleting any rendered storage. A display configuration mistake does not require removing or regenerating the Minecraft world.
Related guidance and maintainer reference
For the broader setup, read Set up a BlueMap web map and control rendering load. Check the installed plugin version before applying syntax from the official BlueMap documentation.
Dynmap tasks
Task guides and troubleshooting for Dynmap. Check the installed release before changing configuration or data.
Find a Dynmap marker hidden by its layer or zoom settings
A missing marker may still exist in Dynmap’s marker data while its set is unchecked or hidden at the current zoom. Check the layer before recreating markers. Repeatedly adding the same location can leave duplicate icons that appear later when visibility changes.
Work through the change
- Identify the expected marker and its marker-set ID. Read the existing marker and set listings through the installed dmarker help, recording labels separately from their internal identifiers.
- Inspect the set’s hide and minzoom settings in the documented marker controls. Open the web layer selector and check whether that particular set is enabled in the current browser.
- Zoom to the marker’s recorded coordinates and compare several zoom levels. Check the world name too; a correctly configured marker will not appear on an unrelated world’s map.
- Change only the responsible set visibility setting through the documented updateset control if the default is wrong. Reload the public page in a fresh session and compare it with the browser that originally reported the problem.
Check the result
The existing marker should appear in its intended layer at the chosen zoom without adding a duplicate. A user can still hide a selectable layer locally, so document whether the change affects the default or the current browser selection. Confirm nearby unrelated marker layers retain their earlier behaviour.
Keep the set identifier in the maintenance notes. Labels can be renamed for visitors, while later command-based checks still need to target the correct internal collection.
Recover or stop safely
Restore the recorded set settings if the change exposes too much information. Do not delete the marker set to reset its display: deleting a set also deletes its contained markers. Preserve identifiers and coordinates before any later structural change to the marker collection.
Related guidance and maintainer reference
For the broader setup, read Install Dynmap and test a bounded world render. Check the installed plugin version before applying syntax from the official Dynmap documentation.
Hide a consenting player’s Dynmap location and verify the public view
Player visibility on a public map should be tested from the public page. Dynmap supplies hide and show controls, but another component can publish similar information independently. Agree what needs to be hidden before changing settings for a live player.
Work through the change
- Ask a consenting test player to join and record the current marker and player-list behaviour. Check whether the installed version or another plugin applies persistent visibility rules on login.
- Read the installed Dynmap command help for the hide control and its required permission. Apply the documented action to the test player without granting them map administration or unrelated command access.
- Open the public map in a fresh browser and move the player between known locations. Inspect both the map icon and player list, then repeat after reconnecting to identify whether the state persists as intended.
- Check third-party claim, chat and marker integrations separately. A static marker bearing the player’s name or a chat message can remain visible even when their live location is hidden.
Check the result
The tested public view should match the agreed location policy, including the reconnect behaviour you recorded. Do not promise that hiding a live icon erases information already observed by visitors. Keep test results tied to the installed plugin version and the components actually enabled.
Use a second consenting test account as a control. Its visible marker helps show that you changed the intended player policy rather than accidentally hiding every live location.
Recover or stop safely
Use the documented show control to restore the test player’s earlier state when appropriate. If another component republishes locations, change that integration through its own configuration rather than removing the terrain map. Preserve the privacy setting until the client understands which information is still public.
Related guidance and maintainer reference
For the broader setup, read Install Dynmap and test a bounded world render. Check the installed plugin version before applying syntax from the official Dynmap documentation.
Separate a stale Dynmap tile from a stale browser response
A build can remain outdated on one browser even when Dynmap has already rendered the new blocks. Compare the rendered state and the web response before scheduling a full world render. One small landmark is enough to isolate the failing layer.
Work through the change
- Record the world, map name and coordinates of a distinctive changed block. Confirm the live world save includes it, then check Dynmap’s task state and console for render errors near the same time.
- Use the installed documentation to request a small render around the affected location. Avoid a fullrender while investigating a single tile because it adds work unrelated to the observed problem.
- Wait for the relevant work to finish and open the location in a fresh browser session. Compare a second device and inspect the response for the tile request if only one view remains outdated.
- If a proxy or CDN serves the map, compare its cache policy and response age with the origin’s current data through the established administration path. Keep internal addresses and access tokens out of public screenshots.
Check the result
The changed landmark should appear consistently after the render and a fresh response. A successful plugin command confirms a request was accepted, not that every web cache has updated. Record whether the stale result affects one tile, one map or all served assets.
Compare the same zoom and coordinates on both clients. Different detail levels may request different rendered files and make a cache problem appear inconsistent.
Recover or stop safely
Leave world files unchanged while correcting the web delivery or specific render problem. Restore any temporary cache setting after the test and retain console evidence if rendering failed. Do not wipe the entire tile directory merely to clear one browser’s outdated response.
Related guidance and maintainer reference
For the broader setup, read Install Dynmap and test a bounded world render. Check the installed plugin version before applying syntax from the official Dynmap documentation.
Pause Dynmap rendering during a busy event and resume deliberately
Map rendering can compete with a large event for server resources. Dynmap provides rendering controls so you can defer background work without removing the map plugin. Record the paused state explicitly so yesterday’s emergency pause does not become tomorrow’s unexplained stale map.
Work through the change
- Read the current rendering status using the installed Dynmap command documentation. Record active work, affected worlds and the reason for pausing before the event begins.
- Use the documented pause control for the intended scope. Confirm the console acknowledges the change and inspect player response through the server’s existing monitoring instead of assuming every lag problem came from rendering.
- Check the public map during the pause and tell staff which updates are deferred. Avoid adding full-render requests while work is intentionally paused because queued jobs can create a surprise burst later.
- After the event, resume through the installed control and monitor a small interval of work. Compare map freshness, task progress and player response before leaving rendering unattended.
Check the result
The service should continue normal play during the pause, while deferred rendering resumes at the planned time. The public page may remain reachable with older imagery; that is different from proving live updates are working. Include the resumption check in the event’s maintenance notes.
Give the pause an owner and a planned review time. An intentionally stale map should not remain unexplained once the event and its resource pressure have ended.
Recover or stop safely
Pause again if the resumed work overwhelms available capacity and review the queue before changing performance settings. Keep existing tiles and world data intact. If staff cannot identify the current state, collect command output and logs rather than repeatedly restarting the server to reset rendering.
Related guidance and maintainer reference
For the broader setup, read Install Dynmap and test a bounded world render. Check the installed plugin version before applying syntax from the official Dynmap documentation.
Compare a lower-detail Dynmap view before changing production map quality
A detailed map can consume substantial storage and rendering time. Dynmap’s map definitions separate views and rendering choices, so evaluate a modest alternative before replacing an established public map. Keep existing tiles available while you measure the tradeoff.
Work through the change
- Record the current world and map definitions, storage use and representative close-up screenshots. Back up the relevant configuration and check the installed documentation for available templates and render settings.
- Prepare a distinct test view following the current world-and-template structure. Give it an unmistakable name and change only the quality-related setting you intend to evaluate, preserving source world identity.
- Render a bounded representative area containing buildings, foliage and terrain. Measure generated storage and elapsed work, and compare the view on an ordinary client device at several zoom levels.
- Decide whether the saving justifies the lost detail. Document whether existing tiles require regeneration for the chosen setting and schedule any wider work for a quiet period with sufficient free space.
Check the result
The comparison should show both the appearance difference and measured resource use for the same area. A smaller test render does not guarantee an identical saving across every terrain type. Keep the original public view until the new option has been accepted and its rollout is planned.
Include a representative dense build in the trial rather than only empty terrain. The visual compromise and storage cost are easiest to judge where players care about detail.
Recover or stop safely
Restore the original map configuration if the experiment is unsuitable. Retain old tile storage until its ownership and active references are understood. Do not delete a shared storage directory to recover test space; another map or world may still serve files from that location.
Related guidance and maintainer reference
For the broader setup, read Install Dynmap and test a bounded world render. Check the installed plugin version before applying syntax from the official Dynmap documentation.
Diagnose a Dynmap view using the wrong world template
A map that resembles the wrong dimension may have a configuration problem rather than corrupted terrain. Dynmap applies world and template settings together. Compare the effective world entry with the installed template structure before launching a large replacement render.
Work through the change
- Record the affected public map name and its actual world identifier. Back up the world-and-template configuration and note recent world imports, renames or copied map entries.
- Read the current maintainer documentation for template selection and world-specific overrides. Check that the intended world entry references the right template and that copied map definitions have distinct identifiers where required.
- Compare a known landmark and dimension-specific feature in game with the web view. Correct one mistaken mapping or override at a time, validating the configuration through the plugin’s supported application method.
- Render a bounded test area after the corrected definition loads. Check the map menu, orientation and visible terrain before scheduling any wider rerender needed by the configuration change.
Check the result
The map should identify and render the intended world under its chosen template, while other dimensions retain their previous definitions. A display label is not proof of source identity; inspect coordinates and landmarks. Keep the configuration diff with the test result so later world imports follow the same pattern.
Recover or stop safely
Restore the backed-up definition if the correction changes unrelated views or the plugin reports configuration errors. Preserve existing tiles while investigating map IDs and storage references. Do not regenerate the Minecraft world because a web renderer selected the wrong template or copied a label incorrectly.
Related guidance and maintainer reference
For the broader setup, read Install Dynmap and test a bounded world render. Check the installed plugin version before applying syntax from the official Dynmap documentation.
Vault tasks
Task guides and troubleshooting for Vault. Check the installed release before changing configuration or data.
Find the economy provider that Vault actually selected
A shop can report that Vault loaded while still using an unexpected economy backend. Establish which provider answers requests before moving balances, installing another money plugin or changing prices.
Before you start
Vault connects consumer plugins to an economy provider; it does not replace that provider or store your player balances. Identify the component holding the money before changing integrations, and check the provider name in startup logs.
Work through the check
- Read the complete startup sequence and note Vault, your economy plugin and the affected shop build.
- Find the economy registration or hook message, then compare its provider name with the money plugin you intended to use.
- Use the provider’s documented balance command for one test account, recording the exact amount and account identity.
- Perform one inexpensive shop transaction, then compare the provider balance and the shop message; keep the timestamp for log correlation.
What to compare
Keep the provider name and the player UUID in the same private test record. A player nickname is not reliable evidence that two displays refer to the same underlying economy account.
Confirm the result
The same test account should show the expected debit or credit in the selected provider, with no second provider claiming the transaction.
If the result differs
A missing hook suggests a disabled or incompatible provider; two different balance displays suggest different backends, currencies or cached placeholders. Inspect earlier startup errors before changing the shop.
Recover safely
Leave balances untouched while diagnosing. If you removed a conflicting plugin on a test copy, restore its matching data before comparing another startup; do not merge balances by guesswork.
Documentation and related help
Check the Vault maintainer documentation and Vault maintainer reference against your installed release before applying changes.
Check a plugin that says no economy provider is available
A consumer plugin needs an enabled economy service as well as Vault. Treat the first hook failure as a dependency problem; granting players more permissions will not create a provider.
Before you start
Vault connects consumer plugins to an economy provider; it does not replace that provider or store your player balances. Identify the component holding the money before changing integrations, and check the provider name in startup logs.
Work through the check
- Locate the first error for the economy plugin during startup, before the shop or reward plugin announces its own failure.
- Confirm the installed money plugin documents a Vault economy hook for the server platform and release you use.
- Check that Vault and the provider are installed in the server actually running the consumer, rather than only on a proxy or another backend.
- Restart the isolated test server with the supported dependency set and repeat the smallest feature that previously failed.
What to compare
Read startup logs from the beginning of that boot, not just the last screenful. A dependency can fail first and cause several later consumers to print similar hook errors.
Confirm the result
Both the provider registration and consumer hook should complete, and one test payment should change the documented balance without an exception.
If the result differs
An enabled permissions plugin is not an economy plugin. If an API library loaded but no service registered, read the provider’s dependency and Java requirements rather than adding random jars.
Recover safely
Restore the previous tested dependency set if a replacement adds new startup errors. Keep player-money files and databases unchanged until the provider boots cleanly.
Documentation and related help
Check the Vault maintainer documentation and Vault maintainer reference against your installed release before applying changes.
Investigate different balances in a shop and a balance command
A balance mismatch needs a controlled comparison. Menus can display cached values, a separate currency or the wrong player identity even when the underlying payment succeeds.
Before you start
Vault connects consumer plugins to an economy provider; it does not replace that provider or store your player balances. Identify the component holding the money before changing integrations, and check the provider name in startup logs.
Work through the check
- Write down the player UUID, backend server, exact balance command and shop or scoreboard showing the mismatch.
- Read startup hook messages to identify the economy service selected by each consumer; distinguish money from points or item currencies.
- Record the balance before and after a single small purchase, using the provider command between each observation.
- Close and reopen the menu, reconnect the same account, then repeat on the same backend without changing any player data.
What to compare
Compare the amount at the same moment after the transaction settles. A sidebar placeholder may refresh less frequently than a direct provider command, so a brief stale display is not automatically missing money.
Confirm the result
A correct result ties the transaction delta to one provider account. A stale display should refresh without another debit or compensation payment.
If the result differs
If values differ only on another backend, inspect its provider and storage configuration. If only a scoreboard differs, investigate that placeholder or refresh interval before modifying economy storage.
Recover safely
Keep the transaction notes and pause the affected feature if you cannot reconcile deductions. Refund only a verified amount through the active provider, not by editing unidentified player files.
Documentation and related help
Check the Vault maintainer documentation and Vault maintainer reference against your installed release before applying changes.
Plan a Vault economy-provider change without losing balances
Switching the plugin that owns money is a data migration. Vault offers an integration API; replacing its provider does not by itself prove that balances moved to the new backend.
Before you start
Vault connects consumer plugins to an economy provider; it does not replace that provider or store your player balances. Identify the component holding the money before changing integrations, and check the provider name in startup logs.
Work through the check
- List every consumer, including shops, jobs, claims and auction features, and confirm the new provider supports their required money model.
- Export or back up the current provider using its supported method, preserving UUIDs, decimal precision and any world-specific accounts.
- Rehearse the provider’s documented import on a disconnected test copy with a separate database and no live integrations.
- Compare selected low, high and fractional balances, then test one consumer debit and credit before planning the live maintenance window.
What to compare
Agree how a duplicate account or unsupported old currency will be handled before migration. Keep an account-count and total-balance comparison as well as a few sample players, because spot checks can miss omissions.
Confirm the result
The test should preserve account identities and balances and demonstrate each consumer using the intended service after a clean restart.
If the result differs
An empty new account is not evidence of a successful import. Stop if the migration method cannot represent your existing currencies, negative balances or per-world behavior.
Recover safely
Keep the original provider and its consistent data snapshot available. Roll back the whole money-storage checkpoint before reopening transactions if reconciliation fails; avoid running both writable backends in parallel.
Documentation and related help
Check the Vault maintainer documentation and Vault maintainer reference against your installed release before applying changes.
Distinguish Vault economy failures from permissions failures
A denied shop action and a missing money hook need different fixes. Capture the exact message so you do not respond to an economy error by granting broad administrative access.
Before you start
Vault connects consumer plugins to an economy provider; it does not replace that provider or store your player balances. Identify the component holding the money before changing integrations, and check the provider name in startup logs.
Work through the check
- Reproduce with one non-operator account and record whether the failure happens when opening the feature or during payment.
- Check the consumer’s own permission documentation and compare the required node with that account’s effective permissions.
- Read the startup economy hook and the provider balance for the same account; keep these checks separate from permission inheritance.
- Allow only the documented task permission on a test role, then retry a low-value transaction and remove the role afterward.
What to compare
Use one known successful payment as a control. If the provider processes that payment but a particular user cannot open the shop command, investigate that access path separately from service registration.
Confirm the result
The account should open only the intended feature and complete the payment through the provider, while unrelated administrative commands remain denied.
If the result differs
If access succeeds but charging fails, inspect provider registration, balance limits and the transaction error. If no access check passes, examine world or server permission contexts instead.
Recover safely
Remove temporary grants after the test. Leave Vault and money data unchanged when the evidence points to authorization, and restore the original role if the new node grants more access than intended.
Documentation and related help
Check the Vault maintainer documentation and Vault maintainer reference against your installed release before applying changes.
Prepare a useful report for a Vault integration error
A maintainer can investigate an integration error faster when you identify both sides of the bridge. A screenshot saying that a plugin is red omits the dependency that failed first.
Before you start
Vault connects consumer plugins to an economy provider; it does not replace that provider or store your player balances. Identify the component holding the money before changing integrations, and check the provider name in startup logs.
Work through the check
- Copy the server software, Java version, Vault build, provider build and affected consumer build from the running service.
- Capture the first startup exception and its surrounding hook messages, then note the exact action and timestamp that trigger the later error.
- Reproduce with a low-value test account and record the before-and-after balance, including whether an item or reward arrived.
- Compare the reproduction on a backed-up test copy with optional consumers removed one at a time, keeping required dependencies intact.
What to compare
Include the first relevant exception and its surrounding startup lines in the report. A final message saying a consumer disabled itself usually explains less than the earlier dependency error that caused it.
Confirm the result
Your report should name the active provider and show a repeatable action, a complete exception chain and the observed transaction outcome.
If the result differs
Redact database passwords, tokens and player addresses before sharing logs. Do not upload an entire server directory or use a public diagnostic upload without reviewing its contents.
Recover safely
Keep production transactions paused if outcomes are inconsistent. Restore any temporarily removed test plugins and their matching configuration before using that test copy for another comparison.
Documentation and related help
Check the Vault maintainer documentation and Vault maintainer reference against your installed release before applying changes.
ChestShop tasks
Task guides and troubleshooting for ChestShop. Check the installed release before changing configuration or data.
Diagnose a ChestShop sign that does not become a shop
A sign that stays ordinary has failed before any customer payment. Check sign recognition, the linked chest and creation permissions instead of refilling stock or changing the economy balance.
Before you start
ChestShop connects a sign, stock container and economy account. Test the buyer and seller separately: permission to create a shop does not prove stock access or payment works. Read the installed release documentation before changing signs on public shops.
Work through the check
- Reproduce beside a single test chest using the sign layout shown by the installed ChestShop release.
- Check that the sign targets the intended container and that its owner line and item description follow the documented syntax.
- Use an ordinary permitted shopkeeper, watching chat and the server log for the first creation denial or item-parsing error.
- Compare another plain material and an unprotected test location to separate sign formatting from region, spawn or claim restrictions.
What to compare
Leave the failed sign text in your private notes before trying the corrected form. A screenshot can hide spacing or punctuation, so record each line exactly and compare it with the installed release instructions.
Confirm the result
The plugin should acknowledge shop creation and recognize the intended item and quantity. A customer should see a shop response when interacting with that sign.
If the result differs
An unknown item points to parsing or version support; a protection denial points to the creation location. A different sign plugin may intercept interaction, so retain the exact message.
Recover safely
Remove only the unsuccessful test sign after recording its details. Do not delete the shop database or disable all land protection to make sign creation succeed.
Documentation and related help
Check the ChestShop maintainer documentation and ChestShop maintainer reference against your installed release before applying changes.
Separate ChestShop buy and sell directions before opening a market
A two-way sign can be confusing because the player and shop owner see opposite money and item flows. Document each direction so a reversed price does not become a market exploit.
Before you start
ChestShop connects a sign, stock container and economy account. Test the buyer and seller separately: permission to create a shop does not prove stock access or payment works. Read the installed release documentation before changing signs on public shops.
Work through the check
- Create a private test shop with an inexpensive item, a counted stock amount and a recorded owner balance.
- Read the sign pricing syntax in the ChestShop documentation for your release and identify which price represents customer buying and selling.
- Have a non-owner buy one advertised bundle, then record the customer balance, owner balance and both item quantities.
- Reverse the transaction with one bundle and check that its amount and payout match the intended selling rule.
What to compare
Test both directions from the customer account with known starting stock. The owner’s perspective reverses who pays and who supplies items, which makes an untested buy or sell label easy to misread.
Confirm the result
The buy direction should move stock to the customer; the sell direction should move it back. Money should travel in the opposite direction for each accepted transaction.
If the result differs
If players profit by cycling the same bundle, compare both prices and bundle sizes with other server shops. Taxes may change the owner’s net amount, so inspect configured tax behavior too.
Recover safely
Close the test shop while correcting the sign. Reconcile the small controlled transactions before reopening; do not compensate every customer from an assumed price without checking actual trades.
Documentation and related help
Check the ChestShop maintainer documentation and ChestShop maintainer reference against your installed release before applying changes.
Check ChestShop quantity and item matching with renamed stock
A shop may contain the right material but still reject a trade because the expected item has different metadata or the container cannot supply the advertised bundle.
Before you start
ChestShop connects a sign, stock container and economy account. Test the buyer and seller separately: permission to create a shop does not prove stock access or payment works. Read the installed release documentation before changing signs on public shops.
Work through the check
- Copy one intended sale item into a test container and record its name, enchantments, damage and other visible properties.
- Use the installed ChestShop item-identification method rather than guessing an old numeric item ID.
- Count the advertised bundle and ensure the chest can supply that exact quantity without mixing different item variants.
- Try a normal item first, then the intended customized variant, recording which one the shop recognizes and transfers.
What to compare
Keep the original custom item outside the shop while preparing samples. Compare material, quantity and metadata separately, and do not rename live stock repeatedly just to see whether the shop begins accepting it.
Confirm the result
Only the documented matching item should move, in the advertised quantity. The customer should not receive a substituted or partially missing bundle.
If the result differs
A custom-item plugin may store data beyond the visible name. Check its ChestShop integration before accepting valuable custom gear, and confirm the customer has room for the whole transaction.
Recover safely
Keep the original stock and sign description available while testing a replacement entry. If matching remains uncertain, suspend that item’s shop instead of stripping item metadata or deleting inventories.
Documentation and related help
Check the ChestShop maintainer documentation and ChestShop maintainer reference against your installed release before applying changes.
Investigate a ChestShop out-of-stock message when the chest is full
A full chest does not prove it contains enough matching shop stock. Treat the displayed material, bundle quantity and linked container as separate checks before moving valuable items.
Before you start
ChestShop connects a sign, stock container and economy account. Test the buyer and seller separately: permission to create a shop does not prove stock access or payment works. Read the installed release documentation before changing signs on public shops.
Work through the check
- Confirm you are reading the sign for the container you opened, especially around double chests and closely packed stalls.
- Compare the sign’s item and bundle size with a counted stack of the exact intended item in the linked container.
- Repeat with a plain low-value item in a private test shop so custom metadata and other shop plugins do not obscure the result.
- Check the shop owner identity and server log for container-access, protection or item-conversion errors at the failed interaction.
What to compare
Count the exact item variant required by the sign, not the chest’s total occupied slots. A chest can look full while containing no stack that matches the configured sale item.
Confirm the result
A known matching bundle should permit one purchase and reduce the linked container stock by the advertised amount, with the expected balance changes.
If the result differs
If only renamed or enchanted stock fails, investigate item equivalence rather than capacity. If no stock works, inspect the sign link and protection integrations for that location.
Recover safely
Return test items to their recorded owner and leave the original shop stock intact. Recreate a sign only after documenting its owner, prices and item identity; do not bulk-remove market records.
Documentation and related help
Check the ChestShop maintainer documentation and ChestShop maintainer reference against your installed release before applying changes.
Audit ChestShop taxes with one low-value transaction
A seller receiving less than the displayed price may be paying a configured transaction tax. Measure the debit and credit around one trade before treating the difference as missing money.
Before you start
ChestShop connects a sign, stock container and economy account. Test the buyer and seller separately: permission to create a shop does not prove stock access or payment works. Read the installed release documentation before changing signs on public shops.
Work through the check
- Read the active ChestShop tax settings and any exemption permissions for the installed release; record the previous configuration.
- Choose a test seller and buyer with known balances, using the same economy backend and world as the affected market.
- Make a single purchase and compare buyer debit, seller credit and any documented tax-account movement.
- Repeat with an account that lacks exemptions, then compare a staff role only if your policy intentionally treats it differently.
What to compare
Include the shop owner, customer and any configured tax recipient in the balance record. A missing amount may be an intentional tax destination rather than a lost transfer between the two visible participants.
Confirm the result
The observed difference should match the configured tax calculation and destination. No unexplained second charge should appear when a menu or another plugin wraps the transaction.
If the result differs
Rounding, bundle size and permission exemptions can change the result. Avoid evaluating tax from a leaderboard or cached display; use the provider’s direct balances and transaction timestamp.
Recover safely
Restore the original tax rule if the trial does not match your policy. Correct only the verified test differences and review public pricing before applying a server-wide tax change.
Documentation and related help
Check the ChestShop maintainer documentation and ChestShop maintainer reference against your installed release before applying changes.
Test ChestShop inside a claim without granting build access to customers
A customer should be able to trade at a market without gaining permission to break containers or edit signs. Protection integrations need a customer test, not only a successful owner visit.
Before you start
ChestShop connects a sign, stock container and economy account. Test the buyer and seller separately: permission to create a shop does not prove stock access or payment works. Read the installed release documentation before changing signs on public shops.
Work through the check
- Write down the claim, region and shop owner, then confirm which protection plugins apply at that exact sign.
- Use the protection plugin’s documented shop integration or interaction rule instead of granting general build access.
- Have an unrelated normal account buy one item, then try opening the stock chest, changing the sign and breaking a nearby block.
- Repeat from the neighboring claim or region edge to check whether an overlap changes the result.
What to compare
Use a separate private chest beside the test shop as a protection control. Successful trading is only safe if the same customer still cannot open unrelated storage or edit the market structure.
Confirm the result
The customer should complete the trade while direct stock removal, sign edits and building remain restricted. The shop owner should retain authorized management access.
If the result differs
If the trade fails, read both ChestShop and protection messages for the same click. Spawn protection or a second claim layer can still deny interaction after one region flag allows it.
Recover safely
Restore the previous narrow interaction setting if the change grants unintended access. Keep the market closed until you can demonstrate trading and container protection with separate test accounts.
Documentation and related help
Check the ChestShop maintainer documentation and ChestShop maintainer reference against your installed release before applying changes.
Preserve ChestShop ownership when a shopkeeper changes name
A display-name change should not become a reason to hand stock or proceeds to another identity. Verify ownership using the records supported by your ChestShop release before editing a public shop.
Before you start
ChestShop connects a sign, stock container and economy account. Test the buyer and seller separately: permission to create a shop does not prove stock access or payment works. Read the installed release documentation before changing signs on public shops.
Work through the check
- Ask the owner to identify a specific shop and record its location, sign text, linked stock and player UUID.
- Check the installed ChestShop documentation for name updates and ownership handling; distinguish a name change from an authentication-mode or UUID change.
- Compare a harmless test trade before and after the owner reconnects, observing the actual recipient balance.
- If a documented repair action exists, rehearse it against a copied test shop and inspect both the sign and owner account afterward.
What to compare
Check both the old and new player names against the same authenticated UUID. A name resemblance does not justify reassignment, especially when cross-play plugins use different account mapping rules.
Confirm the result
The same legitimate account should retain shop management and receive proceeds. A different player reusing an old name must not gain ownership.
If the result differs
If the server’s authentication mode changed, stop and investigate identity migration across permissions, claims and economy. Renaming a sign alone cannot reconcile mismatched UUID records.
Recover safely
Keep the old shop record and consistent stock checkpoint while investigating. Do not transfer all shops or reset owner data until the current and former identities have been verified.
Documentation and related help
Check the ChestShop maintainer documentation and ChestShop maintainer reference against your installed release before applying changes.
Collect a ChestShop transaction failure without exposing player data
An intermittent market error needs a traceable shop and transaction. Record a small reproduction so support can distinguish stock movement, balance changes and protection denials.
Before you start
ChestShop connects a sign, stock container and economy account. Test the buyer and seller separately: permission to create a shop does not prove stock access or payment works. Read the installed release documentation before changing signs on public shops.
Work through the check
- Note the server build, ChestShop build, Vault provider, shop location and the exact sign layout without sharing unrelated player accounts.
- Choose a cheap item and controlled buyer, record both balances and quantities, then attempt one transaction at a known time.
- Capture the first relevant exception and surrounding log lines, including any protection or provider message for that same attempt.
- State whether the customer lost money, received stock, saw a rejection or observed only a stale display.
What to compare
Record one failed transaction time precisely enough to find its log entry. Share the error and plugin versions without publishing full databases, player inventories, payment histories or connection credentials.
Confirm the result
The report should show a repeatable transaction with enough before-and-after evidence to identify which step failed, without needing a full private server archive.
If the result differs
Redact addresses, database credentials and private chat before sharing logs. Keep the original exception text and stack trace structure so redaction does not remove the failing plugin name.
Recover safely
Suspend the affected shop if outcomes are inconsistent and preserve its stock and records. Avoid repeated purchases on live accounts while gathering evidence or applying unverified refunds.
Documentation and related help
Check the ChestShop maintainer documentation and ChestShop maintainer reference against your installed release before applying changes.
QuickShop-Hikari tasks
Task guides and troubleshooting for QuickShop-Hikari. Check the installed release before changing configuration or data.
Change one QuickShop-Hikari price and verify the bundle cost
A price adjustment can charge more than expected when the shop also uses a bulk amount. Check the item quantity and transaction direction alongside the new number.
Before you start
QuickShop-Hikari maintains shop records alongside container contents and economy transactions. Use the command help bundled with your release because aliases and optional modules differ. Begin with one player-owned test shop rather than a whole-market bulk action.
Work through the check
- Look at the intended test shop and record its owner, trading mode, current price and bundle amount.
- Read the installed help for the price command; use the documented targeted-shop action rather than a whole-market edit.
- Set a small trial price on an inexpensive stocked shop and have a non-owner make one purchase.
- Compare the item quantity delivered, customer debit and owner credit, then repeat with the final intended price on the test copy.
What to compare
Use the supported amount display to distinguish a bundle price from a unit price. Record delivered quantity as well as money so the new label cannot conceal an unexpectedly expensive stack.
Confirm the result
The charged amount and delivered bundle should match the advertised combination. Other nearby shops should retain their original prices and modes.
If the result differs
If the result differs, inspect bulk-size settings, taxes and benefits before changing the economy provider. A display sign can remain misleading if it shows a per-unit value for a multi-item transaction.
Recover safely
Restore the recorded price and bundle amount if the trial is wrong. Keep the shop unavailable while reconciling any verified test debit; do not run broad price updates to fix one stall.
Documentation and related help
Check the QuickShop-Hikari maintainer documentation and QuickShop-Hikari maintainer reference against your installed release before applying changes.
Switch a QuickShop-Hikari stall between buying and selling
Buying and selling describe the shop’s direction, not a promise that the container or owner can fund either mode. Prepare both stock and money before allowing customers to trade.
Before you start
QuickShop-Hikari maintains shop records alongside container contents and economy transactions. Use the command help bundled with your release because aliases and optional modules differ. Begin with one player-owned test shop rather than a whole-market bulk action.
Work through the check
- Record the target shop’s current mode, item, owner balance and container contents.
- Use the release’s documented buy or sell command while targeting only that shop, and inspect the resulting description.
- For a buying shop, prepare the owner’s funds and container room; for a selling shop, provide matching counted stock.
- Ask an unrelated player to complete one low-value trade and record the item and money movements on both sides.
What to compare
Before opening the revised stall, check who supplies the traded item in the selected mode. A buying shop needs enough owner funds and storage capacity; a selling shop needs the advertised stock.
Confirm the result
The new direction should produce the intended exchange, while the opposite operation is unavailable unless your specific configuration explicitly supports it.
If the result differs
An owner balance shortage and an out-of-stock condition are different failures. Check the exact message, tax settings and selected currency before restocking or crediting the owner.
Recover safely
Return to the original mode and recorded inventory arrangement if the policy is incorrect. Reverse only the small verified test trade; do not empty the shop container to reset its mode.
Documentation and related help
Check the QuickShop-Hikari maintainer documentation and QuickShop-Hikari maintainer reference against your installed release before applying changes.
Freeze QuickShop-Hikari trading during a market investigation
A trading freeze can preserve evidence while you inspect a pricing exploit. Confirm the scope of the installed freeze control before using it on a busy server.
Before you start
QuickShop-Hikari maintains shop records alongside container contents and economy transactions. Use the command help bundled with your release because aliases and optional modules differ. Begin with one player-owned test shop rather than a whole-market bulk action.
Work through the check
- Read the freeze command help and permission reference for your exact QuickShop-Hikari release, including whether the action affects the server or a selected scope.
- Announce the temporary pause and record balances and stock for the shop involved in the complaint.
- Apply the documented freeze in the smallest supported scope, then try a normal customer transaction and an owner stock-management action.
- Keep a timestamped note of the denied trade and the shop state before investigating prices, taxes or another integration.
What to compare
Record every shop and player affected by the freeze control’s documented scope. After reopening, make a small test transaction before telling customers that the whole market is available again.
Confirm the result
Customers should receive a clear refusal without losing items or money. You should retain enough state to compare the shop before and after the investigation.
If the result differs
If some trades still succeed, check other shop plugins and backend servers rather than assuming this control covers them. Do not remove the economy provider to simulate a freeze.
Recover safely
Unfreeze using the documented reversal only after the fault is understood and a controlled test passes. Avoid enabling an affected shop while another backend still uses the broken configuration.
Documentation and related help
Check the QuickShop-Hikari maintainer documentation and QuickShop-Hikari maintainer reference against your installed release before applying changes.
Give a QuickShop-Hikari assistant access to one shop
A player helping with stock does not need ownership of the whole market. Use the shop’s supported staff controls and check the exact actions the assistant can perform.
Before you start
QuickShop-Hikari maintains shop records alongside container contents and economy transactions. Use the command help bundled with your release because aliases and optional modules differ. Begin with one player-owned test shop rather than a whole-market bulk action.
Work through the check
- Record the owner and shop identity, then read the installed staff command help and supported permission roles.
- Add a test assistant only to the intended shop; avoid staff-all actions while evaluating one container.
- Test restocking, price changes, ownership transfer and removal separately using that assistant’s normal account.
- Check a second shop owned by the same player to confirm the new access did not extend beyond the intended stall.
What to compare
Confirm the result
The assistant should perform the agreed management actions at one shop and remain unable to manage unrelated stalls or perform owner-only operations.
If the result differs
If broad access appears, inspect global QuickShop permissions and inherited administrative roles. A successful test with an operator cannot prove the shop-specific staff rule is safe.
Recover safely
Remove the temporary assistant through the same shop-specific control and confirm access disappears after rejoining. Keep ownership unchanged; do not transfer all shops to revoke a helper role.
Documentation and related help
Check the QuickShop-Hikari maintainer documentation and QuickShop-Hikari maintainer reference against your installed release before applying changes.
Trace a QuickShop-Hikari custom item that will not trade
Two items with the same display name may have different custom data. Use one known item as the reference and inspect what the shop actually advertises before replacing stock.
Before you start
QuickShop-Hikari maintains shop records alongside container contents and economy transactions. Use the command help bundled with your release because aliases and optional modules differ. Begin with one player-owned test shop rather than a whole-market bulk action.
Work through the check
- Record the item creator plugin, visible name and any version change that preceded the issue.
- Inspect the target shop’s stored item using its supported information or editing controls; compare it with a sample taken from stock.
- Trial a normal material in a separate shop, then test the intended custom item with a non-owner customer.
- Check the installed QuickShop integration and custom-item plugin documentation for supported matching behavior and migration requirements.
What to compare
Prepare the sample using the same item-producing plugin and release as the original. A visually similar renamed vanilla item does not prove compatibility with a custom item’s stored identity.
Confirm the result
The shop should accept and transfer only the intended item variant, keeping custom properties intact and charging the advertised amount once.
If the result differs
If ordinary stock works but custom stock fails, investigate item metadata compatibility. A texture looking correct in the client does not prove the underlying server item matches.
Recover safely
Keep the old item sample and shop record while correcting the integration on a test copy. Avoid stripping metadata, regenerating valuable gear or editing live database blobs as a shortcut.
Documentation and related help
Check the QuickShop-Hikari maintainer documentation and QuickShop-Hikari maintainer reference against your installed release before applying changes.
Check QuickShop-Hikari trade history before refunding a complaint
A refund should follow a verified transaction rather than a repeated purchase attempt. Compare shop history, the provider’s balance evidence and the stock state around one timestamp.
Before you start
QuickShop-Hikari maintains shop records alongside container contents and economy transactions. Use the command help bundled with your release because aliases and optional modules differ. Begin with one player-owned test shop rather than a whole-market bulk action.
Work through the check
- Identify the shop, buyer, owner and approximate transaction time without publishing their private account details.
- Read the history command help for your installed release and inspect only the affected shop or transaction range.
- Compare the recorded quantity and price with the shop’s current mode and the economy provider’s available audit data.
- Use a cheap controlled trade on a test shop to understand how successful and rejected attempts appear in that release’s history.
What to compare
Match a complaint to the player identity, shop, time and traded quantity together. A nearby entry for another customer is not sufficient evidence to refund or reverse the transaction.
Confirm the result
You should be able to distinguish an accepted exchange from a denial and calculate any confirmed discrepancy without assuming the current price was also the historical price.
If the result differs
If history is missing, review logging and retention settings before declaring that no trade occurred. External economy plugins may keep separate records or omit detail in ordinary chat messages.
Recover safely
Preserve the relevant records before changing retention or restarting an investigation. Apply only a documented, verified refund and record it separately so later staff do not refund the same complaint twice.
Documentation and related help
Check the QuickShop-Hikari maintainer documentation and QuickShop-Hikari maintainer reference against your installed release before applying changes.
Move a QuickShop-Hikari checkpoint to an isolated test server
A test market needs matching shop records, world containers and player-money state. Connecting a copied server to production storage can turn a harmless experiment into live transactions.
Before you start
QuickShop-Hikari maintains shop records alongside container contents and economy transactions. Use the command help bundled with your release because aliases and optional modules differ. Begin with one player-owned test shop rather than a whole-market bulk action.
Work through the check
- Pause trading and create a completed checkpoint that includes the world, QuickShop data and the active economy provider’s supported backup.
- Prepare the test instance with a separate database or isolated file storage and disable live reward, web and network integrations.
- Restore the matching checkpoint and verify a sample shop’s owner, item, bundle price and container stock before permitting a test login.
- Perform one controlled trade with a test identity, checking that no production balance or shop history changes.
What to compare
Block public access to the test copy and confirm its database target before starting it. Two shop servers writing the same records can change live ownership or transaction history during what appears to be an isolated trial.
Confirm the result
The copied market should behave against its own data and preserve the recorded shop state. The production service should remain unaffected by every test operation.
If the result differs
If the test points to the same database, stop it before trading and correct storage settings. Copying only the jar cannot reproduce a transaction or preserve shop ownership.
Recover safely
Keep the original checkpoint immutable and restore the whole test dataset when repeating the trial. Never push a stale test shop database back over new live trades.
Documentation and related help
Check the QuickShop-Hikari maintainer documentation and QuickShop-Hikari maintainer reference against your installed release before applying changes.
Reduce QuickShop-Hikari display clutter without removing shops
Floating display items can be distracting or interact with another visual plugin. Change the display behavior separately from shop ownership, stock and trade availability.
Before you start
QuickShop-Hikari maintains shop records alongside container contents and economy transactions. Use the command help bundled with your release because aliases and optional modules differ. Begin with one player-owned test shop rather than a whole-market bulk action.
Work through the check
- Select one inexpensive test shop and record whether its display is visible before the change.
- Use the release’s documented display-toggle control for that targeted shop; avoid an all-shops command until the result is understood.
- Move away and return, then check with another normal account to distinguish client caching from a server-side display change.
- Make one customer trade and inspect the stock and balances to confirm the visual adjustment did not change the shop’s item or price.
What to compare
Ask a normal customer whether the remaining sign or menu identifies the item and price clearly. Hiding a display should improve visibility without making players guess which neighboring container is the active shop.
Confirm the result
The intended visual should change while the shop record, stock and ability to complete an authorized transaction remain intact.
If the result differs
If another display remains, identify whether a hologram, NPC or separate shop plugin created it. Do not issue broad entity-kill commands around a market to remove a persistent visual.
Recover safely
Restore the recorded display choice through the same supported control if customers cannot identify the stall. Leave shop records and containers untouched while diagnosing duplicate visuals.
Documentation and related help
Check the QuickShop-Hikari maintainer documentation and QuickShop-Hikari maintainer reference against your installed release before applying changes.
EconomyShopGUI tasks
Task guides and troubleshooting for EconomyShopGUI. Check the installed release before changing configuration or data.
Find why one EconomyShopGUI item is missing for a player
A missing item can be a permission or availability decision rather than a broken inventory. Compare the same section with a normal test account before rebuilding the menu or replacing its configuration.
Before you start
EconomyShopGUI distinguishes shop items, sections and permissions. Free and Premium releases expose different options, so check the documentation for your installed edition. Test ordinary players and a single section before sharing a change across the shop.
Work through the check
- Record the section and item identifiers from the active shops file, plus the player group that cannot see the listing.
- Check the item and section permission settings against the documentation for your edition; inherited groups can grant or deny a different result than the primary group suggests.
- Compare the listing with an account in the same group and another in the intended allowed group, without operator status.
- After changing one relevant permission, reopen the menu and test an inexpensive purchase so visibility and transaction access are checked separately.
Confirm the result
The intended group should see the listing and buy it, while a group excluded by the shop policy remains excluded. Neighboring listings should retain their previous behavior.
If the result differs
Recover safely
Restore the specific permission or item entry from your saved copy if access broadens unexpectedly. Do not grant wildcard shop permissions to make a single item reappear.
Documentation and related help
Check the EconomyShopGUI maintainer documentation and EconomyShopGUI maintainer reference against your installed release before applying changes.
Check EconomyShopGUI item currency against its section currency
A server shop can use a different currency for one item than for the surrounding section. Trace the documented fallback order before treating an unexpected balance as lost money.
Before you start
EconomyShopGUI distinguishes shop items, sections and permissions. Free and Premium releases expose different options, so check the documentation for your installed edition. Test ordinary players and a single section before sharing a change across the shop.
Work through the check
- Choose one inexpensive listing and record the player’s balances in the expected economy and any configured alternative currency.
- Read the item’s economy selection, the section economy and the configured default; identify which level supplies the effective choice.
- Verify that the selected currency integration is installed and enabled before changing the listing. Keep the item price unchanged during this check.
- Buy one unit as a normal customer, then compare every recorded balance and the item quantity received. Repeat a sale only if the listing permits selling.
Confirm the result
Only the currency selected by the effective item configuration should change, by the documented price and quantity. The menu label should identify that currency clearly.
If the result differs
A placeholder balance can display another provider even when the transaction is correct. If the integration fails at startup, resolve that dependency before changing prices to compensate for the wrong display.
Recover safely
Restore the recorded currency selection if the trial affects the wrong account. Reconcile the single test transaction from your notes; do not convert all customer balances during a display investigation.
Documentation and related help
Check the EconomyShopGUI maintainer documentation and EconomyShopGUI maintainer reference against your installed release before applying changes.
Audit EconomyShopGUI buy and sell prices for an accidental profit loop
A buy price below the matching sell return lets players repeatedly generate money. Check exact item identity, quantity and applicable discounts before publishing a price change.
Before you start
EconomyShopGUI distinguishes shop items, sections and permissions. Free and Premium releases expose different options, so check the documentation for your installed edition. Test ordinary players and a single section before sharing a change across the shop.
Work through the check
- Export the affected shop entries and record the edition and any premium price modifiers currently enabled.
- For the target item, list the actual purchase cost and sale return for the same number of units, including group discounts and configured taxes where applicable.
- Test the smallest quantity as an ordinary player, recording the balance before purchase, after purchase and after selling the identical item back.
- Repeat the comparison for any second section that accepts the same item, and for a group eligible for discounts, before reopening the listing publicly.
Confirm the result
A complete buy-and-sell cycle should follow your intended economy policy. Where arbitrage is not intended, the return must not exceed the total cost paid for identical stock.
If the result differs
An apparent difference may come from a stack amount, dynamic pricing or item metadata. Do not compare the label of one listing with a different material or premium pricing state.
Recover safely
Restore the previous listing prices or make the affected trade unavailable through supported shop controls while calculating corrected values. Preserve transaction evidence before issuing any customer refunds.
Documentation and related help
Check the EconomyShopGUI maintainer documentation and EconomyShopGUI maintainer reference against your installed release before applying changes.
Diagnose an EconomyShopGUI sell command that skips an item
An item can be purchasable in the menu but unavailable to a selling command. Check the particular selling feature and the listing’s item rules without broadening access to unrelated shop functions.
Before you start
EconomyShopGUI distinguishes shop items, sections and permissions. Free and Premium releases expose different options, so check the documentation for your installed edition. Test ordinary players and a single section before sharing a change across the shop.
Work through the check
- Record which command or menu action was used, the material and any name, lore or enchantments on one sample item.
- Find the matching listing and confirm that selling is configured for it; a buy-only entry is not evidence that every selling route must accept the item.
- Compare the permission for the specific command with the item and section access using the current permissions reference.
- Test a plain sample and the affected sample separately, keeping only those items in the test inventory to avoid selling unrelated valuables.
Confirm the result
The supported selling route should accept an eligible item and leave an ineligible variant untouched, with a balance change matching the configured quantity and sell value.
If the result differs
Item similarity rules and available selling commands differ by edition and release. If a plain item sells but the named one does not, investigate matching requirements instead of granting broad sell permissions.
Recover safely
Revert the single eligibility or permission change if it admits unintended items. Keep original sample items in a secure test container rather than destroying them during repeated sell tests.
Documentation and related help
Check the EconomyShopGUI maintainer documentation and EconomyShopGUI maintainer reference against your installed release before applying changes.
Check an EconomyShopGUI section edit before reloading it
A malformed shop section can stop a menu from loading. Validate one saved edit with the installed release’s schema before sending another reload request or replacing the entire shop directory.
Before you start
EconomyShopGUI distinguishes shop items, sections and permissions. Free and Premium releases expose different options, so check the documentation for your installed edition. Test ordinary players and a single section before sharing a change across the shop.
Work through the check
- Take a copy of the active section and note which file the installed release uses; configuration layouts can differ across editions.
- Edit one listing at a time, preserving indentation and documented field types. Use the supplied example for the same release rather than a random older shop file.
- Check the edited YAML with a parser, then apply it on an isolated test server using the plugin’s documented reload or restart procedure.
- Open the section with a normal account, navigate back to its parent and complete one inexpensive trade to check both structure and effective prices.
Confirm the result
The server should parse the edited file without an exception and show the intended section. Other sections should remain accessible with their previous item order and prices.
If the result differs
A YAML parser only checks syntax, not whether a material or setting exists in EconomyShopGUI. Read the first plugin error for an unknown field or item rather than repeatedly retrying a broken reload.
Recover safely
Restore the saved section file and use the same supported apply procedure if the menu fails. Avoid replacing all shop files, which can erase unrelated price and permission changes.
Documentation and related help
Check the EconomyShopGUI maintainer documentation and EconomyShopGUI maintainer reference against your installed release before applying changes.
Compare EconomyShopGUI stack prices with a single-item purchase
Before you start
EconomyShopGUI distinguishes shop items, sections and permissions. Free and Premium releases expose different options, so check the documentation for your installed edition. Test ordinary players and a single section before sharing a change across the shop.
Work through the check
- Choose a low-value item with room in the test inventory and record the configured listing amount, buy price and any active modifier.
- Read the shop’s quantity controls in the running edition, then select the smallest supported purchase rather than assuming every click buys one item.
- Record inventory count and balance, complete that purchase, and calculate the actual number delivered against the debit.
- Repeat with a larger supported quantity and compare the unit rate, accounting for documented dynamic pricing if your edition uses it.
Confirm the result
The delivered count and charged amount should agree with the listing’s configured units and the quantity selected by the customer. A larger order should not silently use a different currency.
If the result differs
Full inventory handling, premium dynamic prices or another plugin replacing items can change the observation. Repeat with a clean test inventory before editing the shop amount or multiplying its price.
Recover safely
Restore the original amount and price if the edit changes units unexpectedly. Reconcile a disputed transaction from the tested quantity and relevant logs rather than refunding an assumed stack size.
Documentation and related help
Check the EconomyShopGUI maintainer documentation and EconomyShopGUI maintainer reference against your installed release before applying changes.
Separate EconomyShopGUI menu access from bulk-selling permission
Players may need to browse a shop without access to a bulk sell command. Treat command access and item access as separate permissions so one convenience feature does not expose every selling route.
Before you start
EconomyShopGUI distinguishes shop items, sections and permissions. Free and Premium releases expose different options, so check the documentation for your installed edition. Test ordinary players and a single section before sharing a change across the shop.
Work through the check
- Decide which player group may browse, purchase and use each selling command, then record the currently inherited permissions.
- Consult the current permissions page for your edition and identify the specific command nodes and default grants. Absence of an explicit grant may not mean access is denied.
- Change one documented command permission for a test group and keep section and item permissions unchanged.
- Log in as a normal member of that group, test the menu and try the restricted selling feature with a single inexpensive item.
Confirm the result
The group should retain the intended menu access while the restricted command is refused. Allowed purchases and sales should still obey each listing’s existing restrictions.
If the result differs
An inherited permission, operator status or a different plugin owning the same alias can explain an unexpected result. Check command ownership and effective permissions before editing more groups.
Recover safely
Restore the previous group setting if normal shop use is blocked. Apply a narrow documented permission change; do not solve a command conflict with a wildcard grant across every shop feature.
Documentation and related help
Check the EconomyShopGUI maintainer documentation and EconomyShopGUI maintainer reference against your installed release before applying changes.
Preserve EconomyShopGUI custom prices through a plugin update
A plugin update can introduce new configuration examples without making them a safe replacement for your live prices. Compare the release changes on a copy before applying them to a public economy.
Before you start
EconomyShopGUI distinguishes shop items, sections and permissions. Free and Premium releases expose different options, so check the documentation for your installed edition. Test ordinary players and a single section before sharing a change across the shop.
Work through the check
- Back up the plugin jar and its complete data directory, recording the edition, version and active economy integration.
- Read the maintainer’s release notes for configuration changes, then create a test server with a matching copy of your shop files and independent storage.
- Compare generated examples with your custom files, carrying forward only documented required changes while preserving item identifiers, prices and permission rules.
- Test representative purchases, sales and a restricted listing as normal players, then inspect startup logs for deprecated or rejected settings.
Confirm the result
The updated copy should retain custom prices and access rules while loading without configuration errors. Premium-only features should be tested only when the matching edition is present.
If the result differs
A clean default shop working does not prove that custom item matching or a third-party currency still works. Keep the affected file and first exception when reporting a migration issue.
Recover safely
If compatibility fails, restore the previous matching jar and data snapshot together. Do not copy a freshly generated default shop over production just to silence a configuration warning.
Documentation and related help
Check the EconomyShopGUI maintainer documentation and EconomyShopGUI maintainer reference against your installed release before applying changes.
Shopkeepers tasks
Task guides and troubleshooting for Shopkeepers. Check the installed release before changing configuration or data.
Fix a Shopkeepers trade blocked by a full payment chest
A player shop needs space to receive payment as well as stock to sell. A chest full of sale items can prevent a valid trade even when the customer holds the correct currency.
Before you start
Shopkeepers player trades exchange physical items held in a linked container. A Vault balance is not the stock for these trades. Work with the shop owner and keep the container, shop record and item metadata together when investigating a failure.
Work through the check
- Ask the owner to open the linked container and record which slots hold sale stock and which can accept the configured payment item.
- Inspect the exact trade costs in the editor, including quantities and any custom currency item metadata.
- As a normal customer, try one inexpensive trade while the owner watches the stock container, then note whether either side changes.
- Move a small amount of the owner’s stock to a safe labeled container to leave payment space and repeat the same trade without changing its price.
Confirm the result
The trade should complete once enough matching stock and sufficient payment space are available. The customer receives the advertised item and the linked container receives the exact currency items.
If the result differs
A free slot may still be insufficient for a large payment or an unstackable custom currency. If space is adequate, compare the payment item’s metadata and the offered quantity with the recipe.
Recover safely
Return the temporarily moved stock after arranging permanent payment capacity. Do not replace the entire chest or delete the shop, because that can separate ownership and stock from the existing trade record.
Documentation and related help
Check the Shopkeepers maintainer documentation and Shopkeepers maintainer reference against your installed release before applying changes.
Test Shopkeepers buying trades with enchanted and damaged items
Buying shops need careful item matching. Vanilla trade behavior can accept or reject variants in ways an owner did not expect, so test valuable equipment before advertising a buy offer.
Before you start
Shopkeepers player trades exchange physical items held in a linked container. A Vault balance is not the stock for these trades. Work with the shop owner and keep the container, shop record and item metadata together when investigating a failure.
Work through the check
- Record the buying recipe, including the example item and currency quantity, and use an isolated shop stocked only for a few low-value tests.
- Prepare separate plain, damaged, enchanted and renamed samples relevant to the item, labeling their differences outside the trade inventory.
- Try each sample with a normal customer account and record which variants the current release accepts; inspect the resulting item in the owner’s chest.
- Check the maintainer’s buying-shop matching notes before changing the example item. Avoid assuming every name or enchantment creates a strict distinction.
Confirm the result
You should have a written acceptance matrix for the recipe before using it with expensive player items. Each accepted variant must produce the intended payment and reach the owner’s container.
If the result differs
Vanilla matching can be asymmetric: a plain requirement may accept a more decorated item. A visual preview alone does not prove that enchanted or cursed equipment is excluded.
Recover safely
Disable the affected offer through the supported editor until its acceptance rules are suitable. Preserve original sample items and restore the previous recipe rather than deleting the shop or its container.
Documentation and related help
Check the Shopkeepers maintainer documentation and Shopkeepers maintainer reference against your installed release before applying changes.
Change one Shopkeepers price without altering the item being sold
The trade editor changes both recipe contents and quantities. Make a narrow price edit so an owner does not accidentally replace a custom sale item while adjusting its cost.
Before you start
Shopkeepers player trades exchange physical items held in a linked container. A Vault balance is not the stock for these trades. Work with the shop owner and keep the container, shop record and item metadata together when investigating a failure.
Work through the check
- Have the owner record the existing trade’s result item, amount, both cost slots if used, and enough stock for one transaction.
- Open the supported shop editor as the owner and change only the intended cost or quantity using the controls documented for that release.
- Close and reopen the editor to verify the saved recipe, then inspect the customer trade screen from a separate normal account.
- Complete one low-value trade and compare the delivered item’s metadata, stock reduction and payment increase against the recorded values.
Confirm the result
Only the intended price should change. The sold item, shop ownership, container link and unrelated offers should remain the same after reopening the editor.
If the result differs
If the displayed recipe differs between owner and customer, close both interfaces and check server logs for a plugin conflict. Do not repeatedly edit while a customer holds an older trade screen.
Recover safely
Restore the recorded recipe through the editor if either cost slot or result item changed unexpectedly. Reimburse the controlled test separately instead of guessing how many historical trades used the new price.
Documentation and related help
Check the Shopkeepers maintainer documentation and Shopkeepers maintainer reference against your installed release before applying changes.
Explain why a Shopkeepers trade ignores a Vault money balance
Shopkeepers player shops normally exchange physical items. A customer’s economy balance does not supply the item cost shown in a villager-style trade, even when Vault is installed on the same server.
Before you start
Shopkeepers player trades exchange physical items held in a linked container. A Vault balance is not the stock for these trades. Work with the shop owner and keep the container, shop record and item metadata together when investigating a failure.
Work through the check
- Open the customer trade screen and identify the actual cost item, its quantity and any second cost slot.
- Check the owner’s configured shop type and its stock container so the recipe is understood as an item exchange rather than a cash withdrawal.
- Give a normal test account only the exact low-value cost item and enough free inventory space, then record its separate Vault balance.
- Complete one trade and compare the item inventory, container contents and unchanged economy balance before documenting payment instructions for customers.
Confirm the result
The trade should consume matching currency items and deliver the result without changing the Vault balance. A customer with money but no required items should not complete that same recipe.
If the result differs
A separate integration or custom shop type may add different behavior, so list installed extensions before assuming standard rules. Do not install another economy bridge merely to make a physical-item recipe accept money.
Recover safely
Keep the existing recipe while clarifying its payment wording. If you require cash sales, test a documented compatible integration separately and retain the current shop and container until a migration is planned.
Documentation and related help
Check the Shopkeepers maintainer documentation and Shopkeepers maintainer reference against your installed release before applying changes.
Avoid title collisions in a Shopkeepers book shop
Book shops copy an owner’s written books using the documented book-shop rules. Reusing titles can make stock identity confusing, so establish a small controlled catalogue before opening a large library.
Before you start
Shopkeepers player trades exchange physical items held in a linked container. A Vault balance is not the stock for these trades. Work with the shop owner and keep the container, shop record and item metadata together when investigating a failure.
Work through the check
- Read the book-shop section for your installed release and record the written book’s title, author and generation before using it as a sample.
- Give each intended catalogue entry a distinct title and keep an untouched original outside the shop container.
- Stock the linked container with the required copying materials described by the maintainer, then offer a low-value test copy to a normal customer.
- Inspect the purchased book’s pages, title and generation and compare the container changes with the expected copy process.
Confirm the result
The customer should receive the intended readable book while the shop retains the correct catalogue entry and consumes the documented materials. Another book should not be substituted because its title collides.
If the result differs
Copy-generation restrictions or unsuitable stock can block a trade even when a book looks correct in the preview. Check those details before changing permissions or rewriting every catalogue entry.
Recover safely
Remove the affected offer through the editor until its identity is clear, preserving the original books and container contents. Rebuild only that catalogue entry from the untouched original when repeating the test.
Documentation and related help
Check the Shopkeepers maintainer documentation and Shopkeepers maintainer reference against your installed release before applying changes.
Investigate a Shopkeepers container link that an owner cannot use
A shop entity, its owner and the linked container must agree. Diagnose that relationship before moving chests or giving every nearby player permission to open protected storage.
Before you start
Shopkeepers player trades exchange physical items held in a linked container. A Vault balance is not the stock for these trades. Work with the shop owner and keep the container, shop record and item metadata together when investigating a failure.
Work through the check
- Record the shop owner, shop type and precise container location, then check whether the owner can access the container directly.
- Read the installed release’s player-shop setup requirements for valid containers and linking distance rather than assuming a nearby chest is the actual stock source.
- Check claim or region permissions with a normal owner account and confirm that only intended staff can edit the shop.
- Try one inexpensive customer transaction while monitoring the identified container, looking for the expected stock and payment change.
Confirm the result
The owner should be able to manage the intended stock source, while customers can trade without receiving general access to that container or permission to edit offers.
If the result differs
A region plugin can block interaction independently of Shopkeepers ownership. A second nearby chest receiving stock is evidence of a mistaken link, not a reason to disable protection across the market.
Recover safely
Restore the previous narrow protection setting if the trial exposes storage. Preserve the original container and shop record until the documented relinking process has been tested with a copy.
Documentation and related help
Check the Shopkeepers maintainer documentation and Shopkeepers maintainer reference against your installed release before applying changes.
Back up Shopkeepers records together with shop containers
Saving only a plugin file does not preserve the world containers holding player stock. Take a consistent checkpoint before a world move, plugin update or ownership repair.
Before you start
Shopkeepers player trades exchange physical items held in a linked container. A Vault balance is not the stock for these trades. Work with the shop owner and keep the container, shop record and item metadata together when investigating a failure.
Work through the check
- List the worlds containing shop entities and their linked containers, and locate the plugin data directory documented for your server platform.
- Pause trading during the checkpoint and save the worlds using the server’s supported procedure; use a clean stop if a consistent running backup is not supported.
- Back up the world data and matching Shopkeepers data together, recording the server and plugin builds beside the archive.
- Restore into an isolated test server and check owner editing, stock quantities and one inexpensive customer trade before relying on the checkpoint.
Confirm the result
The restored test should contain the shop entity, correct owner, linked container and matching inventory from the same checkpoint. Its trades must not connect to live shared storage accidentally.
If the result differs
A backup that restores entities without stock is incomplete for player shops. If records and worlds were captured at different times, preserve both copies and investigate rather than merging ownership by guesswork.
Recover safely
Keep the original checkpoint immutable. Restore the matching complete dataset on the isolated server when repeating tests, and do not overwrite newer production trades with an older shop file.
Documentation and related help
Check the Shopkeepers maintainer documentation and Shopkeepers maintainer reference against your installed release before applying changes.
Separate Shopkeepers owner editing from customer trading
A customer should be able to trade without editing recipes or handling stock. Test those boundaries with real player roles so an administrative bypass does not hide an access mistake.
Before you start
Shopkeepers player trades exchange physical items held in a linked container. A Vault balance is not the stock for these trades. Work with the shop owner and keep the container, shop record and item metadata together when investigating a failure.
Work through the check
- List the owner and any supported staff roles for one test shop, then record claim permissions for its stock container.
- Open the editor as the actual owner using the documented interaction, keeping the trade configuration unchanged during the access check.
- Use an unrelated normal account to open the customer screen, attempt an inexpensive trade and confirm it cannot open the editor or stock chest.
- If an extension manages staff access, check its documented scope separately; do not assume a generic claim trust grant is limited to this shop.
Confirm the result
Customers should trade through the offered recipes while only authorized owners or documented staff can change them. Container protection should stay independent of the customer trading permission.
If the result differs
An operator or region bypass can make a failed protection test appear successful. Recheck with fresh normal accounts and inspect inherited permissions before changing Shopkeepers settings.
Recover safely
Remove only the accidental editing or storage grant if the test account gains excess access. Preserve shop ownership and offers; deleting the shop is not needed to correct a permission boundary.
Documentation and related help
Check the Shopkeepers maintainer documentation and Shopkeepers maintainer reference against your installed release before applying changes.
Jobs Reborn tasks
Task guides and troubleshooting for Jobs Reborn. Check the installed release before changing configuration or data.
Separate Jobs Reborn money, experience and points rewards
A job action can award experience or points without paying economy money. Compare each reward channel before changing a player’s balance or assuming the entire job has stopped working.
Before you start
Jobs Reborn tracks job membership, experience and rewards as well as money payments. Use a test player with a recorded level and balance. Some actions depend on optional integrations, so identify the job file and event before editing rewards.
Work through the check
- Record the test player’s job membership, level, job experience, points and economy balance before the action.
- Read the active job’s entry for one simple action and identify its money, experience and points rewards separately, including any level-based expression.
- Perform that action once in a permitted location with a normal account, then wait for the configured payout interval before checking each recorded value.
- Compare the observed changes with the job information and current bonuses; use the installed command help to inspect that job rather than editing the player record.
Confirm the result
Each enabled reward channel should change according to its own configuration. A zero money reward can be valid when experience or points are intentionally enabled.
If the result differs
If only money fails, inspect the Vault provider hook and payment logs. If every channel stays unchanged, check membership, action eligibility and region restrictions before replacing the economy plugin.
Recover safely
Restore the original reward entry if your test edit changes more than one channel. Reconcile the controlled test only; adding money manually cannot repair missing job experience or points.
Documentation and related help
Check the Jobs Reborn maintainer documentation and Jobs Reborn maintainer reference against your installed release before applying changes.
Test Jobs Reborn break-and-place rewards for a money loop
A positive break reward can become exploitable when players replace the same block repeatedly. Test the configured protection and reward policy on a small sample before opening a mining job publicly.
Before you start
Jobs Reborn tracks job membership, experience and rewards as well as money payments. Use a test player with a recorded level and balance. Some actions depend on optional integrations, so identify the job file and event before editing rewards.
Work through the check
- Copy the active job file and record the break and place entries for one inexpensive block, plus any relevant protection settings.
- Prepare a controlled area where the test account can build, keeping naturally generated blocks separate from blocks placed during the trial.
- Break one natural block and one player-placed block, recording money and job experience changes after each payout interval.
- Repeat a short place-and-break cycle and compare its net return with your intended policy; inspect the current release’s block information tools if protection tracking is unclear.
Confirm the result
Natural gathering should pay as intended, while a repeat placement cycle should not produce an unintended profitable loop. Any placement penalty must be understood before players build valuable structures.
If the result differs
Older troubleshooting examples can use material names from obsolete Minecraft versions. Match the current generated job example and installed protection behavior rather than copying an old block identifier.
Recover safely
Restore the previous reward entry or temporarily make the affected action nonpaying through documented settings while reviewing the exploit. Keep player balances and historical records intact for a measured reconciliation.
Documentation and related help
Check the Jobs Reborn maintainer documentation and Jobs Reborn maintainer reference against your installed release before applying changes.
Investigate a Jobs Reborn income limit that stops payments
A player can remain in a job after reaching an income limit. Check the configured limit period and actual earnings before granting a bypass or resetting their progress.
Before you start
Jobs Reborn tracks job membership, experience and rewards as well as money payments. Use a test player with a recorded level and balance. Some actions depend on optional integrations, so identify the job file and event before editing rewards.
Work through the check
- Record when the player last received money, their current job and level, and the exact limit message shown by the plugin.
- Inspect the active income-limit settings and applicable permissions for that release, distinguishing money limits from experience or points limits.
- Use a normal test account under the same policy and record each low-value eligible action until its behavior can be compared with the configured threshold.
- Check the documented reset period and server time, then repeat one eligible action after the limit should have cleared without changing job membership.
Confirm the result
Payment should stop and resume according to the intended limit policy. Job membership and unrelated progress should remain intact while a money limit is active.
If the result differs
A delayed economy payout can resemble a limit, but it normally has different messages and timing. Check payment batching and provider errors before removing a limit from every player group.
Recover safely
Restore any temporary narrow test permission after the trial. Do not reset production job data or issue an unrestricted bypass just to make one payment appear; preserve the observed totals for support.
Documentation and related help
Check the Jobs Reborn maintainer documentation and Jobs Reborn maintainer reference against your installed release before applying changes.
Audit Jobs Reborn bonuses before a double-pay event
A timed event may overlap with existing group, item or job bonuses. Measure the effective reward before advertising a multiplier so the event does not pay far more than intended.
Before you start
Jobs Reborn tracks job membership, experience and rewards as well as money payments. Use a test player with a recorded level and balance. Some actions depend on optional integrations, so identify the job file and event before editing rewards.
Work through the check
- Record the test player’s active job and level, applicable bonus permissions, held bonus items and current event settings.
- Inspect the job’s displayed bonuses using the documented bonus command for the installed release, and capture the ordinary reward for one reproducible action.
- Apply only the proposed event bonus on an isolated test server or a narrowly scoped trial, noting whether it affects money, experience, points or all three.
- Repeat the identical action with the same account and compare every reward channel, then test the documented event expiry or reset behavior.
Confirm the result
The observed effective reward should match your announced policy, and the bonus should end at the intended time without removing unrelated permanent bonuses.
If the result differs
Different bonus sources may combine differently from a simple multiplication assumption. Check the release documentation and measured result rather than compensating by changing the base job reward.
Recover safely
Remove the temporary event bonus using the supported reset control and verify the baseline returns. Preserve existing group bonuses and item data; do not clear all player progress to undo an oversized event.
Documentation and related help
Check the Jobs Reborn maintainer documentation and Jobs Reborn maintainer reference against your installed release before applying changes.
Check Jobs Reborn leave-and-rejoin level loss before changing jobs
Leaving a job may reduce or archive progress according to server policy. Explain the effective behavior before a player confirms a change they expected to be reversible.
Before you start
Jobs Reborn tracks job membership, experience and rewards as well as money payments. Use a test player with a recorded level and balance. Some actions depend on optional integrations, so identify the job file and event before editing rewards.
Work through the check
- Back up Jobs data and record the test player’s current job, level, experience and any archived job entry.
- Read the installed configuration for leaving penalties, archive retention and joining limits, including any group-specific exceptions.
- On an isolated copy, use the documented leave control for that single test job, then inspect the resulting archive and displayed level.
- Rejoin the same job through the supported command and compare restored progress, slot availability and action rewards with the original record.
Confirm the result
The trial should show exactly which progress is retained, reduced or unavailable after rejoining. Publish that policy before encouraging customers to switch jobs.
If the result differs
A job name change or different UUID can resemble a lost archive. Check identity and internal job names before deciding that the plugin discarded the record.
Recover safely
Restore the isolated dataset when repeating the trial. If a live player has already changed jobs, preserve their current data and backup before using any documented correction command; do not overwrite the full database with an older copy.
Documentation and related help
Check the Jobs Reborn maintainer documentation and Jobs Reborn maintainer reference against your installed release before applying changes.
Back up Jobs Reborn membership and economy state consistently
Jobs progress and economy balances can live in separate stores. A consistent backup should make clear which dataset contains membership and which contains money before a plugin or database migration.
Before you start
Jobs Reborn tracks job membership, experience and rewards as well as money payments. Use a test player with a recorded level and balance. Some actions depend on optional integrations, so identify the job file and event before editing rewards.
Work through the check
- Identify the active Jobs storage backend, its database or local data location, and the separate economy provider holding balances.
- Pause job activity for the checkpoint and use supported server-save and database-backup procedures; record any payout queue behavior for your release.
- Save Jobs configuration, player progress and the matching economy checkpoint, keeping credentials outside any public troubleshooting bundle.
- Restore into an isolated server with independent database names, then inspect one player’s job level and complete one low-value action to verify both progress and money updates.
Confirm the result
The test restore should retain the same membership and progress and pay through its isolated economy provider. It must not write test rewards into the production database.
If the result differs
Copying a database file while it is being written may produce an inconsistent checkpoint. Follow backend-specific backup guidance rather than assuming that a copied jar and config preserve player progress.
Recover safely
Keep the original backups immutable and restore matching copies for further trials. Do not push an older Jobs database over current player activity simply because a new economy connection fails.
Documentation and related help
Check the Jobs Reborn maintainer documentation and Jobs Reborn maintainer reference against your installed release before applying changes.
Trace a Jobs Reborn custom-mob action that pays nothing
A custom mob kill may use an integration-specific action instead of the ordinary entity action. Identify the event and reward entry before adding duplicate payments to multiple job sections.
Before you start
Jobs Reborn tracks job membership, experience and rewards as well as money payments. Use a test player with a recorded level and balance. Some actions depend on optional integrations, so identify the job file and event before editing rewards.
Work through the check
- Record the custom mob’s internal identifier, the integration plugin versions and the test player’s active job.
- Compare the installed Jobs example and supported integration list with the active job entry; distinguish ordinary kill rewards from custom-mob actions.
- Kill one eligible low-value test mob in an allowed area and record money, experience, points and the relevant log timestamp.
- Repeat with an ordinary mob of the underlying entity type to establish whether the failure is the custom integration or the entire kill reward path.
Confirm the result
The eligible custom action should use the intended reward entry once. The ordinary-mob control should help explain whether general job payment remains healthy.
If the result differs
Display names are not necessarily internal mob identifiers. If the integration failed during startup or does not support the installed versions, editing the payout number will not make its event fire.
Recover safely
Restore the original job entry if the trial creates double rewards. Keep the custom and ordinary tests separate, and preserve logs rather than changing every kill section at once.
Documentation and related help
Check the Jobs Reborn maintainer documentation and Jobs Reborn maintainer reference against your installed release before applying changes.
Review Jobs Reborn level-up commands before awarding a rank
Level-up rewards can run privileged commands. Test the exact target and execution context so a reward grants the intended rank without exposing administrative command access to players.
Before you start
Jobs Reborn tracks job membership, experience and rewards as well as money payments. Use a test player with a recorded level and balance. Some actions depend on optional integrations, so identify the job file and event before editing rewards.
Work through the check
- Copy the active job reward section and identify the level threshold, command text and documented player placeholder for your release.
- Check which console or player context executes the reward, and restrict the command to the specific rank operation needed by the permissions plugin.
- Use an isolated test account with no administrative rights and advance it through one reward threshold using documented test controls.
- Inspect the resulting permission group, any economy charge and logs, then test relogging and a nearby level to check whether the reward repeats unexpectedly.
Confirm the result
Only the intended account should receive the documented reward at the intended threshold. The player should not gain permission to execute the administrative command directly.
If the result differs
An unresolved placeholder can target a literal name or fail silently. Confirm the generated command in a private test log and redact identifiers before sharing a support report.
Recover safely
Restore the saved reward configuration and remove only the test account’s unintended rank if needed. Do not grant wildcard command permissions or replay all level rewards against existing players.
Documentation and related help
Check the Jobs Reborn maintainer documentation and Jobs Reborn maintainer reference against your installed release before applying changes.
Towny tasks
Task guides and troubleshooting for Towny. Check the installed release before changing configuration or data.
Check Towny plot permissions that override the town policy
A town-wide build rule does not fully explain every owned plot. Compare the effective plot settings and ownership before changing the whole town’s outsider policy.
Before you start
Towny combines town membership, plots, permissions and economy rules. Test with a mayor, resident and outsider where relevant; an administrator can bypass the restriction you intend to check. Record the town and world so similarly named places do not confuse results.
Work through the check
- Stand inside the affected plot and record its coordinates, owner, type and displayed permission settings alongside the town defaults.
- Test one harmless build or interaction as a resident and as an unrelated outsider, keeping administrative bypass disabled on both accounts.
- Compare whether the plot is personally owned or town-owned and consult the current Towny permissions explanation for that ownership case.
- Change only the intended plot setting using the documented plot control, then repeat the same tests inside the plot and in a neighboring town-owned plot.
Confirm the result
The affected plot should follow its intended access policy while neighboring plots retain their existing behavior. The owner’s ability to manage their own land should remain intact.
If the result differs
A town permission edit can affect future defaults or town-owned land differently from an existing resident plot. If the result is inconsistent, inspect alliances, resident relationships and plot ownership before broadening access.
Recover safely
Restore the recorded plot rule if the test grants outsiders more access than planned. Do not unclaim or delete the plot to reset permissions; ownership and existing structures should remain untouched.
Documentation and related help
Check the Towny maintainer documentation and Towny maintainer reference against your installed release before applying changes.
Calculate Towny town-bank runway before the next upkeep collection
A town can have wealthy residents but insufficient money in its own bank. Check the actual upkeep payer and next collection before assuming personal balances protect the town.
Before you start
Towny combines town membership, plots, permissions and economy rules. Test with a mayor, resident and outsider where relevant; an administrator can bypass the restriction you intend to check. Record the town and world so similarly named places do not confuse results.
Work through the check
- Record the town bank balance and current upkeep shown by the installed Towny release, including plot-count or other configured cost modifiers.
- Read the economy settings for the collection schedule and insolvency policy; do not assume another server’s daily rate or deletion behavior applies.
- Calculate how many full collections the current bank can cover and add a margin for planned claims or other charges.
- Use the documented town-bank deposit control for an authorized test deposit, then recheck the bank balance and confirm the depositor’s separate economy debit.
Confirm the result
The recorded bank should contain enough funds for the intended operating period. The deposit must affect the town bank rather than only displaying money in the resident’s wallet.
If the result differs
A nation account, personal account or different town with a similar name can confuse the calculation. Confirm the target town and any configured cost changes before setting taxes to cover an unexplained shortfall.
Recover safely
Keep the original cost settings while investigating. If a test deposit was mistaken, use an authorized documented withdrawal with a clear audit note instead of editing bank values directly in stored data.
Documentation and related help
Check the Towny maintainer documentation and Towny maintainer reference against your installed release before applying changes.
Check Towny percentage taxes against a flat resident tax
A percentage tax and a fixed tax have different effects on wealthy and new residents. Confirm the active tax mode and cap before publishing a figure that players interpret as a flat amount.
Before you start
Towny combines town membership, plots, permissions and economy rules. Test with a mayor, resident and outsider where relevant; an administrator can bypass the restriction you intend to check. Record the town and world so similarly named places do not confuse results.
Work through the check
- Record the town’s current tax mode, rate, any percentage cap and the server’s collection schedule from the installed documentation and configuration.
- Choose two controlled residents with different balances and calculate the expected charge for each under the active policy.
- On an isolated copy, allow or trigger collection only through the release’s documented test procedure, keeping the production scheduler untouched.
- Compare resident debits and town-bank credits, then inspect exemptions and any related plot tax as separate charges.
Confirm the result
The two test residents should pay amounts consistent with the configured mode and cap. Town-bank income should be explainable from the charges and any documented adjustments.
If the result differs
A resident exemption, mayor status or plot tax can make a correct collection look wrong. Do not alter the global economy provider while investigating a town’s tax calculation.
Recover safely
Restore the recorded tax mode and rate if the trial changes the intended policy. Calculate any player correction individually from the collection record rather than refunding a guessed amount to every resident.
Documentation and related help
Check the Towny maintainer documentation and Towny maintainer reference against your installed release before applying changes.
Test a Towny embassy plot before selling it to an outsider
Embassy plots support a different ownership use case from ordinary residential plots. Test the buyer’s eligibility and permissions without changing the town’s general outsider build policy.
Before you start
Towny combines town membership, plots, permissions and economy rules. Test with a mayor, resident and outsider where relevant; an administrator can bypass the restriction you intend to check. Record the town and world so similarly named places do not confuse results.
Work through the check
- Identify a dedicated test plot and record its current type, owner, sale price and permission settings before making an embassy example.
- Read the installed Towny explanation for embassy ownership, including the buyer’s existing town membership and any server restrictions.
- Use an unrelated ordinary account that matches the intended buyer situation and check the supported plot purchase flow with a low test price.
- After purchase, inspect ownership and try a harmless permitted action inside that plot, then confirm the same account remains restricted on neighboring plots.
Confirm the result
The eligible outsider should own or use only the intended embassy plot under the server’s configured rules. Their purchase must not grant general build rights across the host town.
If the result differs
A regular plot, insufficient balance or ownership limit can reject the purchase independently of outsider permissions. Check the precise message before granting the buyer resident membership as a workaround.
Recover safely
Restore the test plot’s recorded type and ownership through supported controls after the trial, preserving its blocks. Do not unclaim surrounding land or grant broad town trust to resolve a single failed sale.
Documentation and related help
Check the Towny maintainer documentation and Towny maintainer reference against your installed release before applying changes.
Check Towny outpost costs before claiming a distant base
A distant outpost can have separate eligibility and costs from an ordinary adjacent claim. Confirm those requirements before charging a player or extending the town’s upkeep commitments.
Before you start
Towny combines town membership, plots, permissions and economy rules. Test with a mayor, resident and outsider where relevant; an administrator can bypass the restriction you intend to check. Record the town and world so similarly named places do not confuse results.
Work through the check
- Record the intended outpost location, town balance and current claim usage, then confirm that the world permits the relevant Towny activity.
- Read the installed release’s outpost requirements and configured costs, including any nation, distance or ownership limitations in your server policy.
- Try the documented outpost flow on an isolated copy or a deliberately chosen empty test area, recording the exact refusal or quoted cost before confirming.
- Inspect the resulting town claims, bank debit and upkeep estimate, and test who can travel to or use the outpost under the existing permissions.
Confirm the result
The outpost should be attached to the correct town with the expected cost and access rules. A rejected claim should leave the bank and surrounding ownership unchanged.
If the result differs
A failed adjacency check is not proof that outposts are disabled. Compare the specific requirements and available town capacity before changing global claim limits or bypass permissions.
Recover safely
If the trial is abandoned, undo only the temporary empty claim through supported Towny controls after confirming its boundaries. Preserve existing bases and do not remove real player structures to repeat a cost test.
Documentation and related help
Check the Towny maintainer documentation and Towny maintainer reference against your installed release before applying changes.
Separate Towny town-spawn access from building permissions
A player may be allowed to visit a town spawn without being allowed to build there. Check travel rules and destination safety separately from land-editing permissions.
Before you start
Towny combines town membership, plots, permissions and economy rules. Test with a mayor, resident and outsider where relevant; an administrator can bypass the restriction you intend to check. Record the town and world so similarly named places do not confuse results.
Work through the check
- Record the town spawn location, public or private travel policy and any configured teleport costs, then confirm the destination is safe.
- Try the documented town-spawn command as an ordinary resident and an outsider, noting the exact result and balance change.
- After a successful visit, test a harmless interaction and build attempt using each account so arrival is not mistaken for ownership access.
- Inspect the current spawn and teleport settings for the installed release before changing a single intended travel rule and repeating the same checks.
Confirm the result
Eligible visitors should arrive at the correct safe spawn and pay only the configured travel cost. Their build and container access should remain governed by the town and plot rules.
If the result differs
Combat restrictions, delayed teleports or another plugin owning an alias can look like a Towny access failure. Keep the original message and compare the namespaced or documented command route where supported.
Recover safely
Restore the recorded travel setting if the change exposes a private destination. Move an unsafe spawn through supported controls; do not grant build access or remove claims merely to allow town visits.
Documentation and related help
Check the Towny maintainer documentation and Towny maintainer reference against your installed release before applying changes.
Review a Towny assistant rank before promoting a resident
A town rank can allow more than its friendly name suggests. Inspect the actual configured permissions before promoting someone who only needs one management task.
Before you start
Towny combines town membership, plots, permissions and economy rules. Test with a mayor, resident and outsider where relevant; an administrator can bypass the restriction you intend to check. Record the town and world so similarly named places do not confuse results.
Work through the check
- Record the resident’s current town and nation ranks and list the specific task they need, such as inviting residents rather than managing the bank.
- Read the installed server’s rank definitions and inherited permission nodes alongside the Towny command reference, because rank contents are configurable.
- On an isolated copy, assign only the proposed town rank to a normal test account using the documented rank control.
- Test the intended action and a few relevant forbidden actions, including bank withdrawal or claim management where appropriate, without completing destructive operations.
Confirm the result
The account should gain the intended task without unrelated management powers. Town rank changes should not silently add a nation role or a global permissions group.
If the result differs
Operator status and permissions-plugin inheritance can mask what the Towny rank actually grants. Inspect the test account’s effective permissions instead of assuming the rank definition is the only source.
Recover safely
Remove the specific trial rank and restore the recorded prior ranks if access is excessive. Adjust the narrow rank definition on a test copy rather than giving a helper every Towny permission.
Documentation and related help
Check the Towny maintainer documentation and Towny maintainer reference against your installed release before applying changes.
Check what happens to Towny plots when a resident leaves
Plot ownership and town membership are related but should not be changed casually during an account move. Test the server’s configured leave behavior before asking a resident to leave and rejoin.
Before you start
Towny combines town membership, plots, permissions and economy rules. Test with a mayor, resident and outsider where relevant; an administrator can bypass the restriction you intend to check. Record the town and world so similarly named places do not confuse results.
Work through the check
- Back up Towny and record the resident’s owned plot coordinates, town membership, ranks and any embassy ownership.
- Read the installed release’s resident-leaving and plot ownership behavior together with your server’s active settings.
- Use an isolated copy and a normal account with a small test plot to perform the documented leave action, then inspect the plot owner and access rules.
- Rejoin only on that copy and compare ownership, permissions and any charges with the initial record before planning a real account change.
Confirm the result
The trial should establish whether plots are retained, returned or otherwise affected under the active policy. The production resident and their structures should remain unchanged during investigation.
If the result differs
A default behavior described online may differ from configured automation or addons. If another plugin handles removals, include its logs before deciding that Towny alone caused the ownership change.
Recover safely
Restore the isolated dataset for repeated tests. For an actual mistaken departure, preserve the latest records and use documented ownership recovery with verified coordinates rather than replacing the entire live Towny database.
Documentation and related help
Check the Towny maintainer documentation and Towny maintainer reference against your installed release before applying changes.
Test Towny shop plots without exposing neighboring storage
A commercial plot still needs suitable protection for customer trading and owner storage. Test the shop plugin interaction alongside Towny instead of opening all town containers to visitors.
Before you start
Towny combines town membership, plots, permissions and economy rules. Test with a mayor, resident and outsider where relevant; an administrator can bypass the restriction you intend to check. Record the town and world so similarly named places do not confuse results.
Work through the check
- Record the target plot’s type, owner and permission settings, then identify the shop plugin and the specific customer interaction it requires.
- Place a low-value test shop and a separate protected storage chest inside the intended commercial plot.
- Use an unrelated ordinary customer to complete one trade and attempt access to the separate storage chest, then repeat on a neighboring private plot.
- Change only the documented interaction or shop integration needed for the commercial plot and repeat both the allowed and forbidden tests.
Confirm the result
Customers should trade through the intended shop interface while private storage and neighboring plots remain protected. The plot owner should retain normal management access.
If the result differs
Build permission is broader than a shop interaction. If trading works only after granting it, check the shop plugin’s Towny integration and required protection exemptions before making the grant permanent.
Recover safely
Restore the original plot rule if customers can reach private stock. Keep shop records and containers intact while narrowing the integration; deleting and recreating the town is unnecessary for an interaction conflict.
Documentation and related help
Check the Towny maintainer documentation and Towny maintainer reference against your installed release before applying changes.
Investigate Towny protection at a town and wilderness boundary
A protection report near a border can refer to two different chunks. Establish where the action actually occurred before changing wilderness rules or claiming extra land around a player’s base.
Before you start
Towny combines town membership, plots, permissions and economy rules. Test with a mayor, resident and outsider where relevant; an administrator can bypass the restriction you intend to check. Record the town and world so similarly named places do not confuse results.
Work through the check
- Record the world and block coordinates of the affected action and inspect ownership on each side of the town boundary.
- Compare the town and plot rules with the world’s wilderness policy in the installed configuration, including any disabled-world settings.
- Use a normal outsider to attempt the same harmless action in a confirmed town block and a confirmed wilderness block, recording both results.
- Check other region or claim plugins at those coordinates, then change only the responsible documented rule on a test copy if the outcome differs from policy.
Confirm the result
Town and wilderness behavior should match their respective rules at the measured coordinates. A fix for one side must not silently remove protection from the neighboring area.
If the result differs
A visual border marker is not always the block where the interaction event is checked. Doors, containers and entities can span or move across boundaries, so test a simple single-block example first.
Recover safely
Restore the recorded world or plot setting if the trial broadens access. Preserve existing claims and structures; do not unclaim a border strip as a shortcut to diagnosing ownership.
Documentation and related help
Check the Towny maintainer documentation and Towny maintainer reference against your installed release before applying changes.
Lands tasks
Task guides and troubleshooting for Lands. Check the installed release before changing configuration or data.
Create a Lands subarea with a deliberate height boundary
A room-sized subarea is different from a normal chunk claim. Define its vertical range deliberately so a tenant’s access does not extend into storage above or below the room.
Before you start
Lands separates land membership, areas and role flags. Select the intended land before editing it, and verify with an ordinary player rather than an administrative bypass. Use the documentation matching your release when menus or permission settings differ.
Work through the check
- Stand in the intended land and use the current release’s
/lands edit herecontrol, then record the existing area list and room corners. - Use
/lands selectionand select the two corners, including the intended floor and ceiling heights. Do not expand to full height unless that is the policy you need. - Assign the selection through
/lands area <area> assign, replacing the placeholder with a new distinctive area name, and inspect the area in the menu. - Trust a normal test player in that area only, then test the intended interaction inside the room and just above, below and outside its measured boundary.
Confirm the result
The test player should receive only the area’s intended access within the selected bounds. Adjacent rooms and floors should retain their original role rules.
If the result differs
Older releases use different command targeting. If the selection affects another land, stop and verify the edit land and area name; existing area names can cause assignment to reshape an area rather than create a separate one.
Recover safely
Restore the recorded original bounds if an existing area was reshaped. Remove only the temporary area membership after testing; do not unclaim the surrounding chunks or delete the land.
Documentation and related help
Check the Lands maintainer documentation and Lands maintainer reference against your installed release before applying changes.
Allow Lands bank deposits while restricting withdrawals
Members may need to fund upkeep without being able to empty the land bank. Check deposit and withdrawal role flags independently of general membership or building access.
Before you start
Lands separates land membership, areas and role flags. Select the intended land before editing it, and verify with an ordinary player rather than an administrative bypass. Use the documentation matching your release when menus or permission settings differ.
Work through the check
- Select the intended land and record its bank balance, the test member’s role and the role’s existing bank permissions.
- Confirm land banks are enabled in the installed configuration and identify the documented BALANCE_DEPOSIT and BALANCE_WITHDRAW flags for your release.
- Allow only the intended deposit behavior for the test role, keeping withdrawal restricted, then use
/lands bank deposit <amount>with a small affordable amount. - Check
/lands bank balanceand the player’s wallet, then attempt a small withdrawal as that normal member and verify that the restriction holds.
Confirm the result
The member should be able to contribute the recorded amount without gaining withdrawal access. The land bank credit and personal debit should agree for the deposit.
If the result differs
A different selected land or administrative bypass can make a permission test misleading. Check effective role priority and inherited permissions before changing every member role.
Recover safely
Restore the original role flag if the test grants excess access. An authorized bank manager can reverse the documented test deposit where appropriate; do not edit bank balances directly in the database.
Documentation and related help
Check the Lands maintainer documentation and Lands maintainer reference against your installed release before applying changes.
Check Lands taxes before changing the economy provider
Lands supports more than one economy mode, but taxes have provider requirements. Verify the active provider before enabling collections or interpreting a missing tax payment as player debt.
Before you start
Lands separates land membership, areas and role flags. Select the intended land before editing it, and verify with an ordinary player rather than an administrative bypass. Use the documentation matching your release when menus or permission settings differ.
Work through the check
- Record the active integration.economy configuration and the provider selected at startup, including any fallback to item or experience currency.
- Read the current Lands economy documentation: taxes require Vault economy, so keep tax collection disabled when using item or experience economy.
- On an isolated test server with a supported Vault provider, record a member’s money, the target area’s tax and the collection schedule.
- Check the member’s displayed tax information and simulate or observe a documented test collection only in that isolated environment, noting debits and bank credits.
Confirm the result
A supported tax configuration should collect the expected amount through the intended money provider. Item or experience economy should not be treated as an interchangeable tax backend.
If the result differs
A displayed currency symbol does not prove the correct provider is active. Check the hook and current balances before changing collection amounts to compensate for a failed integration.
Recover safely
Restore the previous provider configuration and keep collection disabled if the test fails. A provider migration needs a separate balance plan; do not convert every account while investigating one tax message.
Documentation and related help
Check the Lands maintainer documentation and Lands maintainer reference against your installed release before applying changes.
Preview Lands inactive-owner expiration without removing claims
Expiration can transfer, sell or delete land. Use the documented preview mode to review the affected owners before enabling any real cleanup policy.
Before you start
Lands separates land membership, areas and role flags. Select the intended land before editing it, and verify with an ordinary player rather than an administrative bypass. Use the documentation matching your release when menus or permission settings differ.
Work through the check
- Take a database backup and record the installed Lands release, existing expiration settings and any scheduled collection or cleanup jobs.
- For releases with the documented land.expiration status system, keep status set to preview and verify that value in the active configuration before running a check.
- Use
/lands admin expiration listand the documented preview run control, recording the proposed owner outcomes and member removals without switching to active. - Review unknown login data, network activity and playtime tiers against a few known active and inactive owners, then revise the policy on the test copy.
Confirm the result
The check should report proposed outcomes while leaving ownership, trust and land protection unchanged. The review must account for activity on other servers sharing the Lands database.
If the result differs
If the release does not provide the documented preview system, stop and consult its matching documentation. Never assume a similarly named cleanup command is a dry run.
Recover safely
Leave expiration off or in verified preview while investigating unexpected candidates. Keep the database checkpoint; deleted land cannot be reconstructed reliably from a screenshot or a configuration file alone.
Documentation and related help
Check the Lands maintainer documentation and Lands maintainer reference against your installed release before applying changes.
Test a Lands rental extension and maximum rental time
A rental payment adds a configured period, but an owner can limit how far ahead tenants pay. Verify the duration and cap before advertising a long-term room rental.
Before you start
Lands separates land membership, areas and role flags. Select the intended land before editing it, and verify with an ordinary player rather than an administrative bypass. Use the documentation matching your release when menus or permission settings differ.
Work through the check
- Select a small test subarea and record its rental offer, price, duration, maximum time and current tenant status.
- Read
/lands rental infowhile standing in that area and confirm the intended land is selected before editing the offer through the documented menu. - Rent with an ordinary test account using a low price, then extend through the supported sign or hologram interaction and compare remaining time and balance.
- Try an extension at the configured limit and confirm the refusal does not debit money or affect unrelated rented areas.
Confirm the result
The tenant should gain only the paid period up to the permitted maximum. The owner and tenant should see consistent remaining time for the same area.
If the result differs
Time without an explicit unit may be interpreted differently from what the owner intended. Review the documented offer format and current saved values instead of repeatedly clicking and assuming every payment succeeded.
Recover safely
Remove a temporary offer or cancel the test rental through the documented rental controls when finished. Check compensation rules before removing a real tenant, and preserve the area and its existing blocks.
Documentation and related help
Check the Lands maintainer documentation and Lands maintainer reference against your installed release before applying changes.
Check a Lands claim refusal without raising every player limit
A failed claim can come from world policy, capacity, distance or cost. Read the precise refusal and selected land before changing global limits that affect the entire server.
Before you start
Lands separates land membership, areas and role flags. Select the intended land before editing it, and verify with an ordinary player rather than an administrative bypass. Use the documentation matching your release when menus or permission settings differ.
Work through the check
- Record the world, chunk location, selected land, current claim count and exact error shown to the normal player.
- Compare the installed claim and world settings with the player’s effective claim-limit permissions and any documented rank modifiers.
- Check the bank and personal balance against the quoted cost, including configured cost increases and fallback-personal behavior where enabled.
- Repeat with a deliberately chosen empty nearby chunk on an isolated copy, changing only the specific documented setting identified by the refusal.
Confirm the result
The controlled claim should succeed only when all intended conditions are met, with the expected owner and cost. A rejected attempt should not change existing land boundaries.
If the result differs
Administrative bypasses, free-chunk allowances or another selected land can hide the original restriction. Test as the affected player group rather than making the account an operator.
Recover safely
Restore the specific test limit or world rule if the result is too broad. Leave existing claims intact; raising every permission limit or unclaiming a player’s base is unnecessary to diagnose one rejected chunk.
Documentation and related help
Check the Lands maintainer documentation and Lands maintainer reference against your installed release before applying changes.
Prevent duplicate Lands economy collection on a Redis network
Before you start
Lands separates land membership, areas and role flags. Select the intended land before editing it, and verify with an ordinary player rather than an administrative bypass. Use the documentation matching your release when menus or permission settings differ.
Work through the check
- List the Lands instances that share the same database and Redis setup, recording versions, timezone and each server’s collection settings.
- Read the current network economy guidance and identify which instance has database.redis.master configured for collection authority.
- Compare collection timestamps and bank changes across two instances without manually triggering another production collection.
- On an isolated network copy, configure the intended single master according to the release documentation and observe one scheduled collection while checking both instances’ logs.
Confirm the result
One intended collection should affect shared balances once, while other instances continue to show consistent data. The test should not create competing jobs for the same tax or upkeep period.
If the result differs
A network with separate databases is not the same as shared Redis synchronization. Confirm the actual storage connections before changing master settings or assuming similarly named lands share balances.
Recover safely
Restore the recorded network settings if synchronization stops on the test copy. Keep production collections paused only through a planned supported procedure while investigating duplicates, and reconcile confirmed charges from logs rather than resetting banks.
Documentation and related help
Check the Lands maintainer documentation and Lands maintainer reference against your installed release before applying changes.
Verify a Lands database backup on an isolated server
A successful backup message is useful, but a restore test proves whether claims and bank data can be recovered. Keep that test isolated because the documented restore replaces the current dataset.
Before you start
Lands separates land membership, areas and role flags. Select the intended land before editing it, and verify with an ordinary player rather than an administrative bypass. Use the documentation matching your release when menus or permission settings differ.
Work through the check
- Check the installed release supports
/lands admin database backup, then create a checkpoint and locate the resulting backup under the documented plugin backup directory. - Save the plugin configuration, release information and world references alongside the archive, keeping database passwords private and exporting a protected copy off the game node.
- Prepare an isolated server with its own storage connection and use the documented restore flow there only, reading its restart and overwrite warning before confirmation.
- After the test restart, compare several known claims, owners, subareas and bank balances with the checkpoint record, then test a harmless ordinary-player access rule.
Confirm the result
The isolated restore should contain the expected protection and account state from that checkpoint. Neither its startup nor its test actions should write into production storage.
If the result differs
A missing backup filename or backend mismatch needs investigation before confirmation. Do not use an administrative restore command on the live server as a quick way to inspect an archive.
Recover safely
Keep the original backup immutable and rebuild the isolated test when repeating recovery. Production rollback needs a separate maintenance plan to avoid replacing newer claims and transactions.
Documentation and related help
Check the Lands maintainer documentation and Lands maintainer reference against your installed release before applying changes.
GriefPrevention tasks
Task guides and troubleshooting for GriefPrevention. Check the installed release before changing configuration or data.
Choose GriefPrevention access trust without exposing containers
A visitor who only needs buttons and doors does not necessarily need a claim’s storage. Use the documented trust tiers to grant the smallest useful access and verify it with an ordinary account.
Before you start
GriefPrevention has different documentation for legacy v16 and newer alpha releases. Match your installed branch before following commands. Test with a claim owner and an untrusted account, and keep claim ownership distinct from operator or bypass permissions.
Work through the check
- Check whether the server runs legacy v16 or a newer branch, then open the command documentation matching that release before changing trust.
- As the owner, stand inside the target claim and inspect
/TrustList, recording the visitor’s existing access and any subdivision context. - Use the documented
/AccessTrust <player>control for a test visitor, then test a harmless button or other supported access interaction and a separate storage chest. - Compare with the documented
/ContainerTrusttier on an isolated example only if storage access is actually required; test building separately from both tiers.
Confirm the result
The visitor should perform only the intended access interactions while containers and building remain protected. The owner’s storage and the neighboring claim should remain unchanged.
If the result differs
A visitor may already inherit broader trust from a parent claim or hold administrative bypass permission. Inspect the complete trust list and repeat with a clean normal account before concluding that access trust is too broad.
Recover safely
Remove only the accidental visitor grant with the documented untrust control and restore any recorded prior trust level. Do not use an all-players untrust command, which would disrupt unrelated members.
Documentation and related help
Check the GriefPrevention maintainer documentation and GriefPrevention maintainer reference against your installed release before applying changes.
Restrict a GriefPrevention subdivision without changing the parent claim
A subdivision can inherit permissions from its parent. If a private room remains accessible to parent members, check inheritance before moving chests or recreating the whole claim.
Before you start
GriefPrevention has different documentation for legacy v16 and newer alpha releases. Match your installed branch before following commands. Test with a claim owner and an untrusted account, and keep claim ownership distinct from operator or bypass permissions.
Work through the check
- Confirm the installed GriefPrevention branch and record the parent claim’s boundaries, owner and trust list before creating or editing a subdivision.
- Use the branch’s documented subdivision mode and define a small test area inside the parent, preserving the parent boundary.
- Inspect the subdivision trust and, where supported, use
/RestrictSubclaimwhile standing in the intended subdivision to stop inherited permissions before adding its specific members. - Test a parent-only member and a subdivision member inside the room and in the surrounding parent area, using harmless interactions and no operator bypass.
Confirm the result
The restricted subdivision should follow its intended local trust while the surrounding parent retains its original members. A player trusted only in the room should not gain unrelated claim access.
If the result differs
If access remains open, verify the player is actually inside the subdivision and has no direct broader permission. Tool modes and inheritance details differ between release branches.
Recover safely
Restore the recorded subdivision rules if the trial excludes intended members. Return the tool to basic claim mode after editing; do not abandon the parent claim to repair a room’s trust settings.
Documentation and related help
Check the GriefPrevention maintainer documentation and GriefPrevention maintainer reference against your installed release before applying changes.
Resize a GriefPrevention claim while preserving its protected build
A claim resize changes which blocks remain protected. Measure the complete build and available claim blocks before moving a corner so storage or farms are not accidentally left outside.
Before you start
GriefPrevention has different documentation for legacy v16 and newer alpha releases. Match your installed branch before following commands. Test with a claim owner and an untrusted account, and keep claim ownership distinct from operator or bypass permissions.
Work through the check
- Confirm the installed release branch, take a backup and record both existing claim corners, the owner and the claim-block totals from the supported claims-list display.
- Inspect the proposed new border around every part of the build, including detached farms and containers, and check for neighboring claims.
- Use the documented claim tool as the owner to move the intended corner, keeping the change small enough to verify immediately.
- Inspect the new boundary and claim-block accounting, then test an outsider’s harmless build attempt near each changed edge and beside important storage.
Confirm the result
The intended build should remain inside the protected boundary, with available claim blocks adjusted consistently. The resize must not affect the neighboring claim’s owner or permissions.
If the result differs
An insufficient claim-block balance, minimum claim size or overlapping neighbor can reject the resize. Read the exact message before granting an administrative bypass or changing global limits.
Recover safely
Restore the recorded original corner promptly if a protected structure falls outside. Keep both the world and claim-data backup; do not abandon and recreate the claim, which can temporarily expose the entire base.
Documentation and related help
Check the GriefPrevention maintainer documentation and GriefPrevention maintainer reference against your installed release before applying changes.
Explain GriefPrevention accrued and bonus claim-block totals
A player’s usable claim blocks are not simply the number of blocks they see in one reward message. Distinguish accrued allowance, bonuses and blocks already committed to claims.
Before you start
GriefPrevention has different documentation for legacy v16 and newer alpha releases. Match your installed branch before following commands. Test with a claim owner and an untrusted account, and keep claim ownership distinct from operator or bypass permissions.
Work through the check
- Record the player’s claims-list totals and each claim size using the command reference for the installed release branch.
- Read the active accrual rate, cap and any permission-based bonus policy, noting whether the player meets the configured conditions for earning blocks.
- Compare the expected total allowance with used area and any recent resize, purchase or rank change, keeping these events separate in a small ledger.
- Observe a controlled eligible play period or an isolated test reward, then recheck the displayed totals without adjusting the live player’s data.
Confirm the result
The remaining allowance should be explainable from accrued and bonus blocks minus claimed area, subject to the installed policy. A rank removal may affect a permission-based bonus differently from ordinary accrual.
If the result differs
Idle time, an accrual cap or an outdated display can explain a smaller increase than expected. Do not repeatedly award bonus blocks while an active scheduler or rank system is still changing the same allowance.
Recover safely
If a verified correction is needed, record the exact difference and use the release’s supported narrow administrative control. Preserve the original totals and avoid resetting every player’s accrued balance to solve one discrepancy.
Documentation and related help
Check the GriefPrevention maintainer documentation and GriefPrevention maintainer reference against your installed release before applying changes.
Check GriefPrevention siege and PvP behavior on a test claim
A siege feature changes the expectation of safety inside claims. Review the active policy on an isolated copy before enabling it or telling a player that claim protection guarantees PvP immunity.
Before you start
GriefPrevention has different documentation for legacy v16 and newer alpha releases. Match your installed branch before following commands. Test with a claim owner and an untrusted account, and keep claim ownership distinct from operator or bypass permissions.
Work through the check
- Identify the installed GriefPrevention branch, check whether siege is supported and enabled, and record the world’s PvP and combat settings.
- Read the branch-specific siege rules, permissions and any breakable-block configuration, together with other combat plugins installed on the server.
- Prepare a disposable test claim and two ordinary accounts with inexpensive gear, then follow only the documented siege flow on that isolated server.
- Record combat access, permitted interactions and the documented end conditions, checking the same accounts outside a siege as a control.
Confirm the result
The observed behavior should match the advertised policy for combat and claims. Ordinary claim permissions outside the test siege should remain unchanged.
If the result differs
Siege is disabled by default in the command reference, and releases or addons may change its availability. If a command is missing, do not install a random fork or grant broad bypass rights to simulate it.
Recover safely
Restore the recorded test settings and remove temporary permissions after checking the feature. Preserve production claims and inventories; a live combat experiment is not a suitable way to investigate a protection complaint.
Documentation and related help
Check the GriefPrevention maintainer documentation and GriefPrevention maintainer reference against your installed release before applying changes.
Keep GriefPrevention administrative claims separate from player claims
An administrative claim belongs to the server administration rather than a player’s personal allowance. Use it deliberately for shared infrastructure and leave player claims under their existing owners.
Before you start
GriefPrevention has different documentation for legacy v16 and newer alpha releases. Match your installed branch before following commands. Test with a claim owner and an untrusted account, and keep claim ownership distinct from operator or bypass permissions.
Work through the check
- Check the installed release’s administrative-claim documentation and grant only the documented administrative permission to the responsible staff account.
- Record the boundaries and nearby claim owners for the intended empty test area, then switch to the documented
/adminclaimsmode before creating the example. - Inspect the resulting owner and trust list, test intended visitor interactions with a normal account and confirm the staff member’s personal claim allowance was not used.
- Return to
/basicclaimsafter the task and verify the tool mode before the staff member next manages personal land.
Confirm the result
The administrative area should have the intended server ownership and visitor policy, while existing player claims retain their owners and allowances. Ordinary visitors should not receive administrative editing powers.
If the result differs
Staff with administrative-claim permission can manage those claims broadly; it is not a room-specific helper permission. Keep that authority separate from normal trust grants and never test protection with the same bypass-capable account.
Recover safely
Restore the recorded trust settings if the visitor policy is too open. Do not transfer a real player’s claim to administrative ownership merely to bypass an access problem; investigate its existing permissions first.
Documentation and related help
Check the GriefPrevention maintainer documentation and GriefPrevention maintainer reference against your installed release before applying changes.
GriefDefender tasks
Task guides and troubleshooting for GriefDefender. Check the installed release before changing configuration or data.
Identify a GriefDefender flag denial in the correct claim context
A denied action can come from a local claim, a parent rule or wilderness context. Record where the event occurs before changing a global flag that could expose unrelated areas.
Before you start
GriefDefender uses LuckPerms and claim-aware rules. Current documentation describes YAML by default with optional HOCON; check the format your server actually generated. Claim, parent and wilderness contexts matter, so record the location and affected player before changing rules.
Work through the check
- Check the installed platform and release, then record the player, world, coordinates and exact block or entity involved in the denied action.
- Use the documented claim inspection and information controls to identify the current claim and owner, including whether the location is wilderness.
- Enable a short, documented diagnostic session for that one test action and compare its source, target and applicable rule with the current flag or definition settings.
- Change only the identified rule on an isolated copy and repeat the action as the same ordinary player, plus a forbidden action in a neighboring context.
Confirm the result
The intended action should be allowed only in the relevant context, with unrelated protection remaining intact. The diagnostic should explain which rule controls the event rather than merely showing that an administrator can bypass it.
If the result differs
Blacklisted event sources or targets may not appear in normal flag handling. Check the release’s blacklist documentation if the expected event is absent instead of disabling protection globally.
Recover safely
Restore the original narrow rule and disable temporary debugging after the check. Keep the diagnostic private where it contains player identifiers, and avoid copying an entire global flag profile over a single claim.
Documentation and related help
Check the GriefDefender maintainer documentation and GriefDefender maintainer reference against your installed release before applying changes.
Give a GriefDefender helper container access without full ownership
A storage helper should not automatically receive permission to manage the entire claim. Compare the documented trust or role controls with actual container behavior before promoting them.
Before you start
GriefDefender uses LuckPerms and claim-aware rules. Current documentation describes YAML by default with optional HOCON; check the format your server actually generated. Claim, parent and wilderness contexts matter, so record the location and affected player before changing rules.
Work through the check
- Record the claim identifier, owner, parent context and the helper’s existing access using the installed release’s supported inspection controls.
- Read the release’s trust and flag documentation and choose the narrow container-related access needed for the task, rather than an owner or administrative role.
- Apply that grant to one ordinary test helper and try opening a disposable chest, using an ordinary interaction and attempting a harmless build action.
- Check a second storage area or child claim to verify the grant does not cross the intended boundary, and confirm the helper cannot edit claim membership.
Confirm the result
The helper should reach only the intended storage and retain the expected build restrictions. They should not gain ownership transfer or claim-management authority through the storage grant.
If the result differs
Inherited LuckPerms groups, parent flags and player-specific overrides can add access independently. Inspect those sources before assuming the local trust menu is the only active rule.
Recover safely
Remove only the temporary grant and restore the recorded previous access if the result is broader than planned. Leave claim ownership, structures and other members unchanged while correcting the permission boundary.
Documentation and related help
Check the GriefDefender maintainer documentation and GriefDefender maintainer reference against your installed release before applying changes.
Review GriefDefender expiration settings before enabling cleanup
An inactivity policy can affect valuable player claims. Review the active configuration and matching release behavior without running a production deletion to see what happens.
Before you start
GriefDefender uses LuckPerms and claim-aware rules. Current documentation describes YAML by default with optional HOCON; check the format your server actually generated. Claim, parent and wilderness contexts matter, so record the location and affected player before changing rules.
Work through the check
- Back up claim storage, configuration and the matching world data, recording the plugin and LuckPerms builds beside the checkpoint.
- Read the installed release’s expiration options and any administrative or playtime exemptions, keeping the current production policy unchanged during the review.
- Restore into an isolated server with independent storage and prepare known active, inactive and exempt test owners to compare the configured thresholds.
- Use only a documented preview facility if that release provides one; otherwise observe the isolated scheduler and logs, recording ownership and protection before and after its test cycle.
Confirm the result
The isolated test should identify which claims the intended policy affects and which exemptions work. Production owners and their protection should remain unchanged while the policy is evaluated.
If the result differs
Do not borrow Lands preview commands or assume that a similarly named GriefDefender cleanup control is non-destructive. Missing activity data or a mismatched release requires investigation before activating an expiry policy.
Recover safely
Keep production cleanup disabled or at its recorded safe setting until the review is complete. Recover a deleted claim only from a verified matching backup and a planned recovery procedure, not by guessing its former boundaries.
Documentation and related help
Check the GriefDefender maintainer documentation and GriefDefender maintainer reference against your installed release before applying changes.
Verify GriefDefender storage before a database migration
Claims, flags and player allowances need a consistent storage checkpoint. Identify the backend selected by storage.yml before moving data or changing a connection string.
Before you start
GriefDefender uses LuckPerms and claim-aware rules. Current documentation describes YAML by default with optional HOCON; check the format your server actually generated. Claim, parent and wilderness contexts matter, so record the location and affected player before changing rules.
Work through the check
- Record the installed platform, plugin release, active storage backend and all servers that share it, keeping passwords out of public notes.
- Pause writes through a supported maintenance procedure and back up the backend with its documented database tooling together with GriefDefender configuration and matching world data.
- Prepare an isolated restore target with a unique database or path and no connection to live shared storage, then follow the release’s documented migration or restore instructions.
- After startup, inspect several known owners, claim bounds, trust settings and player allowances, and test one harmless normal-player action at a protected boundary.
Confirm the result
The isolated server should preserve the checkpoint’s claim identity and protection behavior without writing to production. A successful database connection alone is not enough to prove that the right dataset loaded.
If the result differs
Table prefixes, platform-specific directories and optional configuration formats can select different data than expected. Inspect startup errors before treating an empty claim list as evidence that the original data is gone.
Recover safely
Retain the original backend and immutable checkpoint while testing. Do not initialize a new empty dataset over the existing database or push older test records over newer production claims.
Documentation and related help
Check the GriefDefender maintainer documentation and GriefDefender maintainer reference against your installed release before applying changes.
Test GriefDefender claim menus with a Bedrock player
Bedrock clients may display interactive menus differently through a cross-play bridge. Separate interface behavior from claim permissions so a menu problem does not lead to unnecessary access grants.
Before you start
GriefDefender uses LuckPerms and claim-aware rules. Current documentation describes YAML by default with optional HOCON; check the format your server actually generated. Claim, parent and wilderness contexts matter, so record the location and affected player before changing rules.
Work through the check
- Record the GriefDefender release, platform and Geyser or Floodgate versions, then confirm the client’s identity and claim ownership on the Java side.
- Open
/gdas the ordinary affected player and compare the supported GUI modes documented for that release, noting whether chat links or inventory clicks fail. - Where supported, use
/gd toggle guito test the alternative interface without changing the claim’s rules, then inspect the same harmless claim information in each mode. - Compare with a normal Java account and test one already-authorized interaction inside the claim to distinguish menu input trouble from an actual permission denial.
Confirm the result
The player should have a usable supported route to the intended claim controls, while ownership and protection remain the same in both client tests.
If the result differs
A renamed or differently mapped Floodgate identity can point to another player record. Check the bridge’s documented UUID behavior before transferring claims or changing LuckPerms groups.
Recover safely
Restore the player’s preferred working GUI mode and preserve the original ownership data. Report the failing client interaction with versions and sanitized logs rather than granting administrative access to bypass the menu.
Documentation and related help
Check the GriefDefender maintainer documentation and GriefDefender maintainer reference against your installed release before applying changes.
Trial GriefDefender economy-mode claim costs before switching modes
Economy-based claims change how players pay for land. Measure the effect on a copy before replacing an established claim-block policy with money-based costs.
Before you start
GriefDefender uses LuckPerms and claim-aware rules. Current documentation describes YAML by default with optional HOCON; check the format your server actually generated. Claim, parent and wilderness contexts matter, so record the location and affected player before changing rules.
Work through the check
- Back up GriefDefender storage and configuration and record existing player allowances, claim ownership and the active economy provider.
- Read the installed release’s economy-mode options and cost or sale-return settings, checking the required provider integration without enabling the mode on production.
- On an isolated copy, enable only the documented economy mode and choose a low-cost empty test area with a normal account and a recorded balance.
- Create the test claim through supported controls, inspect its charged amount and ownership, then test any sale or refund behavior only on that disposable claim.
Confirm the result
The trial should establish the actual purchase and refund policy, including the effect on existing allowance displays. Player-facing prices should agree with the observed debit before the change is announced.
If the result differs
A working Vault installation does not prove that the selected provider or the configured cost is correct. Check startup hooks and generated options before editing balances to make a failed trial look successful.
Recover safely
Restore the isolated checkpoint before another policy trial. Keep production mode unchanged until a separate migration plan covers existing claims and balances; do not sell or abandon real claims as a test.
Documentation and related help
Check the GriefDefender maintainer documentation and GriefDefender maintainer reference against your installed release before applying changes.
MythicMobs tasks
Task guides and troubleshooting for MythicMobs. Check the installed release before changing configuration or data.
Fix a MythicMobs skill that never fires on attack
An attack skill can load without running when you expect it. Separate the mob definition, attack trigger and skill reference before changing damage or adding extra timers.
Check the installed content
MythicMobs separates mob definitions, skills, targeters and triggers. Keep the internal IDs stable while testing a behaviour change; changing a display name does not require replacing the mob ID. Use documentation for your installed MythicMobs release.
Work through the change
- Make a copy of the affected mob and its referenced skill under new test IDs. Remove unrelated skills from that copy so the result belongs to one trigger.
- Check the attack trigger against the installed-release reference: onAttack is the mob attacking, while onDamaged is the mob receiving damage. Confirm the named skill exists with matching spelling and case.
- Give the test skill an observable harmless action supported by your release, such as a message. Keep damage, summons and command rewards out of this first test.
- Spawn one test mob in an enclosed area and let it attack an ordinary test player. Separately have the player hit the mob as the damaged-event control, recording who attacks and sees the diagnostic action.
Verify the result
The diagnostic action should run for the intended attack event, once per expected occurrence. Add the original skill actions back one at a time and repeat the same encounter after each addition.
If the result differs
If the action never appears, read the first load error and inspect any conditions on the skill line. If it appears on the wrong participant, investigate the targeter rather than duplicating the trigger.
Keep a recovery path
Remove the test mob and restore the original definition if the encounter becomes noisy. Keep the modified skill out of production until the harmless test works; restarting a server does not repair a misspelled skill reference.
References and related help
Check the maintainer reference: MythicMobs documentation, MythicMobs documentation.
Before changing live data, read how to keep a completed recovery copy. For startup errors, use the log collection guide.
Choose the right MythicMobs target for a healing skill
A healing skill that repairs the wrong mob usually needs a target check. Test the target selection with healthy and injured entities before changing the heal amount.
Check the installed content
MythicMobs separates mob definitions, skills, targeters and triggers. Keep the internal IDs stable while testing a behaviour change; changing a display name does not require replacing the mob ID. Use documentation for your installed MythicMobs release.
Work through the change
- Record whether the design should heal the caster, the triggering attacker or a nearby ally. These are different targets and may require different targeters.
- Copy the skill to a test ID. Select a targeter from the maintainer list for the installed release, including its range or filter only where the reference supports it.
- Place one injured ally, one healthy ally and an unrelated entity in a bounded test area. Keep the test heal small enough that you can see which health value changes.
- Trigger the copied skill once and inspect the selected entities. Repeat with the intended target outside the range, then with no eligible ally present.
Verify the result
Only the intended eligible target should receive the heal. A no-target case should finish without affecting unrelated mobs, and increasing the range should not silently change your intended selection rule.
If the result differs
If several entities heal, check whether the chosen targeter returns a set rather than one entity. If nothing heals, inspect the condition and target filters separately; a valid targeter cannot override a failed condition.
Keep a recovery path
Restore the previous skill line and retain the test layout for comparison. Do not deploy a large repeated heal while selection remains unclear, because it can make an encounter impossible to finish.
References and related help
Check the maintainer reference: MythicMobs documentation, MythicMobs documentation.
Before changing live data, read how to keep a completed recovery copy. For startup errors, use the log collection guide.
Stop a MythicMobs timer skill from overwhelming an arena
A timer that summons entities or emits effects can multiply load during a long fight. Measure one mob first and set a deliberate event budget for the arena.
Check the installed content
MythicMobs separates mob definitions, skills, targeters and triggers. Keep the internal IDs stable while testing a behaviour change; changing a display name does not require replacing the mob ID. Use documentation for your installed MythicMobs release.
Work through the change
- Copy the affected mob to a staging definition with natural spawning disabled. Record the timer interval, actions per activation and number of mobs the arena normally allows.
- Estimate activations over one minute using the timer units documented for your release. Include nested skills and summoned mobs that can start their own timers.
- Increase the test interval or reduce actions per activation, changing one setting at a time. Avoid solving the problem by killing unrelated world entities.
- Run a timed encounter with one mob, then the planned maximum. Count surviving summons and compare server timing evidence with the same arena while the skill is disabled.
Verify the result
The number of skill actions should remain bounded over the complete fight, including periods when no player can finish it. Confirm that remaining summons have an intentional end or despawn path.
If the result differs
If load keeps rising after the caster dies, inspect skills on its summons and persistent scheduled actions. If the count grows only near several players, test target-dependent multiplication before increasing server resources.
Keep a recovery path
Restore the previous definition only if it is safe at the old arena capacity. Otherwise keep the encounter unavailable while you reduce its scope. Keep the world save before testing summoning changes.
References and related help
Check the maintainer reference: MythicMobs documentation, MythicMobs documentation.
Before changing live data, read how to keep a completed recovery copy. For startup errors, use the log collection guide.
Separate MythicMobs custom drops from vanilla loot
Unexpected extra loot can come from the base Minecraft entity as well as your custom drop list. Compare both sources before reducing every reward on the server.
Check the installed content
MythicMobs separates mob definitions, skills, targeters and triggers. Keep the internal IDs stable while testing a behaviour change; changing a display name does not require replacing the mob ID. Use documentation for your installed MythicMobs release.
Work through the change
- Choose one test mob type and write down its expected custom reward, quantity and probability. Include whether ordinary vanilla drops should remain.
- Inspect the mob drop definition and the installed-release options controlling other drops. Check any referenced drop table for additional entries or nested rewards.
- Create a staging variant with a small deterministic custom reward. Kill it through the same method players use, since a player kill and environmental death may have different conditions.
- Count each output type across a recorded set of test kills. Repeat with the custom reward removed from the test definition to identify the vanilla contribution.
Verify the result
The observed item types should match the design, including the intentional vanilla portion. A rare drop needs enough samples to assess probability; one successful kill cannot prove a percentage.
If the result differs
If rewards double, inspect plugins that also reward that entity type and skill actions that give items on death. A second reward path can coexist with a correct drop table.
Keep a recovery path
Restore the prior drop definition if the trial changes progression. Remove only expendable test rewards and record any distributed items; changing a drop file does not retrieve loot already given to players.
References and related help
Check the maintainer reference: MythicMobs documentation, MythicMobs documentation.
Before changing live data, read how to keep a completed recovery copy. For startup errors, use the log collection guide.
Diagnose a MythicMobs boss bar that disappears during combat
A boss bar can disappear while the entity remains alive. Check its visibility rules and encounter transitions before replacing the mob or resetting the arena.
Check the installed content
MythicMobs separates mob definitions, skills, targeters and triggers. Keep the internal IDs stable while testing a behaviour change; changing a display name does not require replacing the mob ID. Use documentation for your installed MythicMobs release.
Work through the change
- Record the boss internal ID, entity health and whether all players lose the bar or only players at a particular distance. Use a test copy of the encounter.
- Compare the boss-bar section with the mob reference for the installed release. Keep a copy of the existing title, range and display settings before editing them.
- Remove optional visibility conditions from the staging variant one at a time. Test close to the boss, at the arena edge and after leaving and re-entering the area.
- Follow any phase transition that replaces or transforms the boss. Confirm that the new entity or definition also has the required display configuration.
Verify the result
The intended players should see a consistent bar for the active boss entity, with a health display that follows the encounter. A replacement phase should create the expected new bar rather than leaving an old one behind.
If the result differs
If only one client fails, compare client-side display behaviour before editing the server definition. If everyone fails at the same phase, inspect the entity replacement and skill log at that timestamp.
Keep a recovery path
Reinstate the previous bar section while keeping the working combat logic. Do not delete live bosses to repair a cosmetic display; plan a controlled encounter reset if the entity itself needs replacement.
References and related help
Check the maintainer reference: MythicMobs documentation.
Before changing live data, read how to keep a completed recovery copy. For startup errors, use the log collection guide.
Keep a MythicMobs spawn skill from duplicating its passengers
An encounter can accumulate extra riders when a passenger or mount action runs more than once. Check the lifecycle event that creates the attachment instead of clearing every nearby entity.
Check the installed content
MythicMobs separates mob definitions, skills, targeters and triggers. Keep the internal IDs stable while testing a behaviour change; changing a display name does not require replacing the mob ID. Use documentation for your installed MythicMobs release.
Work through the change
- Write down which entity should own the attachment and when it should appear. Inspect the mob and its skills for more than one creation path.
- Make a staging copy with a visible single attachment. Keep repeating timers and damage-triggered creation actions disabled while checking the initial spawn behaviour.
- Test a fresh spawn, then the events that previously caused duplication, such as taking damage or entering a later encounter phase. Count attachments after each event.
- Use the installed-release mechanics and trigger references to choose the lifecycle point intended for creation. Keep reattachment logic separate from creating a new companion entity.
Verify the result
A fresh encounter should create the planned number of attached entities. Repeated damage and phase checks should leave that count unchanged unless the design explicitly introduces another attachment.
If the result differs
If counts increase, find which skill line ran at that instant and trace nested skills. If a passenger disappears instead, check entity lifecycle and despawn rules rather than adding a repeated summon as a workaround.
Keep a recovery path
Put the prior definitions back on the test copy and remove its disposable entities. Keep the production encounter closed until the attachment count stays stable over a full run and an orderly server restart.
References and related help
Check the maintainer reference: MythicMobs documentation, MythicMobs documentation, MythicMobs documentation.
Before changing live data, read how to keep a completed recovery copy. For startup errors, use the log collection guide.
Check MythicMobs conditions before a reward skill runs
A reward condition should distinguish the qualifying player from everyone nearby. Build a small pass-and-fail test before connecting it to valuable currency or items.
Check the installed content
MythicMobs separates mob definitions, skills, targeters and triggers. Keep the internal IDs stable while testing a behaviour change; changing a display name does not require replacing the mob ID. Use documentation for your installed MythicMobs release.
Work through the change
- Describe the rule in plain language, including which player must satisfy it and whether it should apply once or on each event. Record the expected failing case.
- Copy the reward skill and replace the valuable reward with a harmless observable action. Preserve the same trigger and target selection during the test.
- Inspect the installed-release condition syntax and whether the condition evaluates the caster, target or trigger. Do not assume those participants are interchangeable.
- Run the copied skill with one qualifying player and one non-qualifying player, then reverse their positions. Test the event again after the qualifying state changes.
Verify the result
Only the correct participant should pass the condition. The failed case should produce neither the reward nor its side effects, and spatial position alone should not grant eligibility.
If the result differs
If both players pass, inspect a condition group or inversion before adjusting the reward amount. If neither passes, test the condition with the simplest supported state and inspect the first parser error.
Keep a recovery path
Restore the copied skill to its harmless form if any case fails. Keep a record of the test accounts and their state; repeatedly granting real rewards while debugging can distort the server economy.
References and related help
Check the maintainer reference: MythicMobs documentation, MythicMobs documentation.
Before changing live data, read how to keep a completed recovery copy. For startup errors, use the log collection guide.
Trace a MythicMobs skill reference across several files
A skill may fail after moving configuration files even when the visible action looks unchanged. Follow its internal references and load errors before recreating the entire content pack.
Check the installed content
MythicMobs separates mob definitions, skills, targeters and triggers. Keep the internal IDs stable while testing a behaviour change; changing a display name does not require replacing the mob ID. Use documentation for your installed MythicMobs release.
Work through the change
- Record the failing mob ID and the first skill name called by its definition. Search the downloaded configuration copy for that exact ID, including spelling and case.
- Make a simple reference map showing each called skill and the file that defines it. Note IDs defined twice and names that appear only as references.
- Read the startup or supported plugin-load errors from the first failure onwards. Correct one unresolved or duplicate definition on a staging copy, then repeat the same load.
- Trigger the shortest skill path that demonstrates the fix. Add nested branches back in sequence so a later failure does not hide the original reference problem.
Verify the result
Every referenced skill in the tested path should resolve to one intended definition. The server should load that path without a missing-skill error and execute the expected action once.
If the result differs
If a reference still fails, check whether the enclosing YAML structure prevented the definition from loading. A correctly spelled ID inside an invalid file remains unavailable to other skills.
Keep a recovery path
Restore the previous file layout from the content backup if moving files introduced the problem. Keep internal IDs stable during organisation work, and do not reset player or world data to fix a configuration reference.
References and related help
Check the maintainer reference: MythicMobs documentation.
Before changing live data, read how to keep a completed recovery copy. For startup errors, use the log collection guide.
Test MythicMobs equipment without changing live boss loot
A visible weapon or armour item on a custom mob does not establish what players will receive when it dies. Test equipment and death rewards as separate parts of the encounter.
Check the installed content
MythicMobs separates mob definitions, skills, targeters and triggers. Keep the internal IDs stable while testing a behaviour change; changing a display name does not require replacing the mob ID. Use documentation for your installed MythicMobs release.
Work through the change
- Copy the mob definition and record each equipment slot, item reference and explicit drop entry. Keep the copied encounter away from production spawning rules.
- Check that every custom item reference resolves in the installed release. Start with one equipment slot and a low-value test item before restoring the full appearance.
- Spawn the copied mob, inspect its visible equipment and observe its attacks. Kill it once through the intended player interaction and collect all dropped items.
- Compare the result with both the equipment configuration and the custom drop table. If needed, change only the release-supported equipment drop behaviour and repeat the test.
Verify the result
The mob should wear the intended items and give only the planned death rewards. A change to its appearance should not accidentally introduce a second high-value loot source.
If the result differs
If equipment looks wrong, verify the custom item itself on a player before investigating the mob slot. If the appearance works but loot doubles, trace explicit drops and other loot plugins separately.
Keep a recovery path
Restore the prior equipment and drop sections together if the change affected rewards. Record any real item distribution during testing; a configuration rollback cannot remove equipment or loot already collected.
References and related help
Check the maintainer reference: MythicMobs documentation, MythicMobs documentation.
Before changing live data, read how to keep a completed recovery copy. For startup errors, use the log collection guide.
Keep MythicMobs test summons inside an arena boundary
A custom summon can escape its encounter through a broad target location or repeated skill. Test the location selection and count limits before opening the arena to players.
Check the installed content
MythicMobs separates mob definitions, skills, targeters and triggers. Keep the internal IDs stable while testing a behaviour change; changing a display name does not require replacing the mob ID. Use documentation for your installed MythicMobs release.
Work through the change
- Choose a staging arena with clear edges and record the permitted summon positions. Keep natural spawning and valuable drops disabled for the test definitions.
- Inspect the targeter used by each summoning skill. Check whether it selects the caster, a player location or a set of locations in a radius.
- Trigger one summon with a player at the centre, then at each arena edge. Count entities and note their starting positions before allowing combat movement.
- Add the planned combat triggers one at a time. Test what happens when the target leaves the arena or disconnects, using only conditions supported by your installed release.
Verify the result
Each summon should begin at an intended location and the encounter should stop creating new entities when its target or lifecycle condition ends. Record the highest observed entity count during the test.
If the result differs
If summons appear outside, inspect target offsets and location filters. If positions are correct but entities later escape, investigate movement and arena design separately from the spawn target.
Keep a recovery path
Remove the disposable test encounter and restore its former skill reference if placement is uncertain. Avoid global entity-clear commands; keep a world recovery copy before adding summons that can damage blocks.
References and related help
Check the maintainer reference: MythicMobs documentation, MythicMobs documentation.
Before changing live data, read how to keep a completed recovery copy. For startup errors, use the log collection guide.
ItemsAdder tasks
Task guides and troubleshooting for ItemsAdder. Check the installed release before changing configuration or data.
Organise ItemsAdder content without changing existing namespaces
Moving a content pack between folders can break references if you also change its namespace. Treat file organisation and item identity as separate changes.
Check the installed content
ItemsAdder content uses namespaced identifiers for items and other assets. A definition, its generated resource pack and the copy downloaded by a player are different checkpoints. Keep content IDs stable and consult the documentation matching your ItemsAdder and Minecraft releases.
Work through the change
- Download the relevant contents subfolder and list the namespaces declared in its YAML files. Record several existing namespaced item IDs that players already own.
- Choose one of the folder layouts supported by the installed-release documentation. Keep the namespace declaration and the model or texture paths compatible with that one layout.
- Move a small self-contained content group on a staging copy. Avoid mixing layout methods inside the same sub-pack or renaming its IDs during the move.
- Generate the staging pack through the documented procedure, then inspect the original test items and obtain fresh copies of the same IDs for comparison.
Verify the result
Existing and newly obtained test items should retain their identity and appearance. The pack build should resolve each referenced asset from its new organised location without missing-file warnings.
If the result differs
If only existing items fail, inspect updater or item-version behaviour separately from the folder layout. If both copies fail, compare the namespace and asset path against the downloaded known-working files.
Keep a recovery path
Restore the entire moved content group and its matching pack output if the layout trial fails. Do not delete generated identity mappings or replace player items to make a directory reorganisation appear successful.
References and related help
Check the maintainer reference: ItemsAdder documentation.
Before changing live data, read how to keep a completed recovery copy. For startup errors, use the log collection guide.
Find an ItemsAdder item that loads under the wrong namespace
An item can exist but appear under an unexpected identifier when its namespace declaration differs from the folder you expected. Inspect the loaded identity before renaming anything.
Check the installed content
ItemsAdder content uses namespaced identifiers for items and other assets. A definition, its generated resource pack and the copy downloaded by a player are different checkpoints. Keep content IDs stable and consult the documentation matching your ItemsAdder and Minecraft releases.
Work through the change
- Record the full item ID shown by the installed plugin, including the namespace before the colon. Compare it with recipe, loot and menu references that try to use the item.
- Open the relevant content YAML and inspect its namespace declaration. Check the complete sub-pack rather than assuming the folder name alone determines every supported layout.
- On a staging copy, correct references to the intended existing ID. If you actually need a new namespace, plan it as a content migration with preserved old definitions.
- Load the staging content and test one direct item retrieval, one recipe or reward reference and one existing player-held copy. Keep each result in the change record.
Verify the result
The same intended identifier should resolve through all tested references. Existing items should remain recognisable; a successful fresh give is not sufficient evidence that old inventory content survived.
If the result differs
If an ID remains missing, inspect the first YAML or asset-loading error for that pack. A file that never loaded can look like a namespace problem even when its declaration is correct.
Keep a recovery path
Restore previous references if the change makes existing content unreachable. Keep the old namespace available until a deliberate migration has a tested recovery path; do not remove it just to tidy tab completion.
References and related help
Check the maintainer reference: ItemsAdder documentation.
Before changing live data, read how to keep a completed recovery copy. For startup errors, use the log collection guide.
Check ItemsAdder texture path case after a Linux move
A texture reference that worked on another machine may fail on a case-sensitive filesystem. Compare exact filenames before changing the resource-pack host or replacing item IDs.
Check the installed content
ItemsAdder content uses namespaced identifiers for items and other assets. A definition, its generated resource pack and the copy downloaded by a player are different checkpoints. Keep content IDs stable and consult the documentation matching your ItemsAdder and Minecraft releases.
Work through the change
- Choose one affected item and follow its definition to the model and texture files. Record the full relative path at each step rather than searching only by display name.
- Compare upper-case and lower-case characters in the model references with the real filenames. Also check extensions and nested directory names in the content sub-pack.
- Correct one mismatch on the staging copy while preserving the namespaced item ID. Rebuild the pack and verify that the generated archive contains the expected asset path.
- Download the exact staging pack as a client, then inspect a fresh test item and an existing copy. Keep unrelated shader or texture-pack changes out of this test.
Verify the result
The intended texture should appear when the client uses the newly generated pack. The server-side item should keep its original behaviour and identity throughout the path correction.
If the result differs
If the archive contains the asset but the client still shows a missing texture, examine the model reference and client resource-pack log. If the asset is absent, investigate content layout or pack-generation errors first.
Keep a recovery path
Restore the previous file names and references as one set if the test affects other models. Preserve the working archive for comparison; deleting the whole content folder hides the evidence you need.
References and related help
Check the maintainer reference: ItemsAdder documentation.
Before changing live data, read how to keep a completed recovery copy. For startup errors, use the log collection guide.
Add a test recipe without replacing a live ItemsAdder recipe
A new custom-item recipe should use a separate identity and inexpensive ingredients while you test it. Keep the existing production recipe available until the replacement behaves as intended.
Check the installed content
ItemsAdder content uses namespaced identifiers for items and other assets. A definition, its generated resource pack and the copy downloaded by a player are different checkpoints. Keep content IDs stable and consult the documentation matching your ItemsAdder and Minecraft releases.
Work through the change
- Read the recipe section for your installed ItemsAdder release and identify which recipe type matches the design. Record its output ID and the identities of any custom ingredients.
- Create a staging recipe under a new internal name in the appropriate content YAML. Use an existing test item as the output so asset creation does not obscure recipe errors.
- Try the exact ingredient layout, then deliberately change one ingredient and one slot. Test with an ordinary player who has only the permissions the design requires.
- Craft several outputs, restart the staging server in an orderly way and test again. Inspect whether another plugin or vanilla recipe claims the same crafting pattern.
Verify the result
The recipe should consume the intended inputs and return the expected quantity only for a valid combination. Its registration should survive a normal restart without replacing an unrelated recipe.
If the result differs
If crafting fails, confirm that each custom ingredient ID exists before editing the shape. If the wrong result appears, inspect recipe-key or pattern collisions rather than adding more broad permissions.
Keep a recovery path
Remove the new staging recipe or restore its previous file before production rollout. Keep a record of test outputs and never use valuable live ingredients to diagnose a recipe that may consume them without the expected return.
References and related help
Check the maintainer reference: ItemsAdder documentation, ItemsAdder documentation.
Before changing live data, read how to keep a completed recovery copy. For startup errors, use the log collection guide.
Test an ItemsAdder furniture hitbox before placing it at spawn
A furniture model can look correct while its interaction area blocks a doorway or fails to match the visible object. Check placement geometry in an expendable test area first.
Check the installed content
ItemsAdder content uses namespaced identifiers for items and other assets. A definition, its generated resource pack and the copy downloaded by a player are different checkpoints. Keep content IDs stable and consult the documentation matching your ItemsAdder and Minecraft releases.
Work through the change
- Record the furniture ID and copy its definition, model and texture into the staging content set. Preserve the original ID in your backup before adjusting any placement properties.
- Consult the installed-release furniture and size reference. Start with a model whose intended footprint fits a small marked area, keeping decorative commands or storage actions disabled.
- Place the test furniture in several orientations beside a wall, doorway and open floor. Try walking past it, interacting from each side and breaking it using an ordinary permitted account.
- Repeat after leaving and reloading the test area. Check that one placement produces one intended interaction target and that removal clears the complete test object.
Verify the result
Players should be able to interact with the visible furniture in its intended footprint, without an invisible obstruction remaining after removal. The orientation should not create an unexpected larger collision area.
If the result differs
If the model alone looks displaced, compare model origin and display transforms. If the interaction target is wrong, inspect the furniture placement and size settings for this release instead of changing its texture.
Keep a recovery path
Restore the prior furniture definition and remove only the disposable placements. Keep a world backup before editing furniture already used in public builds, especially if it includes storage or multiple underlying entities.
References and related help
Check the maintainer reference: ItemsAdder documentation, ItemsAdder documentation.
Before changing live data, read how to keep a completed recovery copy. For startup errors, use the log collection guide.
Check a custom ItemsAdder sound before adding it to rewards
A silent custom sound can result from a missing pack asset, a mismatched identifier or client audio settings. Test the sound on its own before connecting it to a quest or reward.
Check the installed content
ItemsAdder content uses namespaced identifiers for items and other assets. A definition, its generated resource pack and the copy downloaded by a player are different checkpoints. Keep content IDs stable and consult the documentation matching your ItemsAdder and Minecraft releases.
Work through the change
- Record the sound identifier, source audio file and the content pack that owns it. Check the supported audio format and sound definition requirements in the installed-release documentation.
- On a staging copy, add or correct one sound entry without changing item IDs. Build the pack and inspect that its sound definition and audio asset appear in the generated archive.
- Join using that exact pack and confirm the relevant client sound categories are audible. Trigger the sound through the documented test or usage method for your release.
- Repeat with a second client, then connect the verified sound to one low-value test action. Compare direct playback with playback through that action.
Verify the result
Both test clients should hear the intended sound through the direct test and the dependent action. A failure only in the action points to its reference or trigger rather than the resource-pack download.
If the result differs
If no client hears it, inspect the client log and generated archive before increasing volume. If one client fails, compare pack acceptance and client audio settings; avoid changing the server definition to compensate for a muted category.
Keep a recovery path
Restore the previous sound definition and keep the action on its original feedback until playback works. Retain source audio and generated files together so a later pack rebuild does not discard the working asset.
References and related help
Check the maintainer reference: ItemsAdder documentation, ItemsAdder documentation.
Before changing live data, read how to keep a completed recovery copy. For startup errors, use the log collection guide.
Limit an ItemsAdder custom block to the intended test world
Custom blocks can affect world storage and mining behaviour, so test their availability in the intended world before including them in a public build kit or reward.
Check the installed content
ItemsAdder content uses namespaced identifiers for items and other assets. A definition, its generated resource pack and the copy downloaded by a player are different checkpoints. Keep content IDs stable and consult the documentation matching your ItemsAdder and Minecraft releases.
Work through the change
- Choose a disposable custom-block ID and record the worlds where you want it available. Back up the affected world and content definitions as one checkpoint.
- Check the installed-release custom-block world controls and placement permissions. Configure the staging rule for one test world rather than changing every world at once.
- Try placing, breaking and obtaining the block in the allowed world with a normal player. Repeat those actions in a world that should remain excluded.
- Restart the staging server and inspect the placed test block again. Test adjacent vanilla blocks so a block-state conflict does not go unnoticed.
Verify the result
The allowed world should support the expected placement and break behaviour, while the excluded world should follow the chosen restriction. Existing nearby vanilla blocks should keep their normal appearance and drops.
If the result differs
If the rule affects only item giving, distinguish acquisition from placement checks. If a block changes after restart, inspect storage and mapping errors before editing the model or assigning a different ID.
Keep a recovery path
Restore the matching world and content checkpoint if persistent block data changes incorrectly. Do not remove a live custom-block definition while its blocks remain in player builds; plan and test a migration first.
References and related help
Check the maintainer reference: ItemsAdder documentation, ItemsAdder documentation.
Before changing live data, read how to keep a completed recovery copy. For startup errors, use the log collection guide.
Validate an ItemsAdder font image in chat and a menu title
A font image may work in chat but fail in a menu title because the consumer handles text differently. Compare the same glyph through two controlled display paths.
Check the installed content
ItemsAdder content uses namespaced identifiers for items and other assets. A definition, its generated resource pack and the copy downloaded by a player are different checkpoints. Keep content IDs stable and consult the documentation matching your ItemsAdder and Minecraft releases.
Work through the change
- Record the font-image ID and its texture path. Confirm the generated pack includes the font definition and image before editing the chat or menu plugin.
- Use the installed-release font-image reference to select its supported text notation. Test a simple message with that notation and a client using the current pack.
- Put the same image into a staging menu title that supports the documented integration. Keep the title short and remove other formatting while checking the image.
- Compare alignment, size and permissions between the two displays with an ordinary account. Test a second client before changing global font spacing.
Verify the result
The same intended image should appear in both supported display contexts, with no raw placeholder or missing-character box. A correctly rendered glyph can still need a separate title-spacing adjustment.
If the result differs
If chat works but the menu does not, verify that the menu plugin supports the required placeholder or font format. If both fail, inspect pack generation and font-image identity before changing permissions.
Keep a recovery path
Restore the original title and font entry if the test makes other text unreadable. Keep the previous pack available, because changing shared font metrics can affect several interfaces even when only one title prompted the change.
References and related help
Check the maintainer reference: ItemsAdder documentation, ItemsAdder documentation.
Before changing live data, read how to keep a completed recovery copy. For startup errors, use the log collection guide.
Check an ItemsAdder consumable before distributing it to players
A custom food or drink can display correctly while consuming the wrong amount or applying an unintended effect. Test its behaviour with disposable items and an ordinary account.
Check the installed content
ItemsAdder content uses namespaced identifiers for items and other assets. A definition, its generated resource pack and the copy downloaded by a player are different checkpoints. Keep content IDs stable and consult the documentation matching your ItemsAdder and Minecraft releases.
Work through the change
- Copy the consumable definition to a staging ID and record the intended stack size, consumption result and effect. Consult the installed Minecraft and ItemsAdder component requirements.
- Start with one supported consumable behaviour and omit command rewards or chained actions. Obtain a small number of test items rather than adding the item to live shops.
- Consume the item while hungry and under the other conditions the design allows. Check the remaining stack, returned container and any effect duration.
- Repeat after relogging and after a normal staging restart. Compare a fresh copy with one obtained before the definition change to identify updater differences.
Verify the result
The player should consume the intended quantity and receive only the planned effect or return item. The action should not leave a reusable reward loop or duplicate containers.
If the result differs
If the appearance works but use does not, inspect behaviour or component loading errors rather than pack delivery. If only older copies differ, check the release-supported item update policy before replacing player inventory.
Keep a recovery path
Restore the previous consumable definition and withdraw the staging item from test rewards. Record any test copies already distributed; a configuration rollback does not reverse effects or remove consumables from inventories.
References and related help
Check the maintainer reference: ItemsAdder documentation, ItemsAdder documentation.
Before changing live data, read how to keep a completed recovery copy. For startup errors, use the log collection guide.
Prepare an ItemsAdder content update with a stable ID inventory
A content update can rename or remove items that already exist in player storage. Build an ID inventory before merging a new pack so you can identify destructive changes.
Check the installed content
ItemsAdder content uses namespaced identifiers for items and other assets. A definition, its generated resource pack and the copy downloaded by a player are different checkpoints. Keep content IDs stable and consult the documentation matching your ItemsAdder and Minecraft releases.
Work through the change
- Export the current content folder and list the namespaces and item IDs used by recipes, shops, rewards and placed objects. Include content supplied by third-party add-ons.
- Compare the incoming pack in a separate directory. Mark removed IDs, reused IDs, changed asset paths and changes to persistent blocks or furniture rather than merging it over production.
- Apply the update to a staging copy with representative old items, placed objects and containers. Generate its pack and inspect the first load errors before inviting testers.
- Test old and new copies of selected items, crafting, placement and a clean restart. Record any migration method the pack author requires for your installed release.
Verify the result
Existing content should retain its intended identity and behaviour after the update. Every removed or changed persistent ID should have a documented migration decision before the production maintenance window.
If the result differs
If the pack loads but old items fail, inspect updater and migration behaviour. If a new ID reuses an old purpose, stop the merge; changing a texture alone cannot resolve conflicting persistent identities.
Keep a recovery path
Recover the previous content, generated pack and affected world or inventory state from the same checkpoint if the migration fails. Restoring only the plugin JAR can leave incompatible updated data behind.
References and related help
Check the maintainer reference: ItemsAdder documentation.
Before changing live data, read how to keep a completed recovery copy. For startup errors, use the log collection guide.
Oraxen tasks
Task guides and troubleshooting for Oraxen. Check the installed release before changing configuration or data.
Build an Oraxen recipe without replacing another recipe
A custom recipe needs its own identity as well as the correct output. Use a disposable recipe to check ingredients, quantities and discovery before changing a recipe players already use.
Check the installed content
Oraxen combines server-side item definitions with client resource-pack assets. Check the installed release before copying a recipe or component example, because Minecraft item formats have changed between releases. Work on a staging copy for changes that affect existing player items.
Work through the change
- Inventory the existing recipe files and record the intended output item ID, amount and recipe type. Keep a backup of the recipe folder before opening the builder.
- In game on staging, open the required player-only builder, such as
/oraxen recipes builder shapedfor a shaped recipe. Fill its inputs and output, then save a new descriptive name with/oraxen recipes save <name>. - Inspect the saved definition and confirm that its name does not overwrite another recipe. Test the exact ingredient arrangement and one arrangement that should fail.
- Test with an ordinary player who has the intended recipe permission. Repeat with insufficient ingredients and with a full inventory, observing where the crafted result goes.
Verify the result
The output should have the correct Oraxen identity and amount, and each craft should consume the intended ingredients. An unrelated recipe should still produce its original result.
If the result differs
If an administrator can craft but a player cannot, check recipe permissions and discovery. If the wrong item appears, inspect the output ID before rebuilding textures; recipe logic and client appearance are separate.
Keep a recovery path
Restore the previous recipe directory and restart the staging server if the new recipe overrides an existing one. Keep the failed recipe outside the loaded folder while comparing names and ingredients.
References and related help
Check the maintainer reference: Oraxen documentation.
Before changing live data, read how to keep a completed recovery copy. For startup errors, use the log collection guide.
Diagnose an Oraxen cooking recipe with the wrong timing
Cooking recipes have processing settings beyond their input and output. Compare one furnace process at a time before changing every custom recipe or the server tick rate.
Check the installed content
Oraxen combines server-side item definitions with client resource-pack assets. Check the installed release before copying a recipe or component example, because Minecraft item formats have changed between releases. Work on a staging copy for changes that affect existing player items.
Work through the change
- Record the cooking type, expected input, output, processing duration and experience. Check the current Oraxen recipe reference for the units and fields supported by your release.
- Copy the recipe to a unique staging name. Set an observable processing duration and a low-value result so a mistake cannot create valuable items.
- Load the test recipe through the release-supported workflow and use the matching cooking block. A furnace, smoker and blast furnace do not accept all the same recipe types.
- Time several individual operations while the server runs normally. Check the consumed ingredients and experience separately, then repeat with a vanilla control recipe in another block.
Verify the result
The custom process should use the intended block and timing without changing the vanilla control. Record server tick performance if wall-clock duration differs from the configured processing time.
If the result differs
If the recipe never starts, inspect its type and ingredient matching before shortening the duration. If every recipe runs slowly, investigate server tick delay rather than multiplying the custom cooking speed.
Keep a recovery path
Restore the earlier custom recipe and remove only the disposable furnace contents. Preserve the world save before testing automation around custom cooking, because a recipe rollback cannot retrieve already processed materials.
References and related help
Check the maintainer reference: Oraxen documentation.
Before changing live data, read how to keep a completed recovery copy. For startup errors, use the log collection guide.
Keep Oraxen recipe-book groups understandable for players
Recipe-book grouping changes how players discover related crafts. Check grouping separately from crafting correctness so a tidy menu does not hide a missing or inaccessible recipe.
Check the installed content
Oraxen combines server-side item definitions with client resource-pack assets. Check the installed release before copying a recipe or component example, because Minecraft item formats have changed between releases. Work on a staging copy for changes that affect existing player items.
Work through the change
- List the recipes that should appear together and record their output types. The maintainer reference describes grouping through a nonempty group and compatible outputs; confirm your installed-release behaviour.
- Back up those recipe definitions and change the group on a small staging set. Keep recipe identities, ingredients and outputs unchanged during this presentation test.
- Use a clean test player with normal permissions and unlock the relevant recipes through the intended gameplay path. Inspect the recipe book rather than relying only on an administrator account.
- Craft each grouped recipe and compare the displayed variants with the actual outputs. Include an unrelated recipe to ensure its discovery and grouping were not affected.
Verify the result
Players should find the intended variants together and still craft each one correctly. A recipe that should remain separate should retain its own entry or documented grouping behaviour.
If the result differs
If crafting works but the book looks wrong, inspect discovery and group compatibility. If one variant disappears entirely, confirm that its file loaded and that the player can access it before changing the group again.
Keep a recovery path
Restore the saved group values if navigation becomes confusing. Do not rename recipe IDs to solve a display problem without checking the effect on existing player recipe discovery and dependent content.
References and related help
Check the maintainer reference: Oraxen documentation.
Before changing live data, read how to keep a completed recovery copy. For startup errors, use the log collection guide.
Fix an Oraxen glyph that is clipped above a menu title
A font glyph can exist in the pack while being cropped in a title. Check its height and ascent together before changing the menu plugin or replacing the whole resource pack.
Check the installed content
Oraxen combines server-side item definitions with client resource-pack assets. Check the installed release before copying a recipe or component example, because Minecraft item formats have changed between releases. Work on a staging copy for changes that affect existing player items.
Work through the change
- Locate the affected glyph definition and its image. Record its height, ascent and the context where clipping occurs, such as chat, a title or an inventory menu.
- Compare the glyph with the installed-release font reference. The documented height must be at least the ascent; also check the image canvas and transparent padding.
- Change a copied glyph on staging and generate the matching pack. Test it in ordinary chat first, then in the exact menu that showed the clipping.
- Try the normal supported client versions and GUI scales. Keep a screenshot of each comparison so a vertical offset is distinguishable from a missing character or missing pack.
Verify the result
The whole glyph should be visible in its intended context without pushing other text beyond the usable area. Ordinary text in the same menu should remain readable.
If the result differs
If chat works but the menu does not, check that menu integration against your Paper and Oraxen versions. Current docs describe version-dependent GUI packet requirements; adding an outdated packet dependency can introduce another failure.
Keep a recovery path
Restore the previous glyph measurements and generated pack together if the layout worsens. Keep the original image file so you can compare padding without changing the glyph identifier used by menus.
References and related help
Check the maintainer reference: Oraxen documentation.
Before changing live data, read how to keep a completed recovery copy. For startup errors, use the log collection guide.
Separate an Oraxen missing glyph from a missing permission
A player seeing raw glyph text may have a pack, permission or formatting problem. Compare the same glyph in two accounts before editing the image or granting broad access.
Check the installed content
Oraxen combines server-side item definitions with client resource-pack assets. Check the installed release before copying a recipe or component example, because Minecraft item formats have changed between releases. Work on a staging copy for changes that affect existing player items.
Work through the change
- Record the exact glyph identifier and the text players type or the menu sends. Verify the installed-release syntax rather than assuming another plugin uses the same placeholder.
- Test the glyph on staging with one administrator and one ordinary account using the same accepted pack. Compare chat output with a server-generated message containing the glyph.
- Inspect the permission rules documented for that glyph and its integration. Grant only the intended narrow permission to a temporary test group and repeat the ordinary-player test.
- Revoke the temporary grant and test the denied case again. If permissions work, compare the client pack version and the formatting path used by the failing message.
Verify the result
If the result differs
If both accounts fail, inspect pack generation and the glyph character mapping. If only one chat format fails, trace its escaping or placeholder processing before changing the glyph file.
Keep a recovery path
Remove the temporary permission group and restore the previous glyph configuration if necessary. Keep a record of the exact node tested so production access can be granted deliberately without using wildcard permissions.
References and related help
Check the maintainer reference: Oraxen documentation.
Before changing live data, read how to keep a completed recovery copy. For startup errors, use the log collection guide.
Check an Oraxen item component against the Minecraft version
A custom item can lose a behaviour after a Minecraft update even when its model remains correct. Check the supported component format before replacing player items or changing the texture.
Check the installed content
Oraxen combines server-side item definitions with client resource-pack assets. Check the installed release before copying a recipe or component example, because Minecraft item formats have changed between releases. Work on a staging copy for changes that affect existing player items.
Work through the change
- Record the exact Minecraft, Paper and Oraxen versions and the affected item ID. Keep a copy of its current definition and one representative existing test item.
- Open the item documentation for that release and identify the behaviour field involved. Do not mix a legacy item setting with a newer Minecraft component example unless the release supports it.
- Create a new staging item ID with only the base material and affected behaviour. Obtain a fresh copy and test the relevant interaction without optional mechanics.
- Compare the fresh simplified item, the full new item and the existing old copy. This separates an unsupported definition from item-update behaviour or another mechanic.
Verify the result
The fresh item should have the intended behaviour on the supported server version. Existing copies should change only according to the item-update policy documented for your installed build.
If the result differs
If the simplified item fails, inspect loading warnings and version support. If only old copies differ, investigate the supported updater path; a resource-pack rebuild alone does not rewrite stored server-side item data.
Keep a recovery path
Restore the earlier definition and keep valuable player items untouched while testing. If an item migration is necessary, prepare a separate backed-up procedure rather than distributing replacements during diagnosis.
References and related help
Check the maintainer reference: Oraxen documentation.
Before changing live data, read how to keep a completed recovery copy. For startup errors, use the log collection guide.
Find duplicate Oraxen item IDs before merging a pack
Two content packs can define the same internal item ID. Compare their definitions before merging files so one pack does not silently change an item players already own.
Check the installed content
Oraxen combines server-side item definitions with client resource-pack assets. Check the installed release before copying a recipe or component example, because Minecraft item formats have changed between releases. Work on a staging copy for changes that affect existing player items.
Work through the change
- Export the current item definitions and list their internal IDs. Compare the incoming pack in a separate directory, including recipes and mechanics that reference those IDs.
- Mark duplicate IDs and decide which existing identity must remain stable. A new filename or display name does not necessarily create a new item identity.
- Import a small nonconflicting section into staging and inspect startup warnings. For each collision, plan a new unique incoming ID and update its references consistently before loading it.
- Test representative existing items alongside fresh incoming items. Check recipes and interactions, not just their models, because two items can look different while sharing conflicting definitions.
Verify the result
Every intended item should resolve to a single definition, and the incoming content should not change the behaviour of existing owned items. Referencing recipes should produce the correct unique output.
If the result differs
If the wrong item appears, search all loaded definition files for its ID. If only its texture is wrong, inspect model references after resolving ID collisions rather than renaming more live items.
Keep a recovery path
Restore the complete previous definitions and generated pack if the merge changes existing content. Do not remove player inventory data to resolve a collision; keep the incoming pack isolated until its IDs are consistent.
References and related help
Check the maintainer reference: Oraxen documentation.
Before changing live data, read how to keep a completed recovery copy. For startup errors, use the log collection guide.
Test an Oraxen pack update with a clean client download
A cached client pack can hide a successful update or make a broken update seem healthy. Compare a clean download with an existing client while keeping server definitions unchanged.
Check the installed content
Oraxen combines server-side item definitions with client resource-pack assets. Check the installed release before copying a recipe or component example, because Minecraft item formats have changed between releases. Work on a staging copy for changes that affect existing player items.
Work through the change
- Record the installed Oraxen version and the pack build being tested. Save the source assets and generated output together so the comparison uses a reproducible build.
- Change one disposable staging texture with an unmistakable difference and generate the pack through the supported workflow. Inspect build errors before sharing its download address.
- Join with a test client that has not cached this pack version and accept the pack. Compare the disposable item with a client that previously used the earlier build.
- Check the server-provided download settings and any external hosting cache if the clients disagree. Confirm that the downloaded file is the new output rather than changing item IDs to force a visual difference.
Verify the result
Both clients should receive the intended build and show the changed test asset. The server-side item identity and unrelated textures should remain unchanged throughout the comparison.
If the result differs
If a clean client also shows the old asset, inspect the generated file and hosting path. If only the existing client differs, investigate cache identity and the release-supported pack delivery settings.
Keep a recovery path
Restore the earlier assets and pack output together if the new build is invalid. Keep the test change out of valuable items and avoid asking every player to clear unrelated client data during diagnosis.
References and related help
Check the maintainer reference: Oraxen documentation, Oraxen documentation.
Before changing live data, read how to keep a completed recovery copy. For startup errors, use the log collection guide.
Nexo tasks
Task guides and troubleshooting for Nexo. Check the installed release before changing configuration or data.
Check a Nexo item stack-size change before updating inventories
A stack-size change can affect storage and item handling even when the model looks unchanged. Compare new and existing copies before applying the change to items players already own.
Check the installed content
Nexo manages custom content through item definitions, resource-pack files and optional mechanics. A correct item identifier does not prove that the client received the matching pack. Follow the documentation for your installed build and keep its generated assets with the source definitions.
Work through the change
- Record the item ID, base material and existing stack size on your installed Minecraft and Nexo versions. Back up the item definition and a staging inventory containing representative copies.
- Check the matching version tab in the component reference. Create a temporary item ID with the intended maximum stack size and no unrelated mechanics.
- Obtain fresh test copies and combine or divide stacks in an ordinary inventory and a chest. Include one stack near the intended limit and one transfer through your normal shop or menu.
- Compare the new test item with an old copy after a staging restart. Check the supported item-update behaviour before expecting stored copies to inherit the new component.
Verify the result
Stacks should respect the intended limit without disappearing, duplicating or losing the Nexo identity. Shops and rewards should handle quantities that cross the new boundary correctly.
If the result differs
If only a third-party menu behaves incorrectly, test normal inventory handling first and report the integration difference. If the component does not load, inspect version support rather than repeatedly regenerating the resource pack.
Keep a recovery path
Restore the saved definition and test inventory checkpoint if the new limit is unsuitable. Do not force a mass inventory conversion while stack behaviour is uncertain; document any required migration separately.
References and related help
Check the maintainer reference: Nexo documentation.
Before changing live data, read how to keep a completed recovery copy. For startup errors, use the log collection guide.
Test Nexo durability and repair materials on expendable tools
A tool can have the right appearance while wearing out or repairing incorrectly. Separate maximum damage, current damage and allowed repair materials during a controlled trial.
Check the installed content
Nexo manages custom content through item definitions, resource-pack files and optional mechanics. A correct item identifier does not prove that the client received the matching pack. Follow the documentation for your installed build and keep its generated assets with the source definitions.
Work through the change
- Record the tool ID and expected durability and repair policy. Check the component reference against the exact Minecraft version, because available item components differ between releases.
- Create a disposable staging tool with only the relevant durability settings. Obtain a fresh copy and perform a repeatable task that normally consumes durability.
- Test the intended repair material through the supported vanilla interaction. Include a material that should fail, and check whether the repaired tool keeps its name and other components.
- Repeat with a copied older tool and inspect the difference. Add other custom mechanics only after the simplified tool wears and repairs as designed.
Verify the result
The tool should lose the intended amount of durability and accept only the planned repair path. Its identity and unrelated enchantments should remain intact after a valid repair.
If the result differs
If the tool never takes damage, inspect its unbreakable or conflicting component settings. If repairs remove custom identity, isolate the anvil or integration behaviour before increasing durability values.
Keep a recovery path
Restore the previous definition and retain the disposable comparison tools for diagnosis. Keep valuable player equipment out of the test; editing a definition does not necessarily reverse damage already stored on an item.
References and related help
Check the maintainer reference: Nexo documentation.
Before changing live data, read how to keep a completed recovery copy. For startup errors, use the log collection guide.
Make a Nexo consumable return the intended container
A consumable that returns a bowl or bottle needs both correct consumption and correct remainder behaviour. Test a small disposable stack before connecting it to a shop or quest reward.
Check the installed content
Nexo manages custom content through item definitions, resource-pack files and optional mechanics. A correct item identifier does not prove that the client received the matching pack. Follow the documentation for your installed build and keep its generated assets with the source definitions.
Work through the change
- Write down when the item may be consumed, how many units it should use and which container should remain. Check the installed-version component examples for food, consumption and remainder support.
- Create a separate staging item with the minimum required components. Avoid command rewards or extra mechanics until the basic consumption cycle works.
- Consume one item from a single-item slot and then from a larger stack. Repeat with a nearly full inventory so you can observe how the returned container is handled.
- Test after relogging and after an orderly staging restart. Compare fresh items with existing copies to identify updater behaviour rather than assuming the definition rewrites every stored item.
Verify the result
Each use should consume the intended amount and produce only the planned container and effect. Players should not receive an endlessly reusable reward or unexpected extra stack.
If the result differs
If the item displays correctly but cannot be used, inspect component compatibility and consumption conditions. If it works only with a fresh copy, review the supported update policy before replacing anything in production.
Keep a recovery path
Restore the previous consumable definition and remove the disposable item from test rewards. Keep a record of distributed test copies because configuration rollback cannot undo already applied effects or returned containers.
References and related help
Check the maintainer reference: Nexo documentation.
Before changing live data, read how to keep a completed recovery copy. For startup errors, use the log collection guide.
Preserve selected item components in a Nexo upgrade recipe
An upgrade recipe may need to keep a tool name or enchantments instead of replacing them with a clean output. Check which input supplies each preserved component before enabling valuable upgrades.
Check the installed content
Nexo manages custom content through item definitions, resource-pack files and optional mechanics. A correct item identifier does not prove that the client received the matching pack. Follow the documentation for your installed build and keep its generated assets with the source definitions.
Work through the change
- Record the intended input, output and components that must survive. Confirm that your installed release supports the preserve behaviour documented for the selected recipe type.
- Copy the recipe under a staging identity and use expendable named or damaged tools. Preserve only the specific components required by the design rather than treating the input as an unrestricted template.
- Craft with one eligible input and compare its name, damage and enchantments with the output. Include an input lacking one selected component to inspect the documented fallback behaviour.
- If several inputs could supply the same component, test their order explicitly. The current recipe reference describes selection from the first matching grid input, which matters for ambiguous upgrades.
Verify the result
The output should retain exactly the selected input state and use the configured defaults elsewhere. The recipe should consume the intended inputs once and return the correct Nexo item ID.
If the result differs
If the wrong state survives, inspect ingredient selection and grid order. If nothing survives, check feature support and recipe type before changing the item definition or resource pack.
Keep a recovery path
Restore the previous recipe and stop offering the upgrade until the component comparison passes. Keep the pre-test inventory checkpoint because changing a recipe cannot reconstruct components lost by an earlier craft.
References and related help
Check the maintainer reference: Nexo documentation.
Before changing live data, read how to keep a completed recovery copy. For startup errors, use the log collection guide.
Restrict a Nexo recipe to the intended crafting station
A recipe designed for automation should not automatically become available in every crafting interface. Test the intended station and the interfaces that must reject it.
Check the installed content
Nexo manages custom content through item definitions, resource-pack files and optional mechanics. A correct item identifier does not prove that the client received the matching pack. Follow the documentation for your installed build and keep its generated assets with the source definitions.
Work through the change
- Identify whether the design requires an ordinary shaped recipe, a shapeless recipe or a crafter-only recipe. Check the installed-release recipe reference before choosing a folder or type.
- Build a disposable staging recipe with a distinct low-value output. Keep its ingredients simple so a failed match is distinguishable from a station restriction.
- Try the same ingredients in the intended station, a crafting table and the player inventory grid where they fit. Record the actual result from every applicable interface.
- Test an automated cycle only after manual station behaviour is correct. Count ingredients and outputs across several cycles to catch repeated processing or an unrelated recipe collision.
Verify the result
The intended station should produce the configured output while excluded interfaces reject it. Existing recipes using similar ingredients should retain their original results.
If the result differs
If every interface accepts it, inspect the loaded recipe type and check for a duplicate ordinary recipe. If no interface accepts it, verify the ingredient identity and initial load errors before changing station rules.
Keep a recovery path
Remove the disposable recipe from the staging load and restore the saved recipe files if necessary. Keep automation disconnected during diagnosis so a mistake cannot process a stockpile before you notice it.
References and related help
Check the maintainer reference: Nexo documentation.
Before changing live data, read how to keep a completed recovery copy. For startup errors, use the log collection guide.
Check a Nexo furniture hitbox independently of its model
A furniture model can look correct while blocking the wrong space or accepting clicks in an unexpected area. Use an empty test plot to compare appearance and interaction boundaries.
Check the installed content
Nexo manages custom content through item definitions, resource-pack files and optional mechanics. A correct item identifier does not prove that the client received the matching pack. Follow the documentation for your installed build and keep its generated assets with the source definitions.
Work through the change
- Record the furniture ID and the intended placement and collision area. Follow the hitbox documentation linked from the mechanic index for the installed release and supported entity type.
- Back up the test world and furniture definition. Place a single expendable copy on a clear floor without region protection or nearby decorative entities obscuring the result.
- Approach from every side and test movement, targeting and the intended interaction. Compare the visible edges with the area that actually blocks or accepts the player action.
- Change only the selected hitbox property on staging and retest a freshly placed copy. Include removal and replacement so an old placed instance does not hide the effect of the definition change.
Verify the result
The furniture should occupy the intended space and remain usable and removable through its documented interaction. The test should leave no unexpected invisible obstacle after normal removal.
If the result differs
If the visual model is wrong, troubleshoot pack delivery separately. If only protected plots differ, inspect the protection integration before enlarging a hitbox or granting players bypass permissions.
Keep a recovery path
Restore the previous definition and the small staging-world checkpoint if the trial leaves inconsistent placed objects. Avoid editing live decorative areas or deleting nearby entity types as a shortcut to removing one test object.
References and related help
Check the maintainer reference: Nexo documentation.
Before changing live data, read how to keep a completed recovery copy. For startup errors, use the log collection guide.
Check a Nexo tooltip change without hiding important item state
A cleaner tooltip should still tell players enough to identify and use an item. Test the relevant tooltip component on supported clients before removing all information from valuable equipment.
Check the installed content
Nexo manages custom content through item definitions, resource-pack files and optional mechanics. A correct item identifier does not prove that the client received the matching pack. Follow the documentation for your installed build and keep its generated assets with the source definitions.
Work through the change
- Record which tooltip lines should remain visible and which should be hidden. Check the component reference for your Minecraft version instead of mixing older item flags with newer tooltip fields.
- Create a temporary copy of the item and change only its tooltip settings. Keep the original identity, damage and enchantments represented in the comparison inventory.
- Inspect both items on supported clients and at ordinary interface scales. Check anvils, shops and custom menus that may display their own version of the item information.
- Test the ordinary player workflow for identifying a damaged, enchanted or restricted item. Confirm that necessary information remains available before adopting the shorter presentation.
Verify the result
The item should show the intended lines consistently and retain its actual server-side behaviour. A hidden tooltip should not be mistaken for removal of the underlying enchantment or component.
If the result differs
If a line remains in one custom menu, inspect that menu output separately. If the component fails to load, review the selected version tab and first configuration warning rather than regenerating unrelated textures.
Keep a recovery path
Restore the earlier tooltip settings and keep the original item definition. Do not replace player items to repair a presentation-only issue until you have confirmed the release-supported update behaviour.
References and related help
Check the maintainer reference: Nexo documentation.
Before changing live data, read how to keep a completed recovery copy. For startup errors, use the log collection guide.
Audit Nexo references before retiring a custom item
Removing a definition can break recipes, rewards and placed content that still reference it. Build a dependency list before deciding whether a custom item can safely be retired.
Check the installed content
Nexo manages custom content through item definitions, resource-pack files and optional mechanics. A correct item identifier does not prove that the client received the matching pack. Follow the documentation for your installed build and keep its generated assets with the source definitions.
Work through the change
- Export the Nexo item definitions and search the downloaded configuration copy for the exact item ID. Include recipes, shop files, quest rewards and other plugin integrations in the search.
- Classify references as new-item creation, existing-item use or placed content. Keep a separate note of items that players may own even when no configuration currently distributes them.
- Disable new distribution on staging while retaining the definition. Test that existing copies still display and interact correctly and that dependent recipes do not fail during startup.
- Plan a separate migration only if the definition must be removed. Decide how existing inventories and placed instances will be handled before changing the persistent ID or deleting its assets.
Verify the result
The audit should identify every configured creation path and the known persistent uses. Stopping new distribution should leave existing legitimate items usable unless a documented migration deliberately changes them.
If the result differs
If an unknown reference appears in logs, add its owning plugin to the inventory rather than immediately removing the warning-producing content. A renamed display label does not resolve a missing internal ID.
Keep a recovery path
Restore the saved distribution files if the retirement trial breaks progression. Keep the definition and assets available until the dependency and player-data migration is complete and a recovery copy has been verified.
References and related help
Check the maintainer reference: Nexo documentation.
Before changing live data, read how to keep a completed recovery copy. For startup errors, use the log collection guide.
AdvancedEnchantments tasks
Task guides and troubleshooting for AdvancedEnchantments. Check the installed release before changing configuration or data.
Fix an AdvancedEnchantments book assigned to a missing group
A book can be misclassified when its enchantment points to a group that is absent or named differently. Follow the reference from enchantment to group before editing shop prices.
Check the installed content
AdvancedEnchantments separates enchantment definitions, groups, book presentation and permissions. Keep test equipment away from player inventories until both application and activation work. Use the reference for your installed plugin version instead of assuming a configuration from another server will match.
Work through the change
- Record the affected enchantment ID and the group value in its definition. Back up the enchantment and group files together so the relationship can be restored.
- Find the matching group in groups.yml, using the exact identifier expected by the installed release. Compare case and spelling rather than only the visible colour or display label.
- Correct the relationship on staging without changing the enchantment ID or existing equipment. Obtain a disposable fresh book through the documented administrator workflow.
- Compare the new book in the intended menu and application interface. Test with an ordinary account and check any shop or reward integration that selects books by group.
Verify the result
The book should use the intended existing group and remain available through the correct distribution path. Other groups should retain their display and selection behaviour.
If the result differs
If its group looks correct but the shop fails, inspect the shop integration separately. If only old books differ, check their stored data and the release-supported update behaviour before reissuing equipment.
Keep a recovery path
Restore both saved files if the relationship remains uncertain. Keep test books out of the live economy; a group configuration rollback does not remove previously distributed books or undo applications.
References and related help
Check the maintainer reference: AdvancedEnchantments documentation, AdvancedEnchantments documentation.
Before changing live data, read how to keep a completed recovery copy. For startup errors, use the log collection guide.
Separate enchantment application failure from activation failure
A custom enchantment that appears on equipment is not necessarily triggering during use. Test application and activation as different stages before increasing the chance or level.
Check the installed content
AdvancedEnchantments separates enchantment definitions, groups, book presentation and permissions. Keep test equipment away from player inventories until both application and activation work. Use the reference for your installed plugin version instead of assuming a configuration from another server will match.
Work through the change
- Record the enchantment ID, supported equipment and triggering activity from the installed-release definition. Use a disposable item with no other custom enchantments as the baseline.
- Apply the enchantment through the documented administrator command or normal book workflow on staging. Confirm the expected level and inspect initial configuration errors.
- Perform the exact activity the enchantment requires with an ordinary player. Use a repeatable low-risk target and keep other effects out of the comparison.
- Compare the unenchanted baseline, the single-enchantment item and the original multi-enchantment item. Note whether application, eligibility or the actual effect is the first stage that differs.
Verify the result
The book or command should apply the intended level, and the eligible activity should produce the documented effect. The baseline should not produce the same custom behaviour without the enchantment.
If the result differs
If application fails, inspect equipment restrictions and book rules first. If application succeeds but the effect fails, inspect trigger type, chance, conditions and conflicts rather than adding a second copy of the enchantment.
Keep a recovery path
Restore the original definition and discard only the disposable test equipment if the trial fails. Do not strip custom enchants from live player gear while the failing stage is still unidentified.
References and related help
Check the maintainer reference: AdvancedEnchantments documentation, AdvancedEnchantments documentation, AdvancedEnchantments documentation.
Before changing live data, read how to keep a completed recovery copy. For startup errors, use the log collection guide.
Test custom enchantment equipment restrictions with ordinary players
An equipment restriction should reject the wrong item without blocking the intended one. Test both cases without operator privileges before distributing a new enchantment book.
Check the installed content
AdvancedEnchantments separates enchantment definitions, groups, book presentation and permissions. Keep test equipment away from player inventories until both application and activation work. Use the reference for your installed plugin version instead of assuming a configuration from another server will match.
Work through the change
- Read the installed-release setting reference for the enchantment and record its eligible equipment types. Include any condition or integration that further restricts use.
- Create a staging book and two disposable items: one intended eligible item and one deliberately ineligible item. Remove unrelated custom enchants from both.
- Attempt application through the ordinary player route on each item. Record the message and resulting inventory rather than relying only on whether the display lore changes.
- Use the eligible item in the intended activity, then test any supported offhand or armour-slot case relevant to the design. A valid item in the wrong slot may still fail to activate.
Verify the result
The eligible item should accept and activate the enchantment where intended. The ineligible item should be rejected without consuming unexpected extra books or modifying unrelated equipment.
If the result differs
If both accept it, inspect the actual loaded restriction and administrative bypass permissions. If neither accepts it, check the item type, group and parser errors before weakening all restrictions.
Keep a recovery path
Restore the earlier restriction and retain the test results for comparison. Keep valuable equipment outside the experiment and remove temporary test permissions when the ordinary-player checks are complete.
References and related help
Check the maintainer reference: AdvancedEnchantments documentation, AdvancedEnchantments documentation.
Before changing live data, read how to keep a completed recovery copy. For startup errors, use the log collection guide.
Check a custom enchantment level limit before selling higher books
A higher-numbered book needs a corresponding supported level and sensible effect settings. Check the level definition before adding it to a paid shop or reward table.
Check the installed content
AdvancedEnchantments separates enchantment definitions, groups, book presentation and permissions. Keep test equipment away from player inventories until both application and activation work. Use the reference for your installed plugin version instead of assuming a configuration from another server will match.
Work through the change
- Record the current highest level and the new level requested. Back up the enchantment definition and every shop or reward file that would distribute the new book.
- Check the installed-release level settings and define the new level on staging. Keep its effect deliberately modest while checking whether the level is recognised and applied.
- Obtain an expendable book at the requested level using documented administration syntax. Apply it to eligible test equipment and compare with the previous maximum level.
- Test the effect, displayed level and any combining or upgrading workflow your server offers. Include an attempt above the allowed maximum to confirm the failure behaviour.
Verify the result
The new level should be recognised, display correctly and produce its intended bounded effect. An unsupported higher level should not become available accidentally through a shop or combination route.
If the result differs
If the book label changes but the effect does not, inspect the level-specific definition and trigger conditions. If the wrong level is issued, trace the distribution command before editing the underlying effect.
Keep a recovery path
Restore both the definition and distribution files if the new level is not ready. Record any test books issued so they cannot be mistaken for a production product or left in a public reward pool.
References and related help
Check the maintainer reference: AdvancedEnchantments documentation, AdvancedEnchantments documentation.
Before changing live data, read how to keep a completed recovery copy. For startup errors, use the log collection guide.
Audit who can issue AdvancedEnchantments books and gear
Routine players should not need the ability to issue custom books or enchant equipment administratively. Review command access separately from the permissions needed for normal gameplay.
Check the installed content
AdvancedEnchantments separates enchantment definitions, groups, book presentation and permissions. Keep test equipment away from player inventories until both application and activation work. Use the reference for your installed plugin version instead of assuming a configuration from another server will match.
Work through the change
- Open the command and permission reference matching the installed version. List the administrative book, item and enchantment actions actually used by staff and integrations.
- Inspect inherited permission groups and temporary grants for those actions. Work on staging or a narrowly scoped test group rather than removing broad permissions from every player at once.
- Test an ordinary account against the issue commands it must not use, then test normal book application and enchantment activation. Keep a second trusted staff session available for administration.
- Grant an integration only the documented command access it requires. Where the action runs from console, confirm the integration executes the intended fixed command rather than accepting arbitrary player-supplied arguments.
Verify the result
Players should retain legitimate enchantment use while unauthorised issuance is rejected. The intended staff or console integration should still issue the exact item and quantity required.
If the result differs
If access remains, inspect inherited groups and operator status before changing plugin files. If normal use breaks, restore the narrow tested permission and identify which action needs it instead of granting a wildcard.
Keep a recovery path
Restore the saved permission changes if the trial affects unrelated commands. Remove temporary test groups and document the final nodes so later staff changes do not reintroduce unrestricted book issuance.
References and related help
Check the maintainer reference: AdvancedEnchantments documentation.
Before changing live data, read how to keep a completed recovery copy. For startup errors, use the log collection guide.
Compare a fresh enchantment book with an older stored copy
Changing an enchantment definition can leave previously issued books looking different from new ones. Compare stored item data before concluding that the plugin ignored the update.
Check the installed content
AdvancedEnchantments separates enchantment definitions, groups, book presentation and permissions. Keep test equipment away from player inventories until both application and activation work. Use the reference for your installed plugin version instead of assuming a configuration from another server will match.
Work through the change
- Record the enchantment ID and the exact change, such as its group or visible name. Preserve the old book in a backed-up staging inventory rather than overwriting it.
- Load the changed definition on staging and obtain a fresh book through the supported workflow. Keep the same enchantment and level so the age of the copy is the main difference.
- Compare display, application and resulting equipment for both copies using expendable items. Test after relogging to distinguish a client display cache from stored item information.
- Read the installed-release guidance for item or book updates before planning any migration. Keep presentation differences separate from a book that applies the wrong effect or level.
Verify the result
The comparison should establish whether the old copy is cosmetic, still valid or incompatible. Fresh issuance should reflect the intended definition and activate the correct enchantment on eligible equipment.
If the result differs
If both copies fail, inspect the definition and its group rather than old-item handling. If only one fails, capture its origin and metadata through supported inspection without publishing player inventory or private data.
Keep a recovery path
Restore the previous definition if the change breaks application. Do not replace every player book during diagnosis; prepare a backed-up, documented migration only after the release-supported update method is confirmed.
References and related help
Check the maintainer reference: AdvancedEnchantments documentation, AdvancedEnchantments documentation.
Before changing live data, read how to keep a completed recovery copy. For startup errors, use the log collection guide.
Check enchantment group selection in a random-book reward
A random-book reward should draw from the intended group, not every available enchantment. Test the distribution path with disposable books before connecting it to a public crate or shop.
Check the installed content
AdvancedEnchantments separates enchantment definitions, groups, book presentation and permissions. Keep test equipment away from player inventories until both application and activation work. Use the reference for your installed plugin version instead of assuming a configuration from another server will match.
Work through the change
- Record the reward command and intended group identifier. Compare that identifier with the installed group definitions and the current command reference.
- Run the documented random-book workflow on staging with a small quantity and a fixed test recipient. Keep valuable currency charges and public announcements disabled for the trial.
- Inspect each issued book for group and valid enchantment level. Check that the intended group actually contains eligible enchantments rather than relying only on its display colour.
- Repeat through the real reward integration with an ordinary test player. Compare its command substitution and quantity with the successful direct test, then test the unavailable-group case safely.
Verify the result
Every issued book should belong to the selected group and reach the correct player in the correct quantity. A missing group should produce a diagnosable error instead of granting an unintended reward.
If the result differs
If direct issuance works but the crate fails, inspect its placeholders, quoting and execution context. If the wrong group is used in both paths, correct the group reference before changing randomisation or reward prices.
Keep a recovery path
Restore the original reward action and keep the new group out of public distribution until the trial passes. Remove disposable books and record any real reward already issued; rollback cannot recover sold or applied books.
References and related help
Check the maintainer reference: AdvancedEnchantments documentation, AdvancedEnchantments documentation.
Before changing live data, read how to keep a completed recovery copy. For startup errors, use the log collection guide.
Keep an enchantment configuration edit from breaking YAML loading
A small indentation mistake can disable more than one custom enchantment. Review the first loading error and the edited section before replacing the plugin or resetting its files.
Check the installed content
AdvancedEnchantments separates enchantment definitions, groups, book presentation and permissions. Keep test equipment away from player inventories until both application and activation work. Use the reference for your installed plugin version instead of assuming a configuration from another server will match.
Work through the change
- Save the affected file and identify the last known working version. Record which enchantment section changed and the first configuration error from an orderly staging startup.
- Compare that section with the installed-release setting reference. Check indentation, list structure and quoting around text containing YAML punctuation without blindly reformatting the whole file.
- Make one minimal correction on the staging copy and restart it normally. Read the first remaining error, since later missing-enchantment messages may only be consequences of the initial parse failure.
- Obtain one disposable book from the edited section and one from an unchanged section. Confirm that both load and that the changed setting has the intended effect.
Verify the result
The file should load without the original parse error and both representative enchantments should remain available. A successful server startup alone does not prove that a rejected section was registered.
If the result differs
If the same line fails, inspect the preceding line and enclosing list or mapping. If syntax loads but a setting is rejected, check version support rather than inventing an alternative configuration key.
Keep a recovery path
Restore the last working file if the correction is uncertain. Keep the broken copy for comparison and preserve player data; a configuration parse error does not justify deleting enchantment inventories or reinstalling the server.
References and related help
Check the maintainer reference: AdvancedEnchantments documentation.
Before changing live data, read how to keep a completed recovery copy. For startup errors, use the log collection guide.
mcMMO tasks
Task guides and troubleshooting for mcMMO. Check the installed release before changing configuration or data.
Find which mcMMO XP multiplier changes a player reward
Unexpected skill XP can come from several multipliers rather than the block or action value alone. Compare a single controlled activity before changing the whole progression curve.
Check the installed content
mcMMO progress belongs to player data, while its configuration controls future skill behaviour. Preserve both before changing progression rules. Match the installed release when checking permissions and configuration; current configuration references identify changes that require a full server restart.
Work through the change
- Record the skill, activity and displayed XP gain for one ordinary account. Save experience.yml and the permission assignments that may apply player or group multipliers.
- Read the matching experience reference and list the relevant global, skill and player modifiers. Keep the base action reward distinct from the effective amount the player receives.
- On staging, remove one optional modifier from a test account and repeat the same activity with equivalent tools and conditions. Use a normal full restart for configuration changes as directed by the maintainer docs.
- Restore each modifier individually and record the result. Include a second account without the special group so you can separate server-wide settings from inherited permissions.
Verify the result
The recorded difference should be attributable to a particular modifier or combination. An ordinary account should receive the planned baseline without needing to reset any skill levels.
If the result differs
If the results vary between attempts, inspect bonuses, party sharing and activity eligibility before adjusting the base XP. A different block source or player state can invalidate an otherwise useful comparison.
Keep a recovery path
Restore the saved experience settings and temporary permission changes if the result is unclear. Keep existing player progress intact; changing future XP rates is separate from correcting or removing stored levels.
References and related help
Check the maintainer reference: mcMMO documentation, mcMMO documentation.
Before changing live data, read how to keep a completed recovery copy. For startup errors, use the log collection guide.
Test mcMMO party XP sharing at the edge of its range
Party members standing apart may receive different XP even when they belong to the same party. Test sharing eligibility and distance before changing skill rewards.
Check the installed content
mcMMO progress belongs to player data, while its configuration controls future skill behaviour. Preserve both before changing progression rules. Match the installed release when checking permissions and configuration; current configuration references identify changes that require a full server restart.
Work through the change
- Record the installed mcMMO version, party state and intended sharing rules. Consult the current party reference for unlock requirements and the configuration governing the sharing range.
- Create a small staging party with two ordinary test accounts that meet the documented prerequisites. Keep their relevant skill and bonus conditions comparable.
- Perform one repeatable XP activity with both players close together, then repeat near and beyond the configured sharing boundary. Record the gain on each account rather than only the party message.
- Compare the same activity outside the party to establish the baseline. Apply any range change through the supported configuration workflow and repeat after a normal restart.
Verify the result
Sharing should follow the configured eligibility and range, and a player beyond the boundary should behave as documented. The baseline should explain whether the total gain changed or was redistributed.
If the result differs
Keep a recovery path
Restore the original range and test-party settings when the trial ends. Do not remove production party records or reset levels to fix sharing; preserve the party and player storage before any later migration.
References and related help
Check the maintainer reference: mcMMO documentation, mcMMO documentation.
Before changing live data, read how to keep a completed recovery copy. For startup errors, use the log collection guide.
Check an mcMMO ability permission without granting every skill command
A player may have access to a skill but lack its active ability or related command. Test the exact permission path rather than granting a broad mcMMO wildcard.
Check the installed content
mcMMO progress belongs to player data, while its configuration controls future skill behaviour. Preserve both before changing progression rules. Match the installed release when checking permissions and configuration; current configuration references identify changes that require a full server restart.
Work through the change
- Identify the skill action that fails and whether it is an ability, a command or ordinary passive progression. Open the permission reference for the installed release and record the relevant nodes.
- Compare the ordinary player group with a working test group, including inherited permissions and explicit denials. Keep operator status out of both test accounts.
- Grant only the documented node required for the failed action on staging. Test activation using the intended tool, prerequisites and cooldown, then test an unrelated administrative command that should remain denied.
- Remove the temporary grant and repeat the original failure. This confirms that the permission changed the result rather than a coincidental cooldown or equipment change.
Verify the result
The permitted gameplay action should work while administrative skill-editing or issuance commands remain unavailable. The denied test should fail predictably without affecting the player existing levels.
If the result differs
If the grant has no effect, inspect cooldown, skill requirements and region restrictions before adding more permissions. If an unwanted command works, trace inherited groups and operator privileges.
Keep a recovery path
Restore the previous permission assignments and remove the temporary group if access becomes too broad. Preserve player data and document the final narrow nodes so later rank changes do not undo the intended boundary.
References and related help
Check the maintainer reference: mcMMO documentation.
Before changing live data, read how to keep a completed recovery copy. For startup errors, use the log collection guide.
Explain why a player-placed block gives no mcMMO XP
Blocks placed by players may be treated differently from naturally generated blocks. Check the anti-exploit rules before increasing rewards or disabling protection across the server.
Check the installed content
mcMMO progress belongs to player data, while its configuration controls future skill behaviour. Preserve both before changing progression rules. Match the installed release when checking permissions and configuration; current configuration references identify changes that require a full server restart.
Work through the change
- Record the skill, block type and how the affected block was created. Keep a naturally generated comparison area separate from the player-placed test area.
- Read the experience reference and installed configuration for source eligibility and exploit prevention. Do not assume a visually identical block has the same reward history.
- Mine one permitted natural block and one deliberately player-placed block with equivalent tools and account permissions. Record XP, drop behaviour and relevant plugin messages.
- Repeat with an unrelated supported block source and check any world or region restrictions. Change only the specific staging rule if your gameplay design deliberately allows that source.
Verify the result
The observed XP should match the documented source policy, with the natural control confirming that the skill itself works. A blocked repeat-placement loop should remain blocked unless you intentionally redesign the economy.
If the result differs
If neither source awards XP, inspect the skill permission and world rules first. If rewards occur inconsistently, check other plugins replacing blocks or handling breaks before weakening anti-exploit settings.
Keep a recovery path
Restore the original source policy if the trial permits a repeatable XP farm. Remove only expendable test blocks and keep player levels intact; a source-eligibility issue does not require deleting skill data.
References and related help
Check the maintainer reference: mcMMO documentation, mcMMO documentation.
Before changing live data, read how to keep a completed recovery copy. For startup errors, use the log collection guide.
Compare mcMMO diminished returns with a genuine XP failure
A reduced reward after repetitive play may be an intentional progression rule. Measure the pattern before treating it as lost player data or changing every skill multiplier.
Check the installed content
mcMMO progress belongs to player data, while its configuration controls future skill behaviour. Preserve both before changing progression rules. Match the installed release when checking permissions and configuration; current configuration references identify changes that require a full server restart.
Work through the change
- Record the affected skill, repeated activity and when its XP changed. Save the experience configuration and note the account bonuses and party state during the report.
- Check whether your installed release enables diminished returns or another activity limit for that situation. Use its documented thresholds and timing rather than assuming values from another server.
- Reproduce a small controlled sequence on staging with a fresh test state and a normal account. Record the reward over the sequence and compare a different eligible activity.
- Apply one documented staging adjustment only if the rule conflicts with your intended progression. Restart normally where the configuration reference requires it, then repeat the same sequence.
Verify the result
The change in reward should follow an identifiable configured rule or expose a separate fault. The comparison activity should help show whether the whole skill is unavailable or only repetitive gains are reduced.
If the result differs
If rewards stop immediately for every activity, inspect permissions and loading errors instead of the return curve. If the pattern depends on a special account, compare its inherited multiplier settings.
Keep a recovery path
Restore the previous rule if the adjustment creates an easy repeatable XP loop. Retain the measurements and preserve player progress; do not compensate or reset levels until the cause and affected period are established.
References and related help
Check the maintainer reference: mcMMO documentation.
Before changing live data, read how to keep a completed recovery copy. For startup errors, use the log collection guide.
Reduce mcMMO notification noise without changing skill progress
Skill notifications can overwhelm chat even when progression works normally. Identify the message source before disabling skill features or changing rewards to quiet the display.
Check the installed content
mcMMO progress belongs to player data, while its configuration controls future skill behaviour. Preserve both before changing progression rules. Match the installed release when checking permissions and configuration; current configuration references identify changes that require a full server restart.
Work through the change
- Capture the exact message and activity that produces it. Record whether it appears in chat, an action bar or another display and whether all players see it.
- Consult the installed configuration reference for the relevant display or notification setting. Keep experience values and player levels outside this presentation change.
- Change one display setting on staging and repeat the triggering activity with an ordinary account. Compare the actual skill XP before and after so a quieter interface is not mistaken for disabled progression.
- Check important ability or cooldown feedback still reaches the player. Test alongside your other action-bar or scoreboard plugin to identify competing display updates.
Verify the result
The intended notification should be quieter or hidden while the skill still gains XP normally. Players should retain the information required to understand active ability availability.
If the result differs
If messages remain, identify which plugin sends the captured wording before changing more mcMMO settings. If another display flickers, compare plugins individually on staging rather than disabling progression.
Keep a recovery path
Restore the original display settings if usability worsens, then restart normally where required by the installed configuration reference. Keep the player database unchanged because this task concerns presentation rather than progression data.
References and related help
Check the maintainer reference: mcMMO documentation.
Before changing live data, read how to keep a completed recovery copy. For startup errors, use the log collection guide.
Tune one mcMMO activity reward without resetting existing levels
A single activity can reward too much or too little XP while the rest of the skill feels right. Change its future reward independently of existing player progression.
Check the installed content
mcMMO progress belongs to player data, while its configuration controls future skill behaviour. Preserve both before changing progression rules. Match the installed release when checking permissions and configuration; current configuration references identify changes that require a full server restart.
Work through the change
- Choose the exact skill source and write down the intended new reward. Save experience.yml and a completed player-data backup before editing progression configuration.
- Locate the source entry in the reference for the installed release. Distinguish the activity reward from a global multiplier so the change stays limited to the intended behaviour.
- Apply a small staging adjustment and perform a normal restart as required by the documentation. Compare the same activity with equivalent tools and account bonuses before and after.
- Test another activity within the same skill and one unrelated skill. Confirm their baseline rewards remain unchanged and inspect a test player existing level after the restart.
Verify the result
The selected activity should award the intended new amount while other sources and stored levels remain intact. Record the measured difference so players can understand the balance change.
If the result differs
If all activities change, inspect the multiplier or enclosing section edited. If nothing changes, confirm the server loaded the intended file and source rather than repeatedly raising the configured value.
Keep a recovery path
Restore the saved configuration if the balance is unsuitable. Do not roll back the player database for a reward-rate change unless a separate reviewed recovery requires it; configuration and earned progression have different recovery implications.
References and related help
Check the maintainer reference: mcMMO documentation.
Before changing live data, read how to keep a completed recovery copy. For startup errors, use the log collection guide.
Test mcMMO party invitations before changing membership limits
A rejected party invitation can come from party state, permissions or a configured limit. Reproduce the rejection before removing members or recreating a production party.
Check the installed content
mcMMO progress belongs to player data, while its configuration controls future skill behaviour. Preserve both before changing progression rules. Match the installed release when checking permissions and configuration; current configuration references identify changes that require a full server restart.
Work through the change
- Record the invitation message, party membership and the inviter role. Consult the installed party and permission references for leadership and membership requirements.
- Create a disposable staging party with ordinary accounts. Confirm the leader can invite one eligible player and that an unauthorised member cannot perform restricted management actions.
- Compare the failing production condition with the test, including membership limits, another party membership and any documented invitation restrictions. Change only the relevant staging setting.
- Test acceptance, a deliberately ineligible invitation and departure from the disposable party. Check that membership counts and shared features update after a normal restart if configuration changed.
Verify the result
Eligible invitations should work within the intended limit, while rejected cases should have an explainable rule. Existing production membership and player skill levels should remain untouched.
If the result differs
If the test works but the reported invitation fails, compare account permissions and current party state. If every invite fails, inspect configuration load errors and leadership permissions before increasing limits.
Keep a recovery path
Restore the original membership setting and remove the disposable test party through supported commands when finished. Keep production party storage backed up and avoid deleting a real party as a diagnostic shortcut.
References and related help
Check the maintainer reference: mcMMO documentation, mcMMO documentation.
Before changing live data, read how to keep a completed recovery copy. For startup errors, use the log collection guide.
AuraSkills tasks
Task guides and troubleshooting for AuraSkills. Check the installed release before changing configuration or data.
Separate an AuraSkills source reward from its XP multipliers
A changed skill reward can originate in its source definition or in a multiplier. Measure the base activity and player modifiers independently before adjusting progression across the server.
Check the installed content
AuraSkills connects skill XP sources to levels, rewards, abilities and menus. A change in one layer can leave another unchanged. Keep the existing skill identifiers and player data, and use the documentation matching your installed release when editing a source or reward.
Work through the change
- Record the skill, source action and observed XP for an ordinary account. Save the relevant source file and note its permission groups, bonuses and other modifiers.
- Find that source in the installed-release source reference. Treat the base source amount separately from the effective XP that appears after bonuses or sharing.
- Repeat one controlled action on staging with a baseline account and the affected account. Keep tools, world and activity conditions identical so the comparison isolates player modifiers.
- Change only the intended source or modifier and repeat after the release-supported configuration workflow. Include a second action from the same skill to check the scope of the change.
Verify the result
The selected action should produce the planned gain, and the comparison should explain why accounts differ. Other source rewards should retain their intended values.
If the result differs
If a source awards nothing, inspect eligibility and world restrictions before increasing its XP. If every source changes, look for a broader multiplier rather than changing each base amount independently.
Keep a recovery path
Restore the saved source and temporary permission changes if the result is unclear. Preserve skill data and avoid resetting levels to diagnose a future reward rate; stored progression is a separate concern.
References and related help
Check the maintainer reference: AuraSkills documentation, AuraSkills documentation.
Before changing live data, read how to keep a completed recovery copy. For startup errors, use the log collection guide.
Check AuraSkills player-placed block protection before allowing XP
Player-placed blocks may deliberately give no skill XP to prevent repeatable farming. Compare a natural block with a placed block before changing source eligibility.
Check the installed content
AuraSkills connects skill XP sources to levels, rewards, abilities and menus. A change in one layer can leave another unchanged. Keep the existing skill identifiers and player data, and use the documentation matching your installed release when editing a source or reward.
Work through the change
- Record the affected skill, block and placement history. Prepare a small natural control area and a separate area containing blocks deliberately placed by the test account.
- Read the source reference for the installed release and inspect its placement-check behaviour. The documented check_replace setting is enabled by default; verify the loaded configuration rather than assuming it changed.
- Break the two sources under equivalent conditions with a normal account. Record the reward and compare any region or world restrictions that could affect both tests.
- If your design needs a different policy, trial only the relevant source on staging. Repeat placement and breaking several times to see whether the proposed policy opens a simple farming loop.
Verify the result
The natural source should award XP where allowed, and the placed source should follow the intended protection rule. The outcome should be reproducible without modifying any player skill levels.
If the result differs
If neither rewards XP, investigate skill access or source matching first. If another plugin replaces the blocks, compare that integration before disabling placement checks across the whole skill.
Keep a recovery path
Restore the protected source policy if the trial permits unintended repeatable gains. Keep the test blocks disposable and preserve player data; a source-policy adjustment should not erase legitimate progress.
References and related help
Check the maintainer reference: AuraSkills documentation.
Before changing live data, read how to keep a completed recovery copy. For startup errors, use the log collection guide.
Find an AuraSkills source with the wrong material or source ID
A source identifier and a Minecraft material name serve different purposes. Check both when a configured activity never awards XP or appears under an unexpected skill.
Check the installed content
AuraSkills connects skill XP sources to levels, rewards, abilities and menus. A change in one layer can leave another unchanged. Keep the existing skill identifiers and player data, and use the documentation matching your installed release when editing a source or reward.
Work through the change
- Record the skill and the exact action that should award XP. Save its source file and compare the current definition with the source format for your installed AuraSkills release.
- Identify the source entry ID separately from the material or entity it matches. Check the supported singular or plural field layout instead of adding both forms as a guess.
- Create one minimal staging source using a documented supported target. Remove optional conditions from that test entry and perform the action with an ordinary account.
- Add the intended target list and optional checks back one at a time. Read the first startup or configuration error after each change and repeat the same activity.
Verify the result
The intended activity should map to one loaded source and award the planned skill XP. Unrelated materials or entities should not receive rewards because a broad matcher was introduced.
If the result differs
If the source never loads, inspect YAML nesting and supported field names. If it loads but matches nothing, compare the real action and material identity before altering the skill or reward curve.
Keep a recovery path
Restore the previous source file and remove the disposable entry if matching remains uncertain. Keep player progression intact and retain the minimal working comparison so future edits do not reintroduce the same format error.
References and related help
Check the maintainer reference: AuraSkills documentation.
Before changing live data, read how to keep a completed recovery copy. For startup errors, use the log collection guide.
Check an AuraSkills menu that shows an outdated reward
Check the installed content
AuraSkills connects skill XP sources to levels, rewards, abilities and menus. A change in one layer can leave another unchanged. Keep the existing skill identifiers and player data, and use the documentation matching your installed release when editing a source or reward.
Work through the change
- Record the skill, level and exact menu text the player sees. Save the relevant menu and reward definitions together and note any translation or placeholder integration involved.
- Read the menu and reward references for the installed release. Identify whether the displayed line is generated from reward data or is manually written descriptive text.
- On staging, update only the incorrect presentation or reward reference. Compare the menu with the configured reward, then trigger a disposable test level-up through the supported test workflow.
- Inspect what the test account actually receives and reopen the menu after relogging. Check neighbouring levels so a copied description does not misrepresent an entire reward interval.
Verify the result
If the result differs
Keep a recovery path
Restore the saved menu and reward files if the trial introduces a mismatch. Keep real player levels unchanged and record any disposable test reward so it cannot enter the live economy accidentally.
References and related help
Check the maintainer reference: AuraSkills documentation, AuraSkills documentation.
Before changing live data, read how to keep a completed recovery copy. For startup errors, use the log collection guide.
Test an AuraSkills money reward when Vault is unavailable
A money reward depends on more than the skill level event. Check the economy bridge and provider before changing a reward amount that the player never receives.
Check the installed content
AuraSkills connects skill XP sources to levels, rewards, abilities and menus. A change in one layer can leave another unchanged. Keep the existing skill identifiers and player data, and use the documentation matching your installed release when editing a source or reward.
Work through the change
- Record the reward level and configured amount, then save its reward definition. Confirm the installed-release documentation for the money reward and its Vault dependency.
- On staging, inspect startup logs for AuraSkills, Vault and the actual economy provider. Vault is a bridge; its presence alone does not prove that an economy service registered successfully.
- Trigger the reward with a disposable ordinary account and record its balance before and after. Compare another supported non-money reward at the same test level to locate the failing stage.
- Repair the missing dependency or provider configuration on staging and restart through the normal server workflow. Repeat the same reward once without manually adding money during the comparison.
Verify the result
The account should receive the intended balance change through the registered economy provider, and the reward should not be issued twice by a separate compensation command.
If the result differs
If all rewards fail, inspect the level reward configuration first. If only money fails, review dependency registration and economy errors rather than increasing the amount or changing unrelated skill sources.
Keep a recovery path
Restore the previous reward definition if the dependency repair is not ready. Record the affected account and event for a separate reviewed compensation decision; configuration rollback cannot undo currency already paid.
References and related help
Check the maintainer reference: AuraSkills documentation.
Before changing live data, read how to keep a completed recovery copy. For startup errors, use the log collection guide.
Check recurring AuraSkills level rewards for off-by-one mistakes
An interval reward can appear at the wrong levels when its range or recurrence is misunderstood. List the intended levels before changing rewards already used by players.
Check the installed content
AuraSkills connects skill XP sources to levels, rewards, abilities and menus. A change in one layer can leave another unchanged. Keep the existing skill identifiers and player data, and use the documentation matching your installed release when editing a source or reward.
Work through the change
- Write down the first few levels that should grant the reward and the levels immediately between them that should not. Save the skill reward file and note any overlapping reward definitions.
- Compare the installed-release interval or level mapping format with the planned sequence. Keep a one-time level reward distinct from a repeating reward rule.
- Build the smallest staging sequence that covers an eligible level, an ineligible level and the next recurrence. Use low-value observable rewards with a disposable player state.
- Trigger each test transition through supported administration or normal progression and record the actual rewards. Include any overlapping rule so two grants are not mistaken for one interval firing twice.
Verify the result
The observed sequence should match the written level list, including its start and next recurrence. Adjacent levels should not receive an accidental grant from overlapping definitions.
If the result differs
If every level grants the reward, inspect its enclosing range or default rule. If only one transition differs, compare previous player state and whether the reward was already processed before changing the interval.
Keep a recovery path
Restore the previous reward mapping and disposable player checkpoint if the test sequence is wrong. Do not lower and raise real player levels repeatedly to diagnose reward timing, since that can create duplicate rewards.
References and related help
Check the maintainer reference: AuraSkills documentation.
Before changing live data, read how to keep a completed recovery copy. For startup errors, use the log collection guide.
Distinguish an AuraSkills mana shortage from an ability cooldown
An ability that does not activate may be waiting for mana or a cooldown rather than being broken. Test its prerequisites separately before lowering costs or removing limits.
Check the installed content
AuraSkills connects skill XP sources to levels, rewards, abilities and menus. A change in one layer can leave another unchanged. Keep the existing skill identifiers and player data, and use the documentation matching your installed release when editing a source or reward.
Work through the change
- Record the skill, ability, current mana and the action used to activate it. Consult the installed-release mana-ability reference for the required tool, activation method and prerequisites.
- Use an ordinary staging account that legitimately meets the skill requirement. Test once with enough mana and an expired cooldown, recording the feedback and effect.
- Repeat immediately to observe cooldown behaviour, then test the insufficient-mana case separately. Keep other abilities and bonus equipment out of the comparison.
- If adjusting the balance, change only the documented cost or cooldown setting and retest the same cases. Include a normal relog to confirm the display agrees with actual eligibility.
Verify the result
The ready account should activate the intended ability, while cooldown and low-mana cases should fail for their respective reasons. The displayed state should match the action the server permits.
If the result differs
If the fully ready case still fails, inspect tool eligibility, permissions and world restrictions. If activation works but the display lags, troubleshoot the display integration before changing the resource cost.
Keep a recovery path
Restore the prior ability settings if the trial changes balance unexpectedly. Keep existing player levels and mana-related data backed up, and remove temporary test grants instead of leaving unrestricted ability access enabled.
References and related help
Check the maintainer reference: AuraSkills documentation.
Before changing live data, read how to keep a completed recovery copy. For startup errors, use the log collection guide.
Keep AuraSkills reward commands from targeting the wrong player
A command reward must resolve to the player who earned the level, not the account testing the command. Compare substitution and execution context before connecting it to valuable rewards.
Check the installed content
AuraSkills connects skill XP sources to levels, rewards, abilities and menus. A change in one layer can leave another unchanged. Keep the existing skill identifiers and player data, and use the documentation matching your installed release when editing a source or reward.
Work through the change
- Record the reward command and the intended recipient. Read the installed-release reward reference for supported player placeholders and whether the command runs as console or player.
- Copy the reward to a staging level and replace valuable issuance with a harmless observable action supported by the target command. Keep command access narrowly scoped.
- Trigger it with two distinct ordinary accounts in separate tests. Confirm that each result identifies the correct player and that the command does not contain a hard-coded staff or previous test name.
- Restore the intended low-value reward and test one successful grant. Check that the target command receives one recipient and the planned quantity rather than accepting arbitrary player-controlled arguments.
Verify the result
Each account should receive only its own reward once at the intended transition. The final command should execute with the documented context and resolve its placeholders correctly.
If the result differs
If the placeholder remains literal, compare the supported syntax and the integration handling before adding aliases. If the command works manually but not as a reward, inspect console compatibility and execution errors.
Keep a recovery path
Restore the harmless test action if recipient resolution is uncertain. Keep valuable rewards disabled until both account tests pass and record any grant already issued so a retry does not create duplicate compensation.
References and related help
Check the maintainer reference: AuraSkills documentation.
Before changing live data, read how to keep a completed recovery copy. For startup errors, use the log collection guide.
RoseStacker tasks
Task guides and troubleshooting for RoseStacker. Check the installed release before changing configuration or data.
Measure RoseStacker changes with stack statistics instead of labels
A larger stack label does not by itself prove that fewer server entities are active. Compare the plugin statistics with a controlled test population before tuning a whole farm.
Check the installed content
RoseStacker stores behaviour for stacked mobs, dropped items, spawners and blocks. A stack label is not a reliable inventory of every underlying entity or item. Test one feature at a time with expendable objects before changing rules that affect existing farms.
Work through the change
- Record the installed RoseStacker version and the type of stacking under review. Save the relevant configuration and keep other farms unchanged during the measurement window.
- In game, use the documented
/rs statscommand to record the available stack statistics. Note the time and whether the test chunks are loaded so later results are comparable. - Introduce a small known number of expendable test entities or items on staging. Observe merging and record statistics again, using the same loaded area and player position.
- Change one relevant stacking rule, then repeat the same test population. Compare actual server timing evidence as well as the plugin counters before calling the result a performance improvement.
Verify the result
The counters should explain how the known population is represented after stacking. The test should distinguish a display change from a reduction in active entity processing.
If the result differs
If counts jump unexpectedly, inspect chunk loading and other nearby farms before changing limits. If labels differ but statistics do not, investigate presentation settings separately from stack formation.
Keep a recovery path
Restore the previous rule if the comparison is inconclusive. Remove only the deliberately created test population through normal supported interactions; avoid global clear commands that could destroy other players mobs or items.
References and related help
Check the maintainer reference: RoseStacker documentation, RoseStacker documentation.
Before changing live data, read how to keep a completed recovery copy. For startup errors, use the log collection guide.
Check whether custom dropped items should merge into one stack
Items with similar names can carry different metadata and should not automatically be treated as interchangeable. Test custom-item stacking with a small labelled comparison set.
Check the installed content
RoseStacker stores behaviour for stacked mobs, dropped items, spawners and blocks. A stack label is not a reliable inventory of every underlying entity or item. Test one feature at a time with expendable objects before changing rules that affect existing farms.
Work through the change
- Record the custom item provider and the RoseStacker version. Back up the staging inventory and the item-stacking configuration before changing compatibility rules.
- Prepare ordinary identical items, two copies of one custom item and a visibly similar item with different legitimate metadata. Keep the quantities small and record each starting count.
- Drop each comparison set separately in a clear staging area. Observe whether it merges, then pick it up normally and inspect its identity and total quantity.
- Repeat after one documented item-stacking adjustment only if the installed reference supports it. Check pickup into a nearly full inventory and compare the preserved custom behaviour after collection.
Verify the result
Compatible copies should retain their total quantity and custom identity, while genuinely different items should remain distinguishable. A merged display must not erase information needed by the custom-item plugin.
If the result differs
If custom items lose behaviour even without merging, inspect their own provider first. If only one metadata combination fails, retain that exact disposable pair for a compatibility report rather than weakening every comparison rule.
Keep a recovery path
Restore the previous stacking configuration and staging inventory checkpoint if identity or quantity changes. Keep valuable player items out of the test and do not use item-clear commands to tidy a live area.
References and related help
Check the maintainer reference: RoseStacker documentation, RoseStacker documentation.
Before changing live data, read how to keep a completed recovery copy. For startup errors, use the log collection guide.
Verify spawner-stack quantity before changing farm output
A spawner display and its represented quantity need to be understood before adjusting farm yield. Test one known stack rather than changing every spawner multiplier at once.
Check the installed content
RoseStacker stores behaviour for stacked mobs, dropped items, spawners and blocks. A stack label is not a reliable inventory of every underlying entity or item. Test one feature at a time with expendable objects before changing rules that affect existing farms.
Work through the change
- Record the RoseStacker version, spawner type and known starting quantity. Save the relevant configuration and a small staging-world checkpoint containing the test location.
- Create a disposable test setup through the supported normal placement workflow. Record the represented quantity using the plugin display or supported inspection method for your release.
- Observe several spawning cycles with ordinary activation conditions satisfied. Keep entity caps, nearby mobs and player distance comparable, and count actual spawned output.
- Test the documented normal add or remove interaction with a small quantity. Recheck represented spawners and output before making any farm-yield adjustment.
Verify the result
The setup should account for its starting spawner quantity and maintain it through normal interactions. Output measurements should be consistent enough to separate activation limits from stacking behaviour.
If the result differs
If output stops, inspect Minecraft activation conditions and nearby entity limits before increasing stack output. If quantity differs, examine placement and break permissions or integrations rather than compensating with another spawner.
Keep a recovery path
Restore the staging-world checkpoint and previous configuration if quantity becomes uncertain. Do not break production spawner stacks or issue replacement items during diagnosis; both can complicate accounting and recovery.
References and related help
Check the maintainer reference: RoseStacker documentation, RoseStacker documentation.
Before changing live data, read how to keep a completed recovery copy. For startup errors, use the log collection guide.
Test stacked-block removal before allowing it in a public build
A stacked block can represent more than one ordinary placed block. Check the documented interaction and item return on staging before players use large stacks in valuable builds.
Check the installed content
RoseStacker stores behaviour for stacked mobs, dropped items, spawners and blocks. A stack label is not a reliable inventory of every underlying entity or item. Test one feature at a time with expendable objects before changing rules that affect existing farms.
Work through the change
- Identify the stacked-block feature and block type supported by your installed release. Save its configuration and a small staging-world backup before placing a disposable test stack.
- Record the starting block count and create the stack through the normal supported workflow. Keep its location clear of unrelated blocks and protection rules for the first comparison.
- Use the documented ordinary removal interaction with a normal account. Count what remains represented and what returns to the inventory after each action.
- Repeat inside a test protected region and with a nearly full inventory. Compare ordinary break behaviour with the protected case instead of granting broad bypass permissions to make it work.
Verify the result
Each permitted action should account for the intended number of blocks without losing or duplicating the represented quantity. Denied actions should leave both the stack and inventory unchanged.
If the result differs
If only protected regions differ, inspect the integration and permission decision. If the unprotected baseline fails, preserve the exact small setup and version details before changing unrelated entity or spawner settings.
Keep a recovery path
Restore the staging-world checkpoint if the test count becomes uncertain. Keep the feature out of public valuable builds until accounting is clear, and avoid global stack-clearing commands as a cleanup method.
References and related help
Check the maintainer reference: RoseStacker documentation, RoseStacker documentation.
Before changing live data, read how to keep a completed recovery copy. For startup errors, use the log collection guide.
Give staff RoseStacker inspection access without cleanup powers
Staff may need to inspect stack state without gaining destructive cleanup commands. Review the exact command permissions and test the restricted role with an ordinary account.
Check the installed content
RoseStacker stores behaviour for stacked mobs, dropped items, spawners and blocks. A stack label is not a reliable inventory of every underlying entity or item. Test one feature at a time with expendable objects before changing rules that affect existing farms.
Work through the change
- Open the command and permission reference for the installed RoseStacker build. List the inspection actions staff require, including statistics and any documented stack inspection tool.
- Compare those nodes with commands that remove stacks or alter stored content. Save the permission group before making a narrowly scoped staging change.
- Grant only the documented inspection access to a temporary group. Test its information commands and, where appropriate, the stack tool on expendable objects in a staging world.
- Attempt a restricted administrative action using its harmless permission-check path or a disposable staging target. Confirm normal players outside the role cannot obtain inspection tools or administrative information.
Verify the result
The role should read the required stack state while destructive actions remain denied. Inspection should not change represented quantity or modify player-owned objects.
If the result differs
If the role still has cleanup powers, inspect inherited groups and operator status. If inspection fails, compare the exact installed command node rather than adding a plugin-wide wildcard.
Keep a recovery path
Restore the saved permission group if access is broader than intended. Remove disposable tools and temporary grants after the trial, and record the final narrow nodes for future staff onboarding.
References and related help
Check the maintainer reference: RoseStacker documentation.
Before changing live data, read how to keep a completed recovery copy. For startup errors, use the log collection guide.
Explain a RoseStacker placeholder count that differs from nearby mobs
A scoreboard placeholder may report a plugin-wide value rather than the visible entities around one player. Identify its scope before treating a different count as missing mobs.
Check the installed content
RoseStacker stores behaviour for stacked mobs, dropped items, spawners and blocks. A stack label is not a reliable inventory of every underlying entity or item. Test one feature at a time with expendable objects before changing rules that affect existing farms.
Work through the change
- Record the exact PlaceholderAPI placeholder and the scoreboard or menu that renders it. Consult the installed RoseStacker placeholder reference for its meaning and dependencies.
- Compare the value with documented RoseStacker statistics at the same timestamp. Note loaded worlds and chunks, because a local visual count may cover a much smaller area.
- On staging, add one known disposable stack and refresh the display through its supported workflow. Observe which counters change and whether the displayed value is cached.
- Test the placeholder directly through the documented PlaceholderAPI inspection route for your installed release, then compare the scoreboard result. This separates provider output from formatting or caching.
Verify the result
The value should match its documented scope and update when the corresponding underlying statistic changes. The display should label that scope clearly rather than implying a local head count.
If the result differs
If direct expansion is correct but the scoreboard is stale, inspect its update interval and cache. If the placeholder remains literal, check expansion availability and syntax before editing stack data.
Keep a recovery path
Restore the previous display expression if the new label or placeholder is incorrect. Keep the actual stack configuration and stored entities untouched; this investigation concerns a reported metric rather than missing world content.
References and related help
Check the maintainer reference: RoseStacker documentation, RoseStacker documentation.
Before changing live data, read how to keep a completed recovery copy. For startup errors, use the log collection guide.
Quests tasks
Task guides and troubleshooting for Quests. Check the installed release before changing configuration or data.
Test whether a Quests item requirement consumes the offered item
A quest requirement can check an item and may also remove it according to its settings. Test that distinction before asking players to bring valuable custom equipment.
Check the installed content
PikaMug Quests has its own quest editor and player progress storage. Confirm that you use this plugin rather than another project named Quests. Current maintainer documentation targets version 5 and newer; use the legacy reference when your installed release needs it.
Work through the change
- In game on staging, open the quest requirements through
/quests editorand record the required item and quantity. Compare the consumption option with the installed-version requirements reference. - Prepare a disposable ordinary account with exactly the required quantity and record its inventory. Keep the quest reward low-value so the test isolates acceptance rather than profit.
- Accept the quest through the normal player route and inspect the inventory immediately. Repeat with one fewer item and with a similar item that should not satisfy the match.
- Test cancellation and a second acceptance only where the quest rules allow it. Record when the item is checked and when it is removed rather than assuming cancellation refunds a consumed requirement.
Verify the result
The quest should reject insufficient or mismatched items and consume only what the configured acceptance policy requires. The player-facing description should explain the cost accurately.
If the result differs
If a custom item fails, inspect the requirement matching options and its provider metadata. If the correct item disappears at an unexpected stage, check action events and objectives for a second removal path.
Keep a recovery path
Restore the previous requirement and disposable inventory checkpoint if the trial is wrong. Keep valuable production items out of testing and do not promise an automatic cancellation refund unless that behaviour has been deliberately implemented.
References and related help
Check the maintainer reference: PikaMug Quests documentation, PikaMug Quests documentation.
Before changing live data, read how to keep a completed recovery copy. For startup errors, use the log collection guide.
Require a completed Quests prerequisite without blocking new players
A follow-up quest should become available after the intended prerequisite rather than after an unrelated quest or a display-name match. Test the chain with distinct player states.
Check the installed content
PikaMug Quests has its own quest editor and player progress storage. Confirm that you use this plugin rather than another project named Quests. Current maintainer documentation targets version 5 and newer; use the legacy reference when your installed release needs it.
Work through the change
- Record the prerequisite quest and follow-up quest identities. Save the quest configuration and consult the installed requirements reference for the supported completed-quest requirement.
- Set the requirement on a staging copy through the quest editor. Keep the quest IDs and prerequisite references consistent instead of renaming live quests during the change.
- Use one disposable account that has not completed the prerequisite and another that legitimately has. Attempt the follow-up through the same NPC or command route.
- Complete the prerequisite with the first account and attempt the follow-up again. Include any repeatability rule so a completed follow-up does not confuse the prerequisite test.
Verify the result
The new player should be denied until completion, then become eligible without an administrator editing their progress. The already qualified account should be able to start the follow-up under its normal rules.
If the result differs
If both accounts are denied, inspect the stored completion identity and other requirements. If both pass, check that the requirement was saved on the quest being offered rather than a similarly named copy.
Keep a recovery path
Restore the earlier quest definition if the chain is blocked. Preserve the player data and avoid deleting completion records to retest; disposable accounts provide a safer comparison for acceptance state.
References and related help
Check the maintainer reference: PikaMug Quests documentation, PikaMug Quests documentation.
Before changing live data, read how to keep a completed recovery copy. For startup errors, use the log collection guide.
Choose when a Quests stage action should run
A stage action can fire on entry, completion or another event. Choose its lifecycle deliberately so a cosmetic message or reward does not run at the wrong moment.
Check the installed content
PikaMug Quests has its own quest editor and player progress storage. Confirm that you use this plugin rather than another project named Quests. Current maintainer documentation targets version 5 and newer; use the legacy reference when your installed release needs it.
Work through the change
- In game, create or inspect the action through
/quests actionsusing the installed-version action editor. Start with a harmless message rather than inventory removal, weather or valuable item issuance. - Open the staging quest stage and identify the documented action hook required by the design. A stage also needs its actual objective; an action is not automatically an objective.
- Test entry, partial progress and completion with an ordinary account. Record the message timestamps and compare them with the selected start or end hook.
- Test any relevant failure, death or disconnect hook separately. Keep a command or chat-triggered action distinct from the stage completion path so repeated player input cannot issue an unintended reward.
Verify the result
The action should run only at the intended lifecycle point, while the objective controls progression. Ordinary partial activity should not be mistaken for completion or repeat a one-time reward.
If the result differs
If the action never runs, inspect its saved reference and selected hook. If it runs repeatedly, check chat or command hooks and other stage actions before adding conditions to an unrelated objective.
Keep a recovery path
Restore the harmless action or previous hook if timing is unclear. Do not test destructive actions against real inventories, and keep the quest and action definitions backed up together so their references remain recoverable.
References and related help
Check the maintainer reference: PikaMug Quests documentation, PikaMug Quests documentation.
Before changing live data, read how to keep a completed recovery copy. For startup errors, use the log collection guide.
Check a daily Quests schedule against cooldown and timezone
A daily quest window and a player completion cooldown are separate clocks. Check both before changing a schedule that appears unavailable to players.
Check the installed content
PikaMug Quests has its own quest editor and player progress storage. Confirm that you use this plugin rather than another project named Quests. Current maintainer documentation targets version 5 and newer; use the legacy reference when your installed release needs it.
Work through the change
- Record the intended opening hours, timezone and repeat policy. Save the planner configuration and use the installed planner editor rather than guessing the date-field order in YAML.
- Compare the start and end window, repeat interval and player cooldown with the maintainer reference. Its planner intervals are expressed in seconds, and the repeat cycle is based on the start time.
- Create a short disposable staging schedule with an observable window. Test before opening, during availability and after closing, using accounts with and without a recent completion.
- Check the documented cooldown override policy at the next repeat boundary. Record server timezone and timestamps so a daily opening is not confused with a fixed delay since the player last finished.
Verify the result
The quest should open within its intended window and enforce the chosen completion policy. A qualified player at the next cycle should behave according to the explicit override setting.
If the result differs
If everyone is denied, inspect the window and timezone first. If only recent completers fail, inspect their cooldown rather than moving the global start date or clearing all player records.
Keep a recovery path
Restore the previous planner values if the trial behaves unexpectedly. Keep production scheduling unchanged until the short-window test is understood, and preserve completion data instead of deleting it to bypass a timer.
References and related help
Check the maintainer reference: PikaMug Quests documentation.
Before changing live data, read how to keep a completed recovery copy. For startup errors, use the log collection guide.
Find which requirement prevents an NPC from offering a quest
A visible quest NPC does not prove that an account meets the quest requirements. Compare acceptance rules before recreating the NPC or removing every condition.
Check the installed content
PikaMug Quests has its own quest editor and player progress storage. Confirm that you use this plugin rather than another project named Quests. Current maintainer documentation targets version 5 and newer; use the legacy reference when your installed release needs it.
Work through the change
- Record the NPC and the exact quest being offered, including its internal identity. Save the quest definition and check the requirements reference matching the installed release.
- Compare the affected player with an eligible disposable test account. List money, items, permissions, completed quests and other requirements actually configured on this quest.
- On staging, test one failing requirement at a time while keeping the NPC and quest route unchanged. Use harmless quantities and do not grant operator status to make the offer appear.
- Once acceptance works, repeat with a deliberately ineligible account and check the rejection message. Confirm the player receives useful guidance without revealing staff-only commands or private data.
Verify the result
The NPC should offer the intended quest to eligible players and reject the specific failing case predictably. The test should identify the blocking requirement without changing other quests.
If the result differs
If acceptance works by command but not through the NPC, inspect the NPC association or dependency integration. If neither route works, inspect quest availability and requirements before replacing the NPC entity.
Keep a recovery path
Restore the prior requirement changes and remove temporary test permissions. Preserve quest progress and the NPC configuration; deleting an NPC or resetting all player records is unnecessary for an unexplained eligibility check.
References and related help
Check the maintainer reference: PikaMug Quests documentation, PikaMug Quests documentation.
Before changing live data, read how to keep a completed recovery copy. For startup errors, use the log collection guide.
Test quest rewards with a nearly full player inventory
A reward that works with empty pockets may behave differently when storage is almost full. Test delivery before advertising a valuable item reward to players.
Check the installed content
PikaMug Quests has its own quest editor and player progress storage. Confirm that you use this plugin rather than another project named Quests. Current maintainer documentation targets version 5 and newer; use the legacy reference when your installed release needs it.
Work through the change
- Record the reward item types, quantities and command-based grants. Save the reward definition and check the installed rewards reference for the supported delivery settings.
- Prepare a disposable staging account with a nearly full inventory and a completed recovery copy of its test state. Leave room for only part of the intended reward.
- Complete the quest normally and inspect the inventory, nearby ground and relevant messages. Compare the same completion with an empty inventory using a separate eligible test state.
- Test any reward integration that uses a command separately, since its delivery behaviour belongs to that plugin. Decide how the quest description should tell players to prepare inventory space.
Verify the result
The delivery outcome should be understood for both inventory states, with no assumed guarantee that every external reward command handles overflow the same way. Quantities should match the configured reward exactly.
If the result differs
If a reward appears missing, inspect drops and the command-provider logs before granting it again. If the quest completed but an integration failed, record that stage rather than repeatedly replaying completion.
Keep a recovery path
Restore the reward definition and disposable inventory checkpoint if needed. Keep a record of actual issued items so retries or compensation cannot duplicate a reward that was delivered somewhere unexpected.
References and related help
Check the maintainer reference: PikaMug Quests documentation.
Before changing live data, read how to keep a completed recovery copy. For startup errors, use the log collection guide.
Distinguish a Quests command permission from quest eligibility
A player who cannot open the quest interface may lack a command permission even when they meet every quest requirement. Check access before editing the quest itself.
Check the installed content
PikaMug Quests has its own quest editor and player progress storage. Confirm that you use this plugin rather than another project named Quests. Current maintainer documentation targets version 5 and newer; use the legacy reference when your installed release needs it.
Work through the change
- Capture the exact command and rejection message. Confirm that the server uses PikaMug Quests and consult its installed-version command and permission reference.
- Compare the affected ordinary account with a working non-operator account. Inspect inherited permission groups and any command aliases or translations that route the request differently.
- Grant the narrow documented interface permission to a temporary staging group. Test opening the interface, viewing the quest and attempting acceptance as separate steps.
- Use an account that deliberately fails a quest requirement to confirm interface access does not bypass eligibility. Also check that administrative editing commands remain denied.
Verify the result
The account should use the intended player interface while the quest still enforces its own conditions. Staff-only editing or progress-management commands should remain unavailable.
If the result differs
If the interface opens but the quest is unavailable, inspect its schedule and requirements. If the command still fails, check alias ownership and inherited denials before granting broad plugin permissions.
Keep a recovery path
Restore the previous permission assignment if the test grants more access than intended. Remove the temporary group and keep quest definitions and player progress unchanged while resolving a command-access problem.
References and related help
Check the maintainer reference: PikaMug Quests documentation, PikaMug Quests documentation.
Before changing live data, read how to keep a completed recovery copy. For startup errors, use the log collection guide.
Plan a Quests storage change without starting with empty progress
Changing storage settings alone is not a safe progress migration. Prepare a supported conversion and comparison before pointing a live quest server at a different database.
Check the installed content
PikaMug Quests has its own quest editor and player progress storage. Confirm that you use this plugin rather than another project named Quests. Current maintainer documentation targets version 5 and newer; use the legacy reference when your installed release needs it.
Work through the change
- Record the current storage backend and installed Quests version. Take a completed backup of quest definitions and all current player progress while the staging copy is stopped.
- Read the storage documentation and its supported conversion tooling. Keep the target database separate and empty for the trial rather than mixing copied records with an existing live dataset.
- Run the documented conversion procedure on staging with the matching tool versions. Keep credentials private and avoid editing tables or assuming that switching the backend setting moves the data.
- Start the staging server on the converted backend and compare several known accounts: active objectives, completed quests and cooldown state. Check that new progress persists through a normal restart.
Verify the result
The converted backend should preserve representative progress and store subsequent changes correctly. Record the source checkpoint and comparison results before planning a production maintenance window.
If the result differs
If accounts appear new, stop the trial and inspect the selected backend, database and conversion output. Do not let players continue on two diverging stores while deciding which contains the authoritative progress.
Keep a recovery path
Return staging to the original configuration and backed-up source data if validation fails. Keep both trial outputs for diagnosis, and prepare an explicit production cutover and rollback plan before any live storage change.
References and related help
Check the maintainer reference: PikaMug Quests documentation.
Before changing live data, read how to keep a completed recovery copy. For startup errors, use the log collection guide.
BetonQuest tasks
Task guides and troubleshooting for BetonQuest. Check the installed release before changing configuration or data.
Find a BetonQuest objective that was defined but never started
An objective definition does not prove that it is active for a player. Follow the event that starts it before changing its target or required count.
Check the installed content
BetonQuest expresses a quest through objectives, conditions, events and conversation links. Keep the package and player state together during testing. The linked reference describes the 2.2 documentation branch; select the corresponding documentation if your server runs another major version.
Work through the change
- Record the package, objective ID and player action that should begin it. Save the package and disposable player-state checkpoint together before editing the quest flow.
- Read the objective and event references for the installed documentation branch. Trace the conversation or preceding objective to the event responsible for starting this objective.
- Replace valuable completion rewards with a harmless observable test event on staging. Start the quest through its ordinary entry path and inspect objective state using the supported administration tools.
- Perform one valid objective action, then complete the test count. Compare a second account that never started the quest so normal world activity is not mistaken for quest progress.
Verify the result
The objective should become active at the intended entry point and count only eligible actions for the correct player. Completion should call the expected next event without repeating the initial start action.
If the result differs
If it is inactive, inspect the start event reference and its conditions first. If active but not progressing, then inspect action matching, world restrictions and objective conditions instead of repeatedly starting another copy.
Keep a recovery path
Restore the previous package and disposable state if the trial becomes inconsistent. Keep live player objectives untouched during diagnosis; deleting progress or recreating the entire quest can hide the missing start event.
References and related help
Check the maintainer reference: BetonQuest documentation, BetonQuest documentation.
Before changing live data, read how to keep a completed recovery copy. For startup errors, use the log collection guide.
Test an inverted BetonQuest condition with both player states
An inverted condition can accidentally make a quest available only to the wrong players. Write a pass-and-fail table before changing the condition on a reward or conversation branch.
Check the installed content
BetonQuest expresses a quest through objectives, conditions, events and conversation links. Keep the package and player state together during testing. The linked reference describes the 2.2 documentation branch; select the corresponding documentation if your server runs another major version.
Work through the change
- Record the condition ID and the player state it checks. Describe in plain language when the branch should be available and when it should be hidden or rejected.
- Check the installed-branch scripting and condition references for negation and condition-list syntax. Keep the underlying condition definition separate from the place that inverts its result.
- On staging, prepare one disposable account that satisfies the condition and one that does not. Use a harmless observable branch rather than currency or item issuance.
- Run the same interaction with both accounts, change the relevant test state through supported tools and repeat. Inspect combined conditions individually before testing their full conjunction.
Verify the result
The branch should follow the written truth table for both states and their transitions. Inversion should change eligibility, without unexpectedly changing the event target or creating another reward path.
If the result differs
If both accounts behave alike, inspect the underlying state and package reference. If one additional condition changes the result, test that condition separately rather than adding another negation as a guess.
Keep a recovery path
Restore the earlier condition reference and keep the reward harmless if any case fails. Preserve live player state; changing a condition should not require clearing tags, objectives or completed quests for every account.
References and related help
Check the maintainer reference: BetonQuest documentation, BetonQuest documentation.
Before changing live data, read how to keep a completed recovery copy. For startup errors, use the log collection guide.
Guard a BetonQuest reward against repeat conversation clicks
A reward conversation can be reopened, so its state checks need to prevent an unintended second grant. Test repeated entry before attaching valuable currency or equipment.
Check the installed content
BetonQuest expresses a quest through objectives, conditions, events and conversation links. Keep the package and player state together during testing. The linked reference describes the 2.2 documentation branch; select the corresponding documentation if your server runs another major version.
Work through the change
- Record the reward event and all conversation or objective paths that can call it. Save the package and identify the intended completion tag or other persistent eligibility state.
- Check the installed-branch event and condition references for the supported state operations. Build a staging reward with a harmless observable action and a clear eligible-versus-completed condition.
- Trigger the legitimate completion path once, then reopen the conversation and repeat the same click. Test relogging and an orderly restart so the check covers persisted state.
- Test a second account that has not completed the quest. Confirm the anti-repeat guard does not block first-time completion or accidentally use a global state shared by every player.
Verify the result
The eligible account should receive one grant, repeat entry should be denied or take a non-reward branch, and the untouched account should remain independently eligible.
If the result differs
If repeat clicks grant again, inspect whether the completion state is set and checked on every calling path. This logical guard is not a guarantee of transactional delivery across a server crash; assess valuable external rewards separately.
Keep a recovery path
Restore the harmless event if repeat protection fails and keep the live reward unavailable. Preserve the test evidence and account states; do not repeatedly grant real rewards while debugging a completion guard.
References and related help
Check the maintainer reference: BetonQuest documentation, BetonQuest documentation.
Before changing live data, read how to keep a completed recovery copy. For startup errors, use the log collection guide.
Keep a BetonQuest journal entry separate from objective progress
A journal can describe progress without starting or completing the underlying objective. Check the event paths independently when the book and quest behaviour disagree.
Check the installed content
BetonQuest expresses a quest through objectives, conditions, events and conversation links. Keep the package and player state together during testing. The linked reference describes the 2.2 documentation branch; select the corresponding documentation if your server runs another major version.
Work through the change
- Record the journal entry ID, objective ID and the point at which each should change. Save the package and a disposable test-player checkpoint before editing the flow.
- Inspect the events that add or remove the journal entry and those that start or finish the objective. Check their references against the documentation matching your installed branch.
- On staging, enter the quest normally and inspect both the journal and active objective state. Perform partial progress and completion while recording the resulting book text.
- Test relogging and a normal restart, then compare a second account outside the quest. Confirm that narrative text and progression are updated for the intended player only.
Verify the result
The journal should accurately describe the active or completed state, while objective tracking should work independently of whether the player has opened the book.
If the result differs
If text changes but progress does not, inspect the objective event chain. If progress works but the journal is stale, inspect entry references and update events rather than resetting the quest.
Keep a recovery path
Restore the saved journal and event definitions together if the trial becomes misleading. Keep production player progress intact and correct the presentation path separately from any genuine missing objective state.
References and related help
Check the maintainer reference: BetonQuest documentation, BetonQuest documentation.
Before changing live data, read how to keep a completed recovery copy. For startup errors, use the log collection guide.
Repair a cross-package BetonQuest reference after organising files
Moving a quest package can change how other packages reach its features. Map the references before renaming folders so an organisation change does not disconnect a live quest chain.
Check the installed content
BetonQuest expresses a quest through objectives, conditions, events and conversation links. Keep the package and player state together during testing. The linked reference describes the 2.2 documentation branch; select the corresponding documentation if your server runs another major version.
Work through the change
- Back up the complete QuestPackages tree and list the package being moved. Record the events, objectives, conditions and conversations referenced by other packages.
- Read the package-path rules for the installed documentation branch. Distinguish a normal subfolder from a folder containing its own package.yml, which creates a separate package boundary.
- Move a small copied package on staging and update the affected references consistently. Use documented absolute or relative package addressing rather than inserting filesystem paths into event IDs.
- Load the staging quest set and test one entry from each dependent package. Inspect the first unresolved-reference error before continuing through the rest of the chain.
Verify the result
Every dependent call should resolve to the intended feature after organisation, with no duplicate IDs within the same package. The player should reach the next quest stage through its ordinary entry route.
If the result differs
If a local reference works but an external one fails, inspect the package path and boundary. If both fail, check whether the feature definition loaded before changing cross-package syntax again.
Keep a recovery path
Restore the original directory tree and package references together if the move breaks the chain. Avoid renaming live persistent quest identities during a file tidy-up without a separate state-migration plan.
References and related help
Check the maintainer reference: BetonQuest documentation.
Before changing live data, read how to keep a completed recovery copy. For startup errors, use the log collection guide.
Check a delayed BetonQuest objective across logout and restart
A waiting objective may use a different timing policy than players expect. Test offline and restart behaviour before advertising a real-time deadline or a guaranteed online-only delay.
Check the installed content
BetonQuest expresses a quest through objectives, conditions, events and conversation links. Keep the package and player state together during testing. The linked reference describes the 2.2 documentation branch; select the corresponding documentation if your server runs another major version.
Work through the change
- Record the installed BetonQuest version, objective type and intended timing policy. Read the matching objective reference, including any options that affect delay or persistence.
- Create a short disposable staging wait objective with a harmless completion event. Record its activation time and compare it with the server clock.
- Run one test while remaining online and another while logging out during the wait. Rejoin and inspect whether the objective completed or retained remaining work according to its documented policy.
- Run a separate test through an orderly staging restart. Keep the server unavailable interval in the timing record and compare the resulting state before increasing the production delay.
Verify the result
The measured behaviour should match the documented objective policy for online, offline and restarted cases. The quest description should explain that policy rather than promise a different kind of clock.
If the result differs
If a wait never finishes, confirm it was active for the account and inspect its completion event. If timing differs only during shutdown, review persistence semantics before shortening every deadline.
Keep a recovery path
Restore the prior delay definition and disposable player checkpoint if the trial fails. Do not clear live waiting objectives to make them disappear; assess any needed correction against the affected player states separately.
References and related help
Check the maintainer reference: BetonQuest documentation.
Before changing live data, read how to keep a completed recovery copy. For startup errors, use the log collection guide.
Match a BetonQuest quest item without accepting lookalikes
A renamed ordinary item can resemble a quest item without sharing its required identity. Test matching rules before a delivery objective accepts valuable substitutes or rejects legitimate rewards.
Check the installed content
BetonQuest expresses a quest through objectives, conditions, events and conversation links. Keep the package and player state together during testing. The linked reference describes the 2.2 documentation branch; select the corresponding documentation if your server runs another major version.
Work through the change
- Record the quest item definition and the condition or objective that checks it. Save the package and identify which properties the installed branch uses for matching.
- Prepare expendable staging examples: the legitimate item, a plain item of the same material and a renamed lookalike. Keep their quantities and creation paths recorded.
- Test the relevant item condition or delivery objective with each example using an ordinary account. Inspect the required quantity and any removal event separately from the match itself.
- If custom-item integrations are involved, verify their supported matching method in the installed release. Repeat after a restart so the outcome is not dependent on a temporary test item.
Verify the result
The legitimate item should pass, lookalikes should fail where the quest requires a distinct identity, and the intended amount should be counted or removed without touching unrelated inventory.
If the result differs
If every same-material item passes, inspect how strict the definition is rather than increasing quantity. If the legitimate item fails, compare the producing reward and matching definition before issuing replacement items.
Keep a recovery path
Restore the earlier item definition and disposable inventory checkpoint if matching is uncertain. Keep valuable player inventory outside the trial and do not delete similar items globally to enforce a quest rule.
References and related help
Check the maintainer reference: BetonQuest documentation, BetonQuest documentation.
Before changing live data, read how to keep a completed recovery copy. For startup errors, use the log collection guide.
Hide a completed quest option without hiding unrelated NPC dialogue
A completion condition should affect the intended conversation option rather than the whole NPC. Test first-time and returning players before changing the conversation entry point.
Check the installed content
BetonQuest expresses a quest through objectives, conditions, events and conversation links. Keep the package and player state together during testing. The linked reference describes the 2.2 documentation branch; select the corresponding documentation if your server runs another major version.
Work through the change
- Record the option ID and completion state that should hide it. Save the conversation and relevant condition definitions together before editing the staging copy.
- Place the documented condition on the narrow option or branch intended by the design. Keep the general greeting and unrelated dialogue paths available unless the story explicitly restricts them.
- Test an account without completion and an account with the legitimate completed state. Follow both the quest option and one unrelated dialogue branch from the same NPC.
- Complete the quest with the first account and reopen the conversation. Verify the option visibility and the fallback dialogue, including the case where no quest-specific branch is eligible.
Verify the result
New players should reach the quest option, completed players should receive appropriate returning dialogue, and unrelated NPC functions should remain available to both accounts.
If the result differs
If the entire conversation disappears, inspect conditions on its starting path. If a hidden option is still reachable elsewhere, trace every pointer to that branch instead of adding a second completion tag blindly.
Keep a recovery path
Restore the previous condition placement and conversation pointers if navigation breaks. Preserve live player completion state; a dialogue-visibility adjustment should not reset quests or remove NPC entities.
References and related help
Check the maintainer reference: BetonQuest documentation, BetonQuest documentation.
Before changing live data, read how to keep a completed recovery copy. For startup errors, use the log collection guide.
Edit BetonQuest dialogue text without renaming conversation options
Wording can be improved without changing the internal IDs that connect a conversation. Keep text editing separate from flow changes so existing references remain valid.
Check the installed content
BetonQuest expresses a quest through objectives, conditions, events and conversation links. Keep the package and player state together during testing. The linked reference describes the 2.2 documentation branch; select the corresponding documentation if your server runs another major version.
Work through the change
- Back up the conversation and record the option IDs and pointers before editing. Note any translations or external events that reference the same conversation features.
- Change only the player-facing text on staging. Keep option keys, event references and condition IDs unchanged, and follow the installed-branch quoting rules for punctuation and multiline YAML.
- Load the quest configuration and inspect the first parsing error if one appears. Walk every edited branch with an ordinary test player, including back links and the normal exit.
- Compare the edited language with any other available locale and check variable rendering. Confirm that translated text has not accidentally become a new option ID or broken pointer.
Verify the result
The conversation should retain its original routes and events while displaying the intended wording. Variables should resolve correctly and every edited option should still reach its expected next node.
If the result differs
If a branch disappears, compare its key and pointer before changing conditions. If all dialogue fails to load, inspect quoting or indentation around the first edited text rather than recreating the whole package.
Keep a recovery path
Restore the saved conversation file if a text-only edit alters navigation. Keep a diff of the wording so it can be reapplied carefully without renaming persistent or externally referenced quest features.
References and related help
Check the maintainer reference: BetonQuest documentation.
Before changing live data, read how to keep a completed recovery copy. For startup errors, use the log collection guide.
Compare BetonQuest configuration errors with player-state errors
A quest that fails for one player may have valid configuration but different stored state. Compare accounts before changing a working quest path or clearing progress.
Check the installed content
BetonQuest expresses a quest through objectives, conditions, events and conversation links. Keep the package and player state together during testing. The linked reference describes the 2.2 documentation branch; select the corresponding documentation if your server runs another major version.
Work through the change
- Record the quest package, failing interaction and first relevant log message. Preserve the package files and player storage checkpoint before making a staging reproduction.
- Load the same package on staging and inspect unresolved definitions or syntax errors. Fix a genuine load failure before interpreting differences between player accounts.
- Use one disposable account in the expected starting state and another reproducing the affected state. Compare active objectives, relevant tags and eligibility conditions through supported inspection tools.
- Run the same interaction on both accounts and trace the first differing decision. Keep a written record of state changes rather than clearing everything until the quest happens to work.
Verify the result
The comparison should identify whether the failure is shared configuration or a specific state transition. A proposed fix should pass both the originally working route and the reproduced failing route.
If the result differs
If both accounts fail identically, return to the shared definitions and event chain. If only one fails, inspect its precise condition or objective state before changing global rewards or dialogue.
Keep a recovery path
Restore the previous staging package and checkpoints if the trial introduces another fault. Any live state repair should be a separate narrow operation with a completed backup, not an undocumented full reset of the player quest history.
References and related help
Check the maintainer reference: BetonQuest documentation, BetonQuest documentation, BetonQuest documentation.
Before changing live data, read how to keep a completed recovery copy. For startup errors, use the log collection guide.
PlaceholderAPI tasks
Task guides and troubleshooting for PlaceholderAPI. Check the installed release before changing configuration or data.
Compare a PlaceholderAPI result for two different players
A balance or rank line can look correct for staff while showing another value for players. Compare the same expression with explicit player context before changing the display plugin or editing anyone’s account data.
Prepare the test
Keep the original placeholder text beside the result during diagnosis. The expansion supplies the data; the scoreboard, menu or chat plugin decides where and how to display that result.
Make the change
- Choose two connected test players with a known difference, such as different ranks. Write down the exact expression from the affected display, including its percent signs, rather than retyping a similar placeholder.
- Use the documented
papi parsecommand with each player name and the same expression. In game, commands start with a slash; the server console normally expects the command without that slash. - Compare the parsed output with the underlying permission or economy provider. If both players return the same value, check what that expression measures before assuming the provider has lost their records.
- Put the verified expression into one private menu or scoreboard line. Refresh that display using its supported method, then ask both players to observe the same line while remaining connected.
Check the result
Success means the raw parse and the visible display agree for each test identity. Keep screenshots of the two results without showing balances or ranks belonging to uninvolved players. Record which account produced each result.
If the test fails
If direct parsing works but the display differs, restore the previous display line and investigate that plugin’s audience or refresh settings. Do not replace player files or reset economy records to repair a presentation problem.
Console parsing needs a named player when the expression uses player data. A console-only or null-audience test can produce an empty result without proving that the expansion has failed.
References and related help
Check the official PlaceholderAPI documentation against your installed release before using a command or setting from another version.
- Install PlaceholderAPI expansions and fix raw placeholders
- Find Minecraft logs and send useful troubleshooting details
Test which PlaceholderAPI expressions need a player context
A scheduled announcement may run without a player even though the same text works in chat. Find which parts need an online identity before changing the whole announcement or granting more permissions.
Prepare the test
Keep the original placeholder text beside the result during diagnosis. The expansion supplies the data; the scoreboard, menu or chat plugin decides where and how to display that result.
Make the change
- Copy the announcement into a private note and separate fixed text from each expression. Pick one known server-wide value and one player-specific value to avoid debugging a long mixed message.
- Parse the server-wide expression with the documented
--nullcontext. Parse the player expression with an explicit connected test player. Compare results without broadcasting the message to everyone online. - Check how the announcement plugin supplies context to PlaceholderAPI. A global timer cannot infer whose balance or rank you meant; choose a server-wide expression or a genuinely per-player delivery feature.
- Update one announcement only, preserving its previous text and schedule. Observe a scheduled run and a manually triggered run because a manual command may have a sender that the timer lacks.
Check the result
The scheduled output should contain a sensible value without exposing one player’s data to the server. Verify a later timer run rather than treating an administrator’s immediate preview as the complete test.
If the test fails
Restore the previous announcement if the scheduled path remains blank. Gather the exact expression, parser context and announcement plugin version, then investigate the integration instead of downloading unrelated expansions or changing player records.
Keep private values out of global messages. A successful named-player parse demonstrates that one player’s data resolves; it does not make that value appropriate for a public scheduled announcement.
References and related help
Check the official PlaceholderAPI documentation against your installed release before using a command or setting from another version.
- Install PlaceholderAPI expansions and fix raw placeholders
- Find Minecraft logs and send useful troubleshooting details
Identify a built-in PlaceholderAPI expansion before downloading another
Some plugins register their own expressions with PlaceholderAPI. Downloading a similarly named expansion can add confusion without repairing the original integration. Identify who owns the expression and what is already registered.
Prepare the test
Keep the original placeholder text beside the result during diagnosis. The expansion supplies the data; the scoreboard, menu or chat plugin decides where and how to display that result.
Make the change
- Find the affected expression in its author’s documentation. Note whether the author describes an eCloud download or a built-in integration, and record the exact identifier before changing the server.
- Compare
papi listwith the installed list shown bypapi ecloud list installed. The registered list can include integrations supplied by another plugin, so a difference between these lists is not itself an error. - Check the startup log for the owning plugin and its integration registration. A plugin that failed earlier may leave its expressions unavailable even though PlaceholderAPI itself started without a warning.
- Follow the owner’s documented dependency route on a staging copy. Add an eCloud expansion only when the documentation calls for it; otherwise repair the owning plugin’s actual startup failure.
Check the result
The intended identifier should register once and produce a value in a direct parse for a connected test account. Check the consuming display afterwards, since its configuration can still contain a misspelled expression.
If the test fails
If an added expansion did not help, remove only that test addition through the supported management method after recording its filename. Preserve the owning plugin’s data and previous expansion set while you investigate the first startup error.
A download catalogue and an active registry answer different questions. Use both as evidence, and avoid treating an absent eCloud entry as proof that a built-in integration is missing.
References and related help
Check the official PlaceholderAPI documentation against your installed release before using a command or setting from another version.
- Install PlaceholderAPI expansions and fix raw placeholders
- Find Minecraft logs and send useful troubleshooting details
Pin one PlaceholderAPI expansion update for a staging test
An expansion update can change an expression’s output while the menu or scoreboard stays the same. Test one expansion release against recorded values before replacing several integrations during the same maintenance window.
Prepare the test
Keep the original placeholder text beside the result during diagnosis. The expansion supplies the data; the scoreboard, menu or chat plugin decides where and how to display that result.
Make the change
- List the target expansion’s information and note its current version. Save its original jar and any related settings, then make a staging copy with separate credentials for external integrations.
- Use
papi ecloud infowith the expansion name and requested version to check the release details. The documented download command accepts a version argument; confirm that release exists before selecting it. - Download only the selected release on the test server and follow PlaceholderAPI’s documented registration or reload procedure. Do not use a general server reload to substitute for a plugin’s supported update path.
- Parse a small recorded set of expressions: a populated value, an empty value and a player with different permissions. Compare formatting, number types and error messages before testing the consuming display.
Check the result
Approve the update when the expressions retain the meaning your displays expect and the log shows no repeated registration failures. Record the tested expansion version beside the server and provider versions for the next update.
If the test fails
If output changes break a display, restore the previous expansion jar and matching settings using a controlled stop and start where appropriate. Keep the new file separately for investigation rather than repeatedly swapping versions during live play.
Treat an expansion and its data provider as a pair. A newer expansion cannot make an unsupported provider version compatible, and a successful download does not prove that the integration works.
References and related help
Check the official PlaceholderAPI documentation against your installed release before using a command or setting from another version.
- Install PlaceholderAPI expansions and fix raw placeholders
- Find Minecraft logs and send useful troubleshooting details
Check a relational PlaceholderAPI value in both directions
A relationship expression can produce different output depending on who views whom. Friendship, faction or visibility displays need a deliberate viewer-and-target test rather than a single ordinary player placeholder check.
Prepare the test
Keep the original placeholder text beside the result during diagnosis. The expansion supplies the data; the scoreboard, menu or chat plugin decides where and how to display that result.
Make the change
- Choose two consenting test accounts and write down the relationship you expect each to see. Use a harmless pair with no private staff information, and copy the exact relational expression from its documentation.
- Use the documented
papi parserelcommand with the first player as the viewer and the second as the comparison target. Repeat with the names reversed while keeping the same expression text. - Compare those results with the provider’s own relationship state. If the output differs by direction, determine whether that is expected before changing groups, teams or protection membership.
- Test one display that explicitly supports relational placeholders. Ask both accounts to view each other, and inspect whether the integration supplies both identities rather than parsing a normal single-player string.
Check the result
Both viewers should receive the value their relationship permits, with no leakage of hidden staff or team status. Capture the input order with each result so a later support report does not reverse the evidence.
If the test fails
If direct relational parsing succeeds but the display stays raw, restore the old display text and check that integration’s documented support. Do not replace relational syntax with a guess or grant the viewers elevated permissions to hide the symptom.
A successful ordinary parse does not test the second identity. Keep viewer, target and provider relationship state together in your notes when comparing behaviour after a plugin update.
References and related help
Check the official PlaceholderAPI documentation against your installed release before using a command or setting from another version.
- Install PlaceholderAPI expansions and fix raw placeholders
- Find Minecraft logs and send useful troubleshooting details
Remove an unused PlaceholderAPI expansion without breaking displays
An expansion that looks unused in chat may still supply a shop menu, hologram or staff scoreboard. Build a reference list before retiring it so the cleanup does not leave raw tokens in player-facing text.
Prepare the test
Keep the original placeholder text beside the result during diagnosis. The expansion supplies the data; the scoreboard, menu or chat plugin decides where and how to display that result.
Make the change
- Record the expansion’s exact identifier and current jar filename. Search your text configurations for its expression prefix, including disabled menu files and scheduled announcements that run less often than normal gameplay.
- Map every match to its owning display or command. Decide whether to remove that line, replace its value, or retain the expansion; do not assume that an infrequently opened staff menu is irrelevant.
- On a test copy, use the documented unregister operation with the precise expansion filename when that operation applies. Keep the jar outside the active expansions folder so a restart cannot silently register it again.
- Open the affected menus and inspect each listed scoreboard, hologram and announcement. Check an ordinary player and a staff account, including conditional displays that become visible only after a requirement succeeds.
Check the result
Cleanup succeeds when no active configuration depends on the retired identifier and normal displays contain no raw expressions. Restart the test server once to confirm that the remaining registry and displays still agree.
If the test fails
Restore the saved expansion file and supported registration state if a missed dependency appears. Repair the reference list before retrying removal; keep the rollback local to this expansion rather than replacing the whole PlaceholderAPI directory.
Built-in registrations belong to their owning plugin rather than a standalone downloaded file. Do not remove another plugin merely because its integration appears in the registered expansion list.
References and related help
Check the official PlaceholderAPI documentation against your installed release before using a command or setting from another version.
- Install PlaceholderAPI expansions and fix raw placeholders
- Find Minecraft logs and send useful troubleshooting details
Reduce repeated PlaceholderAPI work in a busy scoreboard
A scoreboard can request many values every refresh even when most values rarely change. Measure the display workload before blaming PlaceholderAPI for all server lag or increasing refresh speed to chase stale-looking output.
Prepare the test
Keep the original placeholder text beside the result during diagnosis. The expansion supplies the data; the scoreboard, menu or chat plugin decides where and how to display that result.
Make the change
- Create a quiet test window and record the scoreboard’s configured refresh intervals and expressions. Separate fast-changing values, such as a timer, from slow-changing values, such as a rank name or total playtime.
- Use a server performance report to identify whether the provider or display appears in the expensive work. Keep the same player count and avoid generating terrain during the comparison so unrelated load does not dominate.
- Copy the scoreboard and lengthen the display plugin’s documented interval for the slow-changing lines. Remove one optional expensive expression at a time; do not invent a universal PlaceholderAPI interval setting.
- Compare the new report and visible update delay with the baseline. Test after a real rank or balance change so you can judge the delay players experience rather than only observing unchanged values.
Check the result
Keep a change when the display remains understandable and measured work falls under comparable conditions. Record the interval, affected expressions and expected delay so another administrator does not reverse the change as a suspected fault.
If the test fails
Restore the previous scoreboard interval if the delayed information harms gameplay. If the provider still performs expensive queries, investigate that integration with its author using a redacted profile rather than stripping unrelated expressions from every display.
The consuming plugin controls many refresh decisions. Use the CloudExa lag guide for evidence collection, and keep provider version, player count and test duration consistent when comparing results.
References and related help
Check the official PlaceholderAPI documentation against your installed release before using a command or setting from another version.
- Install PlaceholderAPI expansions and fix raw placeholders
- Find Minecraft logs and send useful troubleshooting details
Share a useful PlaceholderAPI support report without player data
A useful report shows which expression failed, which player context you supplied and whether the provider started. A large unreviewed log can disclose player names, network addresses or integration details that support does not need.
Prepare the test
Keep the original placeholder text beside the result during diagnosis. The expansion supplies the data; the scoreboard, menu or chat plugin decides where and how to display that result.
Make the change
- Record the server build, PlaceholderAPI version, provider version and affected display plugin. Keep the exact expression in a private note and reproduce the failure with a disposable test identity where the provider permits it.
- Capture a direct parse result and the corresponding startup registration messages. Include the first relevant error and its surrounding cause chain, rather than sending hundreds of repeated follow-up exceptions.
- If you use
papi dump, understand that it uploads environment information to a paste service. Review what the report contains and use a private support route when it includes information you do not want public. - Attach a short reproduction sequence and the expected result. State whether the failure affects one account, all accounts, console-only output or only a particular display; those distinctions narrow the integration path.
Check the result
A reviewer should be able to identify the failing layer from your report without receiving passwords, account balances or a full unredacted player list. Confirm the shared link is the intended report before submitting the ticket.
If the test fails
If a report exposed a secret, restrict or remove access where the service allows it and rotate that secret through its owner. Do not regenerate repeated public dumps as a substitute for collecting a smaller redacted example.
CloudExa support can inspect your hosting service, but the plugin maintainer may need the same version and parse evidence for an upstream bug. Keep that evidence independent of customer credentials.
References and related help
Check the official PlaceholderAPI documentation against your installed release before using a command or setting from another version.
- Install PlaceholderAPI expansions and fix raw placeholders
- Find Minecraft logs and send useful troubleshooting details
MiniPlaceholders tasks
Task guides and troubleshooting for MiniPlaceholders. Check the installed release before changing configuration or data.
Compare MiniPlaceholders output with and without an audience
A tag that works for a player can remain unresolved in a console message. Test the audience explicitly before replacing the tag or adding another expansion to the server.
Prepare the test
Choose the correct execution platform before testing a tag. A proxy and a backend can have different expansions, audiences and permissions even when the same player appears on both.
Make the change
- Copy one failing tag and one global tag from their expansion documentation. Keep the surrounding message short so formatting and nested tags do not hide which part failed.
- Use
miniplaceholders parsewith a connected player, then repeat with--null. On Velocity use the documentedvminiplaceholderscommand family instead of assuming a backend command reaches the proxy. - Check whether your destination supplies a player audience. A server-wide console announcement may need global data, while a per-player join message can resolve information about its recipient.
- Change one destination line and test it through its actual delivery route. A preview command with a sender can supply context that a scheduled or console-triggered message lacks.
Check the result
The global test should resolve global values; the named-player test should resolve values belonging to that identity. Observe a real scheduled or console-triggered delivery before treating a manual preview as proof.
If the test fails
If the destination cannot provide the required audience, restore its prior text and use a documented global alternative. Do not expose one chosen player’s private values in a message intended for everyone.
Keep the command context and the destination context in your notes. They can differ even when the same tag appears in both strings.
References and related help
Check the official MiniPlaceholders documentation against your installed release before using a command or setting from another version.
- Use MiniPlaceholders with a compatible Minecraft text plugin
- Find Minecraft logs and send useful troubleshooting details
Find a missing MiniPlaceholders expansion on the correct server
A backend can show the right expansion while the proxy still lacks it. Identify where the message renders before reinstalling files or comparing expansion lists from unrelated server consoles.
Prepare the test
Choose the correct execution platform before testing a tag. A proxy and a backend can have different expansions, audiences and permissions even when the same player appears on both.
Make the change
- Find the plugin that owns the affected message and establish whether it runs on Paper, another supported backend platform, or Velocity. Record that instance beside the exact tag.
- Run the documented expansions subcommand on that instance. Compare the listed identifiers with the expansion documentation, including spelling and any dependencies required by its current release.
- Check startup messages for the expansion and its data provider on the same instance. An expansion jar on a different server does not make the integration available here.
- Add or repair only the required integration on a test copy, using its supported platform artifact. Start the test instance cleanly, list expansions again, and parse a small example before restoring the full message.
Check the result
The relevant registry should contain the intended expansion, and a direct parse should produce the expected value on the renderer’s own instance. Check the visible message afterwards with an ordinary account.
If the test fails
If the integration will not register, restore the previous artifact set and investigate its first startup error. Keep proxy and backend files separate; copying every jar to both instances can introduce unsupported deployments.
Use the expansion author’s compatibility guidance rather than treating similarly named PlaceholderAPI and MiniPlaceholders downloads as interchangeable.
References and related help
Check the official MiniPlaceholders documentation against your installed release before using a command or setting from another version.
- Use MiniPlaceholders with a compatible Minecraft text plugin
- Find Minecraft logs and send useful troubleshooting details
Check a MiniPlaceholders relational tag from two viewpoints
Player relationships can depend on who views the message. A single parse for one account cannot establish that the second account will see the intended relationship or visibility state.
Prepare the test
Choose the correct execution platform before testing a tag. A proxy and a backend can have different expansions, audiences and permissions even when the same player appears on both.
Make the change
- Choose two test accounts with a known relationship and a harmless sample value. Record which account acts as viewer and which acts as target before issuing any comparison.
- Use the documented relational parsing command for the installed platform. Consult its help for argument order, then run the same tag with the two identities in opposite positions.
- Compare both outputs with the relationship provider. Keep a normal parse result separately so you can distinguish a missing expansion from a destination that supplies only one identity.
- Put the tested tag into one destination documented to support relational placeholders. Ask each player to view the other through the actual feature rather than relying on an administrator’s preview.
Check the result
Both directions should follow the provider’s relationship rules and the intended visibility policy. Record the viewer, target and result together; an unlabeled screenshot can reverse the meaning of the test.
If the test fails
If only the destination fails, return it to the previous text and check its relational support. Do not grant additional staff permissions or change friendship or team data simply to make a display look correct.
Private team or vanish information deserves a separate ordinary-player check before a public rollout.
References and related help
Check the official MiniPlaceholders documentation against your installed release before using a command or setting from another version.
- Use MiniPlaceholders with a compatible Minecraft text plugin
- Find Minecraft logs and send useful troubleshooting details
Choose MiniPlaceholders or percent-style placeholders for one field
A plugin can support MiniMessage formatting without automatically supporting every placeholder system. Check the exact field’s integration documentation before converting all of its text to another syntax.
Prepare the test
Choose the correct execution platform before testing a tag. A proxy and a backend can have different expansions, audiences and permissions even when the same player appears on both.
Make the change
- Copy the original field into a local note. Separate formatting tags, MiniPlaceholders tags and percent-style expressions so you can identify which parser should handle each part.
- Check the destination plugin’s documented support and required integrations. Verify its own version and the platform where it runs before interpreting a raw tag as a missing expansion.
- Test one supported value with minimal formatting in a private copy of that field. Compare a direct MiniPlaceholders parse with the destination output, keeping the same test player context.
- Add formatting back in small steps after the value resolves. If the plugin offers different configuration paths for different parsers, select one documented route instead of nesting syntax by guesswork.
Check the result
The destination should show the intended value and formatting without literal tags or percent tokens. Test both a populated result and an empty result because an empty string can conceal a parsing failure.
If the test fails
Restore the original field when the destination does not support the chosen system. Use its supported integration or ask the maintainer about that exact field rather than replacing the whole text stack.
Keep player-entered text outside any path that treats it as trusted formatting or command content.
References and related help
Check the official MiniPlaceholders documentation against your installed release before using a command or setting from another version.
- Use MiniPlaceholders with a compatible Minecraft text plugin
- Find Minecraft logs and send useful troubleshooting details
Verify a MiniPlaceholders tag after a server transfer
A player can switch backend servers while a proxy display remains active. Compare the value at each stage to determine whether the display, expansion or provider still refers to the old location.
Prepare the test
Choose the correct execution platform before testing a tag. A proxy and a backend can have different expansions, audiences and permissions even when the same player appears on both.
Make the change
- Choose a test account and a tag whose value should change between two test backends. Record the expected value on each server and avoid changing unrelated display settings during the trial.
- Parse the tag on the renderer’s instance before the switch. Transfer the player using your normal supported route, then repeat the parse and capture the visible display after its documented refresh interval.
- Compare the provider’s own current server or state with the parse output. If parsing has updated but the display has not, inspect the display’s refresh or cache behaviour.
- Adjust only a documented refresh control on a staging copy. Repeat the transfer in both directions and include a disconnect and rejoin to separate transfer-specific state from initial login behaviour.
Check the result
The displayed value should match the player’s current context within the delay you accept. Record that delay instead of assuming every integration updates in the same tick as the transfer.
If the test fails
If the change introduces excessive refresh work or inconsistent values, restore the previous interval and collect the parse-versus-display timeline for the relevant maintainer. Do not reset player identity data to repair a cached label.
Backend permission checks and proxy permission checks may differ; compare the same audience on the instance that owns the display.
References and related help
Check the official MiniPlaceholders documentation against your installed release before using a command or setting from another version.
- Use MiniPlaceholders with a compatible Minecraft text plugin
- Find Minecraft logs and send useful troubleshooting details
Diagnose a MiniPlaceholders tag that breaks only for one rank
A tag can fail for one rank while remaining correct for staff. Compare the provider’s data and the destination’s access checks before changing rank inheritance or granting broad permissions.
Prepare the test
Choose the correct execution platform before testing a tag. A proxy and a backend can have different expansions, audiences and permissions even when the same player appears on both.
Make the change
- Pick two ordinary test accounts with different intended ranks. Copy the exact tag and record whether each account can use the destination feature independently of the tag’s output.
- Parse the tag with each named audience through the installed platform’s documented command. Compare the result with the data provider’s own rank or metadata value for the same account.
- Check the destination plugin’s permission requirements separately. A denied menu opening and an unresolved text value are different failures, even when the player reports them together.
- Apply the smallest documented permission or metadata correction to the test rank. Repeat the named-audience parse and actual destination test without operator status or a wildcard permission.
Check the result
Both accounts should receive the values and access their roles permit. Confirm that the restricted account still cannot use administrative features after the display starts working.
If the test fails
Remove the temporary test permission if it did not address the failing layer. Restore the previous metadata value if the correction affected another feature, and preserve the comparison results for support.
An administrator preview can bypass destination restrictions. Keep ordinary-player evidence in the final test notes rather than relying on a staff screenshot.
References and related help
Check the official MiniPlaceholders documentation against your installed release before using a command or setting from another version.
- Use MiniPlaceholders with a compatible Minecraft text plugin
- Create Minecraft ranks and inheritance with LuckPerms
DeluxeMenus tasks
Task guides and troubleshooting for DeluxeMenus. Check the installed release before changing configuration or data.
Restrict one DeluxeMenus button without hiding the entire menu
A player may need to see an upgrade button while lacking permission to use it. Decide whether your rule controls visibility, execution or both before adding requirements to the menu.
Prepare the test
Work on a copy of one menu while the existing player route remains available. Use ordinary test accounts to check requirements; an administrator can bypass checks that affect your players.
Make the change
Check the result
The item should appear and respond according to the written rule for both accounts. Confirm that nearby unrestricted buttons still work and that a denied click does not consume money or items.
If the test fails
Restore the copied item’s original requirements if unrelated buttons disappear or legitimate actions fail. Correct the requirement level before touching the permission provider or granting a broad menu bypass.
Keep access checks on the action that spends currency or grants a reward. Visibility alone does not establish that an executable action is authorised.
References and related help
Check the official DeluxeMenus documentation against your installed release before using a command or setting from another version.
Choose player or console execution for a DeluxeMenus action
Prepare the test
Work on a copy of one menu while the existing player route remains available. Use ordinary test accounts to check requirements; an administrator can bypass checks that affect your players.
Make the change
- Identify the exact command and its owner. Test that command as an ordinary account outside the menu and record the minimum permissions and arguments it requires.
- Check the action prefix in the copied item. The documented player action uses the clicker’s permissions, while the console action uses server authority; choose the identity the feature actually needs.
- Keep player-controlled arguments out of privileged command strings. Use a fixed test action first and review whether any supplied player name or value could change the command’s meaning.
- Test the copied button with an allowed and a denied account. Include a malformed or missing argument where the menu accepts input, and verify that rejection happens before the privileged action.
Check the result
The intended account should receive only the planned result. Inspect the relevant plugin state or audit record as well as the menu message, since a success message alone cannot prove correct execution.
If the test fails
Revert the action prefix and temporarily close the copied route if a denied account can trigger the command. Remove any unintended test grant through its owning plugin and keep the menu evidence for review.
A console action deserves a fixed, permission-checked workflow. Do not turn a general command launcher into a player-facing console bridge.
References and related help
Check the official DeluxeMenus documentation against your installed release before using a command or setting from another version.
- Build a safe starter menu with DeluxeMenus
- Find Minecraft logs and send useful troubleshooting details
Fix a DeluxeMenus item missing from a specific slot
A blank slot can result from a hidden item rather than an invalid material. Isolate the slot and the viewer conditions before changing the menu size or replacing its whole item section.
Prepare the test
Work on a copy of one menu while the existing player route remains available. Use ordinary test accounts to check requirements; an administrator can bypass checks that affect your players.
Make the change
Check the result
The slot should show the intended item for each viewer condition without covering a different button. Test all configured menu pages that reuse the same slot number before approving the change.
If the test fails
Restore the original item section if the simplified test still fails and inspect the first menu parsing error. Keep the working public menu intact; deleting other items can hide the collision without explaining it.
A conditionally hidden item can be correct behaviour. Write down which account should see which version so future changes preserve the intended selection.
References and related help
Check the official DeluxeMenus documentation against your installed release before using a command or setting from another version.
- Build a safe starter menu with DeluxeMenus
- Find Minecraft logs and send useful troubleshooting details
Prevent a DeluxeMenus open command from conflicting with another plugin
Prepare the test
Work on a copy of one menu while the existing player route remains available. Use ordinary test accounts to check requirements; an administrator can bypass checks that affect your players.
Make the change
Check the result
The new command should reach the intended menu without invoking another plugin. Confirm that both allowed and denied players receive the intended access result and that unrelated commands retain their previous behaviour.
If the test fails
If registration fails, restore the previous open command and collect the startup or refresh error. Do not disable a working unrelated plugin simply to free a command name; choose a documented non-conflicting route.
Command names, permissions and menu identifiers serve different purposes. Changing one does not automatically update references to the others.
References and related help
Check the official DeluxeMenus documentation against your installed release before using a command or setting from another version.
- Build a safe starter menu with DeluxeMenus
- Find Minecraft logs and send useful troubleshooting details
Trace a DeluxeMenus placeholder before changing a purchase requirement
A purchase denial can result from raw text where the requirement expects a number. Trace the displayed and compared values before adjusting prices or adding money to a player’s account.
Prepare the test
Work on a copy of one menu while the existing player route remains available. Use ordinary test accounts to check requirements; an administrator can bypass checks that affect your players.
Make the change
- Copy the purchase item and record its price, requirement type, compared expression and provider. Keep the rewarding action disabled in the diagnostic copy to avoid accidental test purchases.
- Parse the expression directly for a connected test player using the provider’s supported diagnostic route. Check whether the result contains currency symbols, separators or an empty string instead of a plain numeric value.
- Compare the requirement with the installed DeluxeMenus documentation. Choose a documented comparator and a provider value with the expected type; do not silently convert an unknown string into zero.
- Test balances below, equal to and above the price on disposable accounts. Re-enable the test action only after the requirement and denial message agree with those boundary cases.
Check the result
The purchase should reject insufficient funds and accept the intended boundary value without granting a reward twice. Confirm the account balance and delivered result independently of the menu’s message.
If the test fails
Restore the previous requirement if parsing remains uncertain and close the test purchase route. Do not compensate by granting bypass permissions or editing production balances; fix the provider or expression first.
Keep the displayed price and the enforced requirement in the same test notes. A correct label can still advertise a different price from the action.
References and related help
Check the official DeluxeMenus documentation against your installed release before using a command or setting from another version.
- Build a safe starter menu with DeluxeMenus
- Find Minecraft logs and send useful troubleshooting details
Check left and right click actions separately in DeluxeMenus
Prepare the test
Work on a copy of one menu while the existing player route remains available. Use ordinary test accounts to check requirements; an administrator can bypass checks that affect your players.
Make the change
- Copy the item definition and list its configured click command and requirement sections. Include shift-click variants and any fallback action documented for the installed release.
- Write the intended result for each defined click type. Leave undefined actions harmless and ensure that a requirement belongs to the corresponding command path rather than a different click section.
- Test each action with an ordinary allowed account and a denied account. Use disposable balances or items when the button changes state, and inspect the owning plugin’s records after each click.
- Repeat a short sequence of different clicks without closing the copied menu. Check whether a result updates immediately and whether a second click can repeat an action that should no longer be available.
Check the result
Each defined click should produce its own intended result and enforce the same required policy. Compare before-and-after balances, inventory or permissions rather than counting displayed success messages.
If the test fails
Restore the item’s previous action sections if a path bypasses the rule, and withdraw the copied menu’s opening route while fixing it. Reverse only the disposable test changes through their owning plugins.
Hide or disable a risky action until its state change is understood. A player’s normal clicking pattern is not a reliable access-control boundary.
References and related help
Check the official DeluxeMenus documentation against your installed release before using a command or setting from another version.
Tune a DeluxeMenus refresh interval for changing display values
Prepare the test
Work on a copy of one menu while the existing player route remains available. Use ordinary test accounts to check requirements; an administrator can bypass checks that affect your players.
Make the change
- Record the copied menu’s update interval and all values that change while it stays open. Separate a live countdown from a rank label that rarely changes during a session.
- Check the current GUI documentation for the update control and its unit before editing it. Keep a screenshot and saved configuration of the existing behaviour for comparison.
- Change the interval for the one copied screen, then alter a harmless test value while an ordinary account keeps the menu open. Measure the visible delay instead of judging an unchanged display.
- Compare server performance under a similar number of viewers. If one costly expression dominates, simplify that line or its provider query rather than shortening every menu’s interval.
Check the result
Keep an interval that updates the important value within an acceptable delay without introducing repeated errors or measurable excess work. Test reopening the menu as well as leaving it open during the change.
If the test fails
Restore the old interval if performance worsens or the menu stops updating reliably. Preserve the provider and viewer-count notes for further diagnosis; repeated general reloads make the comparison harder to interpret.
The fastest visible refresh is not automatically the right choice. Tie the interval to the information players need while that particular screen remains open.
References and related help
Check the official DeluxeMenus documentation against your installed release before using a command or setting from another version.
- Build a safe starter menu with DeluxeMenus
- Find Minecraft logs and send useful troubleshooting details
Repair one DeluxeMenus YAML edit while preserving the working menu
A quoting or indentation mistake can prevent a menu from loading after a small edit. Preserve the failing file as evidence and use the last working copy to identify the actual difference.
Prepare the test
Work on a copy of one menu while the existing player route remains available. Use ordinary test accounts to check requirements; an administrator can bypass checks that affect your players.
Make the change
- Find the first relevant DeluxeMenus parsing error in the console or log. Record the filename and indicated location, but inspect the preceding lines too because an unclosed quote can move the reported error.
- Open the copied file in a text editor that shows indentation. Compare the changed section with the working version, including list markers, quotation marks and any colon inside a text value.
- Fix one structural difference in the copied menu and use the plugin’s documented refresh route. Check whether the error disappears before changing item materials, permissions or unrelated placeholders.
- Open the repaired menu as an ordinary player and test the changed item. Keep the prior public copy available until opening, visibility and the defined click action all pass.
Check the result
If the test fails
If the error remains, restore the last working menu and attach a redacted minimal section to support. Do not replace the entire DeluxeMenus folder with newly generated defaults or discard unrelated menu files.
Keep secrets out of online syntax checkers. A local editor can show indentation and quoting without publishing private command arguments or integration details.
References and related help
Check the official DeluxeMenus documentation against your installed release before using a command or setting from another version.
- Build a safe starter menu with DeluxeMenus
- Find Minecraft logs and send useful troubleshooting details
DecentHolograms tasks
Task guides and troubleshooting for DecentHolograms. Check the installed release before changing configuration or data.
Move a DecentHolograms display without losing its text
A display in the wrong position needs a location correction, not a fresh recreation. Preserve its identity and content so references, permissions and line settings survive the move.
Prepare the test
Record the hologram name, world and location before editing. Match the command family to the installed release because newer display commands and older hologram commands can differ.
Make the change
- Record the display name, source world and coordinates through the installed release’s information commands. Save its text and settings or take a completed configuration backup before moving the public version.
- Create a uniquely named test copy using the supported clone operation. Check that the copy contains the same lines before editing its position; keep the public original in place during this trial.
- Use the matching command family’s move or move-here operation in the destination world. Check height, direction and nearby blocks with an ordinary viewer instead of deciding from the editor’s position alone.
- Walk away and return through the normal player route. Confirm that the world and location still match, then apply the verified relocation to the intended public display during a quiet window.
Check the result
The display should appear at the new position with the same text and visibility policy. Test a reconnect and check any menu, NPC or script that refers to its existing name.
If the test fails
If the location is wrong, move the display back using the recorded world and coordinates. Keep the clone as a diagnostic copy until the public display passes; do not delete and recreate the original to correct an offset.
Newer releases include display commands alongside older hologram operations. Choose the documented command for the object you already have rather than mixing syntax from different tutorials.
References and related help
Check the official DecentHolograms documentation against your installed release before using a command or setting from another version.
- Create a DecentHolograms display and check player visibility
- Find Minecraft logs and send useful troubleshooting details
Fix one stale PlaceholderAPI value in a DecentHolograms line
A hologram can keep an old balance or rank label while the underlying provider has already updated. Compare those layers with one test line instead of rebuilding the whole display.
Prepare the test
Record the hologram name, world and location before editing. Match the command family to the installed release because newer display commands and older hologram commands can differ.
Make the change
- Copy the affected line and record its exact placeholder and the intended viewer. Check that the integration supports the placeholder system and context required by that expression.
- Parse the expression directly for the same connected test account. If the raw parse is already wrong, investigate the expansion or provider before altering the hologram update interval.
- Create one private test line with fixed text around the expression. Inspect the documented update range and interval controls for the installed display type, recording their units before a change.
- Change a harmless provider value and observe the display from near and far. Compare the visible delay with the configured range and interval, then repeat after the player reconnects.
Check the result
The line should update within the chosen interval while an eligible viewer is in range. Confirm that other lines retain their formatting and that repeated update exceptions do not appear in the log.
If the test fails
Restore the prior range or interval when the trial adds load or fails to update. Keep the direct parse evidence for the integration author instead of resetting balances or removing the display’s stored data.
A global hologram may not supply the same audience as a player-specific display. Check that context before interpreting an empty value as a refresh failure.
References and related help
Check the official DecentHolograms documentation against your installed release before using a command or setting from another version.
- Create a DecentHolograms display and check player visibility
- Find Minecraft logs and send useful troubleshooting details
Limit a DecentHolograms display range for a crowded spawn
A spawn full of displays can reach players who are far beyond reading distance. Test a bounded range on one display while preserving the route players use to approach it.
Prepare the test
Record the hologram name, world and location before editing. Match the command family to the installed release because newer display commands and older hologram commands can differ.
Make the change
- Map where the display first becomes useful to an ordinary visitor. Record the current display range and update range separately, because rendering visibility and refreshing values may have different controls.
- Use the installed release’s documented range operation on a test copy. Choose a distance that covers the approach path and avoid changing several crowded spawn displays in the same comparison.
- Walk toward and away from the copy with a normal account. Check the boundary from more than one direction and include any raised path or nearby portal that changes the practical viewing distance.
- Compare the server profile and visible behaviour under similar player activity. Check a changing placeholder near the boundary so a readable display does not retain an out-of-date value.
Check the result
The display should appear before players need to read it and stop rendering outside the planned area. Keep a note of the selected values and the approach routes used for the trial.
If the test fails
Restore the previous range if visitors lose necessary directions or values stop refreshing at readable distance. Adjust this display’s bounds before applying the same value to every hologram across different worlds.
A shorter range is a design decision as well as a performance decision. Essential safety or navigation text needs a wider test than an optional decorative label.
References and related help
Check the official DecentHolograms documentation against your installed release before using a command or setting from another version.
- Create a DecentHolograms display and check player visibility
- Find Minecraft logs and send useful troubleshooting details
Reorder DecentHolograms lines without changing their contents
Changing the order of a display can disturb a line’s formatting or conditions when an administrator rebuilds it by copying text. Preserve the existing content and test the installed line operations instead.
Prepare the test
Record the hologram name, world and location before editing. Match the command family to the installed release because newer display commands and older hologram commands can differ.
Make the change
- Record each line in its current order and note any line-specific permission, spacing or alignment. Use a numbered local list so a later screenshot does not leave the original order ambiguous.
- Clone the display into a private test location and check the supported swap or line-edit commands for its command family. Do not assume that a command for a newer display object accepts an older hologram.
- Move only the two intended lines and inspect the result with an ordinary viewer. Check whether formatting and permissions remain attached to the intended text after the operation.
- Repeat from another viewing angle and test any dynamic value on the moved lines. Apply the verified change to the public object only after the copied display preserves its complete meaning.
Check the result
The display should present the intended reading order without changing text, visibility or update behaviour. Compare the numbered record with the final state and keep the original order in the maintenance note.
If the test fails
Reverse the swap using the saved order if a line setting moved unexpectedly. Restore the saved display configuration when needed, preserving its identity rather than deleting the original and rebuilding all lines by hand.
Line numbering can differ between command families and releases. Confirm the help output on a harmless copy before editing the public sign.
References and related help
Check the official DecentHolograms documentation against your installed release before using a command or setting from another version.
- Create a DecentHolograms display and check player visibility
- Find Minecraft logs and send useful troubleshooting details
Restrict a DecentHolograms information line to the intended viewers
A staff information line can reveal data even when the rest of a hologram is public. Decide whether the restriction applies to the whole object or one line before assigning its permission.
Prepare the test
Record the hologram name, world and location before editing. Match the command family to the installed release because newer display commands and older hologram commands can differ.
Make the change
- Copy the display into a private test area and replace sensitive data with fixed example text. Record the intended allowed group and a public account that must not see the restricted content.
- Check the installed release’s documented object and line permission operations. Set the restriction at the intended level, using a specific permission node rather than granting editing or administrative access.
- Test the allowed and denied viewers at the same location. Include a reconnect and a group change through your normal permissions workflow to see whether the display updates its audience.
- Check the remaining public lines and any hover or click behaviour. A hidden text line does not automatically establish that every related action or external destination follows the same policy.
Check the result
Only the intended viewer should see the example restricted content while public navigation remains available. Replace the example with real data only after the denied account’s result is clear.
If the test fails
If a public account sees the line, remove the sensitive value from the public object first and restore the prior permission settings. Investigate inheritance and object-level visibility on the test copy before trying another rollout.
Do not use the editor’s view as the access test. Administrators can have bypasses that ordinary accounts lack.
References and related help
Check the official DecentHolograms documentation against your installed release before using a command or setting from another version.
- Create a DecentHolograms display and check player visibility
- Create Minecraft ranks and inheritance with LuckPerms
Check DecentHolograms persistence before a planned restart
A display that returns to old text after a restart may not have saved the change where you expected. Test one known object and collect evidence before editing files while the server runs.
Prepare the test
Record the hologram name, world and location before editing. Match the command family to the installed release because newer display commands and older hologram commands can differ.
Make the change
- Record the display’s name, type, world, coordinates and a harmless changed line. Save a completed backup of its configuration through the game panel before the maintenance window.
- Follow the installed release’s documented editing and persistence workflow. Keep the server log from the edit through a normal shutdown, looking for file access or save errors rather than repeated renderer messages.
- Start the server using its normal panel control and compare the same object before issuing any corrective commands. Check the actual configuration copy if multiple plugin directories or old deployment files exist.
- Test the display with an ordinary viewer after the startup completes. Compare text, location, permissions and dynamic values so a visually present object does not conceal missing settings.
Check the result
The recorded edit should survive a clean stop and start without manual recreation. Keep the log timestamps and file location in the change record for the next maintenance window.
If the test fails
If the edit disappears, preserve both versions of the configuration and restore the known working state through a controlled stop. Check ownership, writable storage and the correct instance instead of repeatedly recreating the public display.
The game panel file screenshot shows where to inspect server files; it does not show a DecentHolograms editing interface.
References and related help
Check the official DecentHolograms documentation against your installed release before using a command or setting from another version.
- Create a DecentHolograms display and check player visibility
- Find Minecraft logs and send useful troubleshooting details
FancyHolograms tasks
Task guides and troubleshooting for FancyHolograms. Check the installed release before changing configuration or data.
Change FancyHolograms visibility without granting editing access
A private display needs a viewer rule rather than an administrator permission. Test with example text before placing staff-only information in a hologram that players can approach.
Prepare the test
Use a uniquely named test display away from busy player paths. Keep an administrator available, but make visibility and readability decisions from a separate ordinary player account.
Make the change
- Copy the object into a test location and record its current visibility mode. Choose one ordinary allowed account and one denied account with no operator or editing privileges.
- Check the installed hologram command help and select the documented permission-based visibility mode. Use the display-specific viewer permission described by FancyHolograms rather than its broad administrator node.
- Grant only that viewer permission to the test role. Compare both accounts at the same distance, then reconnect them so initial visibility and subsequent updates receive a separate check.
- Remove the temporary viewer grant and confirm the display disappears for that account. Review any integration that uses manual visibility before applying the setting to the public object.
Check the result
The intended role should read the example text without gaining commands that edit or remove holograms. A denied account should remain unable to see the display after reconnecting.
If the test fails
If the denied account sees private content, replace it with harmless text and return to the previous visibility state. Investigate inherited permissions or an integration controlling visibility before adding the real value back.
Visibility modes are separate from rendering distance. Check both when an authorised reader cannot see the object.
References and related help
Check the official FancyHolograms documentation against your installed release before using a command or setting from another version.
Tune a FancyHolograms viewing distance on one display
A display can appear too late on a walkway or remain visible across an entire spawn. Choose its distance from the places players need the information rather than copying one value to every object.
Prepare the test
Use a uniquely named test display away from busy player paths. Keep an administrator available, but make visibility and readability decisions from a separate ordinary player account.
Make the change
- Record the object name, coordinates and existing visibility distance. Identify the approach path and any elevated route that players use to reach the information.
- On a copied object, use the documented
visibilitydistanceedit operation for the installed release. Begin with a distance that covers the route and preserve the original setting for comparison. - Walk across the boundary with an ordinary player in both directions. Check whether the display appears before its text becomes useful, and observe the result after reconnecting nearby.
- Compare other nearby displays and the client view from the same position. Keep the test limited to this object so a large spawn redesign does not obscure the effect of one distance change.
Check the result
The display should become visible before visitors need its directions and disappear outside its intended area. Record the accepted approach points and selected distance in the object’s maintenance note.
If the test fails
Restore the original distance if the label vanishes along an important route. Check the object’s separate visibility mode and world before increasing distance to compensate for a permission or location problem.
A missing display can result from several independent conditions. Distance changes should follow a visible boundary test, not a guess made from the editor account.
References and related help
Check the official FancyHolograms documentation against your installed release before using a command or setting from another version.
- Set up a FancyHolograms text display on Paper
- Find Minecraft logs and send useful troubleshooting details
Rotate a FancyHolograms text display for its viewing area
A text display can face the wrong wall or rotate in a way that looks awkward from a staircase. Test orientation separately from position so the change does not displace the public object.
Prepare the test
Use a uniquely named test display away from busy player paths. Keep an administrator available, but make visibility and readability decisions from a separate ordinary player account.
Make the change
- Record the display’s current rotation, location and billboard setting through the installed information and edit controls. Note which direction the main visitor route approaches from.
- Create a test copy and adjust its documented rotation control by a small amount. Check a fixed orientation from the intended path before changing any behaviour that faces the viewer.
- Compare supported billboard choices using the command help for the installed version. Observe the copy from the side, above and below; a setting that helps one path may reduce readability on another.
- Keep text and scale unchanged during the orientation trial. Ask a second ordinary player to view the copy from a different approach while you record the accepted angle and mode.
Check the result
Readers on the intended paths should see a stable, legible label without needing to stand at the editor’s exact position. Verify a reconnect and retain the previous orientation values for recovery.
If the test fails
Restore the saved rotation and billboard setting if the result clips into scenery or behaves poorly for another viewer. Move the object only in a separate test so the cause of the visual change stays clear.
Changing direction does not correct a missing world or visibility permission. Check those independently when a player sees no object at all.
References and related help
Check the official FancyHolograms documentation against your installed release before using a command or setting from another version.
- Set up a FancyHolograms text display on Paper
- Find Minecraft logs and send useful troubleshooting details
Resize a FancyHolograms display without blocking nearby signs
A larger label can cover another sign or intersect a wall even when it looks attractive from the editor’s position. Check the reading area with the full public message before approving a scale change.
Prepare the test
Use a uniquely named test display away from busy player paths. Keep an administrator available, but make visibility and readability decisions from a separate ordinary player account.
Make the change
- Record the current scale and position, then copy the object into the same type of space away from the public route. Keep the exact text so the longest line remains part of the test.
- Use the documented scale edit control with a small change. Keep location, orientation and billboard behaviour unchanged so you can judge the scale alone.
- View the copy from the nearest and farthest intended reading points. Include a narrow screen or different client interface scale where possible, because the editor’s display setup may not match the player’s.
- Check neighbouring labels, doors and decorative objects for overlap. Test a longer dynamic value if the display includes names or numbers that can grow beyond the current sample.
Check the result
The message should remain readable across the planned area without obscuring essential directions or controls. Record the accepted scale and the longest test value used during review.
If the test fails
Return to the previous scale if the display clips or blocks nearby information. Consider shortening the wording or separating a long message into a different design rather than enlarging every display to solve one crowded label.
A scaling test should use harmless example data when real player information is private. Larger text can make that information readable from unintended viewpoints.
References and related help
Check the official FancyHolograms documentation against your installed release before using a command or setting from another version.
- Set up a FancyHolograms text display on Paper
- Find Minecraft logs and send useful troubleshooting details
Copy a FancyHolograms display before editing its public version
A copied display lets you trial a design without removing the label players rely on. Give the copy a distinct identity and verify its properties before assuming it matches the original.
Prepare the test
Use a uniquely named test display away from busy player paths. Keep an administrator available, but make visibility and readability decisions from a separate ordinary player account.
Make the change
- Record the original object name and inspect its information through the installed command help. Choose a unique test name that scripts, menus and administrators will not confuse with the public object.
- Use the documented copy operation and move the copy to a private test area. Compare text or item content, visibility mode, distance and orientation before changing its appearance.
- Change one design property at a time and ask an ordinary viewer to inspect it. Keep actions or integrations pointed at the public original until the copy passes its own checks.
- Write down the final differences you intend to apply. Update the original through its supported editing controls rather than renaming or swapping object identities without checking external references.
Check the result
The public object should keep its original identity and references while receiving only the approved design changes. Check its view after reconnecting and keep the test copy isolated until the comparison is complete.
If the test fails
If the public result differs from the trial, restore the recorded original properties and inspect the missing difference. Remove the test copy only after confirming its name is not used by another integration.
Copying a visual object is not a backup of all server data. Keep the relevant configuration checkpoint before a wider plugin or server update.
References and related help
Check the official FancyHolograms documentation against your installed release before using a command or setting from another version.
- Set up a FancyHolograms text display on Paper
- Find Minecraft logs and send useful troubleshooting details
Collect a FancyHolograms display report after a Minecraft update
A Minecraft update can expose a plugin compatibility problem that affects one display type or one client. Collect a small reproducible case before rebuilding the existing public displays.
Prepare the test
Use a uniquely named test display away from busy player paths. Keep an administrator available, but make visibility and readability decisions from a separate ordinary player account.
Make the change
- Record the Minecraft build, FancyHolograms version and affected client versions. Capture the first relevant startup error and check the maintainer’s release guidance for the installed combination.
- Inspect one affected object’s type and properties without changing its stored identity. Compare an ordinary player with a staff viewer and note whether the object is missing, malformed or only unreadable.
- Create a harmless simple display through the installed command help in a separate area. Keep its scale and formatting minimal so the test separates basic rendering from a complex design.
- Compare the simple display with the existing object across the same clients. Preserve the original configuration and send a redacted report with the exact difference to the plugin maintainer if needed.
Check the result
Your report should identify the affected display type, client combination and minimal reproduction without exposing private text or customer identifiers. Keep logs from the first failure rather than only repeated follow-up errors.
If the test fails
If a rollback is necessary, follow the server and plugin release compatibility guidance and restore matching configuration from a completed checkpoint. Do not delete every stored hologram to see whether the rendering error disappears.
The CloudExa console screenshot is a general log location, not proof that this plugin version has been tested on your particular server.
References and related help
Check the official FancyHolograms documentation against your installed release before using a command or setting from another version.
- Set up a FancyHolograms text display on Paper
- Find Minecraft logs and send useful troubleshooting details
TAB tasks
Task guides and troubleshooting for TAB. Check the installed release before changing configuration or data.
Find which TAB instance controls a player’s visible list
A backend edit can appear ineffective when the proxy owns the visible tab list. Identify the renderer first so you do not introduce competing configurations while chasing an unchanged display.
Prepare the test
Record which server owns TAB before changing its files. A proxy deployment can use different permission checks and command names from a backend deployment; edit the instance players actually see.
Make the change
- Record where TAB is installed across the proxy and backends. Use the documented command family on each instance; the TAB command reference distinguishes proxy
btabfrom backend tab commands. - Choose one connected test player and inspect the renderer’s diagnostic information through its installed help. Record which configuration and permission system that instance uses for the player.
- Change one harmless test label on the suspected owner during a quiet window. Compare the visible result after the supported refresh and a reconnect without changing the other instances.
- Restore the test label and map any remaining backend integration needed for player data. Avoid removing duplicate installations until you know whether an integration intentionally uses them.
Check the result
You should have one clear record of which instance controls the visible feature and where its permissions come from. Confirm the same ownership after moving the test player between backends.
If the test fails
If two instances overwrite each other, return to the saved configurations and plan a supported single-owner deployment. Keep backend access protected; changing TAB ownership does not require exposing backend game ports.
Operator status on a backend does not automatically supply proxy command permissions. Keep the test identity and execution instance together in your notes.
References and related help
Check the official TAB documentation against your installed release before using a command or setting from another version.
Correct a TAB player group without changing all rank permissions
A player’s tab prefix can come from a resolved group that differs from the rank you expected. Check the selection path before editing inheritance or copying staff permissions to the player.
Prepare the test
Record which server owns TAB before changing its files. A proxy deployment can use different permission checks and command names from a backend deployment; edit the instance players actually see.
Make the change
- Record the affected account’s intended groups and TAB’s reported group through the installed diagnostics. Compare the permission provider’s own data, including primary group and inherited membership.
- Check TAB’s documented group resolution settings on the rendering instance. Determine whether it reads groups through a supported permissions integration or through configured permission checks.
- On a test account, change only the documented group assignment or resolution priority that explains the mismatch. Keep the original value and avoid a wildcard permission intended merely to alter a label.
- Compare the test player with another account in the same rank and one account in a different rank. Check reconnect and proxy transfer behaviour before applying the correction to a public role.
Check the result
TAB should resolve the intended group and display the matching format without granting unrelated commands. Verify the permission provider still reports the desired membership after the visual result changes.
If the test fails
Restore the previous group selection setting if another rank changes unexpectedly. Keep per-player overrides and inherited groups in the report so the maintainer can distinguish resolution from formatting.
A label is evidence of the display path, not proof of the player’s effective command permissions. Test those separately with an ordinary account.
References and related help
Check the official TAB documentation against your installed release before using a command or setting from another version.
Fix TAB sorting without changing player name prefixes
A staff prefix can look correct while the list order remains wrong. Sorting and formatting use related data but deserve separate tests before you rewrite group names or duplicate ranks.
Prepare the test
Record which server owns TAB before changing its files. A proxy deployment can use different permission checks and command names from a backend deployment; edit the instance players actually see.
Make the change
- Choose test accounts representing each intended sort group. Write the desired order and record the current order with the same players online to avoid confusing roster changes with a configuration fix.
- Check the renderer’s sorting guide and group resolution results. Confirm that the configured group names match what TAB resolves, including case and any fallback group.
- Change one documented sorting rule on a copied configuration while retaining the existing prefix and suffix text. Test accounts with the same rank as well as accounts in different ranks.
- Observe the list after reconnecting and switching backends if applicable. Compare alphabetical or placeholder tie-break behaviour only after the primary rank order matches the written plan.
Check the result
Players should appear in the planned order while their visible text remains unchanged. Include a pair with equal rank so the final tie-break behaviour is deliberate and repeatable.
If the test fails
Restore the previous sorting rule if unrelated players move into the wrong category. Diagnose the group input or conflicting team owner before changing the permission hierarchy itself.
Only one scoreboard team can own a player’s team properties at a time. Check for another team-management plugin when order or nametags flicker.
References and related help
Check the official TAB documentation against your installed release before using a command or setting from another version.
- Configure a Minecraft TAB list and scoreboard
- Find Minecraft logs and send useful troubleshooting details
Diagnose TAB nametag flicker from competing team plugins
A flickering nametag can result from two plugins assigning different scoreboard teams. Reducing refresh intervals may only make their competition less visible without resolving ownership.
Prepare the test
Record which server owns TAB before changing its files. A proxy deployment can use different permission checks and command names from a backend deployment; edit the instance players actually see.
Make the change
- Record which plugins manage nametags, glow, collision or team-based sorting. Check whether TAB’s scoreboard-team feature is enabled and note the other plugin’s documented integration options.
- Choose a test account in a quiet area and observe prefix, colour and collision state. Capture when the state changes, including after a reconnect or another plugin’s visible action.
- On a staging copy, disable one competing team feature through its own documented setting while leaving the plugin installed. Keep TAB’s other display features unchanged during the comparison.
- Repeat the exact event sequence and compare the team-related output. If the flicker stops, choose a supported single owner or placeholder integration instead of running both features against each other.
Check the result
The nametag and related team properties should remain stable through the recorded events. Verify that the chosen integration still gives players the intended sorting and collision behaviour.
If the test fails
Restore the previous feature settings if the test identifies a different cause. Do not remove all scoreboard objectives or player data to clear a presentation conflict; preserve the event timeline for support.
TAB’s nametag guide explains that one team owner controls several properties together. Plan the whole feature interaction before changing only the visible prefix.
References and related help
Check the official TAB documentation against your installed release before using a command or setting from another version.
- Configure a Minecraft TAB list and scoreboard
- Find Minecraft logs and send useful troubleshooting details
Check a TAB scoreboard placeholder before changing its refresh rate
A scoreboard value can appear stale because its provider has not changed, its parser lacks context or its display refresh is delayed. Test those layers in order instead of lowering every interval.
Prepare the test
Record which server owns TAB before changing its files. A proxy deployment can use different permission checks and command names from a backend deployment; edit the instance players actually see.
Make the change
- Copy the affected line and identify the provider for each expression. Record the expected value for a connected test account and the existing display refresh setting.
- Parse the expression through its documented provider diagnostic route. If it already returns an old or empty value, investigate the provider rather than editing TAB’s refresh settings.
- Use one copied scoreboard line with fixed surrounding text and the same player context. Change a harmless test value and measure the time until the visible line updates.
- Adjust only the documented interval for that type of value and repeat under similar player activity. Keep an eye on provider errors and a performance profile while comparing faster updates.
Check the result
The scoreboard should show the correct value within the chosen delay without excessive repeated provider work. Record the accepted interval and the type of value it serves.
If the test fails
Restore the previous interval if the change increases load or leaves the value wrong. Keep the direct parse and visible timing evidence for the relevant integration author instead of resetting the player’s data.
A rank name and a countdown have different freshness needs. Avoid using the most demanding value as the default interval for the entire display.
References and related help
Check the official TAB documentation against your installed release before using a command or setting from another version.
- Configure a Minecraft TAB list and scoreboard
- Find Minecraft logs and send useful troubleshooting details
Limit a TAB display to the intended backend server
A proxy can retain a display while the player changes backends. Define where the feature belongs before changing player permissions or installing another copy of TAB on the destination.
Prepare the test
Record which server owns TAB before changing its files. A proxy deployment can use different permission checks and command names from a backend deployment; edit the instance players actually see.
Make the change
- Record the exact backend identifiers from the proxy and the display’s intended scope. Keep the current display configuration and note what the test player sees before and after a transfer.
- Check the installed TAB feature guide for documented server-specific configuration or disabling conditions. Use the proxy’s real server identifier rather than a public display label.
- Apply the restriction to one copied feature and test the player moving in both directions. Leave unrelated list and nametag features unchanged so you can identify which condition worked.
- Include a direct join, a reconnect and a normal proxy transfer in the trial. Check that the correct feature returns when the player re-enters the allowed server.
Check the result
The display should appear only in its intended context and recover without staff intervention after a return transfer. Test an ordinary account with no personal display overrides.
If the test fails
Restore the previous condition if the display vanishes on the allowed backend. Compare resolved server names and condition evaluation before changing permission groups or duplicating feature owners.
Feature conditions belong to the rendering instance. Backend configuration changes may have no effect when the proxy supplies the visible scoreboard.
References and related help
Check the official TAB documentation against your installed release before using a command or setting from another version.
- Configure a Minecraft TAB list and scoreboard
- Find Minecraft logs and send useful troubleshooting details
Test a TAB header with an empty and a long player value
A header that looks clean for one account can wrap badly for a long rank or show an awkward gap for an empty value. Test realistic boundary values before adjusting the whole layout.
Prepare the test
Record which server owns TAB before changing its files. A proxy deployment can use different permission checks and command names from a backend deployment; edit the instance players actually see.
Make the change
- Copy the header and list its dynamic fields. Choose harmless test accounts that represent a short value, a long value and a missing optional value without altering production player records.
- Check each expression through its supported parser and record the actual returned text. Distinguish missing data from a raw unresolved token before deciding how the header should handle it.
- Open the copied header on ordinary clients with different screen or interface sizes. Check both header and footer spacing while keeping colour and animation changes out of the first comparison.
- Use the documented conditional or formatting features when the design needs an optional line. Test a reconnect and a later data change so the empty-state handling does not depend only on login.
Check the result
All test accounts should see a readable header without raw tokens, clipped essentials or accidental disclosure of private metadata. Keep a screenshot of the longest accepted value for future edits.
If the test fails
Restore the previous layout if the new header breaks at a boundary. Shorten the field or use a supported conditional design rather than editing the provider’s stored player names to fit a label.
Collect a direct parse result beside each visual example. It helps separate text-layout problems from a provider that returned unexpected content.
References and related help
Check the official TAB documentation against your installed release before using a command or setting from another version.
- Configure a Minecraft TAB list and scoreboard
- Find Minecraft logs and send useful troubleshooting details
Collect a focused TAB diagnostic report for one affected player
A useful TAB report identifies the feature, rendering instance and affected player context. A full collection of configuration files can reveal unrelated addresses, private labels or integration information.
Prepare the test
Record which server owns TAB before changing its files. A proxy deployment can use different permission checks and command names from a backend deployment; edit the instance players actually see.
Make the change
- Record the TAB version, server or proxy build and relevant permission or placeholder provider. Describe whether the fault concerns order, text, visibility, refresh or an error during startup.
- Use the installed command help for the supported player diagnostics and feature information. Record the resolved group or server context that explains the failure rather than only sending a cropped list screenshot.
- Reproduce the issue with an ordinary test account and capture the smallest configuration section involved. Include a second unaffected account when the difference appears to follow rank or personal overrides.
- Review generated output before sharing it and remove secrets or uninvolved player data. Use the private CloudExa support route for service-specific evidence and the maintainer’s issue route for a reproducible plugin fault.
Check the result
The report should show what input TAB received, what appeared to the test account and what you expected instead. Keep timestamps when another plugin or a transfer triggers the change.
If the test fails
If the test configuration worsens the display, restore the saved section and attach the comparison rather than leaving a broken trial active. Do not grant broad permissions just to make the diagnostic command available to customers.
A console screenshot can show where to collect logs; it does not replace the redacted text and exact reproduction steps needed by a maintainer.
References and related help
Check the official TAB documentation against your installed release before using a command or setting from another version.
- Configure a Minecraft TAB list and scoreboard
- Find Minecraft logs and send useful troubleshooting details
DiscordSRV tasks
Task guides and troubleshooting for DiscordSRV. Check the installed release before changing configuration or data.
Choose the authority direction for one DiscordSRV rank mapping
Rank synchronisation can undo a manual change when the wrong side is authoritative. Test one ordinary group and one disposable Discord role before enabling a mapping for staff or paying members.
Prepare the test
Use a private test channel and two test identities before changing the public bridge. Keep bot tokens, linking codes and staff console output out of screenshots and public support messages.
Make the change
- Write down the intended rule in plain language: a Minecraft group grants a Discord role, or a Discord role grants a Minecraft group. Decide what should happen when that membership is removed, not only when it is added.
- Open
synchronization.ymland compare the installed comments with the official configuration reference. Check the authority direction, one-way behaviour and whether only the primary Minecraft group participates before editing the mapping. - Confirm the exact group name visible to DiscordSRV and the Discord role ID. Case, display names and role IDs matter; a similarly named role is not a reliable substitute for the intended object.
- Apply the single mapping using the release-supported reload or a planned restart. Link two disposable identities and test adding then removing the authoritative membership while observing the other side.
Check the result
Both promotion and removal should follow the written rule. Reconnect the test account and trigger the documented resynchronisation if needed, then confirm the relationship remains stable rather than flipping after the next sync.
If the test fails
Disable the trial mapping and restore its saved configuration if permissions spread unexpectedly. Remove only the test membership changes you recorded; do not clear all linked accounts or reset your permission database.
Keep staff and owner roles outside the first trial. Synchronising a cosmetic member role proves the direction without giving the test account administrative access.
References and related help
Check the official DiscordSRV documentation against your installed release before using a command or setting from another version.
- Connect Minecraft chat to Discord with DiscordSRV
- Create Minecraft ranks and inheritance with LuckPerms
Fix DiscordSRV role hierarchy without granting Administrator
A bot can send chat successfully while failing to update roles. Discord channel permissions and role-management rules are separate, so a working chat bridge does not prove rank synchronisation has sufficient access.
Prepare the test
Use a private test channel and two test identities before changing the public bridge. Keep bot tokens, linking codes and staff console output out of screenshots and public support messages.
Make the change
- Identify one failing mapping and copy its target role ID into a private note. Confirm the linked Minecraft and Discord test accounts are correct before changing the bot’s permissions or your rank configuration.
- In Discord server settings, inspect the bot’s effective permissions and its role position relative to the target role. Follow DiscordSRV’s setup guidance for the permissions needed by the feature you actually use.
- Move the bot role above the intended manageable member role where appropriate. Keep owner and protected staff roles outside this test, and avoid granting Administrator to bypass an unknown hierarchy problem.
- Run a controlled membership change for the test account. Read the corresponding DiscordSRV log entry and compare the role ID, direction and result with your recorded mapping, then test removal as well as assignment.
Check the result
The selected role should appear and disappear as the mapping requires, while the bot still cannot manage roles you intended to protect. Verify that public chat continues to work after the permission change.
If the test fails
Restore the previous role position if unrelated roles become manageable. If the target remains unchanged, inspect the mapping’s authority and linked identity rather than repeatedly expanding bot privileges until the warning disappears.
An integration-managed Discord role may have separate restrictions. Use an ordinary disposable role for the first test so those restrictions do not obscure whether the bot’s normal hierarchy is correct.
References and related help
Check the official DiscordSRV documentation against your installed release before using a command or setting from another version.
- Connect Minecraft chat to Discord with DiscordSRV
- Create Minecraft ranks and inheritance with LuckPerms
Move one DiscordSRV chat route to a replacement channel
Renaming a Discord channel does not create a new channel ID, but deleting and recreating one does. When moving a bridge, record the intended destination and test both directions before announcing the change.
Prepare the test
Use a private test channel and two test identities before changing the public bridge. Keep bot tokens, linking codes and staff console output out of screenshots and public support messages.
Make the change
- Create a private replacement text channel and grant the bot only the channel permissions required for your bridge. Confirm ordinary members can read or send there according to the communication policy you intend.
- Use Discord developer mode to copy the replacement channel’s ID. Preserve the existing
Channelsmapping from DiscordSRVconfig.yml, including its Minecraft-side channel key, so you change only the destination of one route. - Update that one mapping using the installed configuration format. Apply it with the documented supported method and watch the console for a rejected channel, missing access warning or configuration parsing error.
- Send a unique harmless test message from Minecraft and a different one from Discord. Confirm each appears once in the intended destination and neither arrives in the previous public channel.
Check the result
The new channel should carry both directions with the correct author context and no duplicate bridge posts. Check a second normal player because administrator channel access can conceal permission problems affecting ordinary members.
If the test fails
Restore the recorded channel mapping if delivery fails, keeping the new channel private while investigating. Do not delete message history or regenerate the bot token to repair a wrong destination ID.
If multiple Minecraft chat channels are configured, test only the chosen route first. A global replacement can accidentally send staff chat and public chat to the same Discord destination.
References and related help
Check the official DiscordSRV documentation against your installed release before using a command or setting from another version.
- Connect Minecraft chat to Discord with DiscordSRV
- Create Minecraft ranks and inheritance with LuckPerms
Keep a DiscordSRV console channel read-only for observers
A Discord console channel can expose logs and permit command input. Decide who needs each capability before inviting observers; read access should not silently become the ability to operate your Minecraft server.
Prepare the test
Use a private test channel and two test identities before changing the public bridge. Keep bot tokens, linking codes and staff console output out of screenshots and public support messages.
Make the change
- Review whether you actually need Discord console forwarding. Identify its configured channel ID and compare the installed DiscordSRV console options with the official reference before changing any public chat mapping.
- Keep the channel private to the smallest staff audience. Check its history for player addresses, private chat or plugin output before adding new readers, since restricting future messages does not remove old sensitive content.
- Deny message sending to the observer role while preserving the bot’s required access. Review other roles and individual overrides on the same observer account; a second allow rule can defeat your intended restriction.
- Test with a separate observer identity and a separate authorised operator. The observer should be able to inspect permitted output without submitting console commands; use only a harmless status command for the operator’s test.
Check the result
The observer should have the intended read access and no writable command path. Confirm the normal player chat bridge still routes separately and that console output has not appeared in a public channel.
If the test fails
Remove the observer’s channel access if the policy cannot be proven, then inspect effective Discord permissions and DiscordSRV’s console command restrictions. Do not test protection by executing destructive commands or by exposing the console channel publicly.
Console output can include secrets from other plugins. Keep the audience limited even when command execution is blocked, and redact captured lines before sharing a screenshot or support report.
References and related help
Check the official DiscordSRV documentation against your installed release before using a command or setting from another version.
- Connect Minecraft chat to Discord with DiscordSRV
- Create Minecraft ranks and inheritance with LuckPerms
Rotate a DiscordSRV bot token after an accidental disclosure
A bot token is a credential, not a channel identifier. If it appeared in a public paste or screenshot, replacing the message alone does not invalidate it; rotate the token in Discord’s developer portal.
Prepare the test
Use a private test channel and two test identities before changing the public bridge. Keep bot tokens, linking codes and staff console output out of screenshots and public support messages.
Make the change
- Identify the correct bot application and the Minecraft instance that uses it. Record the configured channel IDs and working bridge behaviour without copying the old token into notes or a diagnostic screenshot.
- Use the application’s official token-reset control in Discord’s developer portal. Store the replacement privately and avoid including it in chat, an issue report, a shared configuration example or a shell command that others can read.
- Update
BotTokenin the correct DiscordSRVconfig.ymlusing the game panel file editor or another authorised private method. Follow the installed release’s restart requirements so a previous in-memory connection is not mistaken for success. - Watch startup for the bot connection result, then send harmless test chat in both directions. If group synchronisation is enabled, verify one existing non-staff linked account without rebuilding its link.
Check the result
The bot should reconnect using the replacement credential and resume the intended bridge. The retired token must stay invalid; remove it from shared drafts and review who could have accessed the original disclosure.
If the test fails
If authentication fails, check for whitespace, quoting errors and the wrong application before resetting the token repeatedly. Keep the bot offline while resolving a known disclosure rather than restoring the exposed token as a workaround.
Review channel permissions separately after rotation. Replacing a token does not correct a bot role that was given unnecessary privileges, and a successful login does not prove every bridge route is appropriate.
References and related help
Check the official DiscordSRV documentation against your installed release before using a command or setting from another version.
- Connect Minecraft chat to Discord with DiscordSRV
- Find Minecraft logs and send useful troubleshooting details
Correct a DiscordSRV link made to the wrong Discord account
A player can accidentally link Minecraft to a secondary Discord account. Correct that one relationship using the documented unlink flow instead of deleting DiscordSRV’s whole linking database or manually editing unrelated records.
Prepare the test
Use a private test channel and two test identities before changing the public bridge. Keep bot tokens, linking codes and staff console output out of screenshots and public support messages.
Make the change
- Confirm ownership through your normal private support process. Ask the player to identify the intended Minecraft account and Discord account without requesting their Discord password, bot token or a public copy of a live linking code.
- Record which non-sensitive role changes the existing mapping produced. Check the installed commands and permissions for unlinking an account; use the supported self-service route where available rather than granting administrative permissions to the player.
- Unlink the incorrect identity and follow the documented linking process with the intended Discord account. Complete the exchange privately and treat the code as temporary proof rather than something to keep in a public screenshot.
- Trigger or wait for the normal role synchronisation and compare both Discord accounts. Check removal from the old account as well as assignment to the new account, especially if membership affects Minecraft access.
Check the result
Only the intended Discord identity should be linked, and the recorded membership policy should apply after reconnecting. Ask the player to verify the account shown in Discord rather than accepting a successful code response alone.
If the test fails
If the replacement cannot be verified, leave the affected relationship unlinked and gather the specific error privately. Do not clear everyone’s links or manually duplicate a role assignment to conceal the unresolved account mismatch.
When link-to-join is enabled, schedule the repair while staff can help the player reconnect. An unlink operation can intentionally interrupt admission until the new relationship is complete.
References and related help
Check the official DiscordSRV documentation against your installed release before using a command or setting from another version.
- Connect Minecraft chat to Discord with DiscordSRV
- Find Minecraft logs and send useful troubleshooting details
Diagnose DiscordSRV chat that works in only one direction
One-way chat is a useful clue. It shows that at least part of the connection works, but the remaining failure may concern message visibility, channel access or the Minecraft chat integration rather than a dead bot.
Prepare the test
Use a private test channel and two test identities before changing the public bridge. Keep bot tokens, linking codes and staff console output out of screenshots and public support messages.
Make the change
- Write down the working direction and test with an ordinary Minecraft player and ordinary Discord member. Use different unique messages on each side and note whether attachments, bot messages or commands behave differently.
- Confirm the configured channel ID matches the channel you are reading. Inspect the bot’s effective permissions for that channel, including category and individual overrides, instead of checking only its general role permissions.
- Compare the bot application’s enabled intents with DiscordSRV’s official setup requirements for your release. Apply required intent changes through the developer portal and restart the connection as documented before retesting message delivery.
- If Discord-to-Minecraft alone fails, inspect the Minecraft chat plugin integration and channel mapping. If Minecraft-to-Discord alone fails, inspect capture and filtering behaviour without disabling all moderation across the live server.
Check the result
Each unique test message should reach the other platform once with a clear author label. Repeat after a normal player reconnects to ensure an administrator-only bypass was not responsible for the apparent repair.
If the test fails
Restore any trial filter or mapping change that did not improve the named direction. Capture the relevant connection and message-handling warning with tokens and private content removed before escalating the integration fault.
A bot appearing online in Discord is only a connection check. It does not prove the application has the required message access or permission to send in the selected channel.
References and related help
Check the official DiscordSRV documentation against your installed release before using a command or setting from another version.
- Connect Minecraft chat to Discord with DiscordSRV
- Create Minecraft ranks and inheritance with LuckPerms
Stop duplicate DiscordSRV bridge posts without losing chat history
Duplicate bridge posts can come from multiple senders rather than a retry fault. Identify which instance publishes each copy before deleting channels, replacing the bot or changing unrelated chat formatting.
Prepare the test
Use a private test channel and two test identities before changing the public bridge. Keep bot tokens, linking codes and staff console output out of screenshots and public support messages.
Make the change
- Send one unique harmless message and compare both Discord posts. Record their timestamps, bot identities and destinations; two different bot senders point to a different investigation from two posts by one integration.
- Inventory the Minecraft instances that have DiscordSRV or another chat bridge installed. On a network, establish whether the public message is processed on a backend, proxy integration or another automation as it crosses servers.
- Preserve the current mappings, then disable one overlapping test route using that integration’s documented configuration method. Keep one known working publisher available and avoid removing player chat or Discord history during diagnosis.
- Retest from two backend locations and from Discord. Check normal chat, reconnect announcements and any relay feature separately because eliminating a duplicate chat route may leave duplicate join notifications from another source.
Check the result
A single test message should produce one intended Discord post and one intended Minecraft delivery. Move the test player across the network and confirm that the chosen ownership rule still holds on the destination.
If the test fails
Restore the disabled route if messages disappear entirely, then trace where the remaining publisher receives its input. Do not create another bot or add a new channel as a shortcut while the duplicate sender remains unidentified.
Keep a short record of the chosen bridge owner for each route. That note helps prevent a later plugin installation from reconnecting a second publisher to the same public chat stream.
References and related help
Check the official DiscordSRV documentation against your installed release before using a command or setting from another version.
- Connect Minecraft chat to Discord with DiscordSRV
- Find Minecraft logs and send useful troubleshooting details
Prepare a redacted DiscordSRV debug report for a bridge fault
A useful bridge report explains one failed operation and includes the corresponding evidence. Uploading every file immediately can expose more information than necessary and makes the actual failing route harder to locate.
Prepare the test
Use a private test channel and two test identities before changing the public bridge. Keep bot tokens, linking codes and staff console output out of screenshots and public support messages.
Make the change
- Reproduce one harmless failing message and record the timestamp, direction and channel role involved. Note the DiscordSRV, Minecraft and chat-plugin versions and whether the failure affects all users or one permission group.
- Inspect the console around that timestamp and the relevant mapping locally. Remove tokens, webhook URLs, linking codes, player addresses and private message text from anything you intend to paste into a support ticket.
- If maintainers request the documented debugger upload command, understand that it sends diagnostic material outside the server. Review the tool’s current output and sharing behaviour before publishing the resulting link.
- Attach a small reproduction description, the sanitised mapping and the difference between expected and actual delivery. Tell support about recent token, intent, role or channel changes so they can avoid repeating irrelevant setup advice.
Check the result
A reviewer should be able to identify which direction failed and compare it with the exact integration state. Keep the report private when it contains service-specific identifiers that do not belong in a public issue.
If the test fails
If an upload includes a credential, rotate that credential through its owner’s official control and remove the shared copy. A deleted report link is not proof that a bot token or webhook remained confidential.
Provide text logs where possible so errors can be searched. A panel console screenshot is useful for context but should not replace the small redacted error sequence and version information.
References and related help
Check the official DiscordSRV documentation against your installed release before using a command or setting from another version.
- Connect Minecraft chat to Discord with DiscordSRV
- Find Minecraft logs and send useful troubleshooting details
Test DiscordSRV link-to-join before enforcing it for players
Link-required admission changes who can join Minecraft. Validate the linking instructions and failure behaviour in a controlled window before enforcing the rule on a community that may not yet have Discord accounts linked.
Prepare the test
Use a private test channel and two test identities before changing the public bridge. Keep bot tokens, linking codes and staff console output out of screenshots and public support messages.
Make the change
- Read the installed
linking.ymlcomments and official reference. Distinguish a linked account, membership of the required Discord server and possession of any required subscriber role; those are different admission conditions. - Prepare one linked ordinary test account and one unlinked test account. Keep authorised panel console access available so a mistaken admission rule can be reverted without depending on an in-game administrator reconnecting.
- Enable only the intended test condition and customise the rejection instructions with the correct bot identity and joining route. Avoid adding subscriber-role requirements unless that is part of the access policy you actually mean to enforce.
- Test fresh joins for both accounts, then complete the legitimate linking flow and retry the unlinked account. If a role is required, separately test missing-role and correct-role states without changing unrelated whitelist or ban rules.
Check the result
The unlinked account should receive understandable instructions, and an eligible linked account should join normally. Verify behaviour during bot startup as well, since a delayed integration must not look like a mysterious Minecraft connection failure.
If the test fails
Revert the trial requirement from the panel if legitimate players are unexpectedly blocked. Inspect the specific linked, guild-membership or role condition that failed instead of bypassing every restriction or deleting existing account links.
Announce the admission change only after the test passes. Give existing players a clear preparation period and a support route for a mistaken link or a Discord account they no longer control.
References and related help
Check the official DiscordSRV documentation against your installed release before using a command or setting from another version.
- Connect Minecraft chat to Discord with DiscordSRV
- Find Minecraft logs and send useful troubleshooting details
Simple Voice Chat tasks
Task guides and troubleshooting for Simple Voice Chat. Check the installed release before changing configuration or data.
Separate Simple Voice Chat listening and speaking permissions
A connected voice icon does not guarantee that both speaking and listening are allowed. Compare those permissions separately when one rank can hear others but cannot reply, or appears muted only on this server.
Prepare the test
Identify the client mod, server implementation and allocated voice endpoint before changing audio settings. Keep Minecraft joining and voice transport as separate tests; success on one does not prove the other.
Make the change
- Choose two ordinary connected players with compatible client mods. Confirm neither has locally muted the other and both have selected a working input and output device before changing server-side permission inheritance.
- On a supported plugin server, inspect the effective
voicechat.listenandvoicechat.speakpermissions for the affected player. Check explicit denies, inherited groups and contexts rather than assuming the primary rank is the whole result. - Correct only the permission that contradicts your policy. These capabilities are normally granted to everyone, so investigate an unexpected deny before adding a wildcard or making the player an operator.
- Have the affected player reconnect if your permission integration requires it. Test a short spoken phrase in each direction while the players stand within proximity range, then repeat with an unaffected account for comparison.
Check the result
The test should establish separately that the affected player hears speech and transmits speech. Preserve intentional mute or moderation restrictions; repairing one accidental deny should not grant voice administration or access to unrelated groups.
If the test fails
Restore the previous permission change if it does not alter the failing direction. Next inspect the local microphone, mute state and voice connection rather than assigning broad privileges to a client with an audio-device problem.
Permission-system support depends on the server implementation. The project does not support hybrid plugin-and-mod servers, so do not assume a Bukkit permission result controls a mixed implementation in the same way.
References and related help
Check the official Simple Voice Chat documentation against your installed release before using a command or setting from another version.
- Set up Simple Voice Chat with an allocated UDP port
- Create Minecraft ranks and inheritance with LuckPerms
Disable Simple Voice Chat groups while keeping proximity audio
A proximity-only community may not want persistent group conversations. Disable the group feature deliberately, then test ordinary proximity speech so the policy change does not get mistaken for a broken voice connection.
Prepare the test
Identify the client mod, server implementation and allocated voice endpoint before changing audio settings. Keep Minecraft joining and voice transport as separate tests; success on one does not prove the other.
Make the change
- Notify your test players that existing group behaviour is changing. Record whether the intended rule applies to everyone or only selected ranks; a global feature switch and a permission-based restriction solve different problems.
- Stop the server normally before editing its generated
voicechat-server.properties. On Paper the file is underplugins/voicechat; mod-loader installations use a different documented location, so choose the file for the installed implementation. - Set
enable_groupsto false for a global proximity-only policy, preserving the previous file. If you instead need a rank-specific policy, inspect the documentedvoicechat.groupspermission through your supported permission system. - Start the server, wait for voice initialisation and reconnect the two test players. Inspect the group interface, attempt the previously available group action and test proximity speech at a short distance outside a group.
Check the result
Players should no longer be able to use the disabled group feature while nearby speech remains usable. Check an ordinary rank and an operator separately, and explain the deliberate change so users do not troubleshoot their microphones unnecessarily.
If the test fails
Restore enable_groups and restart normally if you chose the wrong policy scope. If proximity audio also fails, compare startup and endpoint settings with the saved file; do not open unrelated ports to repair a group-interface change.
A server-side group policy does not change microphone permissions in the operating system. Keep the audio-device test separate from whether the interface permits joining or creating a voice group.
References and related help
Check the official Simple Voice Chat documentation against your installed release before using a command or setting from another version.
- Set up Simple Voice Chat with an allocated UDP port
- Create Minecraft ranks and inheritance with LuckPerms
Tune Simple Voice Chat normal and whisper distances separately
Whispering and normal proximity speech have separate range settings. Measure both before changing them so a request for quieter local conversation does not accidentally make all voice inaudible beyond a few blocks.
Prepare the test
Identify the client mod, server implementation and allocated voice endpoint before changing audio settings. Keep Minecraft joining and voice transport as separate tests; success on one does not prove the other.
Make the change
- Choose a flat quiet area and place two test players at known distances. Record the existing normal and whisper behaviour with the same volume settings, avoiding background music or a group call during the comparison.
- Stop the server and preserve
voicechat-server.properties. Readmax_voice_distanceandwhisper_distancein the installed file and current official reference; record any explicitly configuredbroadcast_rangebecause it also affects which audio is distributed. - Change one distance at a time to match the intended play area. Keep endpoint, packet-size and codec settings unchanged so a later failure can be attributed to the distance change rather than several simultaneous adjustments.
- Start the server and test inside, near and outside the intended normal range. Repeat the same positions with whisper activated, then swap the speakers so one client’s microphone level is not mistaken for a range boundary.
Check the result
The two modes should follow the intended separation and remain usable close by. Write down the accepted values and listening positions; a repeatable spatial test is more useful than describing the voice as merely louder or quieter.
If the test fails
Restore the previous distances if the result cuts off expected conversation. If no speech works even at close range, inspect the voice connection and audio device before increasing the range further or changing the server firewall.
Use modest changes and test the actual spawn or roleplay area afterwards. A large theoretical range can include conversations across areas that players reasonably expected to remain separate.
References and related help
Check the official Simple Voice Chat documentation against your installed release before using a command or setting from another version.
- Set up Simple Voice Chat with an allocated UDP port
- Find Minecraft logs and send useful troubleshooting details
Choose a Simple Voice Chat spectator speaking policy
Spectator speech can reveal information from places ordinary players cannot visit. Decide when spectators should speak to active players, then verify the policy with separate spectator and survival accounts.
Prepare the test
Identify the client mod, server implementation and allocated voice endpoint before changing audio settings. Keep Minecraft joining and voice transport as separate tests; success on one does not prove the other.
Make the change
- Write down the intended behaviour for a free-flying spectator and for a spectator viewing through another player. Choose a harmless test scene rather than checking the policy during a competitive event.
- Stop the server and preserve the voice configuration. Read
spectator_interactionandspectator_player_possessioninvoicechat-server.properties, matching their descriptions to the installed Simple Voice Chat release before choosing values. - Change only the spectator options required by your rule and restart normally. Reconnect compatible clients, keep their mute and volume settings constant, and ensure the listening player remains outside any private group call.
- Test speech while the spectator is free-flying, then while spectating the listening player. Swap roles where possible and compare what each person hears with the written policy rather than relying only on an interface icon.
Check the result
Living players should hear spectator speech only in the situations you deliberately permitted. Test ordinary proximity speech between two survival players afterwards to show that the policy did not disable general voice communication.
If the test fails
Restore the saved spectator settings if the experiment exposes unintended speech. If a role still behaves differently, inspect additional voice add-ons and permission rules instead of giving every spectator broad administrative access.
Tell moderators how the chosen behaviour works before using spectator mode for investigations. Voice interaction is not a substitute for the server’s rules about staff observation, privacy or fair play.
References and related help
Check the official Simple Voice Chat documentation against your installed release before using a command or setting from another version.
- Set up Simple Voice Chat with an allocated UDP port
- Find Minecraft logs and send useful troubleshooting details
Set a Simple Voice Chat recording policy without promising privacy guarantees
The recording option controls a supported voice feature; it cannot stop a player recording system audio with unrelated software. Set the server policy clearly and avoid presenting the configuration as a complete privacy guarantee.
Prepare the test
Identify the client mod, server implementation and allocated voice endpoint before changing audio settings. Keep Minecraft joining and voice transport as separate tests; success on one does not prove the other.
Make the change
- Decide whether the built-in recording feature should be available, then communicate that rule to your community. Get the consent required by your community policy before making any test recording with another person’s voice.
- Stop the server, preserve the generated voice configuration and review
allow_recordinginvoicechat-server.properties. Change only that setting, leaving port and audio-distance values untouched so the test has one clear purpose. - Start the server and reconnect a compatible test client. Inspect the supported recording control and its response, using a short agreed test if recording is allowed rather than capturing ordinary players’ conversations without warning.
- Check that proximity speech and existing mute controls still work for both test accounts. Delete the agreed sample when it is no longer needed and document whether the supported recording feature is available or deliberately blocked.
Check the result
The built-in feature should follow the server setting, while ordinary voice remains usable. Publish a plain-language rule that distinguishes a disabled feature from the broader expectation that players must respect others’ conversations.
If the test fails
Restore the previous setting if the installed client does not handle the change as expected, then compare client and server compatibility. Do not claim a server fault merely because an external recorder can still capture computer audio.
If a dispute involves recorded conversations, handle the evidence through a private moderation route. Changing this setting later does not revoke files that someone already recorded or shared.
References and related help
Check the official Simple Voice Chat documentation against your installed release before using a command or setting from another version.
- Set up Simple Voice Chat with an allocated UDP port
- Find Minecraft logs and send useful troubleshooting details
Stage a Simple Voice Chat client-required admission rule
Requiring the voice client changes Minecraft admission, not just audio. Test both permitted and rejected joins before enforcing the setting on players who may use a different launcher or a modpack without voice support.
Prepare the test
Identify the client mod, server implementation and allocated voice endpoint before changing audio settings. Keep Minecraft joining and voice transport as separate tests; success on one does not prove the other.
Make the change
- Prepare one client with the compatible Simple Voice Chat mod and a separate client without it. Confirm both can currently join, and keep panel console access available in case the new rule rejects an in-game administrator.
- Stop the server and preserve
voicechat-server.properties. Reviewforce_voice_chatand the documented millisecond unit forlogin_timeoutbefore editing; do not confuse the admission timeout with a network or microphone timeout. - Enable the rule for a controlled test window and restart normally. Join with the unmodified client and record the rejection timing and message, then join with the compatible client without granting operator status.
- Test the compatible client on an ordinary connection and after a fresh launch. Confirm it remains admitted and can establish voice; passing the mod-presence check alone does not prove that the separate UDP audio path works.
Check the result
The unmodified client should receive the intended rejection while the compatible client joins reliably. Check your published joining instructions so players know which client mod and Minecraft version they need before the rule becomes permanent.
If the test fails
Disable the requirement through the panel and restart if legitimate compatible clients are blocked. Investigate their handshake and version details before extending the timeout blindly or telling everyone to reinstall an unrelated modpack.
Allow a preparation period for existing players. A voice-required policy can exclude people who cannot install the mod, so make that community decision explicitly instead of enabling it as a connection troubleshooting shortcut.
References and related help
Check the official Simple Voice Chat documentation against your installed release before using a command or setting from another version.
- Set up Simple Voice Chat with an allocated UDP port
- Find Minecraft logs and send useful troubleshooting details
Keep a Simple Voice Chat configuration edit from being overwritten
A setting that reverts may have been edited in the wrong file or overwritten during shutdown. Establish which implementation owns the configuration before changing permissions, reinstalling the plugin or repeatedly saving a live file.
Prepare the test
Identify the client mod, server implementation and allocated voice endpoint before changing audio settings. Keep Minecraft joining and voice transport as separate tests; success on one does not prove the other.
Make the change
- Record whether the server uses the Paper plugin or a supported mod-loader build. Check the official file locations: Paper uses
plugins/voicechat/voicechat-server.properties, while mod-loader deployments use the documentedconfig/voicechatpath. - Stop the server normally and wait for the panel to show it fully offline. Download a copy of the target file, then change one harmless intended setting without renaming the file or altering unrelated generated values.
- Save and reopen the file in the panel before starting the server. Confirm the chosen value is present, then start and inspect the initialisation log for a parse error or a plugin loading from a different directory.
- After startup, reopen the file and test the setting through its visible behaviour. Perform a later normal stop and start, checking whether the value persists across both boundaries rather than only immediately after Save.
Check the result
The on-disk value and observed behaviour should agree after the complete lifecycle. Keep the saved original and the startup timestamp so a repeat reset can be compared with scheduled tasks, templates or add-ons that also manage configuration.
If the test fails
Restore the original file while stopped if parsing fails. If the value changes again, identify the process writing it; do not delete the entire configuration directory or reinstall the server to repair an unknown file owner.
The file editor screenshot shows where to inspect a saved configuration. Match the visible path to your installation instead of assuming every voice implementation uses the same directory.
References and related help
Check the official Simple Voice Chat documentation against your installed release before using a command or setting from another version.
- Set up Simple Voice Chat with an allocated UDP port
- Find Minecraft logs and send useful troubleshooting details
Distinguish a Simple Voice Chat UDP port conflict from a game connection fault
Minecraft joining and voice audio use different tests. Simple Voice Chat sends audio over UDP, so a successful TCP connection to the game port cannot prove that its allocated voice port is reachable or unused.
Prepare the test
Identify the client mod, server implementation and allocated voice endpoint before changing audio settings. Keep Minecraft joining and voice transport as separate tests; success on one does not prove the other.
Make the change
- Copy the service’s assigned voice allocation from the panel Network page and compare it with the configured voice port. Do not choose a new public port at random or assume the default number belongs to your container.
- Inspect startup for a bind or address-in-use error. Check whether another UDP feature, such as server query or another voice plugin, is configured on the same endpoint before changing the network or removing a plugin.
- Stop the server and preserve the voice configuration before correcting an allocation mismatch. Avoid
port=-1as an unexamined shortcut: the project warns that reusing the game port can conflict with its UDP query service. - Start normally and test from a compatible external client. Confirm ordinary Minecraft joining, voice initialisation and two-way nearby speech separately; record the endpoint and relevant timestamps if audio still times out.
Check the result
Startup should have no voice bind conflict, and two test players should hear each other through the assigned UDP endpoint. A TCP port checker or an online server-list status is not evidence that the voice transport passed.
If the test fails
Restore the prior setting if you changed the wrong service allocation. Ask CloudExa support to verify the assigned UDP mapping when the configured value matches but packets still fail, rather than opening unrelated public ports yourself.
Control actions such as group changes also use Minecraft networking. Keep that distinction in your report so a working group interface does not get confused with working UDP audio.
References and related help
Check the official Simple Voice Chat documentation against your installed release before using a command or setting from another version.
- Set up Simple Voice Chat with an allocated UDP port
- Find Minecraft logs and send useful troubleshooting details
Plasmo Voice tasks
Task guides and troubleshooting for Plasmo Voice. Check the installed release before changing configuration or data.
Investigate a Plasmo Voice not-installed message before changing ports
The client’s not-installed message indicates failed detection between client and server. Plasmo Voice documents this separately from UDP reachability, so start with versions and plugin channels instead of changing a working allocation.
Prepare the test
Record client and server major versions before comparing results. Keep the Minecraft connection, voice handshake and UDP audio path separate when deciding which setting or log to inspect next.
Make the change
- Record the exact client mod version, server plugin version and Minecraft implementation. Compare their major versions first: the project documents that the 1.x and 2.x voice protocols cannot detect each other correctly.
- Confirm the server actually loaded the intended build by inspecting startup. On the client, verify the mod is present in the launched profile rather than merely downloaded into another instance or launcher directory.
- Test with a minimal compatible client profile if your pack includes a mod that hides its mod or plugin-channel list. Keep the original profile intact and change only that variable before reconnecting to the same server.
- If detection still fails, capture matching client and server logs around one fresh join. Enable the documented debug mode only for that short reproduction, then turn it off and redact personal data before sharing the evidence.
Check the result
The client should recognise that Plasmo Voice is installed before you proceed to an audio-path test. Then check nearby two-way speech; successful detection alone does not prove the separate UDP endpoint carries audio.
If the test fails
Return to the original client profile if the minimal profile changes nothing. Provide the exact versions and handshake evidence to support instead of opening extra ports, replacing the world or deleting the voice configuration.
Consult the current troubleshooting page for release-specific handshake fixes. Avoid promising that an old version’s workaround applies unchanged to every later client and server combination.
References and related help
Check the official Plasmo Voice documentation against your installed release before using a command or setting from another version.
- Install Plasmo Voice and diagnose voice connection errors
- Find Minecraft logs and send useful troubleshooting details
Apply and reverse a targeted Plasmo Voice moderation mute
A moderation mute should affect the intended player and remain reversible. Separate that action from a broken microphone or a server-wide audio fault so the player and other moderators understand why speech stopped.
Prepare the test
Record client and server major versions before comparing results. Keep the Minecraft connection, voice handshake and UDP audio path separate when deciding which setting or log to inspect next.
Make the change
- Confirm the player’s exact current Minecraft identity through your normal moderation process. Record the reason and intended duration privately, and establish whether the player can currently receive voice even though transmission is being restricted.
- Check the installed help for
/vmuteand its accepted duration format. The documented command accepts a player with optional duration and reason, but do not invent a shorthand duration that the installed release may parse differently. - Allow the moderator only the required
pv.muteand, where appropriate,pv.unmutepermissions. Apply the agreed targeted mute and ask a cooperating test account to verify what the affected player can and cannot transmit. - Use
/vunmutefor the agreed test reversal or confirm expiry when a supported timed mute was used. Retest transmission with the same listener and keep the moderation record clear about when the restriction ended.
Check the result
The affected player’s transmission should follow the moderation decision without interrupting other nearby players. Verify the reversal explicitly; the absence of an error message is not enough to establish that voice was restored.
If the test fails
If the wrong account was selected, reverse that mute immediately and record the correction. If unmuting does not restore speech, inspect client mute and microphone state before removing unrelated moderation records or restarting every voice instance.
Use a consenting test player while learning the command. Do not practise moderation on uninvolved players, and keep reasons and disciplinary details out of public console screenshots.
References and related help
Check the official Plasmo Voice documentation against your installed release before using a command or setting from another version.
- Install Plasmo Voice and diagnose voice connection errors
- Create Minecraft ranks and inheritance with LuckPerms
Check Plasmo Voice proximity activation permissions for one rank
A player can have a working voice connection while being forbidden to activate proximity speech. Compare the activation permission with the actual rank policy before treating the issue as a UDP or microphone failure.
Prepare the test
Record client and server major versions before comparing results. Keep the Minecraft connection, voice handshake and UDP audio path separate when deciding which setting or log to inspect next.
Make the change
- Choose an affected ordinary player and an unaffected comparison player on the same backend. Confirm their clients detect Plasmo Voice and use the same intended activation mode, with neither player locally muted.
- Inspect the effective
pv.activation.proximitypermission for each account through your supported permission manager. Check group inheritance, explicit false values and server contexts rather than looking only at the primary group’s visible name. - Correct the narrow permission that contradicts your policy. The default proximity activation is normally available, so identify why a deny was added before replacing it with a broad activation wildcard or an operator grant.
- Reconnect if the integration requires it and test a short nearby conversation. If the server uses additional activation add-ons, test their documented permissions separately instead of assuming proximity permission controls every voice mode.
Check the result
The chosen rank should be able to activate the intended mode and exchange speech with the comparison account. Moderation, reload and administration permissions should remain limited to the staff roles that actually need them.
If the test fails
Restore an ineffective permission edit and investigate the client’s selected activation, local mute state or connection result. Do not expand privileges repeatedly when both accounts already have the same effective proximity permission.
Keep deliberate moderation restrictions visible in your investigation. A correct permission deny is an access-policy outcome; it should not be silently removed because the player describes it as an audio connection problem.
References and related help
Check the official Plasmo Voice documentation against your installed release before using a command or setting from another version.
- Install Plasmo Voice and diagnose voice connection errors
- Create Minecraft ranks and inheritance with LuckPerms
Trace Plasmo Voice audio after moving between proxy backends
Voice that works before a transfer but fails afterwards often needs a route-specific comparison. Establish whether each backend exposes its own voice service or the network uses the supported Plasmo Voice proxy integration.
Prepare the test
Record client and server major versions before comparing results. Keep the Minecraft connection, voice handshake and UDP audio path separate when deciding which setting or log to inspect next.
Make the change
- Record the working source backend, failing destination and their plugin versions. Compare the network design with the official proxy guide; installing a proxy component does not remove the need for the documented backend components.
- For independent backend voice services, verify that each uses its own assigned UDP endpoint and advertises the correct public destination. Do not point two services at the same allocation merely because they share one Minecraft proxy.
- For a proxy-owned route, inspect the documented backend names, voice destinations and forwarding-secret configuration privately. Match server names to the proxy’s real configuration and do not paste the shared secret into a support screenshot.
- Test a fresh connection to each backend and a transfer in both directions. Record when detection succeeds and when audio stops, keeping the Minecraft connection, handshake and UDP transport as separate observations.
Check the result
Players should keep or re-establish voice on each intended backend through the chosen architecture. Verify the destination after a second transfer, since a first successful login does not prove that cross-server switching is correct.
If the test fails
Restore the previous working route for the trial backend if the edit breaks it. Ask support to verify the assigned mappings when endpoints match but transport fails; do not expose private backend voice ports globally without reviewing the design.
The official proxy design can use one public UDP port while backend traffic remains between proxy and servers. Preserve that distinction instead of opening every backend port as a troubleshooting shortcut.
References and related help
Check the official Plasmo Voice documentation against your installed release before using a command or setting from another version.
- Install Plasmo Voice and diagnose voice connection errors
- Find Minecraft logs and send useful troubleshooting details
Compare a Plasmo Voice bind error with an unreachable advertised endpoint
A bind failure occurs before a client can use the voice listener. An advertised-endpoint problem can occur even when that listener started correctly. Identify which stage failed before changing both host and public settings.
Prepare the test
Record client and server major versions before comparing results. Keep the Minecraft connection, voice handshake and UDP audio path separate when deciding which setting or log to inspect next.
Make the change
- Record the service’s allocated UDP address and port from the panel. Inspect the current Plasmo Voice host configuration and public endpoint configuration against the official installation guide for the deployed server or proxy component.
- Read startup for an address-in-use or cannot-bind error. Check for another voice service or UDP query feature using the same assigned endpoint; a successful Minecraft TCP listener does not exclude a UDP conflict.
- If the listener starts, compare the address clients are told to reach with the real public allocation. A private container address or a public endpoint from a previous host may be valid locally but unusable for an external player.
- Make one documented correction with the server stopped and preserve the original configuration. Restart, confirm the listener result and test from a compatible external client with a nearby cooperating listener.
Check the result
The voice listener should start without a bind error, and the client should reach the intended public UDP destination. Capture the specific remaining stage if it fails instead of describing every symptom as a port being closed.
If the test fails
Restore the original setting if you changed the wrong component’s configuration. When the allocation and advertised destination agree, send the relevant startup and client error to support rather than allocating an unapproved port or disabling the firewall.
A game-port TCP check cannot validate this UDP path. On a proxy network, identify the component that owns the public voice endpoint before interpreting a backend listener test.
References and related help
Check the official Plasmo Voice documentation against your installed release before using a command or setting from another version.
- Install Plasmo Voice and diagnose voice connection errors
- Find Minecraft logs and send useful troubleshooting details
Capture a short Plasmo Voice client-and-server debug session
Voice faults are easier to diagnose when both sides describe the same connection attempt. A short coordinated capture is more useful than hours of debug output from different clients and unrelated server transfers.
Prepare the test
Record client and server major versions before comparing results. Keep the Minecraft connection, voice handshake and UDP audio path separate when deciding which setting or log to inspect next.
Make the change
- Write down the precise symptom and the client, server and proxy versions involved. Decide whether the failure occurs during detection, connection or speech, and choose one cooperating account for a fresh reproduction.
- Follow the current troubleshooting page to enable debug for the installed client and server implementation. Confirm the actual generated file location rather than copying a Paper path into a mod-loader installation or editing an inactive profile.
- Reconnect once, note the exact time and reproduce only the failing action. Keep a second account nearby if speech is the fault, and record what each participant sees without collecting private conversations.
- Disable debug on both sides after the capture using the documented apply method. Extract the matching time window and redact player addresses, forwarding secrets and unrelated personal data before sending the report privately.
Check the result
The report should contain matching evidence for one connection attempt, exact versions and a clear expected result. It should also state whether a minimal compatible client profile changes the symptom, if you performed that separate comparison.
If the test fails
If debug prevents a normal start or creates excessive output, restore the saved configuration and reproduce with ordinary logs first. Do not leave verbose logging enabled indefinitely or share an entire server directory to avoid selecting the relevant lines.
The official troubleshooting page describes a specific handshake retry history. Report the installed version accurately rather than assuming every apparent not-installed warning is the same known issue.
References and related help
Check the official Plasmo Voice documentation against your installed release before using a command or setting from another version.
- Install Plasmo Voice and diagnose voice connection errors
- Find Minecraft logs and send useful troubleshooting details
InteractiveChat tasks
Task guides and troubleshooting for InteractiveChat. Check the installed release before changing configuration or data.
Limit repeated InteractiveChat placeholders with a measured cooldown
Item and inventory links can crowd chat when players repeat them. Use the supported limits for those features rather than slowing every normal message or removing the chat formatter that players already use.
Prepare the test
Use disposable example items and ordinary player accounts for chat tests. Keep private inventory contents, staff commands and personal data away from demonstrations that other players can click or hover.
Make the change
- Choose two test accounts and record the current behaviour for one placeholder, two placeholders in a message and a second immediate message. Keep the examples harmless and use a quiet testing period.
- Preserve InteractiveChat
config.ymland inspect the installed Settings comments forUniversalCooldownandMaxPlaceholders. The upstream configuration documents the universal cooldown in seconds and uses -1 to disable the per-message limit. - Choose limits that allow an ordinary player to share an item without flooding chat. Apply the change using the installed release’s supported method, leaving packet-size, threading and unrelated moderation settings unchanged.
- Repeat the three original tests with an ordinary account. Check the cooldown or limit message and confirm normal text without a placeholder still follows the intended chat policy, then allow enough time for the cooldown to expire.
Check the result
Repeated interactive links should be limited predictably, while a legitimate later share works. Verify a second account independently so one player’s restriction is not mistaken for a global cooldown affecting everyone on the server.
If the test fails
Restore the prior limits if normal use becomes frustrating or valid messages are rejected. If a separate anti-spam plugin also intervenes, compare their messages and test each documented policy rather than disabling all moderation.
Use the generated file for your installed version as the final key reference. Upstream master can change ahead of a release, so avoid pasting a whole current template over an older working configuration.
References and related help
Check the official InteractiveChat documentation against your installed release before using a command or setting from another version.
- Test InteractiveChat item previews without exposing staff inventory
- Find Minecraft logs and send useful troubleshooting details
Restrict one InteractiveChat custom placeholder to an intended group
A custom interactive keyword may be useful only for a builder or staff group. Inspect how your installed release assigns per-placeholder permissions before allowing a private action through the same rules as public item sharing.
Prepare the test
Use disposable example items and ordinary player accounts for chat tests. Keep private inventory contents, staff commands and personal data away from demonstrations that other players can click or hover.
Make the change
- Identify the selected custom placeholder in the current configuration and record its position and intended audience. Inspect its hover and click behaviour for private data or command actions before making it available to more accounts.
- Preserve the file and review
UseCustomPlaceholderPermissionsin the generated Settings section. The upstream comments describe numbered permission nodes such asinteractivechat.module.custom.1; match numbering to the installed configuration rather than guessing from a display name. - Enable the documented permission behaviour and grant only the selected node to a disposable test group. Inspect effective inherited permissions and explicit denies for one permitted account and one ordinary unpermitted account.
- Apply the change through the release-supported method, then send the custom keyword from each account. Verify its rendered action as well as its visible label; an attractive label does not prove the audience restriction works.
Check the result
The permitted group should use the intended feature, while the unpermitted group should receive the configured restricted behaviour. Confirm public built-in sharing still works as planned and that no staff-only custom action became available accidentally.
If the test fails
Restore the saved permission mode if the configuration changes access more broadly than intended. Remove only the trial permission assignment and inspect numbering again before changing global rank inheritance or granting a wildcard.
Recheck these numbered mappings after adding, removing or reordering custom entries. Keep a small local record linking the configured entry to its approved audience so a later edit does not silently reassign access.
References and related help
Check the official InteractiveChat documentation against your installed release before using a command or setting from another version.
- Test InteractiveChat item previews without exposing staff inventory
- Create Minecraft ranks and inheritance with LuckPerms
Keep InteractiveChat command links as suggestions rather than execution
A clickable command can insert text for review or execute an action immediately. Decide which behaviour players should receive before changing InteractiveChat’s command display, especially when the example includes user-controlled text.
Prepare the test
Use disposable example items and ordinary player accounts for chat tests. Keep private inventory contents, staff commands and personal data away from demonstrations that other players can click or hover.
Make the change
- Choose a harmless informational command and two ordinary test players. Record the current click behaviour and identify whether another chat plugin also adds command interactions to the same message.
- Preserve InteractiveChat
config.ymland inspect its Commands section. The upstream configuration listsSUGGEST_COMMANDandRUN_COMMANDas different action choices; keep the suggestion action when the player should review text before submitting it. - Apply a small formatting change to the test command display without altering its authority or adding console execution elsewhere. Check the hover text so it accurately describes whether a click inserts a suggestion or runs something.
- Send the example from an ordinary account and click it on the second client. Inspect the chat input before pressing Enter, then test the same display with a harmless longer argument and confirm the suggested text remains understandable.
Check the result
Clicking should insert the intended command for review when suggestion behaviour is selected. The action must still respect normal command permissions after the player chooses to submit it; a chat link should not grant administrative capability.
If the test fails
Restore the original Commands section if the action executes unexpectedly or another plugin replaces it. Disable the trial interactive command display while tracing ownership rather than testing with teleport, permission or destructive administration commands.
Describe the behaviour clearly in help text. A label saying click to use can be ambiguous, so tell players when clicking merely prepares a command that they must review and send themselves.
References and related help
Check the official InteractiveChat documentation against your installed release before using a command or setting from another version.
- Test InteractiveChat item previews without exposing staff inventory
- Find Minecraft logs and send useful troubleshooting details
Diagnose an InteractiveChat formatter conflict one event at a time
A formatter can replace or cancel a message before its interactive parts reach players. Capture the input, resulting text and plugin ownership before changing event priorities or advanced packet-handling options.
Prepare the test
Use disposable example items and ordinary player accounts for chat tests. Keep private inventory contents, staff commands and personal data away from demonstrations that other players can click or hover.
Make the change
- Use one ordinary sender and receiver to compare plain text with a single harmless interactive keyword. Record whether formatting, hover content, click actions or the entire message disappears, and whether the console reports cancellation.
- Identify the chat formatter and moderation plugins involved and note their versions. Preserve the current InteractiveChat configuration and compare the installed
EventPrioritiescomments with the upstream reference for the specific event path you are investigating. - On a staging copy, change one documented priority only and repeat the identical message. Do not enable advanced Paper chat event switches merely because the server runs Paper; the upstream template explicitly warns against that assumption.
- Check both public chat and any configured private-message parsing route. Once a supported combination works, apply that narrow change during an agreed window and confirm moderation still cancels messages that it is supposed to reject.
Check the result
The intended interactive content should survive the formatter while ordinary styling and moderation remain effective. Record the accepted priority and plugin versions so a future update can be compared with the known working combination.
If the test fails
Restore the original priority if messages duplicate, bypass a filter or lose their author context. Provide the minimal reproduction to the relevant maintainers rather than disabling every chat listener or increasing packet limits at random.
Keep staging messages free of private inventory data. The purpose is to identify event ownership, so a simple disposable item and a short fixed sentence provide better evidence than a crowded public chat capture.
References and related help
Check the official InteractiveChat documentation against your installed release before using a command or setting from another version.
- Test InteractiveChat item previews without exposing staff inventory
- Find Minecraft logs and send useful troubleshooting details
Reduce InteractiveChat mention noise without disabling normal chat
Mention sounds and titles can become disruptive even when the chat message itself is reasonable. Review the mention controls independently so a noise complaint does not lead to removing ordinary player conversation.
Prepare the test
Use disposable example items and ordinary player accounts for chat tests. Keep private inventory contents, staff commands and personal data away from demonstrations that other players can click or hover.
Make the change
- Choose two cooperating test players and agree on a short mention test. Record whether the current behaviour produces a sound, title, other visual notification or repeated alerts when the same sender mentions the same player.
- Preserve
config.ymland inspect the installed Chat section. CompareAllowMention,MentionCooldownand the available notification settings with the upstream configuration; use its documented units rather than assuming every duration follows the same format. - Adjust the one notification or cooldown responsible for the complaint. If your policy restricts broad mentions, inspect the documented here and everyone controls separately instead of assuming an individual mention cooldown handles every broadcast case.
- Apply the change using the installed supported method and repeat the same messages. Test an immediate repeat, a later mention after the cooldown and ordinary non-mention text while both players remain connected.
Check the result
The intended alert should occur at a sensible frequency, and normal chat should remain readable. Check the receiving client’s own sound and title settings before declaring a missing notification a server failure.
If the test fails
Restore the prior section if the change suppresses wanted notifications or affects unrelated formatting. If another chat plugin also sends mention alerts, trace its configuration separately so two independent sounds are not mistaken for a failed cooldown.
Use the actual received message and notification timing as evidence. A configuration value alone does not show how a player with different client settings experiences the chosen mention policy.
References and related help
Check the official InteractiveChat documentation against your installed release before using a command or setting from another version.
- Test InteractiveChat item previews without exposing staff inventory
- Find Minecraft logs and send useful troubleshooting details
Explain an expired InteractiveChat inventory link without resetting inventories
Interactive inventory views are temporary representations rather than permanent inventory backups. An expired view message does not establish that the player’s actual items were deleted or that their world data needs restoring.
Prepare the test
Use disposable example items and ordinary player accounts for chat tests. Keep private inventory contents, staff commands and personal data away from demonstrations that other players can click or hover.
Make the change
- Record the exact message shown when the old link is clicked and its approximate age. Ask the owner to inspect their real inventory in game, keeping private contents out of public screenshots and support messages.
- Compare the installed message configuration and release documentation. The upstream template describes expiry for generated shared views; treat that behaviour separately from a failed fresh click or a missing permission to use sharing.
- With consent, create a fresh share containing only a disposable example item. Have the second player open it promptly and compare the result with the old expired link, without changing the owner’s stored inventory files.
- Test a second fresh link after reconnecting if the first fails. Note whether failure follows age, sender, viewer or server transfer; that distinction helps identify a temporary-view lifecycle issue rather than a general chat fault.
Check the result
A fresh permitted view should open while the old expired example remains unavailable as designed. The player’s real items should remain unchanged; keep that distinction explicit when explaining the result to your community.
If the test fails
If a fresh view fails immediately, gather its timestamp, versions and the relevant console error for support. Do not restore a world, clear player data or disable inventory protections to repair a temporary chat-view error.
Tell players not to use chat previews as an item backup or permanent proof of a later inventory state. For persistent troubleshooting, capture an agreed redacted screenshot and record the time it represents.
References and related help
Check the official InteractiveChat documentation against your installed release before using a command or setting from another version.
- Test InteractiveChat item previews without exposing staff inventory
- Find Minecraft logs and send useful troubleshooting details
MiniMOTD tasks
Task guides and troubleshooting for MiniMOTD. Check the installed release before changing configuration or data.
Verify every entry in a MiniMOTD rotation
A rotating server-list message can hide one broken entry among several working ones. Validate each candidate on its own before treating a few successful refreshes as proof that the complete rotation is ready.
Prepare the test
Test the address players use in their multiplayer list. A proxy can answer its own status request, so changing the backend file may leave the public listing unchanged.
Make the change
- Copy the current
main.confand list every configured MOTD entry in a private checklist. Mark time-sensitive claims, joining addresses and formatting tags so an old event message does not remain in the random pool unnoticed. - On a staging instance or quiet test window, leave one intended entry in the motds list while preserving the others in your saved copy. Keep its line1, line2 and icon together as one entry.
- Apply the file through the installed release’s supported method and refresh the actual public address in a Minecraft server list. Inspect both lines, the icon and readability, then repeat this isolated check for each candidate.
- Restore the reviewed entries into the list and refresh several times. The documented rotation chooses randomly, so do not expect entries to appear in order or assume a missing entry is broken after only one refresh.
Check the result
Every isolated entry should display correctly, and the restored rotation should contain only reviewed messages. Keep the checklist with an expiry reminder for event announcements rather than relying on random refreshes to reveal stale wording later.
If the test fails
Restore the previous complete configuration if HOCON parsing fails. Compare the bracket and entry structure around the last edit instead of replacing the whole plugin or disabling its other player-count and icon features.
If the public message never changes during the isolated test, establish which proxy or backend answers the status request. Editing a backend’s file cannot validate a proxy-owned server-list response.
References and related help
Check the official MiniMOTD documentation against your installed release before using a command or setting from another version.
Pair a MiniMOTD message with the intended icon
An unexpected icon may be a deliberate random selection rather than a missing file. Check the installed configuration generation before renaming images, because older MiniMOTD icon-index instructions do not describe modern entries.
Prepare the test
Test the address players use in their multiplayer list. A proxy can answer its own status request, so changing the backend file may leave the public listing unchanged.
Make the change
- Record the installed MiniMOTD version and preserve
main.confplus the icons directory. Inspect the icon value inside the affected MOTD entry, keeping it alongside the two message lines it is meant to accompany. - For the documented modern format, use the filename stem from the icons directory without its .png extension. A value of random deliberately selects from the available icons; a numeric index from an older tutorial is a different scheme.
- Choose an existing valid icon for the first test and assign it to one isolated MOTD entry. Apply the change using the supported method, then refresh the public listing without replacing every image at once.
- Once the pairing works, restore the rotation and inspect each message-icon combination independently. Check filename spelling and case exactly, especially when a file was uploaded from a desktop with different case-handling behaviour.
Check the result
The selected message should consistently display its intended icon in the isolated test. Random icon behaviour should remain only where you deliberately requested it, and the other reviewed message entries should retain their own pairing.
If the test fails
Restore the saved icon value if the test falls back or the configuration fails. Check file format, filename and log warnings before using an old index-based recipe; the official historic icon page explicitly marks that recipe obsolete for version 2 onward.
Keep source artwork that you own or have permission to use. A working image file is still unsuitable for a public listing if it includes another server’s branding or material you cannot publish.
References and related help
Check the official MiniMOTD documentation against your installed release before using a command or setting from another version.
Hide MiniMOTD player-name hover details while keeping honest counts
The player-count hover can reveal names to people who have not joined. You can review that exposure independently from the displayed total, rather than replacing names with an inflated online figure.
Prepare the test
Test the address players use in their multiplayer list. A proxy can answer its own status request, so changing the backend file may leave the public listing unchanged.
Make the change
- Inspect the public listing with a cooperating player online and record the hover response and counts. Decide whether your policy hides names only or hides the numeric count too, since those are separate choices.
- Preserve
main.confand review the installedplayer-count-settingssection against the official template. The documenteddisable-player-list-hoverandhide-player-countoptions have different visible effects; select the one matching your privacy goal. - Review fake-player and maximum-count modifications already configured. Leave population inflation disabled and do not present a display-only maximum as a resource upgrade or a promise that the service supports more concurrent players.
- Apply the narrow change and refresh from a separate Minecraft client. Inspect the hover result, compare the visible total with actual connected players and check the normal server description still renders as expected.
Check the result
The listing should reveal only the intended public information and avoid misleading population claims. Test after an ordinary player joins and leaves so you see how the chosen count behaviour responds to a real change.
If the test fails
Restore the saved section if the count disappears when you meant to hide names only. If names still appear, identify another status plugin or proxy answering the request before changing player records or disabling normal game joining.
This controls one status response, not every source of player information. Review separate websites, Discord announcements or query features if your community policy also restricts those ways of publishing who is online.
References and related help
Check the official MiniMOTD documentation against your installed release before using a command or setting from another version.
Trace a MiniMOTD virtual-host message to the address players use
Two hostnames can point at the same proxy while intentionally showing different server-list messages. Test the hostname sent by the client before assuming a message came from an outdated backend configuration.
Prepare the test
Test the address players use in their multiplayer list. A proxy can answer its own status request, so changing the backend file may leave the public listing unchanged.
Make the change
- Record the exact hostname and port saved in the affected player’s multiplayer entry. Compare it with your published joining instructions and establish whether a proxy or a standalone backend answers that status request.
- Preserve the proxy’s MiniMOTD files and inspect the installed plugin settings for virtual-host mappings. Compare the documented hostname-and-port key format and the named configuration in extra-configs with the actual generated files.
- For a short controlled test, give the intended configuration a distinctive harmless label. Use the documented virtual-host test mode if needed, capture the relevant ping information and turn that diagnostic mode off afterwards.
- Refresh separate multiplayer entries for the intended hostname and the default route. Confirm the special message appears only for its mapped address and the fallback remains suitable for other legitimate joining paths.
Check the result
The intended hostname should select its reviewed message reliably, while unmapped addresses receive the expected default. Record the matching key and owning proxy so future message edits happen on the correct instance.
If the test fails
Restore the previous mapping if the trial affects the wrong listing. Check the hostname and port actually reported during the ping before changing DNS, moving the backend or making every virtual host use one generic configuration.
Keep the live configuration’s filename spelling as your guide. Documentation and older examples can differ in surrounding filenames, so locate the installed virtual-host block rather than creating a second similarly named file.
References and related help
Check the official MiniMOTD documentation against your installed release before using a command or setting from another version.
ServerListPlus tasks
Task guides and troubleshooting for ServerListPlus. Check the installed release before changing configuration or data.
Repair ServerListPlus YAML without removing its typed sections
ServerListPlus uses multiple typed YAML sections rather than a single plain mapping. A generic editor can produce syntactically valid YAML while removing information the plugin expects, so preserve the complete file structure.
Prepare the test
Treat ServerListPlus as an existing integration to maintain, with release-specific compatibility. Preserve its complete configuration before an edit and check which instance answers the public server-list request.
Make the change
- Download the existing
ServerListPlus.ymland record the installed version and startup error. Compare the file with the version-appropriate official structure rather than starting from an unrelated plugin’s generic YAML template. - Locate the document headers
--- !Status,--- !Pluginand--- !Core. Keep those tags and their section boundaries intact; status text belongs in the status section, while the Core section is not a routine presentation-tuning area. - Repair only the indentation, quoting or list entry identified by the error. Check the lines immediately before the reported location, since an unclosed value can make the parser complain later than the actual mistake.
- Apply the repaired file through the installed supported route and inspect startup or reload output. Refresh the public listing to confirm the intended message, then compare the saved file with your original for unrelated changes.
Check the result
ServerListPlus should accept the complete typed configuration and render the intended status response. Retain the original alongside the repaired copy until a later normal restart also proves that the file loads consistently.
If the test fails
Restore the complete original if the plugin rejects the repair or rewrites unexpected sections. Do not remove all type tags to satisfy a generic YAML checker, and do not change Core performance settings to solve a description typo.
This is maintenance for an existing compatible deployment. Check the project’s current releases before assuming an old configuration or plugin build supports a new Minecraft or proxy version.
References and related help
Check the official ServerListPlus documentation against your installed release before using a command or setting from another version.
Preserve two-line ServerListPlus text and UTF-8 characters
Literal newline escapes and an unintended file encoding can turn a simple description edit into visible symbols or a broken configuration. Keep line structure separate from colour styling while testing the change.
Prepare the test
Treat ServerListPlus as an existing integration to maintain, with release-specific compatibility. Preserve its complete configuration before an edit and check which instance answers the public server-list request.
Make the change
- Preserve
ServerListPlus.ymland choose one affected Description entry. Record its existing two lines and remove private or time-sensitive wording from your test so repeated refreshes do not advertise an unfinished public announcement. - Follow the official configuration guide’s YAML block style for multiline text, preserving list indentation and the surrounding typed section. Use two short plain lines first instead of mixing a complex gradient with a line-break repair.
- Save the file as UTF-8 and reopen it to confirm special characters remain unchanged. Add one intended non-ASCII character only after the plain two-line version is readable and the plugin accepts the file.
- Apply the file using the installed supported method and refresh the public server-list address. Inspect the line break, punctuation and character rendering on a normal client, then reintroduce the desired supported formatting gradually.
Check the result
The description should appear as two intentional lines without printed escape sequences or replacement characters. Keep each line short enough for a useful listing preview, checking the longest intended wording as well as the initial sample.
If the test fails
Restore the original entry if parsing fails, then compare indentation and encoding before changing the rest of the file. Do not convert the entire configuration to another format or remove typed headers to fix one multiline value.
Colour support is also version-dependent. Verify your installed ServerListPlus and client capabilities before adopting a modern RGB recipe from a different MOTD plugin or an older gradient example.
References and related help
Check the official ServerListPlus documentation against your installed release before using a command or setting from another version.
Check which ServerListPlus virtual host owns a displayed message
A familiar server address can select a hostname-specific description while the same machine’s numeric address shows a default. Compare those routes deliberately when an edited message seems to appear for only some players.
Prepare the test
Treat ServerListPlus as an existing integration to maintain, with release-specific compatibility. Preserve its complete configuration before an edit and check which instance answers the public server-list request.
Make the change
- Write down the exact multiplayer-list address and port for the affected player. Identify the ServerListPlus instance that handles its status ping, including whether a proxy answers before a backend receives any connection.
- Preserve the configuration and inspect the Hosts section alongside Default and Personalized. Use the official virtual-host documentation for the deployed version, especially if a Bungee forced-host name participates in the existing selection.
- Change one mapped description to a short harmless test label using the same valid YAML structure. Apply through the installed supported method, leaving the default and other host mappings unchanged during the experiment.
- Refresh separate listing entries for the mapped hostname and a known default route. If personalisation is enabled, compare a previously joined test client with a fresh test context so a personalised override does not obscure the host comparison.
Check the result
Only the intended address should select the trial message, with the default route remaining recognisable. Record the owning instance and relevant mapping so later branding edits do not get repeated on multiple inactive backends.
If the test fails
Restore the original description if the wrong route changes. Check what hostname the client actually presents and whether another status plugin answers first; do not change DNS or joining ports merely to force an unverified message edit to appear.
Use existing version-appropriate host keys as the starting point. The project’s historical documentation includes proxy-specific naming conventions that should not be copied into a different proxy implementation without compatibility checks.
References and related help
Check the official ServerListPlus documentation against your installed release before using a command or setting from another version.
Review ServerListPlus hover text for unintended player information
Server-list status is visible before someone joins. Review what its hover and personalised messages expose instead of assuming a message is private because its text sits in a plugin configuration file.
Prepare the test
Treat ServerListPlus as an existing integration to maintain, with release-specific compatibility. Preserve its complete configuration before an edit and check which instance answers the public server-list request.
Make the change
- Inspect the public listing with a consenting player online and hover over its player count. Record whether it shows names, a custom message or version-specific fallback text, and compare clients if the presentation differs.
- Preserve
ServerListPlus.ymland inspect the applicable Default, Personalized and host-specific status sections. Follow each active override so you do not repair the default while a personalised or virtual-host message still publishes the old text. - Replace unnecessary personal information in the relevant hover content with a short public description. Check documented placeholders before keeping a random-player or returning-player expression, and avoid using the display as a staff activity report.
- Apply the change through the installed supported method and repeat the hover test before and after a normal player joins. Check an existing-player context separately from a fresh one when personalisation is configured.
Check the result
The public status should contain only information you deliberately intend strangers to see. Confirm ordinary joining and the main description still work, and treat any client-added summary text as presentation behaviour rather than additional configuration lines.
If the test fails
Restore the previous safe text if the edited section fails to load. If unexpected names remain, inspect the active route and other status responders before deleting player tracking data or disabling every server-list feature.
The official guide notes that custom hover content uses the protocol’s player sample area and can render differently in external lists. Verify the actual client experience instead of promising that every listing service displays the same layout.
References and related help
Check the official ServerListPlus documentation against your installed release before using a command or setting from another version.
GSit tasks
Task guides and troubleshooting for GSit. Check the installed release before changing configuration or data.
Let players opt out of GSit click interactions
Clicking a stair and clicking another player are different GSit interactions. Give players clear control over the behaviour your server permits, and verify which toggle affects the specific complaint before changing global sitting settings.
Prepare the test
Choose a safe flat test area with two ordinary players. Separate sitting, clicking a seat and clicking another player because they can follow different permissions and protection checks.
Make the change
- Choose two consenting ordinary players and a safe flat test area. Record what happens when one clicks a supported seat and when one clicks the other player, avoiding combat, edges or an active public event.
- Check the installed help for
/sit toggleand/sit playertoggle. Compare the relevantGSit.SitToggleandGSit.PlayerSitTogglepermissions with the affected account’s effective permissions, including inherited denies and world contexts. - Use one toggle and repeat only its corresponding interaction, then test the other separately. Explain the observed scope to the player rather than promising that any one toggle disables every GSit command or interaction.
- Reconnect and repeat the agreed checks to establish how the installed release preserves the preference. Leave voluntary command-based sitting available if your policy permits it, and verify the second player’s own preference independently.
Check the result
Each player should understand which click interaction is enabled and how to change it through an allowed command. The other player’s settings and ordinary gameplay should remain unaffected by the test account’s preference change.
If the test fails
If the toggle is unavailable, repair the specific intended toggle permission instead of granting GSit.* or operator status. If behaviour still differs, inspect global configuration and protection rules before removing other movement or seat plugins.
Use your community rules alongside the plugin controls. A technical toggle is helpful, but it does not replace consent rules for player stacking or staff handling of repeated unwanted interactions.
References and related help
Check the official GSit documentation against your installed release before using a command or setting from another version.
- Set up GSit poses and restrict player interactions
- Create Minecraft ranks and inheritance with LuckPerms
Separate GSit command sitting from right-click seat permissions
A player who can use /sit may still be unable to right-click a stair. Those paths have distinct permissions and can also meet different protection checks, so test each action explicitly before broadening the rank.
Prepare the test
Choose a safe flat test area with two ordinary players. Separate sitting, clicking a seat and clicking another player because they can follow different permissions and protection checks.
Make the change
- Choose a safe unclaimed comparison area and one intended seat block. Record whether the affected player can run
/sitand whether the same player can right-click the supported seat while holding an appropriate item state. - Inspect effective
GSit.SitandGSit.SitClickpermissions through your permission manager. Compare the exact account, world and group context with an ordinary account that works, keeping operator bypasses out of the comparison. - Correct only the permission that contradicts the server’s rule. Test the command and click action again before changing allowed materials or region flags, so you know whether the permission edit fixed its intended path.
- Repeat inside the area where the complaint occurred. If both actions now work outside but one remains blocked inside, compare protection settings for that region rather than adding a broad world bypass to the player.
Check the result
The intended command and click routes should each follow your permission policy in the relevant area. Other poses, player stacking and administration actions should remain controlled by their separate permissions.
If the test fails
Restore an ineffective permission edit and inspect the seat material, available space and protection response. Do not grant a wildcard or remove claim protection simply because an administrator can sit on a block that an ordinary player cannot.
Keep the before-and-after permission results in a small support note. A reproducible difference between command, click and region is more useful than describing the entire plugin as unavailable to one rank.
References and related help
Check the official GSit documentation against your installed release before using a command or setting from another version.
- Set up GSit poses and restrict player interactions
- Create Minecraft ranks and inheritance with LuckPerms
Diagnose a GSit region denial without opening claim protection
Protected areas can intentionally reject sitting or posing. Prove which action is denied and which protection integration owns the decision before changing region permissions that also protect blocks, vehicles or other interactions.
Prepare the test
Choose a safe flat test area with two ordinary players. Separate sitting, clicking a seat and clicking another player because they can follow different permissions and protection checks.
Make the change
- Use an ordinary test account and record the region, action and message shown. Repeat the same sitting or pose action just outside the protected area, keeping the player, seat material and nearby space otherwise comparable.
- Identify whether the location uses WorldGuard, GriefPrevention, PlotSquared or another integration supported by the installed GSit release. Inspect overlapping region priorities and membership before assuming the most visible region is the only rule.
- For WorldGuard, compare the documented GSit action flags with the relevant underlying interaction requirements. Review the sit, playersit, pose or crawl action that actually failed rather than enabling every flag across the world.
- Apply the narrow intended region policy and retest as an ordinary player. Separately confirm that protected building and unrelated interaction restrictions remain effective, using harmless checks that do not modify another player’s claim.
Check the result
The chosen GSit action should work only where your area policy permits it, with claim protection still intact. Check both a region member and a non-member if the intended behaviour depends on membership.
If the test fails
Restore the original flags if the experiment broadens access or fails to change the action. Investigate another overlapping rule or integration before granting a global bypass or setting build access to allow for everyone.
The maintainer documents that some GSit WorldGuard actions also depend on ride, interact or build permissions. That dependency is a reason to review the full policy, not an instruction to open all three flags globally.
References and related help
Check the official GSit documentation against your installed release before using a command or setting from another version.
- Set up GSit poses and restrict player interactions
- Find Minecraft logs and send useful troubleshooting details
Check GSit pose compatibility after a Minecraft update
Working sitting does not prove that every pose or crawl feature supports the same client and server combination. Capture the failing pose precisely after an update instead of reinstalling the server or disabling all GSit functionality.
Prepare the test
Choose a safe flat test area with two ordinary players. Separate sitting, clicking a seat and clicking another player because they can follow different permissions and protection checks.
Make the change
- Record the Minecraft server build, GSit version and affected client version. Compare them with the maintainer’s current release information; pose support can have different requirements from ordinary seat interaction and should not be inferred from an old tutorial.
- Test a simple
/sitin a safe area, then the specific failing pose using the installed command help. Use an ordinary player account and note whether the command is denied, accepted without a visual change or accompanied by a console error. - Compare a client matching the server’s native protocol with a translated client if your network uses version-translation plugins. Keep permission and region contexts identical so a protocol difference is not confused with an access rule.
- If a compatible plugin update is required, preserve the current jar and configuration and test it on staging first. Check its dependencies and release notes before applying the narrow update during a planned restart.
Check the result
Supported poses should behave consistently for the client combinations you intend to support. Record any documented limitation and keep working seat features available instead of promising universal pose support from one successful administrator test.
If the test fails
Restore the previous compatible plugin build if a trial update introduces new faults, following its documented configuration compatibility rules. Send the exact pose, versions and redacted error to support rather than deleting player data or rebuilding the world.
A console capture can establish when an update-related error occurs. Include the short searchable error text and reproduction steps alongside a screenshot so the report remains useful when diagnosing a specific pose.
References and related help
Check the official GSit documentation against your installed release before using a command or setting from another version.
- Set up GSit poses and restrict player interactions
- Find Minecraft logs and send useful troubleshooting details
Geyser tasks
Task guides and troubleshooting for Geyser. Check the installed release before changing configuration or data.
Separate a Geyser signalling failure from a gameplay timeout
A Bedrock server entry that never appears and a visible entry that times out during joining point to different checks. Current Geyser NetherNet uses TCP for signalling and UDP for gameplay. A successful Java connection proves neither Bedrock path.
Record the starting point
Write down the Geyser build, Bedrock client version, assigned public address and advertised Bedrock port. Keep one failed attempt's timestamp. Use a remote client outside the server network so a local shortcut cannot hide a public routing problem.
Work through the change
- Open the service Network page and match the configured listener to an allocation that supports the protocols your Geyser setup requires. Ask support about protocol availability rather than inventing a second port.
- From the remote Bedrock client, refresh the server entry and record whether its description and player count appear. Keep this result separate from the later join attempt.
- Attempt one join and compare the timestamp with the Geyser console. Note whether signalling starts, gameplay negotiation begins, or no request reaches Geyser.
- Check any configured external signalling provider as a separate component. The address players save may differ from the Java address and from the address inside the container.
Check the result
Success means a remote player can discover the entry, complete joining and move in the world. Ask the tester to disconnect and reconnect once; cached discovery information can conceal a broken new address. Record the public endpoint they actually used.
If the result differs
An empty console during discovery suggests the wrong endpoint, listener or TCP path. A visible entry followed by a negotiation timeout makes the UDP advertisement and gameplay path worth checking. Authentication errors after negotiation belong to the identity configuration, not a blanket firewall reset.
Restore only the listener or advertisement setting you changed if the previous endpoint worked. Preserve the failed attempt log for support; do not disable Java authentication or reinstall Floodgate to diagnose a missing network path.
References and related help
- Geyser maintainer reference 1
- Geyser maintainer reference 2
- Set up Geyser and Floodgate for Java and Bedrock crossplay
- Find Minecraft logs and send useful troubleshooting details
Resolve a Geyser port collision with Query or a web map
A bind failure can appear after enabling a web map, Minecraft Query or another listener on the same service. With current NetherNet, Geyser's normal built-in signalling arrangement needs TCP as well as UDP; a number that looked unused under one protocol may already have an owner.
Record the starting point
Record the exact bind error and the port named beside it. List Geyser, Java gameplay, Query, voice chat and map listeners from their active configuration files. An allocation belongs to this service only when the panel or support confirms it.
Work through the change
- Stop the affected server during a planned window. Save copies of the listener configurations so a port change does not become an untracked change across several plugins.
- Compare each service by address, number and protocol. Do not assume Java gameplay can share a TCP listener with Geyser signalling just because older Bedrock guidance mentioned UDP only.
- Select a separately assigned endpoint for the conflicting component. Change that component alone, including its public URL or player instructions if users connect to it directly.
- Start the server and read startup output for both components. Test the web map, Query or voice service as well as a real Bedrock join from another network.
Check the result
Both listeners should start without address-in-use errors, and both services should remain reachable. Keep the final allocation list with the server notes. This prevents a later plugin installation from choosing the same number again.
If the result differs
A second bind error may come from another server process or from editing an inactive configuration. Check the filename Geyser loaded and whether the server actually stopped before restarting. Support can inspect host listeners; a game-panel account should not kill unknown host processes.
Return the changed component to its recorded endpoint if the new allocation does not work, then leave it stopped until support confirms the allocation. Keep the other working service running instead of deleting plugin data or opening every port.
References and related help
- Geyser maintainer reference 1
- Set up Geyser and Floodgate for Java and Bedrock crossplay
- Connect a domain to your Minecraft server
Check the public address Geyser advertises behind container networking
The address a game process sees inside its container can differ from the address a player can reach. A correct listening port does not help if signalling sends the client a private, loopback or obsolete public address for gameplay.
Record the starting point
Collect the assigned endpoint from your service details, the Geyser build and the current signalling arrangement. Save the relevant Geyser configuration and any startup properties. Treat a support-provided public address as authoritative over an address guessed from an interface inside the container.
Work through the change
- Reproduce a failed Bedrock join from a remote connection and note the address used in the saved entry. Check whether a domain still resolves to a previous service.
- Compare the advertised gameplay endpoint described by your installed Geyser release with the public allocation. Read the current NetherNet setup guidance before using startup overrides from an older tutorial.
- If an advertisement override is necessary, ask support to confirm the public mapping and supported startup control. Change the advertisement without moving the Java listener or changing the world.
- Restart through the panel, refresh the Bedrock server entry, and repeat the remote join. Keep the old and new endpoint values in your change record.
Check the result
The test should reach the same server ID, world and player identity as before while completing negotiation through the assigned public endpoint. Check a second remote client if the first has cached the previous discovery response.
If the result differs
If only one network fails, compare that client's saved endpoint and connection route before changing the server again. If all remote clients receive an unreachable address, send support the advertised endpoint, timestamp and build number with private configuration values removed.
Undo the single advertisement change if it makes discovery fail. Do not replace the allocation with another customer's IP, expose container management ports or copy an unrelated host's startup properties. Preserve the working Java endpoint throughout the investigation.
References and related help
- Geyser maintainer reference 1
- Geyser maintainer reference 2
- Set up Geyser and Floodgate for Java and Bedrock crossplay
- Find Minecraft logs and send useful troubleshooting details
Investigate the first-connection trust prompt in Geyser NetherNet
Current Geyser can serve NetherNet signalling over plain HTTP. Bedrock clients may ask whether to trust the endpoint on first use. This prompt concerns signalling transport; it does not show that the Minecraft world or Floodgate account data has changed.
Record the starting point
Record the address players enter, whether it is a domain or an IP, and how signalling reaches Geyser. Check who controls the domain and certificate before planning HTTPS. A hosting-panel allocation alone does not provide a domain certificate or an HTTPS reverse proxy.
Work through the change
- Read the HTTPS section linked from the current Geyser setup guide and identify whether the installed release supports your proposed built-in or external signalling arrangement.
- Check the certificate name against the exact domain players will use. Keep the existing endpoint available while the certificate and signalling route undergo a separate test.
- Have support configure or approve any host-level proxy and certificate path. Do not upload private certificate keys to a public web root or paste them into a ticket.
- Test discovery and joining from a fresh client entry. Check both the first connection and a reconnect, and confirm UDP gameplay still reaches the assigned server.
Check the result
With a valid documented HTTPS arrangement, clients should reach signalling under the intended domain without a certificate warning. A successful HTTPS page in a browser does not replace the Bedrock join test, because gameplay uses a different transport path.
If the result differs
A name mismatch, expired certificate or proxy route error needs fixing at that layer. Do not tell clients to ignore TLS errors as a permanent solution. A remaining gameplay timeout may be unrelated to the original trust prompt.
If the HTTPS trial fails, restore the previously recorded signalling route and tell testers which entry to use. Keep ownership of the certificate and domain documented so the same issue does not return at renewal.
References and related help
- Geyser maintainer reference 1
- Geyser maintainer reference 2
- Set up Geyser and Floodgate for Java and Bedrock crossplay
- Connect a domain to your Minecraft server
Check a Bedrock resource pack without replacing the Java pack
A Java resource pack is not automatically a Bedrock resource pack. If Java players see the correct items while Bedrock players see missing textures, separate the two pack formats and test Geyser's Bedrock delivery path before changing item identifiers.
Record the starting point
Keep the currently working Java pack and item definitions untouched. Record the Bedrock pack filename, its origin and the Geyser build. Use a small licensed test pack rather than a new archive containing your entire custom-item collection.
Work through the change
- Follow the installed Geyser release's pack documentation for the supported Bedrock archive format and pack folder. Check that the archive contains the expected manifest and resources rather than an extra enclosing download folder.
- Add only the test Bedrock pack to the documented location while the service is stopped. Preserve the previous packs and their names in a separate recovery copy.
- Start Geyser, inspect pack-loading errors, and join with a Bedrock tester who accepts the pack prompt. Ask them to report download failure separately from an incorrect texture after joining.
- Test an existing known item and the new test asset. Then reconnect with the same client to see whether the result depends on an old cached pack.
Check the result
The client should accept and load the intended Bedrock pack while Java players retain their working pack. Record which pack version the tester received. Check a second Bedrock device before treating one client's cache as a server-wide failure.
If the result differs
A malformed archive or manifest needs correction before item mappings can work. If downloading succeeds but the asset remains wrong, inspect the Bedrock mapping and supported custom-item workflow for the installed versions. Do not regenerate every item ID to fix a delivery problem.
Remove the trial pack and return to the saved pack set if clients cannot join. Keep the original Java definitions and player items intact; changing a pack file should not trigger a world reset or an inventory rewrite.
References and related help
- Geyser maintainer reference 1
- Set up Geyser and Floodgate for Java and Bedrock crossplay
- Add a Java server resource pack and fix download errors
Compare static and passthrough server descriptions in Geyser
A Bedrock description can come from Geyser's configured text, a Java-server passthrough response or an external signalling service. Editing the Java MOTD may therefore leave the Bedrock entry unchanged even though Java players see the new wording.
Record the starting point
Take a screenshot of each client entry and record the address and client edition. Identify whether the current setup uses built-in or external signalling. Keep a copy of the previous description so a cosmetic trial cannot leave players unsure which server they are joining.
Work through the change
- Locate the MOTD and passthrough controls in the configuration generated by the installed Geyser build. Read their comments instead of copying keys from a different release.
- Choose one source of truth for this test. Change either the explicit Bedrock description or the Java description that the selected passthrough mode reads, not both at once.
- If external signalling handles discovery, read its refresh behaviour. Current Geyser guidance notes that external signalling can update descriptions periodically rather than forwarding every ping live.
- Restart or apply the documented setting change, then refresh a remote Bedrock entry. Compare the full address so an old saved server is not mistaken for the edited one.
Check the result
The displayed wording should match the chosen source after the relevant refresh interval. Test the actual join as well; the server description should identify the world or community players reach, not merely provide a reassuring green entry.
If the result differs
If the Java entry updates and Bedrock does not, inspect passthrough selection and discovery caching. If neither updates, confirm you edited the active server files. A translation plugin does not make every Java formatting or display feature identical on Bedrock.
Restore the recorded text and passthrough setting if the trial produces a misleading description. Leave networking and authentication unchanged during this cosmetic investigation, and document any external service refresh delay for the next administrator.
References and related help
- Geyser maintainer reference 1
- Geyser maintainer reference 2
- Set up Geyser and Floodgate for Java and Bedrock crossplay
- Change the built-in Minecraft server-list MOTD
Build a Geyser compatibility check before a Bedrock client update
Bedrock clients can update before a server administrator changes anything. Geyser support also changes between builds. Keep a dated compatibility check for the client versions your community uses instead of promising that an old build will support every future release.
Record the starting point
Record the current Geyser build, Java server version, proxy version if present and any ViaVersion components. Save the current plugin files and configuration together. Choose one Java tester and one Bedrock tester with accounts that do not carry valuable trial items.
Work through the change
- Read the current Geyser supported-version page and the release or download notes. Confirm the target build supports the actual client and backend combination you plan to test.
- Use a separate copy of the service for the upgrade rehearsal. Keep its ports, external integrations and databases separate so the trial cannot admit production players or change their records.
- Exercise login, chat, inventory use, a container, a teleport and any required resource pack. Check Java joining too, because a dependency update can affect the shared backend.
- Record the exact build and client versions that pass. Plan a short maintenance window for the same tested file set rather than downloading an unrecorded build during the live restart.
Check the result
A useful check produces a repeatable list of working actions and a known recovery set. Include a disconnect and reconnect, because first login alone may miss identity or inventory problems that appear when a session resumes.
If the result differs
If the client version is unsupported, preserve the error and follow the project's release guidance. Adding ViaVersion does not guarantee support for every Bedrock transport or feature. Avoid changing online mode to bypass a protocol-version failure.
Return the staging copy to its saved plugin set if the trial fails. If a live upgrade changes data formats, use the complete matching recovery checkpoint rather than assuming an older JAR can read newer data.
References and related help
- Geyser maintainer reference 1
- Geyser maintainer reference 2
- Set up Geyser and Floodgate for Java and Bedrock crossplay
- Update Paper, Purpur and plugins safely
Test Bedrock forms and inventory menus with a non-staff account
A Bedrock player can join successfully yet struggle with a Java plugin's inventory menu, custom item or interaction. Protocol translation does not guarantee identical client interfaces. Reproduce the exact click and permission context before changing Geyser networking.
Record the starting point
Choose a disposable test account with the same rank as the affected player. Record the menu plugin version, Geyser build and client device. Save a small description of the expected menu action, such as opening a category or buying one harmless test item.
Work through the change
- Join with a Java account at the same permission level and complete the action. This establishes whether the backend menu works before adding the Bedrock translation path.
- Join with the Bedrock tester and repeat the same path, slot and interaction type. Keep the inventory contents simple so accidental clicks cannot consume valuable items.
- Check both plugin and Geyser logs at the attempt time. Record whether the backend received the command, denied a permission, or accepted an action the client displayed incorrectly.
- Consult the menu plugin and Geyser compatibility guidance before choosing a fallback command or a simpler menu. Change one display feature on a staging copy and repeat both client tests.
Check the result
The tester should reach the intended action without staff privileges and without receiving duplicate items or charges. Check the resulting backend state, not just whether the menu closed. A successful Java action remains useful evidence even if the Bedrock interface needs another design.
If the result differs
If both editions fail, investigate the menu configuration first. If only Bedrock fails, provide the maintainers with the reduced menu, versions and exact interaction. Avoid giving wildcard permissions to make an interface appear functional.
Restore the previous menu file if the trial changes purchase or command behaviour. Offer the documented ordinary command as a temporary route where one exists, and keep the unsupported interface disabled until a tested design works.
References and related help
- Geyser maintainer reference 1
- Geyser maintainer reference 2
- Set up Geyser and Floodgate for Java and Bedrock crossplay
- Build a safe starter menu with DeluxeMenus
Floodgate tasks
Task guides and troubleshooting for Floodgate. Check the installed release before changing configuration or data.
Plan a Floodgate username-prefix change without splitting player identity
A Floodgate name prefix helps distinguish Bedrock names from Java names. Changing it on an established server can confuse plugins that store names, permission targets or display labels. It is an identity migration, even if the player-facing change looks cosmetic.
Record the starting point
Record the present prefix and pick one consenting Bedrock tester with known homes, claims and permissions. Note the tester's UUID from a trusted server record. Back up the world and identity-dependent plugin data, including their databases where applicable.
Work through the change
- Inspect which installed plugins use UUIDs and which rely on player names or commands containing names. List the rank, claim, economy and teleport integrations the tester actually uses.
- Trial the prefix change on a private server copy using the installed Floodgate release's documented configuration. Do not change authentication type or account-linking policy during the same trial.
- Join with the same Bedrock account and compare its UUID, inventory, balance, homes and claim membership. Rejoin with a Java account whose display name could be confused with the new format.
- Update only the name-based integration entries that the documented migration requires. Keep a mapping from old visible names to verified UUIDs so staff do not create replacement accounts by guesswork.
Check the result
The same person should retain the same intended data and permissions, while staff can still distinguish identities. Check console commands and moderation searches as well as chat appearance. Record any plugin that needs a separate migration before scheduling the live change.
If the result differs
Missing data does not prove it was deleted. Stop the trial and inspect the UUID and account-linking state before creating a new record or copying inventories. An online-mode change can introduce a second identity problem that hides the original prefix issue.
Return to the saved prefix and configuration if any identity-dependent feature fails. Restore affected plugin data only from a matching checkpoint if the trial wrote incompatible records; do not merge player folders or database rows without a documented migration.
References and related help
- Floodgate maintainer reference 1
- Floodgate maintainer reference 2
- Set up Geyser and Floodgate for Java and Bedrock crossplay
- Back up game files before making changes
Check player progress before enabling Floodgate global account linking
Floodgate global linking can let a player use their Java identity when joining from Bedrock. That changes which existing data they see. A player who links first and checks inventories later can mistake their old Bedrock progress for a deletion.
Record the starting point
Ask the player to identify both accounts and the progress they need to retain. Keep a recovery checkpoint of the server and relevant plugin databases. Do not ask them to send passwords, linking codes or Microsoft authentication tokens in a public ticket.
Work through the change
- Read the current official linking instructions together. Explain that linked sessions use the Java account data described there, while the separate Bedrock data does not simply merge into it.
- Before linking, have the player record and arrange the items or ownership they need to transfer using your normal supervised server rules. Check ender storage, equipped items, claims and economy records.
- Let the account owner complete the official linking flow themselves. Staff should observe the resulting identity through normal server records rather than impersonating either account.
- After linking, join from Bedrock and verify the intended Java identity, permissions and progress. Repeat the test after reconnecting, and confirm the player understands the effect of unlinking.
Check the result
The player should see the expected linked identity and a documented account of what moved through supervised gameplay or plugin tools. A link is not a generic inventory-merging utility. Keep records of any staff-assisted transfer to prevent later duplicate-item disputes.
If the result differs
If progress appears missing, compare the active UUID and linking status before restoring anything. The official documentation explains how unlinking can make the separate Bedrock data accessible again. Avoid importing both data sets into one record without a tested per-plugin method.
Pause further account changes while the owner and staff review the checkpoint. Use the official unlinking route when appropriate, then reassess the identities. Restore live data only after confirming which account and timestamp the recovery must target.
References and related help
- Floodgate maintainer reference 1
- Set up Geyser and Floodgate for Java and Bedrock crossplay
- Recover a Minecraft player inventory from a backup
Allowlist a Floodgate player using the identity the server actually sees
The name typed into a Bedrock client is not enough to identify every server-side account. Prefixes, linked accounts and plugin allowlists can affect the name or UUID the backend uses. Resolve the actual identity before adding access.
Record the starting point
Keep an existing staff session or console route available so the allowlist cannot lock you out. Ask the player for the account name they use, then verify it against a trusted connection attempt or an existing record. Keep private identifiers out of public screenshots.
Work through the change
- Identify whether the server uses the built-in allowlist or a separate admission plugin. Read that tool's support for Floodgate and UUID entries before choosing its command.
- Check whether the player has linked a Java account. Record the prefixed Bedrock identity or linked Java identity that this server sees instead of guessing from an old chat nickname.
- Add the single verified identity through the documented admission tool. Leave authentication enabled and keep unrelated allowlist entries unchanged during the test.
- Ask the player to reconnect from outside your network. Also verify that a different unlisted test account remains unable to join; a successful allowed join alone does not prove admission is restricted.
Check the result
The intended account should pass admission and retain its existing inventory and rank. An unlisted account should still fail at the admission step. Keep the record tied to the verified UUID when the admission tool supports it, particularly if visible names may change.
If the result differs
If the allowed player still fails, read the exact rejection and compare the identity at the proxy and backend. A proxy allowlist and a backend allowlist can enforce separate checks. Do not disable both permanently to hide an identity mismatch.
Remove only the trial entry if it targeted the wrong identity, then restore the recorded admission policy. If the player appears as a new account, investigate linking or forwarding before transferring data or granting administrator access.
References and related help
- Floodgate maintainer reference 1
- Floodgate maintainer reference 2
- Set up Geyser and Floodgate for Java and Bedrock crossplay
- Manage Minecraft operators, permissions and the whitelist
Give a Bedrock player a rank without relying on a display name
A rank can appear correct in chat while permission checks target a different account record. Floodgate prefixes, nicknames and global linking make name-only staff workflows fragile. Use the identity your permission plugin records for the actual login.
Record the starting point
Choose one ordinary Bedrock tester and one harmless permission to check. Record the existing primary group, UUID and linking state. Keep a copy or export of the permission data before changing a live network role.
Work through the change
- Have the player join through the normal public route, then find their account in the permission plugin using its documented lookup or editor. Compare the UUID with trusted login records.
- Assign the intended group to that account only. Do not add every spelling of their name or grant a wildcard permission in an attempt to cover all possible identities.
- Test the selected command as the Bedrock player and check one command the rank should still deny. If linking is enabled, compare the Java account's expected role before changing it.
- Reconnect and, on a network, transfer between two intended backend servers. Confirm the same permission record applies under the configured forwarding and storage arrangement.
Check the result
The player should gain the intended command and remain unable to perform unrelated staff actions. Check permission output rather than relying on a prefix in chat. Record whether the group belongs to a standalone Bedrock identity or the linked Java identity.
If the result differs
A different result after switching servers suggests inconsistent permission storage, context or identity forwarding. Compare account UUIDs first. Changing the Floodgate prefix to match a permission record can create additional name-based problems without fixing the underlying identity.
Remove the trial group from the single target record if the test selected the wrong account. Use the saved permissions checkpoint only when a wider change needs recovery; keep normal player progress and unrelated groups untouched.
References and related help
- Floodgate maintainer reference 1
- Floodgate maintainer reference 2
- Set up Geyser and Floodgate for Java and Bedrock crossplay
- Create Minecraft ranks and inheritance with LuckPerms
Replace a leaked Floodgate key across the trusted proxy path
Floodgate's key is an authentication credential. If it appears in a public download, screenshot or repository, removing the public file alone does not make the old key trustworthy. Plan a coordinated replacement for every component that must share it.
Record the starting point
Identify the proxy, Geyser deployment and backend Floodgate installations that belong to this network. Confirm which components need the key under the official setup for their platforms. Keep the existing configuration and a complete recovery checkpoint in restricted storage.
Work through the change
- Close the relevant maintenance window to player logins and stop the affected components through their normal controls. Avoid a rolling half-update that leaves some servers trusting the old key.
- Follow the current Floodgate release instructions to produce the replacement key and distribute it only to the required trusted components. Use private file transfer, never a public paste or repository.
- Check the documented forwarding settings on the proxy and backend. The key does not replace Velocity or Bungee forwarding configuration, and backend admission still needs the protected proxy path.
- Start the network in its planned order, then test a Bedrock login and a Java login. Confirm that a normal player retains their identity and can transfer to each intended backend.
Check the result
If the result differs
A failure on only one backend often means that component retained the old key, used the wrong folder or did not restart. Inspect redacted errors and configured file locations. Do not solve the mismatch by enabling unauthenticated direct backend access.
If a coordinated restart fails, keep admission closed while correcting the new deployment. Reusing the exposed key is not a sound long-term rollback. Preserve player data; a credential rotation does not require deleting accounts, worlds or inventories.
References and related help
- Floodgate maintainer reference 1
- Set up Geyser and Floodgate for Java and Bedrock crossplay
- Set up a Velocity network with protected backend servers
Diagnose missing Bedrock skins on one backend server
A Bedrock player may authenticate through the proxy while a backend lacks the Floodgate support needed by skin-aware integrations. A missing skin on one backend therefore does not prove the player's Microsoft account or stored inventory is broken.
Record the starting point
Record which backend shows the problem, the Geyser and Floodgate versions and any skin plugin involved. Use the same Bedrock tester across servers. Save the affected backend and proxy configuration before changing the trusted forwarding path.
Work through the change
- Check whether the official Floodgate setup for your proxy calls for backend installation to expose the API or display Bedrock skins. Compare the affected server with a working backend rather than installing unrelated skin plugins.
- Verify the required backend Floodgate file and the documented proxy data-forwarding setting. Check that its credential belongs to this trusted network, without posting the key in a support ticket.
- Restart the changed component during a quiet window and transfer the tester through the normal proxy route. Do not use a direct backend login as a substitute for testing forwarded identity.
- Check the skin, UUID and a harmless permission on both backends. If another skin plugin overrides appearance, trial the conflict on a private copy instead of changing account authentication.
Check the result
The same Bedrock account should retain the same identity while the supported backend shows its expected skin. Reconnect once to distinguish a temporary client cache from a repeatable server difference. Record the exact backend versions that pass.
If the result differs
If skins remain inconsistent but UUIDs and login are correct, inspect integration compatibility and skin override rules. If identity also differs, stop the trial and investigate forwarding first. Appearance changes should not cause staff to merge or rename player data.
Restore the saved configuration for the trial component if it introduces a new login problem. Keep the protected proxy route and authentication policy intact. Escalate with redacted logs and the working-versus-failing backend comparison rather than replacing every plugin at once.
References and related help
- Floodgate maintainer reference 1
- Floodgate maintainer reference 2
- Set up Geyser and Floodgate for Java and Bedrock crossplay
- Configure SkinsRestorer without changing account authentication
ViaVersion tasks
Task guides and troubleshooting for ViaVersion. Check the installed release before changing configuration or data.
Set a deliberate Java client policy with ViaVersion version blocks
Accepting a protocol does not mean you want to support it. A community may choose a smaller client range because its resource pack, combat rules or accessibility testing covers only those clients. ViaVersion provides readable version blocks without changing the server world.
Record the starting point
Write down the native server version, the oldest and newest clients you intend to allow, and the installed ViaVersion build. Keep the current configuration and prepare one allowed client plus one intentionally excluded client. Use a quiet test window rather than excluding everyone during an event.
Work through the change
- Open the active ViaVersion configuration and locate its generated block-versions and block-protocols options. Read the comments supplied by the installed release before changing either list.
- Add only the intended readable version restriction to block-versions. Existing numeric blocks also apply, so inspect both lists when a client appears to be excluded unexpectedly.
- Set a concise blocked-client message using the documented message option. Tell players which client range to use; do not claim they have been banned from the community.
- Restart normally and test the two prepared clients through the public connection route. On a proxy network, repeat the check for each backend whose supported range differs.
Check the result
The allowed client should join and perform normal movement and inventory actions. The excluded client should receive the intended explanation before entering gameplay. Record the effective range alongside the release numbers so a future upgrade can repeat the same acceptance test.
If the result differs
An allowed client failing too may indicate overlapping numeric blocks, a restriction on another network component or a missing translation dependency. Compare the rejection text and startup log. Do not loosen every restriction simply because one version was entered incorrectly.
Restore the saved restriction lists and restart if the policy prevents the intended population from joining. Keep a copy of the failed rule for review. Changing an admission rule does not require changing player files or regenerating a world.
References and related help
- ViaVersion maintainer reference 1
- ViaVersion maintainer reference 2
- Allow compatible Minecraft Java clients with ViaVersion
- Find Minecraft logs and send useful troubleshooting details
Locate the translation layer in a Velocity network
A network can translate client traffic at a proxy or at supported backend installations. Adding another copy everywhere makes the topology harder to understand and does not guarantee broader support. First establish which component sees the original client and which version each backend actually runs.
Record the starting point
Draw the public proxy, lobby and destination servers on paper. Record their software builds and the Via plugins installed on each. Keep forwarding credentials out of this diagram. Include a working backend as a comparison, because the same client can expose different compatibility requirements across destinations.
Work through the change
- Check startup logs to identify active ViaVersion installations and their platform. A JAR sitting in a folder is not proof that the plugin loaded successfully.
- Compare the arrangement with the current ViaVersion platform guidance. For Velocity, inspect backend version detection in the generated configuration rather than assuming every destination uses the lobby version.
- Join through the normal public proxy with the affected client and transfer to each backend. Record which transfer fails and the corresponding proxy and backend timestamps.
- Trial a corrected supported placement on a private copy or controlled maintenance window. Change one translation location at a time and preserve protected backend forwarding.
Check the result
The chosen client should reach every destination you claim to support, and logs should identify one understood translation path for each hop. A successful lobby login alone is insufficient evidence. Include a native-version client in the test so the change does not hide a basic forwarding problem.
If the result differs
A failure on one destination suggests its version detection, plugin requirements or unsupported protocol direction needs checking. Authentication or forwarding errors are a separate issue. Installing ViaBackwards cannot repair a proxy secret mismatch or a backend listening on the wrong address.
Return to the recorded placement if the trial creates new failures. Leave direct backend access protected and retain both sides of the transfer log. Do not reset the network, player databases or login mode merely to simplify a compatibility diagram.
References and related help
- ViaVersion maintainer reference 1
- ViaVersion maintainer reference 2
- Allow compatible Minecraft Java clients with ViaVersion
- Set up a Velocity network with protected backend servers
Test translated items before publishing a Java resource pack
ViaVersion translates network protocol data; it is not a resource-pack converter. A custom item that looks correct on the native server client can display a fallback model or different behaviour on another supported version. Check the cosmetic feature itself rather than treating a successful login as complete compatibility.
Record the starting point
Prepare a small private test area containing the exact items, menus and interactions used by your pack. Record the pack release and its intended client versions. Keep the existing pack URL and hash so the previous presentation can be restored without changing inventories.
Work through the change
- Use the native server client to confirm that the resource pack downloads and that the test item works before involving translation. A broken download is independent of ViaVersion.
- Repeat with the oldest and newest clients in your published support range. Accept the pack where supported and compare inventory icons, held models, placement and menu clicks.
- Record a fallback as a presentation limitation rather than replacing the real item with a different identifier on the live server. Ask the pack or custom-item maintainer about its supported client formats.
- Decide whether to publish the limitation, adjust the pack through its documented process, or narrow the permitted client range. Retest after the chosen change.
Check the result
Players should know which versions receive the full presentation and which receive a fallback. Verify that clicking or moving the item does not duplicate it or lose it during the trial. Keep screenshots labelled with client versions so two different renderers are not mistaken for changing server data.
If the result differs
If every client sees the wrong model, inspect the resource-pack URL, hash and pack configuration first. If only translated clients differ, collect the client version, item plugin build and ViaVersion build. Avoid submitting a full paid resource pack in a public issue.
Restore the previous pack reference if the updated asset breaks the native client. Keep the test items isolated and remove only those created for the trial. Do not roll back an entire player inventory because a model rendered incorrectly.
References and related help
- ViaVersion maintainer reference 1
- Allow compatible Minecraft Java clients with ViaVersion
- Add a Java server resource pack and fix download errors
Update the Via plugin family as a tested release set
ViaBackwards and ViaRewind depend on the Via translation chain. Updating one library while retaining an incompatible companion can fail at startup or break only the oldest client. Treat the installed family as a tested set, while keeping server and Java compatibility in view.
Record the starting point
Record all Via plugin filenames and release numbers, the server platform, Java runtime and advertised client range. Download releases from their maintainers. Preserve the current JARs and configuration outside the active plugins directory; duplicate JARs in that directory can make loading ambiguous.
Work through the change
- Read the release requirements for the target ViaVersion, ViaBackwards and ViaRewind builds. Include only components your client range needs and check support for the server platform.
- Stop the server normally, replace the selected artifacts and retain existing configuration unless the release notes require a documented migration. Do not use a plugin hot-loader for the update.
- Start and read the first dependency or startup error before testing players. Resolve a failed companion load rather than continuing because the main server reached its ready message.
- Test a native client, a newer translated client and the oldest client you advertise. Exercise inventory movement, world travel and a representative menu rather than checking the server list alone.
Check the result
Every required component should report a successful load, and each test client should complete the same small gameplay checklist. Save the final release combination with the test date. This gives staff a known working baseline when the next Minecraft client update arrives.
If the result differs
A missing class or incompatible API error after replacement usually deserves a dependency comparison before configuration changes. If one client fails, confirm its protocol direction is supported by the installed chain. A development snapshot may not provide the same support as a stable release.
Stop and restore the previous matching set if a required client regresses. Retain the failed startup log and new artifact names for reporting. Do not downgrade the world or delete player data as a workaround for an incompatible translation library.
References and related help
- ViaVersion maintainer reference 1
- ViaVersion maintainer reference 2
- ViaVersion maintainer reference 3
- Allow compatible Minecraft Java clients with ViaVersion
- Back up game files before making changes
Investigate packet-rate kicks without disabling every guard
A packet-rate kick can follow a client action, a plugin loop or an unusual network condition. Raising every limit hides the evidence and can remove useful protection. Establish the exact kick message and the action that precedes it before editing any rate-control setting.
Record the starting point
Record the affected client version, ViaVersion release and installed packet-related plugins. Keep the current generated configuration. Choose a consenting tester and a quiet area; reproducing a packet flood with the whole player base online is not necessary to identify a repeated action.
Work through the change
- Capture one disconnect timestamp and the complete relevant message from the console. Distinguish a ViaVersion message from a proxy, anti-cheat or server-native packet restriction.
- Repeat the suspected action once with the native server client and once with the affected translated client. Note whether joining, inventory use, movement or another action triggers the problem.
- Compare the installed release's documented packet settings and compatibility notes. If a dependent plugin is implicated, reproduce on a private copy with that integration changed rather than disabling protections publicly.
- Apply only a justified, bounded setting adjustment or compatible plugin update. Retest the same action and an ordinary session, then watch whether the error reappears under normal traffic.
Check the result
The tester should complete the action without a repeated disconnect, while the reason for any changed limit remains documented. A lower player count during testing can conceal the original pattern, so retain the exact steps and check them again during a representative session.
If the result differs
If the kick survives with native and translated clients, examine the originating plugin or proxy before editing ViaVersion again. If it occurs only with one client build, include that build and a minimal reproduction in the maintainer report. Do not publish player addresses from raw connection logs.
Restore the original limit when an adjustment does not change the symptom. Keep the captured evidence and revert the isolated trial plugin change. A rate-limit investigation should not involve changing world files, authentication mode or unrelated host firewall rules.
References and related help
- ViaVersion maintainer reference 1
- ViaVersion maintainer reference 2
- Allow compatible Minecraft Java clients with ViaVersion
- Find Minecraft logs and send useful troubleshooting details
Prepare a useful ViaVersion support report without leaking configuration
A useful compatibility report explains which client, server and translation path failed. A screenshot of a disconnect message rarely supplies enough context. Conversely, posting an entire panel archive can expose unrelated credentials. Build a small report that a maintainer can reproduce without accessing your service.
Record the starting point
Write down the server platform and build, Java version, ViaVersion family releases and affected client version. Identify whether the client connects through a proxy. Keep the original error locally, including its timestamp, and separate account or address information from the technical reproduction.
Work through the change
- Reproduce the issue using one short sequence of actions. Include the expected behaviour, actual result and whether the native server client behaves differently.
- Use the diagnostic or dump facility documented for your installed ViaVersion release if support requests it. Read the output before sharing its link; generated reports may expose plugin and network details.
- Add only the relevant startup or disconnect excerpt. Redact passwords, tokens and unrelated player information without removing version numbers or the first error in the stack trace.
- Check the maintainer's issue template and search for the same server/client combination. Submit one report with the minimal reproduction instead of multiple reports containing different guesses.
Check the result
A reader should be able to identify the protocol direction, components involved and exact failing action. Keep a private copy of the report and its original logs so staff can answer a follow-up without asking the player to repeat the failure repeatedly.
If the result differs
If the reproduction disappears after removing a packet-dependent plugin on a test copy, include that comparison. It does not prove either maintainer is at fault, but it narrows the interaction. If no clean reproduction exists, say which observations are confirmed and which remain uncertain.
Remove a public diagnostic link where the hosting tool allows it if you discover a secret after sharing. Rotate an exposed credential rather than assuming deletion removed every copy. Keep gameplay configuration unchanged while preparing the report.
References and related help
- ViaVersion maintainer reference 1
- Allow compatible Minecraft Java clients with ViaVersion
- Find Minecraft logs and send useful troubleshooting details
ViaBackwards tasks
Task guides and troubleshooting for ViaBackwards. Check the installed release before changing configuration or data.
Check old-client access near modern world-height limits
A modern world can contain playable blocks outside the height range understood by an older client. ViaBackwards documents limits for clients predating expanded world height. Translation cannot give those clients a native view of every modern coordinate, even when joining works.
Record the starting point
Record the server version and oldest permitted client. Identify the coordinates of spawn, portals, homes and minigame arenas. Use a private test area with a safe recovery location. Do not test the limitation by dropping a real player's valuable inventory into an inaccessible region.
Work through the change
- Read the current ViaBackwards known issues for the client generation you allow. Compare its supported vertical range with the coordinates your community actually uses.
- Join with the native client and the older client, then inspect a safe route near each relevant boundary. Check movement and interaction, not just whether a chunk appears.
- Review automatic teleports such as homes, portals and random-teleport destinations. A plugin may select a valid modern coordinate that the older client cannot use properly.
- Choose a documented client restriction, a compatible destination policy or a clearly explained limitation. Retest a normal login and the affected teleport using a disposable test account.
Check the result
The supported client range should match the areas players are expected to reach. Record the tested coordinates and client builds. If you retain older clients with limits, place the explanation alongside joining instructions so players do not discover it after becoming trapped.
If the result differs
If the native client also fails at the destination, investigate the world, teleport plugin or protection rule separately. If only the old client fails beyond the documented range, repeatedly reinstalling ViaBackwards will not expand the client's world model.
Return the tester to the safe location using normal server controls. Restore only the trial teleport or client policy if it causes a new issue. Keep the modern world intact; deleting regions or downgrading world files is not a safe compatibility fix.
References and related help
- ViaBackwards maintainer reference 1
- Allow compatible Minecraft Java clients with ViaVersion
- Let supported older Java clients join with ViaBackwards
Test smithing and crafting menus with older Java clients
New Minecraft releases can change workstation screens and recipes. ViaBackwards translates many interactions, but its known issues include limitations affecting older clients and modern smithing behaviour. A client that can open the menu has not necessarily completed a valid transaction.
Record the starting point
Prepare disposable copies of the ingredients and record the expected output using the server's native client. Note custom recipe and menu plugins. Keep valuable player items out of the test, and verify the installed ViaBackwards release against its current known-issues list.
Work through the change
- Run the complete recipe with the native client first. Confirm the server creates the intended output and consumes the expected ingredients without a permission override.
- Repeat the exact interaction with the older supported client. Check input slots, preview output, shift-click and taking the finished item, using ordinary player permissions.
- Reconnect before checking the final inventory. A temporary visual item is different from a server-confirmed result; compare both clients without repeatedly clicking an uncertain output.
- If the interaction is unsupported, publish the limitation or require a compatible client for that feature. Test any custom workaround on a private copy and check it cannot duplicate ingredients.
Check the result
The recipe should either complete with consistent server-side inventory or fail in a documented, understandable way. Keep the test small enough to compare item counts before and after. A workaround should preserve the intended recipe cost rather than granting an unrelated replacement reward.
If the result differs
A failure on both clients suggests a recipe, permission or plugin issue outside protocol translation. A failure only on the older client should be checked against ViaBackwards limitations before changing the global crafting system. Include the exact menu and click sequence in a report.
Remove the disposable ingredients and restore the trial menu configuration if needed. Correct a test inventory through ordinary staff tools after checking server-side counts. Do not restore the entire world because one workstation preview displayed incorrectly.
References and related help
- ViaBackwards maintainer reference 1
- Allow compatible Minecraft Java clients with ViaVersion
- Let supported older Java clients join with ViaBackwards
Contain a translated-client inventory desynchronisation report
An older client's inventory screen can disagree temporarily with server state after an unsupported click sequence. ViaBackwards lists inventory compatibility limits. Treat a report as a consistency problem to investigate, rather than immediately compensating every item shown in a screenshot.
Record the starting point
Ask for the client version, container type and exact action before the mismatch. Prepare low-value test items with counted stacks. Keep an inventory checkpoint for the test account and avoid experimenting in a shared chest containing player valuables.
Work through the change
- Repeat the action with the native server client. Record the starting and ending stack counts and whether a container-management plugin changes the menu.
- Use the affected older client with the same items and permissions. Try the reported action once, then close and reopen the inventory instead of repeatedly moving a suspicious stack.
- Reconnect and compare the server-confirmed inventory. If staff inspect stored data, use established inventory tools rather than editing raw player files while the account is online.
- Trial the compatible ViaVersion and ViaBackwards release set, or restrict the failing interaction or client version. Check both the reported action and ordinary chest transfers before reopening normal use.
Check the result
A passing result means counts remain consistent after reconnecting and the player can use the supported interaction reliably. If a visual mismatch remains a known limitation, explain the safe supported client choice. Preserve a short reproduction for the plugin maintainers.
If the result differs
If item counts actually change server-side, stop the affected test route and investigate all menu or inventory plugins involved. A screenshot alone cannot establish duplication or loss. Avoid adding compensating items until staff have checked the original and final records.
Restore the test account's checkpoint only if the controlled test altered its real inventory. Revert the isolated compatibility change if it creates a broader failure. Keep unrelated player records and worlds untouched throughout the investigation.
References and related help
- ViaBackwards maintainer reference 1
- Allow compatible Minecraft Java clients with ViaVersion
- Recover a Minecraft player inventory from a backup
Separate a missing ViaBackwards dependency from an unsupported client
ViaBackwards requires ViaVersion. A failed dependency load and an unsupported client are different problems: the first concerns the server's plugin chain, while the second concerns the protocols that chain can translate. Checking them in order avoids changing working authentication or network settings.
Record the starting point
Record all Via release numbers, server software and affected client version. Keep the first startup error, not just the final disconnect. Check whether ViaRewind is also required for the legacy client generation you intend to support.
Work through the change
- Start with the normal boot log and confirm ViaVersion loaded before ViaBackwards. Resolve missing dependency or incompatible API messages using the maintainers' release requirements.
- Check the supported protocol direction. ViaBackwards allows supported older clients onto newer servers; it is not a promise that every historic or snapshot build is accepted.
- Test the native client, one supported older client and the reported failing client. On a proxy network, use the normal public route and record which destination rejects the connection.
- Change the smallest relevant component: install a compatible dependency set, correct its placement or adjust the published support range. Restart normally and repeat the same three tests.
Check the result
The log should show a healthy dependency chain before older-client acceptance is judged. The native client should continue to work. Keep a record of the oldest tested client rather than treating the plugin name as a complete compatibility policy.
If the result differs
If ViaBackwards loads but a client fails, inspect the rejection text and any proxy-side restriction. If ViaBackwards never loads, debugging gameplay menus is premature. A Java runtime mismatch can also stop a plugin before it has handled any player traffic.
Restore the previous working Via release set if the replacement cannot load. Preserve the error and artifact names for support. Do not remove authentication, delete plugin databases or downgrade world files to work around a missing library.
References and related help
- ViaBackwards maintainer reference 1
- ViaBackwards maintainer reference 2
- ViaBackwards maintainer reference 3
- Allow compatible Minecraft Java clients with ViaVersion
- Find Minecraft logs and send useful troubleshooting details
ViaRewind tasks
Task guides and troubleshooting for ViaRewind. Check the installed release before changing configuration or data.
Check the complete dependency chain for a legacy Java client
ViaRewind extends a translation chain rather than replacing it. The maintainer lists ViaVersion and ViaBackwards as requirements. A legacy client can therefore fail because of an earlier missing component even when a ViaRewind JAR is present in the plugins folder.
Record the starting point
Write down the precise legacy client build and why the community needs it. Record the server platform, Java runtime and all three Via versions. Keep a normal supported client available as a control, and back up the existing plugin configuration before replacing artifacts.
Work through the change
- Read the current ViaRewind requirements and supported platform instructions. Select compatible releases from the maintainers instead of combining whatever files a search result offers.
- Check the boot log for successful loading of ViaVersion, ViaBackwards and ViaRewind. Identify the first dependency error and fix it before testing a legacy login.
- Connect with the native server client and the intended legacy client through the same public route. Test a simple world interaction as well as joining.
- Document the release combination and the legacy limitations you accept. If you operate a proxy, confirm the supported placement for that platform and retest a backend transfer.
Check the result
The required chain should load without dependency errors, and the tested legacy client should reach the intended destination. Keep the exact build numbers with the support policy. Compatibility with one legacy release does not establish support for every nearby client modification or snapshot.
If the result differs
If the native client fails too, check the basic service or proxy path before adding more translation plugins. If only the legacy client fails, compare its exact version and the first relevant translation error with current maintainer guidance.
Return to the previous matching plugin set if the trial breaks existing clients. Keep removed JARs outside the active plugins folder and restart normally. No part of a dependency check requires resetting the world or changing player identity storage.
References and related help
- ViaRewind maintainer reference 1
- ViaRewind maintainer reference 2
- ViaRewind maintainer reference 3
- Evaluate legacy Java client support with ViaRewind
- Allow compatible Minecraft Java clients with ViaVersion
Explain legacy-client block and item fallback displays
A legacy Minecraft client does not contain the models and behaviours of every modern block or item. Translation can present a substitute representation, but that does not make the client equivalent to a native modern client. Test the features players actually use before advertising full visual parity.
Record the starting point
Select a private sample area containing the modern building blocks, containers and equipment important to your community. Record the native server and legacy client versions. Use disposable items so an awkward interaction cannot damage a player's collection.
Work through the change
- Inspect the sample area with the native client and record the intended appearance and interaction for each feature. Include signs or labels identifying the real server-side block.
- Join with the legacy client and compare appearance, collision and right-click behaviour. Keep a fallback texture separate from a failure to interact with the object.
- Check ViaRewind's current limitations and the requirements of custom-item or resource-pack plugins. A Java resource pack does not automatically add every modern protocol feature to an old client.
- Publish the tested limitations or narrow access to the supported client range. Retest any proposed workaround on the sample area before changing a public build.
Check the result
Players should receive accurate expectations about what the legacy client can display. Confirm that a fallback does not cause an important object to be mistaken for a harmless one. Staff screenshots should label the client version rather than imply the actual world block changed.
If the result differs
If the native client sees the wrong block too, investigate world or custom-item configuration. If only the legacy view differs, compare the documented translation fallback before replacing server data. Do not treat a substitute model as proof of world corruption.
Remove only the sample objects created for testing and restore any trial client restriction if needed. Keep production builds intact. Requiring a newer supported client for a feature is safer than rewriting a player's build merely to match a legacy display.
References and related help
- ViaRewind maintainer reference 1
- ViaRewind maintainer reference 2
- Evaluate legacy Java client support with ViaRewind
- Add a Java server resource pack and fix download errors
Run a legacy-client combat and anti-cheat acceptance test
Older and newer Minecraft clients differ in combat presentation and packet behaviour. ViaRewind compatibility alone does not certify an anti-cheat or competitive ruleset. A controlled acceptance test can reveal false positives without weakening protection for the entire server.
Record the starting point
Create a private arena and use consenting test accounts with ordinary permissions. Record server, Via family, anti-cheat and client versions. Save the anti-cheat configuration and decide which simple actions count as expected play before beginning the trial.
Work through the change
- Run movement, jumping, melee hits and a normal inventory swap with the native client. Record alerts and server behaviour as a baseline.
- Repeat the same actions with the supported legacy client. Keep timing and equipment comparable, and distinguish an alert from an automatic kick or cancelled action.
- Check the anti-cheat maintainer's supported Via integration and known limitations. Trial a documented compatible release or scoped adjustment on a private copy rather than disabling all checks.
- Repeat both client tests after the adjustment. Include a normal non-staff login so a bypass permission cannot make the result appear successful.
Check the result
Ordinary test actions should complete consistently without unexplained kicks, and the community's intended combat rules should remain clear. Save timestamps and the small action list. A test of harmless movement does not prove that every combat exploit is detected.
If the result differs
If only one minigame fails, inspect its mechanics and packet hooks alongside the anti-cheat. If every client triggers the same alert, the baseline itself needs attention. Send a redacted minimal reproduction to the relevant maintainer rather than exposing full player histories.
Restore the saved anti-cheat setting if it introduces new false positives or weakens an unrelated check. Pause legacy competitive access if compatibility remains unresolved. Keep worlds, player inventories and the server's authentication policy unchanged.
References and related help
- ViaRewind maintainer reference 1
- ViaRewind maintainer reference 2
- Evaluate legacy Java client support with ViaRewind
- Find Minecraft logs and send useful troubleshooting details
Retire a legacy Java connection route without touching the world
A community may stop supporting legacy clients when their limitations become costly to maintain. Removing a translation route is a connection-policy change, not a reason to downgrade or replace the world. Plan the change around dependencies and player communication.
Record the starting point
Confirm which client generations currently use the route and whether another plugin explicitly depends on ViaRewind. Record the installed Via family and existing version restrictions. Keep the old artifacts and configuration outside the active plugins directory for a reversible trial.
Work through the change
- Announce the supported client range and a date for retiring the legacy route. Tell players which client to install rather than implying their account or inventory will be removed.
- Check maintainer requirements and dependent-plugin documentation before removing ViaRewind. Retain ViaVersion or ViaBackwards where other supported clients still require them.
- Stop normally, remove only the unused compatibility artifact from the active folder and start again. Read the startup log for newly missing dependencies.
- Test the native client, the oldest still-supported client and the retired legacy client. Verify that the first two work and that the rejected route produces an understandable outcome.
Check the result
The world and player identities should remain unchanged while the published client range becomes smaller. Check a backend transfer on networks and a representative menu after login. Keep the retirement note with the final dependency list to avoid accidental reinstallation later.
If the result differs
If a remaining plugin will not load, examine its declared dependency before removing additional libraries. If a still-supported client fails, restore the known working chain and reassess which component handles its protocol. Do not use a successful native login as the only check.
Restore the previous artifact and configuration during a normal stop if the retirement causes unexpected breakage. Keep the planned player notice accurate while the trial is paused. No player files, inventories or regions need to be deleted for this change.
References and related help
- ViaRewind maintainer reference 1
- ViaRewind maintainer reference 2
- ViaRewind maintainer reference 3
- Evaluate legacy Java client support with ViaRewind
- Back up game files before making changes
ProtocolLib tasks
Task guides and troubleshooting for ProtocolLib. Check the installed release before changing configuration or data.
Identify the dependent plugin behind a ProtocolLib listener error
ProtocolLib lets other plugins inspect and change network packets. An error mentioning ProtocolLib may originate in a listener registered by a dependent plugin. Read the complete exception and identify the listener owner before deciding which component needs a change.
Record the starting point
Keep the first complete stack trace and the action immediately before it. Record ProtocolLib, server, Java and dependent-plugin versions. Reproduce with a consenting account in a low-risk area, especially if the error occurs while editing menus or moving items.
Work through the change
- Find the first exception and its cause in the log, then look for the dependent plugin's classes or listener name. A repeated wrapper line alone is not enough to identify ownership.
- Check that plugin's documented ProtocolLib and server requirements. Compare its release date and supported builds with the exact server version you run.
- On a private copy, repeat the reported action with the suspected integration changed or updated. Keep other packet plugins stable so the comparison isolates one difference.
- Apply the compatible component change during a normal restart. Repeat the action and test another feature that uses ProtocolLib, such as a menu or display integration.
Check the result
The original action should complete without the repeated listener exception, and unrelated dependent features should still work. Save both the failing and passing version combinations. An empty log during an idle period does not prove the packet action has been exercised.
If the result differs
If several plugins fail at startup, compare the library artifact and server compatibility before investigating individual listeners. If one plugin's handler throws only during one action, provide that maintainer with the full redacted cause and reproduction steps.
Restore the previous plugin combination if the targeted change causes broader failures. Keep the failing trace for support rather than deleting logs. Do not reinstall the server or remove player data to repair a packet-listener exception.
References and related help
- ProtocolLib maintainer reference 1
- Install ProtocolLib and diagnose dependent plugin failures
- Find Minecraft logs and send useful troubleshooting details
Choose the correct ProtocolLib artifact for Paper or Spigot
ProtocolLib's current distribution distinguishes its primary Paper artifact from the Spigot compatibility artifact. Old instructions that treat every file as interchangeable can lead to a startup failure. Confirm the platform and the maintainer's current release guidance before downloading another copy.
Record the starting point
Record the actual server software from startup output, not just a panel label. Note the server build and Java runtime. Save the current ProtocolLib artifact and dependent-plugin list outside the active folder so the previous combination can be restored if the trial fails.
Work through the change
- Open the official ProtocolLib repository and release instructions. Confirm whether your platform needs ProtocolLib.jar for Paper or the documented ProtocolLib-Spigot.jar compatibility artifact.
- Download the matching server plugin from the maintainer. Do not substitute a developer API dependency, sources archive or an unofficial renamed download.
- Stop the server and remove duplicate ProtocolLib artifacts from the active plugins folder before adding the selected one. Keep the saved previous file outside that folder.
- Start normally and read the ProtocolLib load result. Test one dependent feature with an ordinary player and check that no second copy or dependency error appears.
Check the result
The correct artifact should load on the intended platform and satisfy dependent plugins that support that release. Record the filename and release number together. A renamed file is not evidence that the internal artifact matches the platform.
If the result differs
If the correct artifact still fails, compare Java requirements and supported server builds. A dependent plugin's own missing class is a separate compatibility check. Preserve the first cause instead of repeatedly swapping files from different websites.
Restore the previous matching artifact and restart if the new release regresses a required integration. Keep the platform decision in the server notes so a future update does not repeat the mismatch. Player data and worlds remain outside this change.
References and related help
- ProtocolLib maintainer reference 1
- Install ProtocolLib and diagnose dependent plugin failures
- Back up game files before making changes
Investigate a missing ProtocolLib API method after an update
A dependent plugin can be compiled against an API that differs from the ProtocolLib release actually loaded. Missing-method or missing-class errors therefore need a version comparison, not random configuration edits. Capture the first failure after startup before a later disabled-plugin message hides it.
Record the starting point
Write down which artifact changed, its previous release and the dependent plugin's version. Record the server build and Java version too. Keep both old files in restricted recovery storage, outside the active plugins folder, and avoid a live plugin reload while investigating.
Work through the change
- Find the complete first exception and identify the plugin invoking the missing API. Include the cause line and several surrounding lines in your private notes.
- Compare the dependent plugin's declared ProtocolLib requirement and release notes with the installed library. Confirm that a duplicate older JAR did not load instead of the intended file.
- Select a documented compatible pair and trial it on a copy of the service or during a controlled stop. Change the pair together only when their requirements justify it.
- Start normally and test the dependent feature that failed. Also check another ProtocolLib consumer so a narrow fix does not create a second compatibility problem.
Check the result
Startup should finish without the original API linkage failure, and the feature should perform its real player action. Keep the passing pair documented. Successful JAR loading alone is not enough if the failing method is called only when a menu opens or a player joins.
If the result differs
If the same error survives, verify the loaded version in the log and the owning plugin in the trace. If the maintainer does not support your server build, retain the known working release set or pause the incompatible feature rather than guessing method substitutions.
Restore the saved matching pair if the trial fails. Preserve configuration and the original exception for the maintainer. Do not delete the dependent plugin's database as a response to a missing Java method; data removal does not repair an API mismatch.
References and related help
- ProtocolLib maintainer reference 1
- Install ProtocolLib and diagnose dependent plugin failures
- Find Minecraft logs and send useful troubleshooting details
Validate dependent features after a ProtocolLib maintenance restart
Some packet-dependent failures appear only when a player opens a menu, changes equipment or enters a display area. A clean startup is therefore one checkpoint, not the whole maintenance test. List the features that actually depend on ProtocolLib and exercise them deliberately.
Record the starting point
Identify your installed ProtocolLib consumers from their documentation and startup output. Choose a normal player account and a compact test route. Save the previous artifacts and configuration before the maintenance restart so a regression has a known recovery path.
Work through the change
- Write one observable action for each important dependent feature, such as opening a configured menu or viewing a packet-based display. Use your actual plugins rather than copying an unrelated server's checklist.
- Stop normally, apply the planned compatible release and start the service. Read the first startup errors before inviting testers to the action route.
- Perform the checklist with ordinary permissions, recording timestamps. Repeat an action after reconnecting if it depends on login state or cached client data.
- Compare item counts, displayed content and permission boundaries with the pre-change behaviour. Keep an eye on the console while the action runs, not only after the player leaves.
Check the result
Each critical dependent feature should produce its intended result without fresh listener exceptions. Record skipped checks explicitly, especially integrations that require another player or a scheduled event. A staff account bypass can conceal a permission or menu problem.
If the result differs
If one action fails, isolate its dependent plugin and gather its complete exception. Avoid changing every packet consumer simultaneously. A clean idle log followed by a failing menu click should be reported as an action-specific regression, not a successful update.
Restore the previous compatible artifact set if a critical feature cannot be recovered within the window. Remove disposable test items only after checking their counts. Keep the checklist for the next update; no server reinstall or world replacement belongs in this validation.
References and related help
- ProtocolLib maintainer reference 1
- Install ProtocolLib and diagnose dependent plugin failures
- Back up game files before making changes
PacketEvents tasks
Task guides and troubleshooting for PacketEvents. Check the installed release before changing configuration or data.
Check whether a plugin bundles PacketEvents or needs it installed
PacketEvents can be distributed inside a plugin or provided as a standalone dependency. The developer chooses how that integration works. Installing an additional JAR merely because the PacketEvents name appears in a stack trace can leave you with an unnecessary or conflicting arrangement.
Record the starting point
Identify the plugin that requested PacketEvents and record its version, server platform and Java runtime. Keep its installation instructions open. Save the current artifact list before making changes and look for an existing standalone PacketEvents entry in startup output.
Work through the change
- Read the dependent plugin's official requirements. Determine whether it explicitly asks you to install PacketEvents or states that the library is bundled.
- Compare the existing standalone version, if present, with every consumer that documents a requirement. Do not remove a shared dependency because one different plugin bundles its own copy.
- On a private copy, trial the documented arrangement and start normally. Read the first load failure to identify whether the problem concerns a missing plugin, bundled library or incompatible API.
- Test the dependent feature with a normal client and check other PacketEvents consumers. Preserve the documented arrangement in your server notes.
Check the result
Every required consumer should load and complete its relevant player action. The final artifact list should match the maintainers' requirements, not the number of times a library name appears in the log. Keep versions with filenames so future maintenance can compare the same setup.
If the result differs
If a bundled consumer fails, installing a random standalone release may not replace its internal library. Report the owning plugin and bundled version information to that maintainer. If a standalone dependency is required, resolve that requirement before changing gameplay configuration.
Restore the saved artifact arrangement if the trial breaks another consumer. Keep old JARs outside the active directory and restart normally. Do not delete player data or rewrite every plugin configuration while deciding how a library is supplied.
References and related help
- PacketEvents maintainer reference 1
- PacketEvents maintainer reference 2
- Set up PacketEvents for plugins that require it
- Find Minecraft logs and send useful troubleshooting details
Trace a PacketEvents API mismatch to the owning plugin
A PacketEvents-related missing method can come from a standalone dependency mismatch or from a library bundled inside its consumer. Those cases require different updates. Identify the owning plugin and distribution model first so a replacement targets the component that actually supplies the failing code.
Record the starting point
Capture the first complete exception and record the consumer version, server build and Java runtime. List any standalone PacketEvents artifact. Keep the previous compatible files in recovery storage and avoid using hot reload to test packet-library replacements.
Work through the change
- Read the trace for the dependent plugin's class and the missing API. Keep the cause line together with the surrounding context instead of sharing only a cropped final message.
- Check whether that consumer bundles PacketEvents or requires a standalone installation. Compare its official release requirements with the library version actually loaded.
- Choose a compatible consumer update or standalone release as documented by its maintainer. Trial the change on a private copy before changing a busy production service.
- Restart normally and repeat the exact action that invoked the missing method. Check another packet-dependent feature to catch a shared-library regression.
Check the result
The original action should complete without linkage errors, and all shared consumers should remain functional. Save the passing combination. A plugin that loads successfully can still call an incompatible method later during a join, inventory action or movement event.
If the result differs
If replacing the standalone JAR has no effect on a bundled failure, return to the consumer's requirements instead of repeating random library swaps. If the artifact list contains duplicates, resolve the duplicates before interpreting the version comparison.
Restore the previous compatible files if the trial fails and retain the exception for the owning maintainer. Keep plugin data intact. An API mismatch is not repaired by deleting a player record, resetting the world or disabling account authentication.
References and related help
- PacketEvents maintainer reference 1
- PacketEvents maintainer reference 2
- Set up PacketEvents for plugins that require it
- Find Minecraft logs and send useful troubleshooting details
Reproduce an action-specific PacketEvents disconnect safely
A packet listener may fail only during a particular player action. A controlled reproduction is more useful than repeatedly reconnecting the entire community. Use the same client and action while recording which dependent plugin handles that packet path.
Record the starting point
Choose a consenting test account, disposable items and a quiet test location. Record the client version, server build, PacketEvents arrangement and relevant consumer versions. Keep the original disconnect timestamp and save configuration before trying a compatibility change.
Work through the change
- Describe the action in a few repeatable steps, including the menu, item or movement involved. Test once with the native client and ordinary permissions before changing a plugin.
- Capture the first related server exception and identify its owning consumer. Separate a client timeout from an explicit server-side packet rejection.
- Repeat on a private copy with the suspected consumer updated or isolated according to its documentation. Keep unrelated packet plugins stable so the comparison remains meaningful.
- Apply only the supported fix that the comparison justifies. Restart normally and repeat the original action, reconnecting once to clear stale session state.
Check the result
The action should complete without the original disconnect and without changing item counts unexpectedly. Record the exact passing versions and steps. If the result depends on a client modification, include that fact instead of describing it as a failure affecting every player.
If the result differs
If there is no server exception, collect the client disconnect text and timing before blaming PacketEvents. A network timeout or proxy rejection may occur before the consumer sees the relevant packet. Avoid turning off unrelated host protections to investigate one menu click.
Restore the trial consumer version if a new failure appears. Correct only the disposable test inventory when necessary, using established staff tools. Keep the redacted log and reproduction for support; do not reinstall the service to erase an intermittent error.
References and related help
- PacketEvents maintainer reference 1
- Set up PacketEvents for plugins that require it
- Find Minecraft logs and send useful troubleshooting details
Coordinate a PacketEvents update across several dependent plugins
A standalone PacketEvents installation may serve several plugins with different release requirements. Updating it for one feature can expose an older consumer that has not been tested against the new API. Plan the update around the complete consumer list rather than the first plugin that requests a newer version.
Record the starting point
List the consumers that explicitly require standalone PacketEvents, their versions and required library ranges. Keep bundled consumers separately identified. Save the existing library, consumers and configuration in a recovery checkpoint outside the active plugin directory.
Work through the change
- Compare the maintainer requirements for every standalone consumer. If there is no documented common compatible release, trial consumer updates on a private copy before touching production.
- Select a supported library and consumer set, then stop the service normally. Replace only the planned artifacts and remove duplicate old library JARs from the active directory.
- Start and read the dependency load results. Do not continue testing gameplay while a required consumer is disabled or reporting a missing API.
- Exercise one real player action per consumer and repeat a reconnect. Use ordinary permissions, because staff bypasses may skip the code path that players use.
Check the result
All required consumers should load and pass their action checks. Record the final library and consumer release set with the maintenance date. Note any untested optional integration explicitly; an absent error during an idle server is not proof of compatibility.
If the result differs
If one consumer fails, inspect its exact requirement and whether it bundles another library copy. Do not change global PacketEvents behaviour to satisfy a plugin that the maintainer has not marked compatible. Keep the failing trace for a focused report.
Restore the previous matching set if a critical consumer regresses. Keep configuration and player data unchanged unless a documented migration specifically requires a separate step. Use a normal restart for recovery rather than unloading packet libraries from a running server.
References and related help
- PacketEvents maintainer reference 1
- PacketEvents maintainer reference 2
- Set up PacketEvents for plugins that require it
- Back up game files before making changes
spark tasks
Task guides and troubleshooting for spark. Check the installed release before changing configuration or data.
Capture only slow ticks with a bounded spark profile
An average profile can hide a short pause among many healthy ticks. Spark can focus a profile on ticks exceeding a chosen duration. This helps investigate a repeatable spike, but its percentages describe the captured slow ticks rather than the entire playing session.
Record the starting point
Record the server version, spark version and the approximate spike frequency. Choose a representative period and a consenting tester for the triggering action. Keep a normal health report or unfiltered profile as a separate baseline so the filtered result has context.
Work through the change
- Check the installed command help and start a bounded recording, for example
/spark profiler start --timeout 120 --only-ticks-over 100. The example selects ticks over 100 milliseconds; choose a threshold relevant to the observed pause. - Repeat the suspected action once or wait for the expected spike. Note its timestamp and player count, without adding unrelated stress to the server.
- Open the resulting viewer and confirm that slow ticks were actually captured. Compare the busiest branches with the action time and the server's tick measurements.
- Make one justified plugin or workload adjustment on a test copy, then record the same filtered test again. Retain the original capture for comparison.
Check the result
A useful capture contains the reported pause and enough context to identify candidate work. A branch dominating filtered samples may still be rare overall. Compare its duration and frequency with normal gameplay before describing it as the server's constant bottleneck.
If the result differs
If the profile is empty, the threshold may exceed the observed ticks or the event may not have occurred. Do not lower every performance setting merely to obtain a busier chart. Repeat during a representative window with a documented threshold.
Cancel an unnecessary recording using the installed profiler controls and revert only the trial workload change if it harms gameplay. Profiling does not require deleting worlds or resetting plugin data. Share the report only after reviewing its metadata.
References and related help
- spark maintainer reference 1
- spark maintainer reference 2
- Diagnose Minecraft lag with TPS, MSPT and spark
- Find Minecraft logs and send useful troubleshooting details
Choose a main-thread or all-thread spark recording
Minecraft tick performance and total process activity are related but different measurements. A main-thread profile can explain expensive tick work, while an all-thread capture can expose activity elsewhere. Selecting the wrong view can make a busy background worker look like the direct cause of low TPS.
Record the starting point
Record whether the symptom is slow ticks, high process CPU, delayed background work or a server that appears to wait. Keep the timestamp and a health snapshot. Use a bounded recording window so an exploratory profile does not run indefinitely.
Work through the change
- Start with the normal server-thread profiler for a tick-performance complaint. Repeat the relevant action and note the player count and workload during the capture.
- If background activity is the question, check command help and use the documented all-thread option, such as
/spark profiler start --timeout 120 --thread *. - In the viewer, inspect the selected thread and its call branches. Compare runnable work with waiting or sleeping states instead of counting every visible thread as active CPU consumption.
- Keep main-thread and all-thread reports labelled separately. Use the same workload for a follow-up capture after a candidate change.
Check the result
The selected report should answer the original question: what consumed tick time, or which background worker was active. Record the thread and time window alongside any screenshot. A high percentage within one selected thread does not automatically equal that percentage of total machine CPU.
If the result differs
If the server is waiting on storage or another service, a CPU-heavy branch may not explain the delay. Compare the observed symptom with spark's metrics and relevant logs. Avoid blaming whichever plugin name is easiest to recognise in a large thread list.
Stop or cancel a recording through spark's controls when enough evidence exists. Restore any trial configuration that does not improve the same workload. Keep performance investigation separate from data cleanup; profiling itself does not justify deleting plugin files.
References and related help
- spark maintainer reference 1
- spark maintainer reference 2
- Diagnose Minecraft lag with TPS, MSPT and spark
- Find Minecraft logs and send useful troubleshooting details
Separate allocation pressure from a Minecraft memory leak
A high allocation rate does not necessarily mean memory is leaking. Java can create many short-lived objects and reclaim them, while a retention problem keeps more live data over time. Compare the measurements before increasing heap or deleting plugin data.
Record the starting point
Record the configured heap, player count, uptime and the time of the reported pressure. Check the service's memory limit separately from Java heap usage. A container limit, native memory and the Java heap are not identical numbers.
Work through the change
- Collect the relevant spark memory and garbage-collection metrics during ordinary play. Note whether usage falls after collection or whether the post-collection baseline keeps rising.
- If allocation work is the question, check your installed spark commands and take a short allocation profile using the documented
--allocoption. Keep it labelled as allocations rather than retained objects. - Compare the capture with a similar period after a single suspected plugin change on a test copy. Keep player count and activity comparable.
- Escalate suspected retained-heap analysis to support with timestamps and measurements. Treat heap dumps as sensitive and potentially large; do not upload one publicly without reviewing its contents and handling requirements.
Check the result
The evidence should show whether pressure follows temporary churn, a growing retained baseline or the service limit. A candidate plugin appearing in an allocation profile indicates object creation, not proof that it retains those objects forever. Keep the distinction clear in a support report.
If the result differs
If the process is killed before Java can report an error, include the panel memory graph and host-side evidence available from support. A flat heap chart does not rule out native or host pressure. Avoid assuming every abrupt exit is a Java leak.
Stop the diagnostic recording and undo an ineffective trial change. Keep ordinary backups before any later data migration, but do not delete worlds or caches solely because they are large. Adjust RAM only after identifying which limit is actually being reached.
References and related help
- spark maintainer reference 1
- spark maintainer reference 2
- Diagnose Minecraft lag with TPS, MSPT and spark
- Find Minecraft logs and send useful troubleshooting details
Save a spark profile locally before sharing it
A performance report can disclose server software, plugin names, paths or other operational details. Spark supports local output for supported reporting commands. Saving locally lets staff inspect a capture before deciding which information should leave the service.
Record the starting point
Check the command help for the installed spark build and identify where the service can store diagnostic files. Record the symptom and test window. Ensure there is enough free space for the capture and that the destination is not a publicly downloadable web folder.
Work through the change
- Start a bounded profile for the actual symptom and record the triggering action. Avoid collecting a long idle session when a short reproduction is available.
- Use the documented local save option when stopping the capture, such as
/spark profiler stop --save-to-file. Read the returned location rather than guessing a filename. - Download the saved file through the service's authorised file access. Review its metadata and follow the viewer's supported local-file workflow if you need to inspect the profile without publishing it.
- Share only with the intended support recipient and state which details were removed or withheld. If an upload is necessary, review its visibility and retention before sending the link.
Check the result
You should retain a useful capture with a known private location and an explicit sharing decision. Confirm that the file exists and can be opened through the supported viewer process. A console message alone is not evidence that a downloaded archive is complete.
If the result differs
If the command reports an unsupported flag, check the installed version's help instead of pasting options repeatedly. If saving fails, inspect free space and permissions for that service. Do not make an entire plugin directory publicly readable to retrieve one report.
Cancel the capture if local saving cannot be completed safely, preserving the relevant logs. Remove temporary diagnostic copies only after the investigation's retention needs are understood. Rotate any exposed secret if a report was shared before review.
References and related help
- spark maintainer reference 1
- spark maintainer reference 2
- Diagnose Minecraft lag with TPS, MSPT and spark
- Find Minecraft logs and send useful troubleshooting details
Compare two spark profiles under the same Minecraft workload
A quieter server often looks faster regardless of the configuration change. A fair spark comparison repeats the same workload and reports the conditions beside the result. This prevents a maintenance change from receiving credit for an empty player list.
Record the starting point
Choose one measurable complaint, such as a pause when entering a prepared area. Record the server build, plugin versions, player count and approximate activity. Keep the previous configuration and decide what improvement would be noticeable before changing anything.
Work through the change
- Capture a bounded baseline while repeating the chosen action. Note the time window and whether chunks are already generated or need generation.
- Apply one candidate change on a controlled service copy or planned maintenance window. Avoid combining view-distance, plugin and world-generation changes in one comparison.
- Capture the same duration with comparable players, route and chunk state. Use the same profiler mode and slow-tick threshold if one was selected.
- Compare tick measurements and the relevant call branches, not just the largest percentage. Record any difference in workload that could explain the result independently.
Check the result
A credible result links the changed setting to an observable improvement under similar conditions. Keep both captures and the exact change. If the second test benefits from warmed caches or generated chunks, state that limitation and repeat an equivalent baseline before drawing a stronger conclusion.
If the result differs
If overall percentages shift but tick duration stays similar, the change may have redistributed sampled work without fixing the player's complaint. If the trigger did not occur in one capture, the pair is not a valid comparison. Gather a smaller repeatable test instead.
Restore the previous setting if the change harms gameplay or does not address the measured symptom. Preserve both reports as evidence rather than keeping an unproven tweak permanently. No world reset or player-data removal is part of a profile comparison.
References and related help
- spark maintainer reference 1
- spark maintainer reference 2
- Diagnose Minecraft lag with TPS, MSPT and spark
- Find Minecraft logs and send useful troubleshooting details
Check and stop an unwanted spark profiler session
A staff member may start a profile and lose its console output or leave before the test finishes. Check the profiler state before starting another recording. Spark provides controls for inspecting and ending a session, so a server restart is not the first response.
Record the starting point
Find out who requested the capture and what event it was intended to include. Record the current symptom and approximate start time. Use the command prefix appropriate to the platform; a proxy's profiler is not automatically the same session as its backend's profiler.
Work through the change
- Check installed command help and run the documented profiler information command, such as
/spark profiler info. Confirm the component and active recording details. - If the required event has been captured, stop the session using the normal profiler stop command. Use the supported local save option if the report needs privacy review before upload.
- If the recording is unwanted or contains no useful test, use the documented profiler cancel control rather than killing the Minecraft process.
- Check profiler information again and note the outcome. If another capture is needed, start a new bounded session with an explicit timeout and named test action.
Check the result
There should be one understood recording state and, when saved, a known report location. Share the result with the staff member who requested it. Record a cancelled session as cancelled rather than presenting it as a successful performance capture.
If the result differs
If commands affect no session, confirm whether you are on the proxy, server or client platform and using its correct prefix. If an upload hangs, separate report delivery from the recording state. Repeatedly starting new profiles can make that distinction harder.
Do not restart the service solely to clear an uncertain profiler state. Preserve relevant console output and ask support about a reproducible control failure. Revert only diagnostic settings changed for the abandoned test, leaving worlds and plugin data intact.
References and related help
- spark maintainer reference 1
- Diagnose Minecraft lag with TPS, MSPT and spark
- Find Minecraft logs and send useful troubleshooting details
Plan tasks
Task guides and troubleshooting for Plan. Check the installed release before changing configuration or data.
Give a staff member a limited Plan web group
Plan's website has its own permission groups. A staff member who can view session summaries does not automatically need player-address information or full web administration. Configure the intended web access instead of granting a broad Minecraft permission wildcard.
Record the starting point
Read the web-permissions documentation for your installed Plan release. Decide exactly which pages the role should see and whether they contain player-identifying data. Ensure the web interface uses the documented HTTPS arrangement before enabling authenticated access.
Work through the change
- Use Plan's documented web permission editor to inspect or create the intended group. Select permissions that match the staff task rather than copying the administrator group wholesale.
- Follow the release's registration instructions and documented group assignment mechanism. Plan documents the
plan.webgroup.{name}permission for registration-related group selection; confirm how it applies to an existing account before expecting a retroactive change. - Sign in with a dedicated test web account and open an allowed page. Then attempt one page or action the role should not access.
- Remove any temporary broad permission used during testing and repeat the login. Keep a record of the final role and the person responsible for reviewing it.
Check the result
The account should see the intended analytics and be denied unrelated administration or private information. Test the actual web session, not only the player's Minecraft group. A menu link being hidden is insufficient if a direct URL remains accessible.
If the result differs
If access differs, compare registration-time group assignment, current web-account membership and the generated permission configuration. Do not disable web authentication to work around a group mistake. Check the installed release documentation before editing account records directly.
Restore the previous group permissions and revoke the trial account if the boundary is unclear. Keep the analytics database intact. Role testing does not require deleting player sessions or exposing the web port publicly without its existing access controls.
References and related help
- Plan maintainer reference 1
- Plan maintainer reference 2
- Set up Plan analytics without exposing private player data
- Create Minecraft ranks and inheritance with LuckPerms
Resolve a Plan web-port conflict without moving gameplay
Plan's web interface is a separate listener from Minecraft gameplay. A conflicting map, Geyser signalling service or another web plugin may occupy the same address and port. Diagnose the listener conflict before changing the server's main connection endpoint.
Record the starting point
Record Plan's startup error, configured listener and public web address. List other web listeners in this service and check the panel's assigned allocations. Keep the existing Plan configuration and HTTPS or proxy arrangement before editing either the internal port or public URL.
Work through the change
- Match the bind error to the Plan configuration actually loaded. Compare address, port and protocol with each other listener, not just the number shown in a browser bookmark.
- Choose a separately assigned supported port where a change is required. Ask support to confirm an allocation rather than using an arbitrary neighbouring port.
- Change the listener and any documented external-address or reverse-proxy mapping together as appropriate for your setup. Preserve authentication and HTTPS requirements.
- Restart normally and test the Plan interface from the intended access route. Check Minecraft gameplay and the previously conflicting web feature as separate tests.
Check the result
Plan should bind without an address-in-use error and serve the expected interface at its documented URL. Sign in with a limited account if authentication is enabled. Record the final allocation so a future plugin installation does not reuse it.
If the result differs
If a page loads but belongs to another service, inspect the public proxy mapping and hostname rather than changing Plan's database. If Plan binds but a browser cannot connect, report the public endpoint and timestamp to support for the relevant network path.
Restore the recorded listener and proxy values if the trial creates a new failure. Leave the conflicting optional listener stopped until its allocation is confirmed. Do not delete analytics data or disable all host firewall rules to resolve one port collision.
References and related help
- Plan maintainer reference 1
- Set up Plan analytics without exposing private player data
- Find Minecraft logs and send useful troubleshooting details
Investigate missing recent sessions in a Plan dashboard
A dashboard with no recent sessions can reflect collection failure, a database issue or a filter that excludes the activity. Work through those layers before importing old records or resetting Plan. A browser showing yesterday's graph does not identify which layer failed.
Record the starting point
Record the server and Plan versions, expected player session time and dashboard date range. Note whether the dashboard covers one backend or a network. Use a consenting test account and keep player names or addresses out of public screenshots.
Work through the change
- Confirm Plan loaded successfully and inspect logs around the expected session. Look for storage or connection errors before assuming the player was not recorded.
- Join the intended backend with the test account, stay long enough to create an observable session, and leave normally. Record both timestamps.
- Refresh the correct server or network view and check its date, timezone and player filters. Allow the documented processing interval for your installed release rather than repeatedly restarting Plan.
- If the session remains absent, compare the configured storage destination with the dashboard's data source. On a network, ensure the backend you tested is the one being inspected.
Check the result
The controlled session should appear under the intended server and time range. Its duration may not match a wall clock to the second, but it should be recognisable. Keep the test timestamps with any storage error so support can connect the observation to the collection path.
If the result differs
If old data appears but no new sessions do, inspect collection and writes. If the session appears under another view, correct the dashboard scope or server identity. Do not merge databases until the actual storage destinations are understood.
Restore any trial display filter or configuration change if it obscures existing data. Preserve the current database before a later migration. Deleting Plan's database to force a fresh graph sacrifices evidence and is not an appropriate first repair.
References and related help
- Plan maintainer reference 1
- Plan maintainer reference 2
- Set up Plan analytics without exposing private player data
- Find Minecraft logs and send useful troubleshooting details
Prepare a recoverable Plan database migration
Changing Plan's database destination can produce an apparently empty dashboard if historical records were not migrated. Treat the change as a data migration rather than a hostname edit. Keep collection consistent while following the database-management procedure for the installed release.
Record the starting point
Record the current storage type, destination and Plan version on every component that writes to it. Identify a few old sessions and one recent session for later comparison. Make a restricted database checkpoint and save configuration without publishing credentials.
Work through the change
- Read the current Plan database-management instructions and select the documented path for your source and destination. Confirm the destination is accessible using the intended service account.
- Plan a maintenance window for writers so data does not continue changing unnoticed during transfer. Follow the documented migration controls instead of copying live database files blindly.
- Update only the required storage configuration and complete the supported migration. Keep the original database available privately until validation is finished.
- Start the intended writers and check the saved historical sessions, aggregate view and a new controlled test session. Review logs for failed reads or writes.
Check the result
Historical and new records should appear in the same intended dashboard without duplicate server identities. Compare selected session dates and durations with the pre-change notes. A successful database connection proves access, but does not establish that the old analytics were transferred.
If the result differs
If history is absent, stop further migration attempts and inspect which source was transferred and which destination the interface reads. If only new sessions appear, do not overwrite the original database with the empty destination. Keep credentials out of support excerpts.
Return writers to the recorded original configuration if validation fails, taking care not to lose sessions created during the trial. Preserve both checkpoints for a deliberate reconciliation. Do not delete the old database or rebuild analytics merely to hide a migration mismatch.
References and related help
- Plan maintainer reference 1
- Plan maintainer reference 2
- Set up Plan analytics without exposing private player data
- Back up game files before making changes
Compare Plan statistics using consistent dates and timezones
Two Plan screenshots can disagree because they cover different dates, timezones or server scopes. Before treating a graph difference as missing data, make the comparison explicit. A network total and one backend's session list do not necessarily measure the same population.
Record the starting point
Choose the question first, such as how many sessions occurred during one scheduled event. Record the event's start and end with its timezone. Note which server or network view each staff member opened and whether a player or date filter remains active.
Work through the change
- Open the intended Plan view and set the same date range on both comparisons. Check the displayed timezone and the release's documented time settings before changing server configuration.
- Select the same server scope and player filters. Keep network-wide movement separate from a single backend's activity when players transfer during the event.
- Inspect a known test session near the time boundary. Compare its timestamp with the server log to determine whether the apparent shift is a display-time difference.
- Save the final comparison with the date range, timezone and scope visible or written in its caption. Explain what metric is being compared rather than reporting an unlabelled percentage.
Check the result
The two views should refer to the same period and population. Differences that remain after alignment are worth investigating through collection and storage logs. Keep the original screenshots privately so staff can explain the initial discrepancy without changing historical records.
If the result differs
If a boundary session moves between days as the timezone changes, that is a grouping difference rather than evidence of deletion. If the same session is absent from every relevant range, investigate collection separately. Avoid changing the machine clock to make a graph match a screenshot.
Restore the previous display preference if a trial setting confuses other staff. Record any intentional timezone change in reporting notes. Keep analytics records intact; comparison work does not require database edits or deletion of sessions outside the selected period.
References and related help
- Plan maintainer reference 1
- Plan maintainer reference 2
- Set up Plan analytics without exposing private player data
- Find Minecraft logs and send useful troubleshooting details
Review privacy before publishing a static Plan export
Plan's static HTML export is not protected by the live web interface's login system. Publishing exported files can therefore expose data that a limited web group could not normally see. Review the export as a separate publication, even when the live dashboard already has authentication.
Record the starting point
Read the export and web-permissions documentation for the installed release. Decide which statistics may be public and whether player-identifying details should be included. Prepare a private destination for inspection rather than exporting directly into a publicly served website folder.
Work through the change
- Generate a small trial export using the documented controls. Keep the files in restricted storage and inspect the available pages before sharing a URL.
- Check player details, links and embedded data, not only the landing page. A hidden navigation item is not an access-control boundary for a static file.
- Choose an export scope suitable for publication or keep the export private. If a website access-control layer is needed, arrange it deliberately with support; Plan web groups do not automatically protect copied files.
- Test the intended destination from a signed-out browser. Confirm that public users receive only the approved material and that private files are not reachable by a direct URL.
Check the result
The publication should contain only the information you intended to disclose. Record the export date and scope because a static snapshot will not update like the live dashboard. Keep a list of published files so they can be removed consistently later.
If the result differs
If private details appear, pause publication and remove the trial files from the public destination. Review caches and any other copies before declaring exposure resolved. Do not turn off authentication on the live interface to make its behaviour match an export.
Return to the private authenticated dashboard if a suitable public export cannot be prepared. Preserve the analytics database and remove only the generated publication files. Notify the responsible administrator if player-identifying information was exposed.
References and related help
- Plan maintainer reference 1
- Plan maintainer reference 2
- Set up Plan analytics without exposing private player data
- Back up game files before making changes
DriveBackupV2 tasks
Task guides and troubleshooting for DriveBackupV2. Check the installed release before changing configuration or data.
Prevent old archives from being included in a new DriveBackupV2 backup
An archive stored inside a selected source directory can be included in the next backup. Repeating that selection can make backups grow rapidly without a matching increase in live game data. Review the actual selected paths before buying more storage or deleting worlds.
Record the starting point
Record where DriveBackupV2 writes local archives and which paths its installed configuration selects. Compare the size of live data with recent archives. Keep the existing configuration and one verified recovery copy before changing selection rules.
Work through the change
- Read the maintainer's file-selection documentation for the installed release. Identify whether the backup output directory or a parent containing it falls inside the selected sources.
- Inspect a recent archive without extracting over the live server. Look for older archive filenames nested inside it and distinguish those files from genuine plugin or world data.
- Adjust the documented selection or exclusion rules so generated backups are outside the new archive's source set. Preserve required world and plugin data rather than excluding an entire directory blindly.
- Run one controlled backup and inspect its file list and size. Verify a small restored sample in a separate location before relying on the revised selection.
Check the result
The new archive should contain the intended live files without a chain of previous backups. Its size should be explainable by those files rather than merely smaller. Keep the verified older copy until the revised archive has passed inspection.
If the result differs
If growth continues, compare source file sizes and check for another plugin's archives, database dumps or temporary exports. An exclusion pattern that misses the actual relative path may have no effect. Read the generated configuration's pattern rules before broadening it.
Restore the previous selection if required files disappear from the test archive, then correct the narrow rule. Do not delete the only known good backup to create space for an unverified replacement. Ask support about temporary capacity when a safe test cannot fit.
References and related help
- DriveBackupV2 maintainer reference 1
- DriveBackupV2 maintainer reference 2
- Configure DriveBackupV2 and verify an off-server recovery copy
- Back up game files before making changes
Separate local and remote DriveBackupV2 retention counts
Keeping fewer remote backups does not necessarily reduce local archive storage, and the reverse is also true. DriveBackupV2 documents separate remote and local retention controls. Decide how many recovery points belong in each place before changing a count.
Record the starting point
List recent local archives and the corresponding remote copies. Record their dates, sizes and whether uploads completed. Keep the current configuration and identify the oldest recovery point the community still needs before applying a policy that may remove copies.
Work through the change
- Read the installed release's storage documentation and locate the remote keep-count and local-keep-count controls. Confirm the documented meaning of each value, including any special values.
- Choose counts based on the actual schedule and recovery need. Three hourly copies provide a different history from three daily copies, even though the count is identical.
- Apply the intended policy and observe one normal backup cycle. Check the log and both destinations to see which archive was created, uploaded and retained.
- Download a retained remote copy and inspect a small restore sample in a separate folder. A remote filename alone does not establish that the archive is usable.
Check the result
Local usage should stay within the chosen capacity while remote storage retains the intended history. Document the schedule beside the counts. Confirm the newest successful remote copy before considering removal of any older local recovery point.
If the result differs
If local usage remains high, inspect whether archives were produced under an older naming or destination arrangement. If remote history differs, check upload success and provider listing behaviour. Do not assume a retention setting has cleaned every historical file outside its managed set.
Restore the previous counts if the new policy is too aggressive, while recognising that deleted copies are not recreated by changing a number back. Preserve remaining good copies and repair the policy before the next cycle. Do not delete live game files to satisfy archive retention.
References and related help
- DriveBackupV2 maintainer reference 1
- Configure DriveBackupV2 and verify an off-server recovery copy
- Back up game files before making changes
Reconnect a revoked cloud account used by DriveBackupV2
A cloud upload can fail after account access is revoked, an organisation changes policy or stored authorisation expires. A successful local archive does not mean a remote recovery copy exists. Check the upload result separately before assuming the backup is protected off-server.
Record the starting point
Keep the relevant upload error, plugin version and last confirmed remote backup time. Verify that the cloud account is still available and has capacity. Do not paste access tokens, refresh tokens or linking URLs into a public ticket or chat.
Work through the change
- Distinguish an authorisation failure from a full quota, provider outage or local archive error. Use the log's first relevant message rather than only the final failed status.
- Follow the maintainer's linking instructions for the selected provider. The documented linkaccount flow includes Google Drive and OneDrive; use the command and provider name supported by the installed release.
- Complete authorisation with the intended backup account and review the requested access. Keep any returned secret in the plugin's private configuration rather than a public note.
- Run a controlled backup and check that the expected archive appears in the intended remote folder. Download and inspect it separately from the local copy.
Check the result
The new upload should complete and the remote archive should be usable. Record the relinking date and last verified recovery point without storing credentials in the change note. Check the next scheduled cycle too, because an interactive test alone does not prove the normal schedule works.
If the result differs
Keep local recovery archives while cloud access is repaired. If the wrong account was authorised, revoke that access and relink deliberately. Do not delete the only recent backup or switch to a public file share to bypass an account problem.
References and related help
- DriveBackupV2 maintainer reference 1
- DriveBackupV2 maintainer reference 2
- Configure DriveBackupV2 and verify an off-server recovery copy
- Find Minecraft logs and send useful troubleshooting details
Investigate overlapping backup jobs and temporary disk pressure
A backup may require space for the source, a new local archive and retained copies while an upload runs. If a scheduled interval is shorter than the complete job, repeated work or waiting can make the service look stuck. Measure the full cycle before increasing frequency.
Record the starting point
Record the configured schedule, recent start and finish times, free disk space and archive sizes. Check whether another panel or plugin backup runs at the same time. Keep the current schedule and identify the last successful remote recovery copy.
Work through the change
- Read a complete DriveBackupV2 cycle from archive creation through upload and retention. Separate time spent compressing from time spent transferring.
- Compare the duration with the next scheduled start and inspect the installed release's handling of an already-running job. Do not repeatedly trigger manual backups while the state is uncertain.
- Choose a schedule that leaves room for the observed workload and other maintenance. Reduce unnecessary source files through reviewed selection rules rather than deleting live data.
- Observe one revised cycle, checking free space before and after. Confirm the remote archive and retention result rather than relying only on a task-start message.
Check the result
The complete cycle should finish before the next intended run under representative conditions, with adequate working space. Keep the measured duration and source size with the schedule. A quieter test can be faster than a busy-world backup, so leave practical margin.
If the result differs
If compression is slow, inspect source size and nested archives. If transfer dominates, collect provider and upload evidence instead of changing Java memory blindly. If disk usage never falls, review local retention separately from scheduling.
Restore the previous schedule if the revised one misses the required recovery window, then arrange capacity or source changes deliberately. Preserve the last verified copies. Do not kill unknown transfer processes or remove an in-progress archive without first understanding which task owns it.
References and related help
- DriveBackupV2 maintainer reference 1
- DriveBackupV2 maintainer reference 2
- Configure DriveBackupV2 and verify an off-server recovery copy
- Find Minecraft logs and send useful troubleshooting details
Plan a consistent external SQL backup with DriveBackupV2
A plugin using MySQL or another external SQL service may keep its important records outside the game files. Copying the plugins directory is not a database backup. DriveBackupV2 documents external backup features, but consistency still depends on how the application writes its data.
Record the starting point
List plugins that store data externally and identify the database owner, schema and supported backup method. Keep credentials private. Decide which files and SQL records must represent the same recovery point, particularly for inventories, currency or cross-server state.
Work through the change
- Read the installed DriveBackupV2 external SQL documentation and the database-dependent plugin's recovery instructions. Confirm supported database types and the service account's required privileges.
- Configure only the intended database source using the documented fields. Keep secrets out of screenshots and do not grant a broad administrator account merely to make a test connect.
- Plan a quiet or controlled write window where required by the application. Capture related game files and SQL data in a sequence that the plugin's recovery procedure supports.
- Inspect the resulting backup and trial a restore into an isolated database and service copy. Confirm representative records without pointing a test server at the live database.
Check the result
The recovery set should include the required SQL data and related files with a documented consistency window. Record which application versions produced it. A successful export message is useful evidence, but a separate restore test is stronger evidence that the data can be recovered.
If the result differs
If connection succeeds but export fails, inspect database privileges, tool requirements and the first error. If restored records disagree with files, revisit write coordination rather than treating the newest filename as automatically correct. Avoid public sharing of SQL dumps.
Restore the previous backup configuration if the trial affects normal jobs, preserving existing verified copies. Keep test databases clearly isolated and remove them only through the agreed test cleanup. Do not overwrite live SQL data during a backup validation.
References and related help
- DriveBackupV2 maintainer reference 1
- DriveBackupV2 maintainer reference 2
- Configure DriveBackupV2 and verify an off-server recovery copy
- Back up game files before making changes
Verify a remote DriveBackupV2 archive without restoring over production
An upload status proves that a transfer reported success; it does not prove the archive contains every required file or can restore a working service. A small recovery trial checks the actual remote object without replacing the live server.
Record the starting point
Select one completed remote archive and record its timestamp, provider location and expected source set. Prepare a separate test folder or isolated service copy with enough space. Keep the live server's data path out of the extraction destination.
Work through the change
- Download the archive from the remote destination rather than reusing the original local file. Compare its reported size and any checksum information available through the documented workflow.
- List the archive contents and check required world, plugin and configuration paths. Watch for an archive containing only an error file or another nested archive.
- Extract into the isolated destination and inspect representative files. If starting a service copy, isolate ports, scheduled tasks and external database connections first.
- Record what the test proved: readable archive, expected file set, or a complete isolated startup. Keep the original archive unchanged while deciding whether the recovery set is sufficient.
Check the result
The downloaded copy should open without errors and contain the intended data. A full startup test should use the matching software and a safe environment. Label a partial inspection honestly rather than describing it as a complete disaster-recovery test.
If the result differs
If the archive is truncated, compare transfer logs and provider storage before deleting the local original. If files are missing, review selection rules and excluded paths. If external database data is required, a complete game-files archive alone is not sufficient.
Leave production untouched if validation fails and preserve the last known good remote copy. Correct the backup selection or transfer issue, then test a new archive. Remove only disposable test extractions after confirming they are not the sole copy of recovered data.
References and related help
- DriveBackupV2 maintainer reference 1
- DriveBackupV2 maintainer reference 2
- Configure DriveBackupV2 and verify an off-server recovery copy
- Back up game files before making changes
InventoryRollbackPlus tasks
Task guides and troubleshooting for InventoryRollbackPlus. Check the installed release before changing configuration or data.
Plan per-event inventory history before raising record limits
InventoryRollbackPlus limits saved records by event type and player, rather than promising a fixed number of days. A player who changes worlds frequently can cycle through world-change records faster than someone who rarely joins. Plan the useful history and its storage cost before raising every limit.
Record the starting point
Preserve the current configuration and a verified copy of the existing history. Record whether this installation stores YAML files or uses MySQL, along with available capacity at that destination. Increasing game-panel disk allocation does not necessarily enlarge a separate database server.
Work through the change
- Open the installed
config.ymland compare itsmax-savessection with the maintainer reference. The documented event keys arejoin,quit,death,world-changeandforce. Record each current count without replacing it with upstream example defaults. - Observe a representative player's event frequency and inspect the oldest and newest records of each relevant type. Estimate the history needed from actual activity: a count of ten joins covers a very different period for daily and hourly reconnects.
- Measure current history storage and the population it represents. Use those observations for a rough capacity budget, allowing for new players and larger inventories rather than treating one player's record size as a universal constant.
- If capacity permits, increase only the event count that lacks useful history. Apply the setting through the installed release's documented method, then use a consenting online test player and a harmless event to confirm new records remain available.
Check the result
The selected event should have the intended higher ceiling, while other event limits remain unchanged. Record the observation period and recheck storage after representative activity. Raising a limit retains more future records; it cannot recreate older records already rotated out.
If the result differs
If no new records appear, investigate event capture and storage errors separately. If file usage stays flat on a MySQL installation, inspect the actual database destination instead of assuming retention failed. Avoid changing storage backend and record limits during the same comparison.
Pause further increases if capacity is uncertain. Lowering counts can rotate away recovery points as new records arrive, so do not reduce them as an automatic rollback. Preserve the verified history and choose any later retention reduction deliberately; never delete data folders or database tables to make a capacity chart smaller.
References and related help
- InventoryRollbackPlus maintainer reference 1
- InventoryRollbackPlus maintainer reference 2
- Restore a recorded player inventory with InventoryRollbackPlus
- Back up game files before making changes
Separate inventory inspection from staff restore permissions
Support staff may need to confirm a loss report without being able to give items or move a player. InventoryRollbackPlus provides separate permissions for viewing backups, restoring and related actions. Test those boundaries with a limited account instead of granting the plugin's full administrative scope.
Record the starting point
Read the installed release's permissions and decide which staff role may inspect, restore or teleport. Save the current permission assignments. Use a test player record and a staff test account that does not have operator status or a wildcard permission.
Work through the change
- Grant the documented inspection permission,
inventoryrollbackplus.viewbackups, to the intended support role. Keep restore and teleport permissions absent unless the role genuinely needs them. - Open a test player's backup list using the documented interface. Confirm the staff account can inspect the relevant timestamp and contents.
- Attempt a restoration action and verify it is denied for the inspection role. Check the separate restore and restore.teleport permissions in the maintainer documentation when configuring the recovery role.
- Repeat the test after reconnecting and inspect inherited groups. A broad parent-group permission can override an apparently narrow assignment.
Check the result
The inspection account should see the intended records and remain unable to apply recovery actions. The authorised recovery role should pass a separate controlled test. Keep the final permission mapping with staff procedures so an urgent incident does not encourage an improvised wildcard grant.
If the result differs
If a supposedly limited account can restore, check operator status, inherited groups and wildcard permissions before changing the plugin. If it cannot inspect, confirm the exact permission spelling and context. A hidden button alone is not enough evidence that the action is protected.
Remove trial grants and restore the previous staff assignment if the boundary cannot be demonstrated. Keep player records untouched during permission testing. If a test restoration was accidentally applied, use the pre-test checkpoint and record the correction.
References and related help
- InventoryRollbackPlus maintainer reference 1
- Restore a recorded player inventory with InventoryRollbackPlus
- Create Minecraft ranks and inheritance with LuckPerms
Investigate a missing InventoryRollbackPlus event record
InventoryRollbackPlus can record several player events, but a missing record may be outside retention or may never have been captured. The existence of a plugin folder does not guarantee every historical inventory is available. Check the record path before telling a player their items are recoverable.
Record the starting point
Collect the player's exact identity, approximate incident time and event type. Record the plugin version and configured storage. Preserve the current data and configuration before changing capture or retention options, because a new policy cannot recreate a record that was never stored.
Work through the change
- Inspect the player's available records and their timestamps through the documented interface. Compare nearby event types rather than assuming every entry represents a death.
- Review the generated configuration's capture and retention settings for the installed release. Check the relevant documented event permissions, such as deathsave, joinsave or leavesave, and any inheritance that may deny them.
- Use a consenting test account to produce one harmless event of the missing type. Check the console for storage errors and confirm whether a new record appears.
- Correct only the identified capture, permission or storage problem. Repeat the event and document the oldest reliable recovery point that actually remains.
Check the result
New test events should produce the expected record, and staff should know whether the original incident has a usable checkpoint. Retention counts and event frequency determine history differently from a calendar promise. State that distinction clearly when discussing available recovery.
If the result differs
If no new events save, inspect the first storage error and relevant permissions. If new records save but the old one is absent, compare retained history and other backup sources. Avoid repeatedly changing retention while expecting deleted records to return.
Restore any ineffective trial setting and preserve remaining records. Use a separate verified server backup only through an approved recovery process if the plugin record is unavailable. Do not fabricate an inventory or delete the player data to force a new entry.
References and related help
- InventoryRollbackPlus maintainer reference 1
- Restore a recorded player inventory with InventoryRollbackPlus
- Find Minecraft logs and send useful troubleshooting details
Create a deliberate inventory checkpoint before a player event
A tournament, inventory-clearing minigame or staff experiment benefits from an explicit checkpoint rather than relying on a later join or death event. InventoryRollbackPlus provides a forcebackup command. Verify the saved record before the event begins, and keep its scope distinct from a full server backup.
Record the starting point
Identify the participating online test player and the exact state you need to preserve. Record the plugin version and approved staff role. Ask the player to stop moving items while the checkpoint is taken so its contents correspond to a clear moment.
Work through the change
- Use the documented command
/ir forcebackup player <player>with the required authorised permission. Confirm the command targets the intended account rather than a similar display name. - Open the player's records and check that a new timestamp appears. Inspect representative inventory slots so a success message is supported by an actual saved checkpoint.
- Record the checkpoint time in the event notes and explain what it covers. It does not replace backups of worlds, plugin databases or other players' inventories.
- Proceed with the controlled event, then compare the final state before deciding whether a restoration is needed. Restore only the approved components through the normal recovery interface.
Check the result
Staff should have a recognisable pre-event record and a documented reason for it. Test the workflow with a disposable account before a valuable live event. A checkpoint that cannot be located in the restore interface should not be treated as ready for recovery.
If the result differs
If the command is denied, check the documented forcebackup permission rather than granting operator status. If no record appears, inspect storage errors and the target identity. Do not start an irreversible inventory experiment while checkpoint creation remains uncertain.
Pause the event when the checkpoint cannot be verified. Preserve any existing records and use the normal server backup process if wider data protection is required. Remove temporary staff permission grants after the event instead of leaving elevated recovery access indefinitely.
References and related help
- InventoryRollbackPlus maintainer reference 1
- InventoryRollbackPlus maintainer reference 2
- Restore a recorded player inventory with InventoryRollbackPlus
- Back up game files before making changes
HuskSync tasks
Task guides and troubleshooting for HuskSync. Check the installed release before changing configuration or data.
Diagnose a player held in HuskSync synchronisation lock
HuskSync can lock player interactions while data is synchronising. A persistent lock is a symptom to investigate, not a reason to remove the protection that prevents competing item changes. Separate one player's state from a network-wide storage or messaging failure.
Record the starting point
Record the source and destination backend names, transfer time, affected account and HuskSync versions. Ask the tester to stop repeated transfers and item actions. Keep current player-data snapshots and a restricted configuration checkpoint before making a recovery change.
Work through the change
- Run the documented
/husksync statuscommand with authorised access on the relevant components. Compare its result with startup and transfer-time logs. - Check database and Redis connection errors separately. Confirm the backend's server.yml name matches the intended proxy server ID and that cluster membership is deliberate.
- Use a disposable account to test one controlled transfer through the normal proxy. Record whether the lock clears and whether an inventory marker reaches the destination.
- Correct only the identified connection or identity mismatch, then restart the affected component through the normal maintenance process. Retest before asking the original player to reconnect.
Check the result
The controlled account should finish synchronising and regain ordinary interactions with the expected data. Check a return transfer too. Keep the original player's recovery state unchanged until the path is healthy and staff have selected the correct authoritative snapshot.
If the result differs
If every tester remains locked, inspect shared services and version consistency. If only one account fails, compare its recorded snapshots and error context before applying a restore. Disabling locked-player command restrictions can expose data races without fixing the blocked operation.
Restore an ineffective trial configuration and keep affected admission paused if safe synchronisation cannot be demonstrated. Use the documented snapshot-recovery controls only with a current checkpoint and a chosen source. Do not delete player records or allow competing backend sessions to bypass the lock.
References and related help
- HuskSync maintainer reference 1
- HuskSync maintainer reference 2
- Test cross-server inventory synchronisation with HuskSync
- Find Minecraft logs and send useful troubleshooting details
Choose which player features should synchronise between backends
HuskSync can synchronise more than inventories, but not every feature belongs across every backend. Its feature switches define what it touches; disabled features use local player data. Decide the desired boundary before assuming a missing balance or changed location is a failed sync.
Record the starting point
List the data that should travel, such as inventory, ender chest or experience, and the data that should remain local. Record the generated configuration on each participating backend. Keep snapshots for a test account before changing the scope of live player state.
Work through the change
- Read the current sync-features table and compare it with your design. HuskSync does not synchronise Vault economy balances or ordinary unlocked maps; those need their own supported arrangements.
- Review the synchronization.features section in the installed configuration. Check location synchronisation carefully: the documented use assumes mirrored worlds where the same coordinates make sense.
- Apply a consistent intended policy across the participating group during controlled maintenance. Do not copy a configuration containing another backend's server ID or credentials without review.
- Transfer a test account with a counted inventory marker and distinct local state. Verify each enabled feature and one deliberately disabled feature on both destinations.
Check the result
The account should carry only the intended shared state. Document unsupported data separately so players do not mistake an economy or map limitation for missing inventory data. Confirm the behaviour again after reconnecting, since local player files can affect disabled features.
If the result differs
If a disabled feature appears to change, inspect another plugin that manages it and compare local player data. If location sync sends the tester somewhere unsafe, stop that trial and review whether the worlds are truly mirrored. Do not enable every feature simply to make configurations match.
Return the feature policy to its saved state if the trial creates an unintended boundary. Restore only the test account's required state using a chosen checkpoint. Keep live player records and world files intact while deciding which data should be shared.
References and related help
- HuskSync maintainer reference 1
- HuskSync maintainer reference 2
- Test cross-server inventory synchronisation with HuskSync
- Back up game files before making changes
Coordinate a HuskSync database recovery across all writers
Record the starting point
Identify every participating backend, its cluster ID and the database being recovered. Select the intended recovery point and keep a fresh checkpoint of the current database and relevant configuration. Decide how player sessions and new progress will be handled before applying old state.
Work through the change
- Read the installed HuskSync recovery and snapshot commands along with your database's supported restore procedure. Choose whether a targeted user snapshot or a wider database recovery is actually required.
- Close the affected route to players and stop the relevant writers through normal controls. Confirm no backend or test copy still points at the production database.
- Recover the chosen data using the supported database or snapshot procedure. Keep the pre-recovery checkpoint available privately and preserve the configuration mapping to each backend.
- Start in a controlled order and test a disposable account before reopening admission. Check an intended recovered player record and a return transfer without creating duplicate sessions.
Check the result
Every active writer should use the same intended recovered state, and new test data should persist normally. Record which recovery point was used and what later progress may need reconciliation. A database service starting successfully does not establish application-level consistency.
If the result differs
If an old state reappears after a transfer, inspect another writer or cached active session before repeating the restore. If only one player is affected, a targeted snapshot recovery may be more appropriate than another network-wide rollback. Keep logs from the controlled startup.
Keep admission closed if consistency cannot be demonstrated and return to the fresh pre-recovery checkpoint only through the same coordinated process. Do not alternate database restores while players continue trading. Never delete the original checkpoint until the recovery has been reviewed.
References and related help
- HuskSync maintainer reference 1
- HuskSync maintainer reference 2
- Test cross-server inventory synchronisation with HuskSync
- Back up game files before making changes
Separate Redis failures from database failures in HuskSync
HuskSync has separate database and Redis configuration. A connection failure in one service does not prove the other is unavailable, and repairing one password does not automatically repair both. Compare status and the first relevant log message to identify the failed dependency.
Record the starting point
Record the failing backend, transfer timestamp and installed HuskSync release. Keep private copies of the database and Redis endpoint configuration. Redact passwords and usernames before sharing logs, and avoid changing several credentials at the same time.
Work through the change
Check the result
Status and logs should show healthy dependencies, and the test account should transfer with the intended inventory state. Confirm a return transfer and a new saved snapshot where appropriate. A TCP connection alone proves reachability, not successful authentication or application operation.
If the result differs
An authentication error points to a different check from a timeout. A healthy database with failed messaging still warrants investigation of Redis; do not rewrite the database schema because the transfer stalls. Compare a working backend's redacted endpoint arrangement for useful differences.
Restore any ineffective trial endpoint change and keep the protected network boundary. Pause affected transfers if data consistency remains uncertain. Do not disable player locks, delete snapshots or reset shared services simply to suppress a connection error.
References and related help
- HuskSync maintainer reference 1
- HuskSync maintainer reference 2
- Test cross-server inventory synchronisation with HuskSync
- Find Minecraft logs and send useful troubleshooting details
Test keepInventory death handling before allowing server transfers
HuskSync gives special treatment to death snapshots and players who change servers while dead. With keepInventory, dropped-item assumptions can conflict with retained items. The maintainer documents a specific configuration and additional care for custom partial-retention plugins.
Record the starting point
Use a disposable account with counted low-value items and record keepInventory behaviour on each participating backend. Save the current HuskSync configuration and test-account snapshot. Check the server requirement for the documented ITEMS_TO_KEEP mode before changing it.
Work through the change
- Read the current keep-inventory guidance and inspect synchronization.save_on_death. The documented arrangement uses ITEMS_TO_KEEP with save_empty_items and sync_dead_players_changing_server enabled; confirm it matches the installed release and supported Paper version.
- Test a normal death and respawn on one backend. Compare inventory counts and the resulting snapshot before involving a server transfer.
- Repeat a controlled death-screen disconnect and join the other backend through the normal route. Check the final alive state and inventory, then return to the first backend.
- If a custom plugin keeps only selected items, review its supported HuskSync integration with its maintainer. A general keepInventory setting may not represent that plugin's item transformation.
Check the result
The test account should retain exactly the intended items with no extra death drops or duplicate recovery state. Record both the same-server and cross-server results. A successful ordinary respawn does not prove that changing servers while dead is safe.
If the result differs
If counts differ, stop the trial and compare snapshot contents, event ordering and the custom death plugin. The maintainer notes that advanced partial-retention setups may require a dedicated API hook. Avoid compensating items repeatedly while the source of duplication remains active.
Restore the saved test configuration if the change regresses death handling and recover only the disposable account's required state. Keep affected transfer behaviour restricted until verified. Do not delete all player snapshots or reset inventories to conceal an inconsistent test.
References and related help
- HuskSync maintainer reference 1
- HuskSync maintainer reference 2
- Test cross-server inventory synchronisation with HuskSync
- Recover a Minecraft player inventory from a backup
Isolate a staging server from the production HuskSync group
A copied backend can retain production HuskSync credentials and cluster membership. Starting it for testing may allow it to read or write real player state. Isolate shared services before the first staging login rather than relying on a different public Minecraft port.
Record the starting point
Keep the staging copy stopped while listing inherited database, Redis and cluster configuration. Record which production servers belong to the live group. Prepare separate authorised test storage and accounts, and keep the copied credentials out of public setup notes.
Work through the change
- Read the installed HuskSync configuration structure. Review database and Redis destinations, cluster_id and the server ID in server.yml as separate settings.
- Configure the test copy for deliberately isolated services and identities using the documented setup. A changed server name alone is not proof that it cannot touch production storage.
- Ask support to verify that the staging service cannot reach production credentials or unintended endpoints where practical. Keep the test instance out of the public proxy route until isolation is checked.
- Start with a disposable test account and confirm where its snapshot is stored. Verify that production snapshots and active player sessions remain unchanged before conducting transfer or recovery experiments.
Check the result
The staging account's changes should remain in the intended isolated environment. Record the test endpoints and cluster design without secrets. A useful test includes checking the production side for unintended writes, not simply observing that the copied server starts.
If the result differs
If test data appears in production, stop staging immediately and preserve the write timestamps. Compare all inherited connection settings rather than changing only the cluster label again. Review affected snapshots before deciding whether a targeted recovery is needed.
Keep the copy stopped until its isolation can be demonstrated. Restore any accidentally changed production state through a coordinated, checkpointed recovery. Do not delete production users or snapshots to make a test account disappear; preserve evidence and repair the boundary first.
References and related help
- HuskSync maintainer reference 1
- HuskSync maintainer reference 2
- Test cross-server inventory synchronisation with HuskSync
- Back up game files before making changes
HuskHomes tasks
Task guides and troubleshooting for HuskHomes. Check the installed release before changing configuration or data.
Resolve conflicting HuskHomes home limits across ranks
A player can inherit several home allowances through donor, staff and temporary groups. Changing the number in the main configuration may appear ineffective because an explicit numeric permission takes precedence. Check the effective allowance before touching any stored home.
Before you change settings
Record the player’s normal groups, context and existing home count. Choose a test account with the same memberships and no operator status. Save the relevant permission-group definitions; the home database is not the setting being repaired.
Follow the request through the plugin
- Inspect effective permissions for the affected account using your permission manager. Look for every granted
huskhomes.max_homes.numeric node, including inherited and contextual entries. - Compare the result with the installed HuskHomes configuration. The documented default selects the largest applicable allowance; enabling
general.stack_permission_limitschanges how numeric home limits combine. - Choose one deliberate policy: a total allowance for each rank, or additive allowances with stacking enabled. Remove only a redundant allowance grant after confirming other groups do not depend on it.
- Test permission evaluation in the same world and server where the complaint occurred. Use a new harmless home name only if the test account has capacity; record whether the next home is permitted or refused.
Confirm the intended result
The ordinary test account should receive the intended total, and its existing home list should remain intact. Repeat after reconnecting and after removing any temporary rank. A successful administrator test alone does not show that a member’s inherited limit is correct.
If the test fails
An unexpected larger total usually means another applicable node remains or stacking is active. A smaller total can indicate a missing context or a negative permission. Changing limits is not a reason to delete homes that already exist above the new allowance.
Restore the saved permission definitions if access becomes inconsistent. Preserve the home records and ask support to inspect effective permissions with the player, world and time of the failed check.
Sources and related help
- HuskHomes maintainer reference 1
- HuskHomes maintainer reference 2
- Set up personal homes and teleport requests with HuskHomes
Explain why a HuskHomes teleport has no warmup
An immediate teleport is not always a broken timer. HuskHomes supports both a permission-based warmup duration and a separate bypass. Staff accounts commonly differ from regular players, so compare like-for-like access before changing the delay for everyone.
Before you change settings
Choose one home in a safe location and record the configured warmup, affected player, server and permission context. Keep the same destination for each attempt so a different command or plugin cannot change the test halfway through.
Follow the request through the plugin
- Check whether the affected player inherits
huskhomes.bypass_teleport_warmup. A deliberate staff bypass should not be copied into a public rank just to make a test pass. - Inspect numeric
huskhomes.teleport_warmup.permissions. HuskHomes documents that the highest applicable numeric value wins, even when stacking is enabled for other limits. - Compare a non-operator account with the affected account. Trigger the same HuskHomes home command, stand still and record the message and elapsed delay rather than estimating from the animation.
- Adjust only the incorrect permission or documented warmup setting. Retest a member and a staff account, checking that intended staff access and member delays both match your policy.
Confirm the intended result
Your member account should wait the expected interval before arriving. The staff account should follow whichever exception you deliberately retain. Test again after reconnecting, because an old session can make a group change harder to interpret.
If the test fails
If neither account follows the configured duration, confirm that HuskHomes owns the command. Another homes plugin can register the same label. A non-positive configured delay also needs checking; permission changes cannot prove which command handler actually ran.
Restore the earlier warmup and permission entries if the change affects unrelated players. Keep the timing notes and command ownership evidence; do not grant operator status as a workaround for a teleport delay.
Sources and related help
- HuskHomes maintainer reference 1
- HuskHomes maintainer reference 2
- Set up personal homes and teleport requests with HuskHomes
Disable a conflicting HuskHomes command without removing homes
Two teleport plugins can compete for labels such as home, spawn or random teleport. You can leave HuskHomes installed and disable a selected registration instead of removing its data or repeatedly changing plugin load order.
Before you change settings
Write down the exact command and aliases players use, and decide which plugin should own that action. Save HuskHomes configuration and the other plugin’s command settings. Keep a list of existing destinations for a before-and-after check.
Follow the request through the plugin
- Confirm ownership using the command-conflict documentation and each plugin’s help. Do not assume the visible response identifies the handler when both plugins use similar messages.
- Open the active HuskHomes configuration. Add only the unwanted slash-prefixed command to its documented
disabled_commandslist, preserving the YAML list structure and existing entries. - Use a planned full server restart for a registration change. A configuration reload does not provide the same assurance that the command map has been rebuilt cleanly.
- Test the chosen public label and documented aliases as a member. Then test another HuskHomes action that should remain available and inspect its destination list.
Confirm the intended result
The competing plugin should consistently handle the selected label, while unaffected HuskHomes commands still work. Existing saved homes should remain present because disabling command registration does not require removing their records. Update player instructions if the command now has different arguments.
If the test fails
An alias can still resolve differently from its main command. Check the disabled list and any server command aliases before making further changes. If the new handler cannot find an old home, remember that separate plugins do not automatically share destination databases.
Remove the single new disabled entry and restart during a maintenance window to restore previous registration. Keep all destination data; do not import, clear or merge home databases merely to resolve a command-name collision.
Sources and related help
- HuskHomes maintainer reference 1
- HuskHomes maintainer reference 2
- Set up personal homes and teleport requests with HuskHomes
Limit a HuskHomes warp to the intended player group
A warp can exist correctly while remaining unavailable to the group that needs it. Restricted warps add a destination-specific permission check to the ordinary warp command. This is useful for staff rooms or rank areas, provided the test includes a player who should be refused.
Before you change settings
Choose a harmless test destination and two non-operator accounts: one allowed and one denied. Record the warp’s exact name and save permission-group settings. Confirm that permission-restricted warps are supported and enabled as documented for your installed release.
Follow the request through the plugin
- Check the allowed account has the required command permission for the action being tested. Listing, travelling, editing and deleting are separate actions; granting travel should not silently grant management.
- Grant the narrow destination permission
huskhomes.warp.followed by the exact warp name to the intended group. Inspect inherited permissions for unintended broad access before testing. - Use the allowed account to list warps and travel to the destination. Run the corresponding list and travel attempts with the denied account, recording the response each receives.
- Repeat from another relevant world or server if your permissions use contexts. Reconnect after group changes and confirm the public player instructions contain only commands that the intended group can actually use.
Confirm the intended result
The permitted member should list and use the destination, while the denied member should remain excluded under the configured restriction. Check another public warp too, so the change has not accidentally removed basic travel for ordinary players.
If the test fails
If both accounts succeed, inspect inherited destination access and whether restrictions are active. If neither succeeds, check command access before renaming the warp. Creating another warp with the same destination does not repair a permission mismatch.
Restore the saved group entries and restriction setting if access widens unexpectedly. Retain the original warp and coordinates. Ask support to inspect the effective permissions rather than publishing a restricted location or granting broad administrative access.
Sources and related help
- HuskHomes maintainer reference 1
- HuskHomes maintainer reference 2
- Set up personal homes and teleport requests with HuskHomes
Control public HuskHomes listings without deleting private homes
A total home allowance and a public listing allowance solve different problems. Increasing one does not necessarily increase the other. Check publication permissions and limits before treating an inability to publish a destination as a missing or damaged home.
Before you change settings
Ask the player which existing home they want to publish and confirm that its coordinates are suitable for public visitors. Record current privacy states and numeric permissions. Use a test home away from private builds when checking the visitor experience.
Follow the request through the plugin
- Inspect
huskhomes.max_public_homes.numeric grants separately from total home allowances. Check inherited group limits and the configured stacking policy rather than changing every allowance together. - Confirm that the member has the documented home-edit and privacy permissions. The ability to create a home does not prove that every edit subcommand is available.
- In game, use
/edithomewith the home name and the documented privacy action to change only the chosen test home. List public homes from another ordinary account. - Visit the new public listing with that second account and check the destination. Then return the test home to private and confirm it no longer appears as an available public destination.
Confirm the intended result
The public list should change for the selected home while other private homes stay private and remain in the owner’s personal list. Record how the public allowance is counted after reversing the test so the player understands which entries occupy a public slot.
If the test fails
If publication fails despite spare total capacity, recheck the public allowance and privacy permission. If the entry appears to the owner but not a visitor, distinguish the owner’s personal list from the shared public list before changing data.
Restore the test home’s original privacy and the saved numeric grants. Avoid deleting and recreating homes to free a listing slot; that can lose descriptions, ownership context and the original location while leaving the underlying policy unresolved.
Sources and related help
- HuskHomes maintainer reference 1
- HuskHomes maintainer reference 2
- Set up personal homes and teleport requests with HuskHomes
Check a HuskHomes home-slot charge before changing balances
An additional home slot can involve a maximum allowance, a free allowance and previously purchased capacity. A player being charged unexpectedly does not justify editing their balance or removing a saved destination. Follow the slot decision first.
Before you change settings
Record the installed build, existing homes, current balance and the exact attempted action. Save the economy configuration and relevant permission entries. On Paper, verify Vault and the intended economy provider loaded successfully before diagnosing a home purchase.
Follow the request through the plugin
- Inspect the member’s numeric free-home and maximum-home permissions. These may override configuration defaults, and inherited memberships can make two apparently identical ranks behave differently.
- Use the documented
/huskhomes homeslotsview action for that player to inspect purchased capacity. View the result before considering any administrative adjustment; do not repeatedly run a purchase as a diagnostic. - Check the additional-slot cost in the generated configuration for the installed build. The maintainer pages show release-dependent naming, so retain the file’s real structure instead of pasting a guessed YAML key.
- Check whether the test account has
huskhomes.bypass_economy_checks. Run one controlled purchase only with the owner’s agreement, recording balance and slot count immediately before and after.
Confirm the intended result
A successful purchase should produce the intended slot increase and a single matching debit. An account with a deliberate bypass should follow its documented exception. Confirm that a later home creation uses the available capacity rather than charging the same purchase again.
If the test fails
If the balance changes without usable capacity, preserve timestamps and economy-provider logs for support. Separate a failed provider hook from a maximum-home limit. Do not compensate speculatively while an automatic or queued transaction may still complete.
Restore only the changed allowance or price after the test. If an adjustment is genuinely required, reconcile the recorded transaction and slot count first; never restore an old entire economy database over unrelated players’ later activity.
Sources and related help
- HuskHomes maintainer reference 1
- HuskHomes maintainer reference 2
- Set up personal homes and teleport requests with HuskHomes
NuVotifier tasks
Task guides and troubleshooting for NuVotifier. Check the installed release before changing configuration or data.
Stop duplicate vote rewards caused by two forwarding paths
A player receiving two rewards may have two delivery paths rather than a reward file that runs twice. NuVotifier can forward votes itself, while VotingPlugin also supports its own proxy transport. Combining both without a deliberate design can submit the same event twice.
Before you change settings
Draw the route from the voting website to the public receiver, proxy transport, backend listener and reward plugin. Record installed builds and save configurations before making a change. Choose one test player and a quiet period so separate legitimate votes are not mistaken for duplicates.
Follow the request through the plugin
- Send one real test from a configured listing and record its timestamp and service identifier. Compare receiver and reward logs across the proxy and destination backend; do not resend until the first attempt is understood.
- Identify which component owns forwarding. For the documented standard VotingPlugin proxy layout, follow its transport guide and keep NuVotifier backend forwarding disabled. A NuVotifier-only forwarding layout has different requirements.
- Check for another public receiver, duplicate listener plugin or a second destination entry. Disable only the redundant route after confirming the retained route can reach the intended reward processor.
- Restart affected components in a planned window and send one further controlled vote. Check the receiver count, processing count, balance change and item delivery separately.
Confirm the intended result
One external vote should create the expected number of deliveries under your declared network policy. If every backend should receive it, distinguish that intentional fan-out from two rewards on the same backend. Test a player who changes backend as well as one who stays connected.
If the test fails
If duplicate rewards persist after only one event reaches VotingPlugin, inspect reward configuration, milestone triggers and repeated command entries. A first-vote bonus alongside a normal reward may be intentional; record each reward source before removing it.
Restore the previous forwarding settings if the retained route fails. Keep vote history and evidence intact. Reconcile accidental rewards with the owner rather than clearing totals or replaying a day of votes to repair one routing mistake.
Sources and related help
- NuVotifier maintainer reference 1
- NuVotifier maintainer reference 2
- Configure NuVotifier and protect vote-receiver credentials
Find an offline vote waiting in NuVotifier forwarding cache
A received vote can wait for a suitable delivery route. With NuVotifier plugin-messaging forwarding, the configured fallback affects where an offline player’s vote eventually goes. A queued event is not proof that the listing failed to send it.
Before you change settings
Record whether the network uses NuVotifier plugin messaging or a different plugin’s proxy transport. This procedure concerns NuVotifier’s own cache. Save forwarding settings and note one test vote’s player, service identifier and timestamp before testing reconnect behaviour.
Follow the request through the plugin
- Verify the proxy received the vote, then inspect whether forwarding is limited to the joined server. Identify the configured
joinedServerFallbackand excluded destinations. - If a fallback is configured, check whether it is reachable. The maintainer guide explains that a cached vote awaiting that fallback is not automatically redirected to whichever server the player next joins.
- If your intended policy is delivery on the next join, compare the documented empty fallback arrangement with the current configuration. Change the policy only after understanding votes already queued under the old route.
- Check the configured cache retention and storage type. Reconnect the test player once, follow the receiver and backend logs, and wait for the recorded vote to be delivered before sending another.
Confirm the intended result
The event should arrive at the destination chosen by your forwarding policy, within the configured retention window. Record which backend applied the reward. Confirm normal online delivery still works after adjusting an offline route.
If the test fails
A listener accepting the event and a reward plugin queuing an offline reward are different stages. If the backend already processed the vote, troubleshoot that plugin’s reward queue instead. Do not assume every proxy or forwarding method has NuVotifier’s caching behaviour.
Restore the previous fallback setting if the new policy sends events to an unintended backend. Preserve cache files and vote logs. Do not delete the cache or manually replay all votes while previously accepted events may still be pending.
Sources and related help
Correct a vote listing that uses the wrong token or RSA key
NuVotifier’s legacy RSA credentials and newer protocol tokens are different. Supplying a token where a listing expects a public key can fail even when the receiver port is reachable. Verify the listing’s supported protocol before replacing any credentials.
Before you change settings
Identify the exact public receiver and save its configuration privately. Record the listing, configured hostname, assigned port and selected protocol. Never paste an entire listener configuration into a public ticket: it can contain secrets for other routes.
Follow the request through the plugin
- Check the listing’s supported Votifier version and its credential field. Legacy RSA setup uses the receiver’s public key; the matching private key remains on the server.
- For a token-based integration, select the token intended for that public receiver. Do not substitute a backend forwarding token simply because both are short strings.
- Confirm the listing connects to the real public address and allocated listener port. A wildcard bind address such as
0.0.0.0is not a destination to enter on the listing website. - Save the corrected listing details and send one listing-generated test. Compare its timestamp with NuVotifier logs, then follow the accepted event through the reward listener.
Confirm the intended result
The receiver should accept the external event and the intended player should receive the configured reward once. Check a second independently configured listing without overwriting its credentials; different integrations can use different supported methods.
If the test fails
If no connection appears, investigate endpoint reachability before rotating keys. If a connection is rejected, inspect protocol and credential mismatch. A successful local reward command does not authenticate a remote listing or test its network route.
Restore the previous listing entry if you changed the wrong receiver. If a token or private key was exposed, coordinate replacement of that credential and its dependent integrations. Keep unrelated credentials and player vote history intact.
Sources and related help
Separate an accepted vote from a failed reward listener
NuVotifier receives vote records; it does not include a reward listener by default. A website’s successful test can therefore stop at the receiver while the player sees no coins, items or message. Establish which stage actually completed.
Before you change settings
Write down the receiver process, reward plugin and backend where delivery is expected. Save the test player’s starting balance and inventory if rewards modify them. Use a genuine account identity and one configured listing to avoid confusing an invented username with a delivery failure.
Follow the request through the plugin
- Send one external test and capture the receiver’s timestamp and accepted vote details. If no receiver event exists, stop here and check the listener endpoint, allocation and listing credentials.
- Confirm a compatible reward listener is loaded on the process that receives or legitimately forwards the event. Read startup errors rather than assuming the presence of its JAR means it is active.
- Look for the reward plugin’s receipt of the same player and service identifier. On a network, follow the forwarding stage between the proxy and backend before editing reward amounts.
- If receipt is confirmed, inspect site matching, eligibility, offline queues and the particular reward action. Run a bounded local processing test only to isolate that downstream stage.
Confirm the intended result
A complete test should show receipt, processing and the intended player-visible result. Record each stage separately so a future support report identifies the missing link. Verify the player reconnects normally if the reward requires online delivery.
If the test fails
An administrative local vote can pass while the public listener is unreachable. Conversely, an accepted listener event can fail to match a configured service name. Do not treat either test as proof of the whole chain or repeatedly send rewards while diagnosis is incomplete.
Revert the single listener or reward setting you changed if another working site stops processing. Preserve event logs and queued records. Do not reinstall the server or erase vote data to resolve a missing listener hook.
Sources and related help
- NuVotifier maintainer reference 1
- NuVotifier maintainer reference 2
- Configure NuVotifier and protect vote-receiver credentials
VotingPlugin tasks
Task guides and troubleshooting for VotingPlugin. Check the installed release before changing configuration or data.
Match a VotingPlugin site to the service name actually received
A listing’s public name, vote URL and incoming service identifier can differ. VotingPlugin uses the received service value to select a configured site. Correcting that mapping can restore rewards without recreating the site or altering player totals.
Before you change settings
Choose one listing and save VoteSites.yml before editing. Record the player and timestamp of a controlled external vote. Check the installed VotingPlugin release, because the maintainer documentation distinguishes current release behaviour from development-only validation features.
Follow the request through the plugin
- Confirm both the Votifier receiver and VotingPlugin log receipt. If only the receiver logs an event, investigate listener integration before changing the site mapping.
- Use the received log value or the documented
/av servicesitescommand to identify the service string. Do not derive it from the website address or the menu item shown to players. - Find the intended site entry and compare its
ServiceSitefield. Matching is documented as case-insensitive, but other differences still matter. Preserve the site’s reward settings and internal key. - Apply the narrowly corrected mapping using the plugin’s supported reload or a scheduled restart. Send one further external test and compare the selected site and delivered reward.
Confirm the intended result
The real listing should select the intended configured site and award its ordinary reward once. Check the player-facing vote link still points to the correct listing. A local administrative vote is useful for reward processing but cannot establish what identifier the remote website sends.
If the test fails
If an unexpected extra site appears, inspect automatic site creation. Generated entries need review, including their vote URL and rewards. Do not enable valuable default rewards for every unknown identifier merely to silence an unmatched-site warning.
Restore the saved mapping if a working listing stops matching. Keep player history and the received service evidence. If the website sends a malformed identifier, correct the integration with that website rather than inventing several competing entries.
Sources and related help
- VotingPlugin maintainer reference 1
- VotingPlugin maintainer reference 2
- Create and test Minecraft vote rewards with VotingPlugin
Investigate an offline VotingPlugin reward before granting it again
An offline player may have a valid vote waiting for delivery, especially when the reward needs an online Bukkit player. Manually granting the reward before checking its queue can create a second payout when the player reconnects.
Before you change settings
Identify one vote by player, listing and timestamp. Save the current relevant configuration and record the player’s balance or expected items. Distinguish a vote still waiting in a proxy forwarding cache from a reward already accepted and queued by VotingPlugin.
Follow the request through the plugin
- Find the VotingPlugin receipt for that event. If it has not reached the plugin, trace the public receiver and proxy transport instead of editing the reward queue.
- Check that the vote username resolves to the intended player identity. On Bedrock networks, compare the actual configured prefix and UUID mode; do not toggle online mode to force a name match.
- Inspect the reward actions and requirements. Permissions, worlds, player-run commands and GUI choices may depend on the player being online and in the correct context.
- Have the player join the intended backend once and watch the bounded delivery log. Record the resulting balance or items before considering any manual correction.
Confirm the intended result
The queued reward should be delivered according to the configured online requirements and only once. Reconnect again without submitting another vote to confirm there is no repeat payout. Keep the original event timestamp separate from the later delivery timestamp.
If the test fails
If the event is accepted but the result is missing, look for a failed economy hook, inventory limitation or unmet requirement. A normal vote count increase does not prove every reward action succeeded. Avoid repeatedly using administrative vote commands as a substitute for inspecting the failed action.
Restore a changed reward requirement if it disrupts other players, while retaining queued state. Reconcile a confirmed missing payout against recorded delivery evidence. Do not delete a player record or restore an old database over newer votes to fix one reward.
Sources and related help
- VotingPlugin maintainer reference 1
- VotingPlugin maintainer reference 2
- Create and test Minecraft vote rewards with VotingPlugin
Review the command privileges in a VotingPlugin reward
A reward command can run with more authority than the player who earned it. A typo or overly broad permission command can therefore affect the whole server. Review the exact command and substituted player before enabling a new reward for real votes.
Before you change settings
Make a copy of the specific reward definition and identify where it is referenced. VotingPlugin supports inline sections and reusable files; editing a shared file can change several sites or milestones. Use a harmless message reward for the first wiring check.
Follow the request through the plugin
- Locate the active definition rather than generated files under
Rewards/DirectlyDefined. The maintainer advises editing the original inline configuration, since generated queue files are not the source of truth. - Check whether each action executes from the console or a player context using the installed version’s reward reference. Use the target player placeholder only where supported; do not assume every output path expands PlaceholderAPI.
- Review the substituted command for scope. Prefer a small item, currency or cosmetic action over operator access or a broad permission grant. Remove ambiguous commands that could target everyone when an argument is absent.
- Test the harmless definition with an ordinary account, then introduce one reviewed action at a time. Check both online processing and a controlled offline delivery if that reward can be queued.
Confirm the intended result
The intended player should receive only the configured benefit and no new administrative access. Confirm a second player’s balance, permissions and inventory remain unchanged. If several sites share a reward file, test one representative path from each affected caller.
If the test fails
A file-based reward begins with its reward keys rather than an unnecessary extra wrapper. An inline section and a file reference have different structure, so preserve the documented format. A message working does not prove a command ran with the expected context.
Restore the copied source definition and disable only the new reward action if its scope is wrong. Preserve vote totals and queued evidence. If authority was accidentally granted, remove that specific grant and review logs before resuming the reward.
Sources and related help
- VotingPlugin maintainer reference 1
- VotingPlugin maintainer reference 2
- Create and test Minecraft vote rewards with VotingPlugin
Distinguish a VotingPlugin vote party from a personal milestone
A vote party measures shared progress, while a personal milestone measures one player’s totals or activity. Both can legitimately trigger on the same vote. Identify each reward source before assuming a doubled message means the listener received a duplicate.
Before you change settings
Save SpecialRewards.yml and record the installed release. The maintainer documents modern milestone and streak systems alongside legacy compatibility sections. Note the party target, eligibility policy and the player’s relevant personal total before submitting a controlled test.
Follow the request through the plugin
- Locate the party section and identify global actions versus per-player rewards. A global console action should run once for the party; a per-player action can legitimately run for several eligible players.
- Check whether eligibility is limited to voters, online players or another documented condition. Compare that policy with the player who says they missed the party reward.
- Inspect personal milestone and legacy reward sections for an equivalent bonus. When migrating to a modern milestone, do not leave an old definition active unless you deliberately want both.
- On a proxy network, identify which component owns party progress and reward forwarding. Test near the threshold with controlled accounts, recording the trigger and every intended recipient.
Confirm the intended result
The party should trigger at the configured shared target, and individual bonuses should follow their own conditions. Check the next vote after the party to confirm progress continues according to the configured reset or increasing-target behaviour.
If the test fails
If the same party executes on several backends, inspect forwarding ownership and shared-state configuration. If only one player misses a reward, inspect eligibility and online delivery first. Neither symptom justifies resetting everyone’s vote totals.
Restore the previous reward definition if the policy changes unexpectedly. Keep progress and delivery logs intact. Reconcile any confirmed missing benefit with the owner, rather than replaying the entire party while some recipients have already been rewarded.
Sources and related help
- VotingPlugin maintainer reference 1
- VotingPlugin maintainer reference 2
- Create and test Minecraft vote rewards with VotingPlugin
Reduce repeated vote reminders without disabling voting
Vote reminders can be triggered at login and at intervals. A short per-rule cooldown does not necessarily describe the whole reminder policy, because global cooldowns, priorities and eligibility conditions also affect which rule runs.
Before you change settings
Check the installed version and its generated configuration before using this procedure. The maintainer documents a redesigned reminder system and a legacy migration; an older release may use different settings. Save the current configuration, especially before allowing an automatic migration.
Follow the request through the plugin
- List enabled reminder rules and their trigger types. Compare login and interval rules so two nearly identical prompts are not unintentionally scheduled for the same player.
- For builds using the redesigned system, inspect
VoteReminderOptions, global cooldown andStopAfterMatch. A higher-priority matching rule can prevent a later rule from being evaluated. - Check each rule’s cooldown, delay and eligibility conditions against the player’s actual vote availability. For interval rules, the documented effective cooldown is the larger of interval and cooldown.
- Test with an ordinary player who can vote, then one who has already voted. Verify the required reminder permission and observe a full configured interval instead of repeatedly reconnecting and changing several timers together.
Confirm the intended result
The eligible player should receive a useful prompt at the intended event, while an ineligible player should not be spammed. Check that ordinary voting and rewards still work; changing reminder timing should not require disabling the receiver or vote sites.
If the test fails
If no reminder appears, inspect conditions and permission access before shortening every timer. If too many appear, compare all matching rules and other reminder plugins. A queued login delay can also make an old session look like a new interval message.
Restore the saved rule configuration if prompts become confusing. Keep migrated and original copies privately, since migration may not create a backup itself. Do not clear persistent player cooldowns merely to make a test message appear immediately.
Sources and related help
Preserve monthly voting history before changing leaderboard tracking
A monthly leaderboard reset and permanent all-time history are different records. If you want previous months available later, decide how that history will be retained before the next reset. An empty historical leaderboard cannot necessarily be reconstructed from the current month alone.
Before you change settings
Record the installed build, database type, timezone and current month totals. Take a consistent backup of plugin data and its database before changing tracking behaviour. On a network, include the proxy and backend configuration so their understanding of shared data remains consistent.
Follow the request through the plugin
- Check the maintainer’s Month Date Totals reference against the installed release. It describes an optional date-labelled storage system, including features marked experimental; do not assume a development option is stable in every release.
- Distinguish storing dated monthly history from making it the primary active total tracker. The documented primary-tracker option depends on dated storage being enabled and represents a separate behaviour change.
- Choose the smallest supported change needed for your history requirement. Keep all-time totals and reward thresholds unchanged, and align corresponding proxy settings if the documentation requires shared configuration.
- Test on an isolated copy using the same build and data. Compare current totals and the documented previous-month display before planning a production change; do not alter the live system clock to simulate month end.
Confirm the intended result
The current leaderboard should retain its values, and supported historical views should expose the months actually stored. Record the first month from which history is available. Enabling storage today does not promise recovery of months already overwritten under the former policy.
If the test fails
If proxy and backend results disagree, inspect their shared-data configuration and plugin versions before resetting anything. A top-voter award also needs its own enabled period and reward settings; a displayed leaderboard does not prove award delivery.
If the trial changes totals unexpectedly, restore the isolated copy and review the option with the maintainer before touching production. Any production rollback must use a consistent data and database pair and account for votes accepted since the backup.