# Chunky tasks
Task guides and troubleshooting for Chunky. Check the installed release before changing configuration or data.
# Pause a Chunky task without discarding its saved progress
Pausing is useful when players arrive during terrain generation or the server needs a maintenance window. Chunky distinguishes pausing from cancelling: cancel removes the task’s progress record. Choose the pause path when your intention is to continue the same job later.
## Work through the change
1. Read the current task status and record the world, shape, centre, radii and completion count. Check that the task you intend to pause belongs to this world rather than another simultaneous job.
2. Run `chunky pause` with the exact world argument supported by the installed release. In the game chat include the leading slash; the panel console usually uses the command without it.
3. Watch the console until the task reports its paused state. Allow outstanding work to settle, then record disk usage and server response so the pause has a measurable operational result.
4. When the quieter period returns, use `chunky continue` for that same world. Check the resumed status against your recorded task rather than issuing `chunky start` with a new selection.
## Check the result
The task should resume from its saved work and retain the intended selection. Progress and elapsed-time estimates may change after a long break, so compare completed chunks and world identity rather than expecting the old ETA to remain exact. Test ordinary player movement while the job runs.
Keep the planned continuation time in staff notes so the task is not forgotten after players arrive. Check that the named world remains available before resuming the saved job.
## Recover or stop safely
If the task cannot be found, stop and inspect the task files and recent restart logs before starting over. Do not substitute cancel while investigating a pause problem. Existing generated terrain is separate from the progress record, so preserve both the world and the diagnostic evidence.
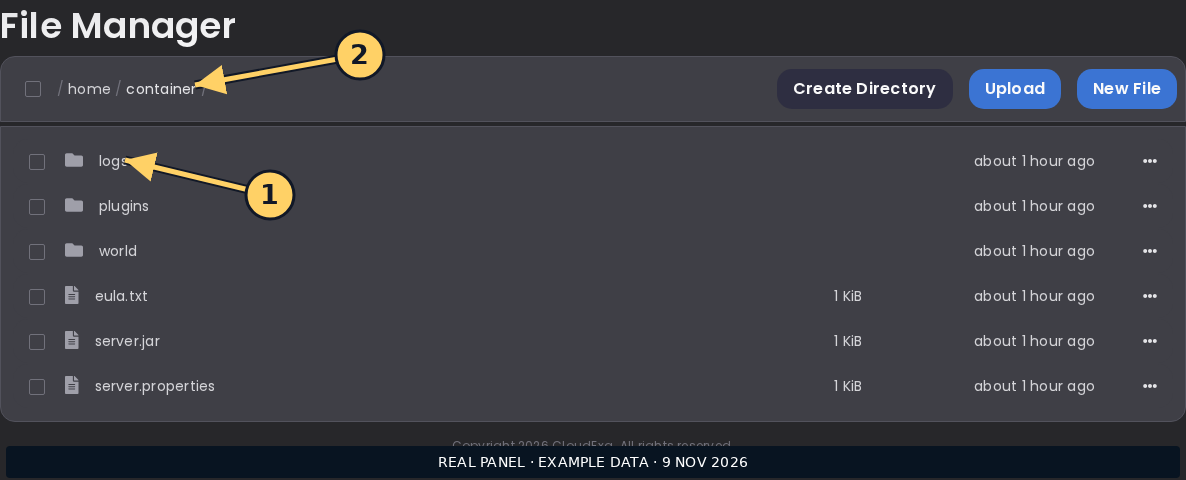Use the CloudExa console and logs to record task status and errors. Check whether each command is intended for a player or the server console before running it.## Related guidance and maintainer reference
For the broader setup, read [Pre-generate Minecraft terrain with Chunky and monitor disk space](https://help.cloudexa-hosting.com/books/game-hosting/page/pre-generate-minecraft-terrain-with-chunky-and-monitor-disk-space). Check the installed plugin version before applying syntax from the [official Chunky documentation](https://github.com/pop4959/Chunky/wiki/Commands).
# Catch an off-centre Chunky selection before generating terrain
A radius does not establish where a pregeneration task is centred. An old selection can leave a new world generating around coordinates from a previous job. Read the complete selection before starting so the finished terrain covers the actual spawn and intended playable area.
## Work through the change
1. Write down the target world’s exact folder name and the planned centre coordinates. Decide whether the centre follows world spawn or a fixed location agreed with the map owner.
2. Select the target world in Chunky and set the centre explicitly using the installed command syntax. Set shape and radii too; avoid treating the current defaults as evidence of the intended area.
3. Use `chunky selection` to read the resulting world, centre, shape and radii together. Compare the minimum and maximum footprint with the playable border and any existing distant builds.
4. Start a modest trial area first and inspect new chunk growth around the intended centre. Record the selection output before extending to the full planned radius.
## Check the result
Generation should expand around the written centre and cover the intended corners or circular edge. A map preview can help, but its own rendering delay may hide recent terrain. Confirm coordinates in game and the active Chunky task status before leaving a large job unattended.
The selection readback is the approval point for the job. Save it where the next administrator can compare a running task with the original plan without reconstructing coordinates from memory.
## Recover or stop safely
Pause the task if its centre is wrong. Record what has already been generated, then plan a corrected selection without deleting terrain. Cancelling progress does not remove generated chunks, and a misplaced pregeneration area is not permission to trim a live world with player builds.
## Related guidance and maintainer reference
For the broader setup, read [Pre-generate Minecraft terrain with Chunky and monitor disk space](https://help.cloudexa-hosting.com/books/game-hosting/page/pre-generate-minecraft-terrain-with-chunky-and-monitor-disk-space). Check the installed plugin version before applying syntax from the [official Chunky documentation](https://github.com/pop4959/Chunky/wiki/Commands).
# Compare circular and square Chunky selections for the same playable area
A circular border and a square selection with the same radius cover different terrain. Choosing by radius alone can generate unnecessary corners or leave intended areas uncovered. Sketch the playable footprint before deciding which Chunky shape should match it.
## Work through the change
1. Record the world, centre and boundary shape used for ordinary players. Include any border wrapping or portal exits that can place players near the edge.
2. Read the installed Chunky shape and radius controls. Prepare a circle selection and inspect it with `chunky selection`, then record the corresponding square selection without starting either job.
3. Compare both footprints against several known coordinates: the cardinal edges and the square’s corners. Use the footprint that matches actual access rather than the one with the more attractive initial ETA.
4. Run a small trial of the selected shape during a quiet period. Check chunk growth, free disk space and normal player response before committing to the larger radius.
## Check the result
The accepted selection should cover the reachable play area without an unexplained mismatch at its corners. Generated area grows roughly with the square of radius, so a small radius increase can still have a large disk cost. Keep the precise shape in the maintenance record.
Border shape and pregeneration shape need separate records even when they match today. A later border change can expose terrain beyond the prepared area unless someone compares the updated footprint deliberately.
## Recover or stop safely
Pause a running job before changing the plan. Existing terrain outside the new footprint remains part of the world and may contain player activity. Preserve it unless a separate, backed-up trimming procedure has been authorised. Restore the previous border policy if access was altered only for testing.
## Related guidance and maintainer reference
For the broader setup, read [Pre-generate Minecraft terrain with Chunky and monitor disk space](https://help.cloudexa-hosting.com/books/game-hosting/page/pre-generate-minecraft-terrain-with-chunky-and-monitor-disk-space). Check the installed plugin version before applying syntax from the [official Chunky documentation](https://github.com/pop4959/Chunky/wiki/Commands).
# Check a Chunky ETA that stops changing before assuming the task has crashed
A stationary ETA can reflect expensive terrain, a paused task or a reporting interval rather than a dead process. Compare multiple signals before restarting a busy server. Interrupting generation repeatedly can make diagnosis harder and affect players who are otherwise connected normally.
## Work through the change
1. Record the exact time, active world, completed chunk count and task state. Wait through more than one configured reporting interval so a short-lived delay is not mistaken for a permanent stall.
2. Read the current console for generation errors, watchdog messages and disk failures. Check free storage through the panel and collect the log around the last visible progress update.
3. Compare CPU activity and player response with changes in completed chunks. If the server is overloaded, pause the specific task and see whether ordinary play recovers before making any resource changes.
4. Once the underlying issue is understood, continue the saved task and compare a fresh pair of status samples. Report both the observation interval and completed chunks instead of quoting a single ETA screenshot.
## Check the result
A healthy task should eventually show advancing work, while a paused or failed task should have an identifiable state or error. ETA is an estimate based on observed throughput, not a completion guarantee. Expensive generator features can make one part of the same world much slower than another.
Take a second sample after recovery. One advancing counter confirms movement, but sustained progress and responsive players show whether the original capacity problem has actually been resolved.
## Recover or stop safely
Leave the task paused if disk errors or repeated generation exceptions continue. Save logs and the selection before seeking support from the generator or Chunky maintainer. Avoid deleting task files or force-killing Java merely to clear a frozen-looking estimate when players are still online.
Use the CloudExa console and logs to record task status and errors. Check whether each command is intended for a player or the server console before running it.## Related guidance and maintainer reference
For the broader setup, read [Pre-generate Minecraft terrain with Chunky and monitor disk space](https://help.cloudexa-hosting.com/books/game-hosting/page/pre-generate-minecraft-terrain-with-chunky-and-monitor-disk-space). Check the installed plugin version before applying syntax from the [official Chunky documentation](https://github.com/pop4959/Chunky/wiki/FAQ).
# Verify Chunky can continue its task after a planned server restart
A saved pregeneration task should be checked before maintenance, not rediscovered afterward. Chunky’s pause and continue controls let you make the handover explicit. Test a modest task once so you know how your installed release handles startup and persisted progress.
## Work through the change
1. Record the running task’s world, bounds and completion count. Pause that world with the documented control and wait for the paused state to appear in the console.
2. Create the usual recoverable checkpoint of configuration and task data with the world save. Review the installed auto-continuation behaviour so maintenance does not unexpectedly restart heavy generation during peak play.
3. Perform the planned normal server restart and watch startup logs for Chunky loading errors. Check task status before issuing any new start command or changing the selection.
4. Continue the saved world task when capacity is available. Compare its identity and bounds with the maintenance notes, then monitor a fresh progress interval to confirm it is doing work.
## Check the result
The resumed job should retain the planned area and recognise completed work according to the installed release. Confirm normal player access as well as generation progress. A server that starts successfully but silently resumes several heavy tasks may still need its startup policy adjusted.
Include the restart time in the progress notes. That distinguishes a resumed saved task from a newly submitted job when several administrators are reviewing the same console later.
## Recover or stop safely
If progress is absent, preserve the current files and compare them with the checkpoint before making changes. Do not overwrite task state with a new job as the first diagnostic action. Previously generated chunks remain valuable world data even if a progress record needs separate recovery.
## Related guidance and maintainer reference
For the broader setup, read [Pre-generate Minecraft terrain with Chunky and monitor disk space](https://help.cloudexa-hosting.com/books/game-hosting/page/pre-generate-minecraft-terrain-with-chunky-and-monitor-disk-space). Check the installed plugin version before applying syntax from the [official Chunky documentation](https://github.com/pop4959/Chunky/wiki/Commands).
# Measure a Chunky pilot area before estimating full-world disk needs
World size depends on terrain, structures, dimensions and generator behaviour. A small pilot area gives a better estimate than a generic megabytes-per-chunk claim. Keep the measurement tied to the same world and settings you intend to use for the full task.
## Work through the change
1. Record available disk space and the world’s current saved size. Note active players and backups that may also write data during the measurement so their growth is not attributed to Chunky.
2. Choose a modest ungenerated pilot region that represents the target terrain. Record shape and radii with `chunky selection`, then run that task in a quiet maintenance window.
3. Wait for the job to complete and allow normal world saves to finish. Compare disk usage with the baseline and record the number of chunks processed and elapsed time.
4. Estimate the larger footprint from the area ratio, leaving headroom for player data, later exploration, map renders and backups. Stop the expansion plan if the estimate approaches the storage allowance.
## Check the result
The result should be a documented estimate with its assumptions, not a promise that every later region compresses identically. A pilot dominated by ocean may not represent a city-heavy custom generator. Repeat with a second representative area if the first sample is clearly unusual.
Keep backup sizes separate from live-world growth in the calculation. A scheduled archive can consume space during the pilot without representing new terrain generated by the selected task.
## Recover or stop safely
Pause further work if free space falls faster than expected. Keep completed terrain intact and reduce the future generation footprint or arrange more storage. Do not delete random region files to recover space; they can contain builds and are not interchangeable cache files.
## Related guidance and maintainer reference
For the broader setup, read [Pre-generate Minecraft terrain with Chunky and monitor disk space](https://help.cloudexa-hosting.com/books/game-hosting/page/pre-generate-minecraft-terrain-with-chunky-and-monitor-disk-space). Check the installed plugin version before applying syntax from the [official Chunky documentation](https://github.com/pop4959/Chunky/wiki/FAQ).
# Schedule two Chunky world tasks without doubling peak generation load
Pregenerating the overworld and a second dimension together can compete for the same CPU, disk and memory. A short controlled comparison tells you whether parallel work is worthwhile. Keep player experience and available storage as the deciding measures, rather than the number of active tasks.
## Work through the change
1. List each planned world task with its centre, shape and bounds. Check available disk space and choose a quiet test period where ordinary player response can still be observed.
2. Start or continue only the first world’s small trial. Record completed chunks over a fixed interval, console errors and the server’s existing performance measurements.
3. Add the second small task only if the first leaves comfortable capacity. Compare combined throughput and player response using the same interval rather than comparing dissimilar ETA snapshots.
4. Pause the second world if response worsens or combined progress provides little benefit. Document a sequential order and continue the saved second task after the first has finished.
## Check the result
Your schedule should have an explicit capacity-based reason for running jobs together or separately. Two progress bars do not prove two jobs finish sooner overall. Dimensions and custom generators can have very different costs, so keep their measurements separate in the maintenance record.
Keep an explicit owner for the paused second task. Otherwise different staff can each resume a job independently and recreate the peak load the sequential schedule was intended to avoid.
## Recover or stop safely
Return to one active task by pausing specific worlds, preserving their progress. If disk pressure persists even with one task, pause all generation and investigate storage growth before continuing. Do not change Java memory or restart the entire service solely to make more task slots appear.
## Related guidance and maintainer reference
For the broader setup, read [Pre-generate Minecraft terrain with Chunky and monitor disk space](https://help.cloudexa-hosting.com/books/game-hosting/page/pre-generate-minecraft-terrain-with-chunky-and-monitor-disk-space). Check the installed plugin version before applying syntax from the [official Chunky documentation](https://github.com/pop4959/Chunky/wiki/Commands).
# Rerun Chunky over existing terrain without treating it as world regeneration
Pregeneration fills terrain; it is not the same operation as replacing an existing world with a new seed. Before rerunning a familiar area, decide whether you are verifying coverage or expecting blocks to change. Existing player builds must remain outside any destructive regeneration plan.
## Work through the change
1. Record the world identity, seed and generation settings, along with a recent world backup. Mark a few existing builds and an ungenerated edge as reference locations for the trial.
2. Read the current Chunky documentation on existing chunks and check your installed configuration. Do not enable an unfamiliar force or regeneration option copied from a different tool.
3. Select a small area that includes known terrain and the intended edge. Run the ordinary pregeneration task and compare progress with actual world changes at the recorded coordinates.
4. Inspect the reference builds after the task and check the new edge terrain. If your goal was a new seed or replaced landscape, stop and plan that separately rather than increasing Chunky’s radius.
## Check the result
The result should match ordinary pregeneration behaviour for the installed version while preserving established terrain. Counts may include checks or skipped chunks and do not necessarily mean each reported chunk was newly generated. Verify the world itself instead of interpreting the progress number as a rewrite total.
A generated map is not a clean test map merely because it has few players. Check claims and scheduled activity before selecting the pilot area used to demonstrate existing-terrain behaviour.
## Recover or stop safely
Pause if unexpected changes appear and preserve logs, settings and the world checkpoint. Restore only through a deliberate recovery procedure after identifying the cause. Do not continue a larger task to see whether a damaged area repairs itself; Chunky is not a backup restoration mechanism.
## Related guidance and maintainer reference
For the broader setup, read [Pre-generate Minecraft terrain with Chunky and monitor disk space](https://help.cloudexa-hosting.com/books/game-hosting/page/pre-generate-minecraft-terrain-with-chunky-and-monitor-disk-space). Check the installed plugin version before applying syntax from the [official Chunky documentation](https://github.com/pop4959/Chunky/wiki/FAQ).